
Refining your reloading process

There’s something about shooters, and reloaders in particular – we are always striving for the next best thing. There’s always another gun to add to the collection, or another chambering to take our hunting to the next level.

When it comes to reloading your own ammo, this dissatisfaction with the status quo is both a source of frustration, and an aid to achieving ever-greater downrange results. It also means we’re always learning. And, to no small extent, it also keeps the industry moving, and is probably often subject to marketing and other trends.

I’ve recently acquired a progressive press to load 9mm for IPSC and 3 Gun, and this is going to open up a whole new world of reloading refinement for me. However, I’m still making tweaks to my single stage reloading process.

Hot off the press #dadjokes #hornady #norma #lee

A post shared by The Gun Rack (@gunracknz) on

Rotating brass between sizing steps.

Adding new steps to your reloading regime

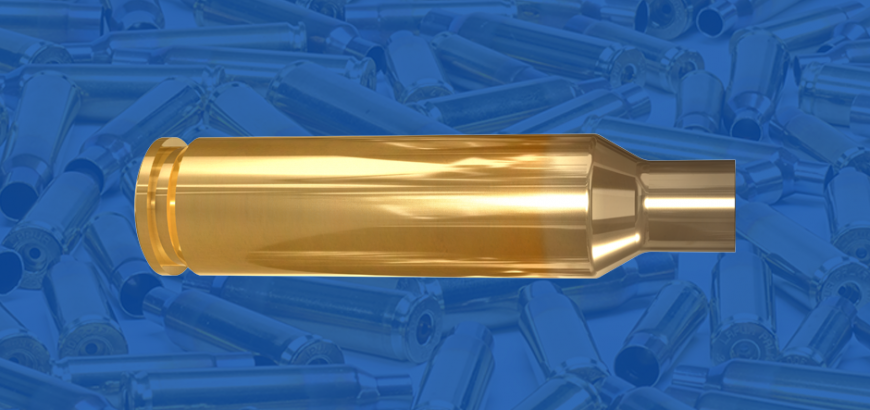
For example, I’ve started rotating my brass in the die when neck sizing over an expander button. Necking up my shiny new Lapua 6.5-284 brass to straight .284 Win, requires a lot of force (comparatively) and imparts stresses on the brass. To ensure greater concentricity and (hopefully) extended brass life, I lower the handle until I feel resistance and the neck has opened up, then I back off and rotate it roughly 90 degrees. I repeat this process twice more, opening up the neck further each time, until the neck is completely sized and the brass is completely inside the neck sizing (NS) die. Lastly, as I back it out, I rotate the brass once more as I pull it back over the expander ball.

For those who want to know, I am currently neck sizing my brass with Redding Competition dies, and I am seating my 180 gr Berger VLDs with the Forster Bench Rest seating die. The combination of these two seems to be producing some excellent results so far. I have the Forster die set for the Bergers, and then the seating die that came in the Redding set is used for practice rounds or trying out new loads.

I have found a noticeable difference in the concentricity of bullets seated with the two different dies. And that’s not saying Redding is terrible and Forster is good. The Redding die seats very well, but the Forster die seats exceptionally well. And you would hope so, given the extra cost and the fact it has “benchrest” in the name. The Forster die I bought also came with a full length (FL) sizing die, which I will use should the brass ever need a reset.

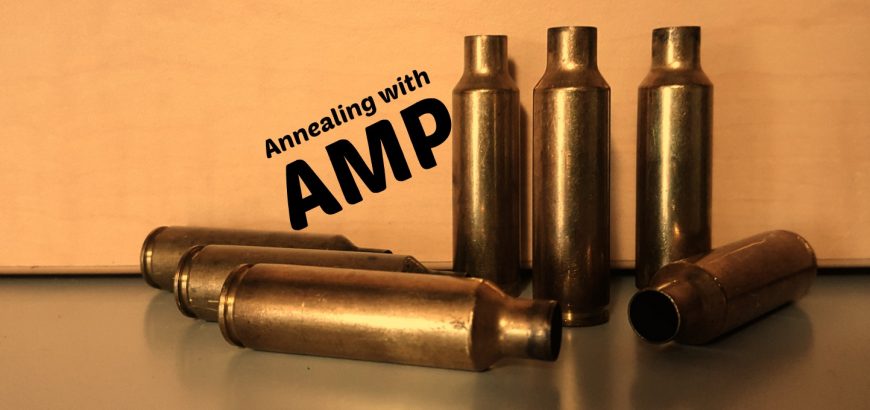
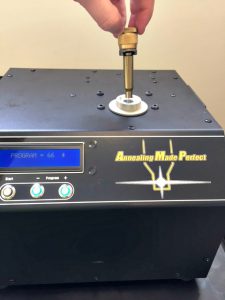
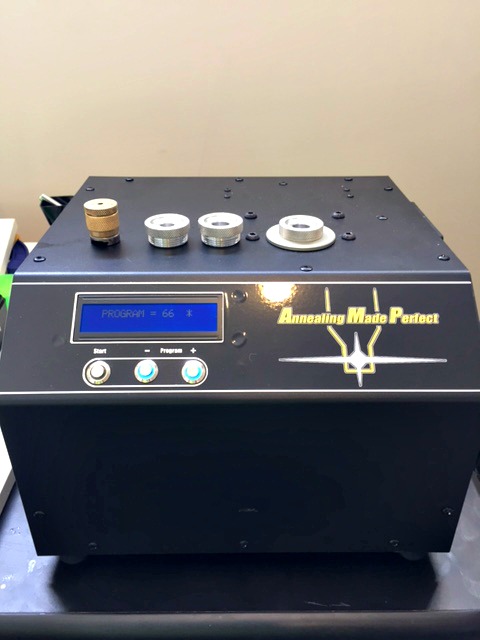
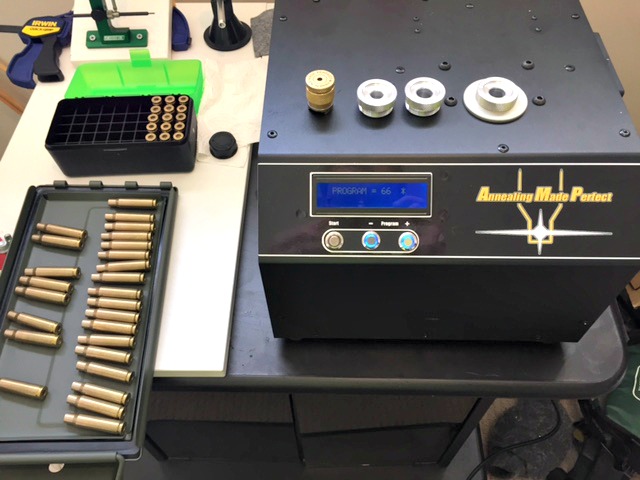
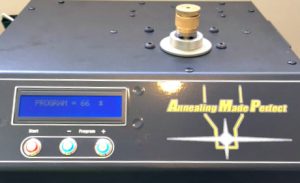
One more thing I will probably add to the reloading repertoire, is annealing. Chris recently did a review on the AMP machine, and I think I may ask him to give my Lapua brass a once over, after it has all been sized up and fired at least once. Given the stress neck sizing up imparts on the brass, it would be good to soften it up again.

Now, you don’t need incredibly expensive dies to achieve great concentricity. My 6.5×55 loads for my Tikka T3 are neck sized with a Lee Collet die. This die was a previous addition to my reloading bench, after I full length sized for a while with RCBS dies, and then moved to a Hornady NS die to try improve accuracy in this rifle in particular.

The Lee collet die is very different to dies that use an expander button, in that it uses a set of compacting jaws to push the brass over a mandrel to size it. Firstly, this means no more lubing cases – that in itself was a reason to give it a go! But, I also find it works the brass much less, and keeps the pressure completely even on the neck when sizing it. It does produce less neck tension, but if you want more, you can back off, rotate the brass and size again. The one key to really good ammo when using this die, is consistently applied pressure when lowering the arm of the press.

So, to increase the concentricity of ammo for this rifle, I have picked up one of Nathan Foster’s tricks, and I start seating the projectile (140 gr Hornady ELD-M), back off, rotate the case 180 degrees, and then complete the seating process. For seating, I’m using an RCBS die, which is quite standard, but does a great job.

Different types of sizing dies are great to experiment with and introduce to your reloading routine.

Removing steps from your reloading process

If you keep adding steps indefinitely, you’ll end up with a very time-consuming process at the end of the day. So it’s important to also consider which steps are not giving you much value.

For a while, I cleaned my brass every couple of reloads. This is okay, and doesn’t add too much time, but it does mean adding a different step into the process. One of the benefits of ultrasonic cleaning, or tumbling with wet stainless media, is cleaning out the primer pockets – which means you need to decap your brass, which is usually part of the sizing process. But another benefit of cleaning your brass is removing debris that would mark or wear down your sizing dies. You see the problem?

So this means getting a universal decapping die and removing spent primers before cleaning so you can get both these benefits (and others) of cleaning.

The other annoying thing about cleaning is that you necessarily have to have two reloading sessions for the same brass. Once to decap, clean, and dry, and again to size, prime, charge and seat. Not the end of the world, but a little bit annoying, unless you work it into your routine and do other things at the same time – or if you load in batches, this works too.

So, I don’t clean my brass that much. I feel the scorn now as some of you read this, but I can live with that.

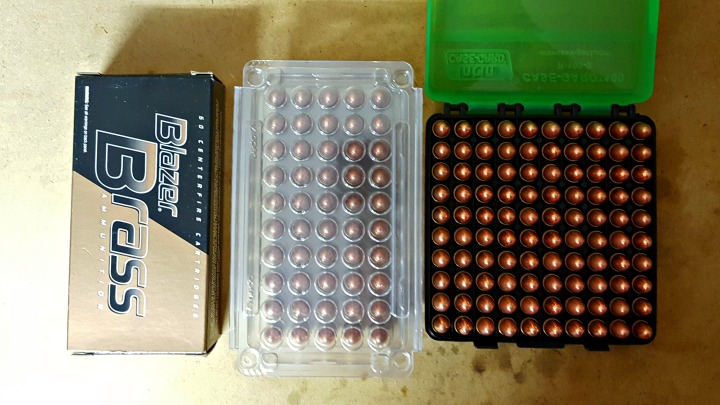
It really doesn’t offer me enough benefits, when I neck size only and I can clean the primer pocket in a second or two with a small tool. I do batch clean my pistol brass, as you always end up getting other peoples’ brass and what have you as well, so it’s good to be able to see any imperfections, and keep your semi auto pistol running smoothly with evenly sized brass. I also clean any brass I pick up off the range (of course). But for my main competition rifles that go through a shed tonne of brass in any given month, it’s not worth the extra steps when I struggle to find the time to shoot, let alone make my brass shiny.

I have also stopped trimming my brass every reloading session. My word, what a laborious task. I speed this up with an electric drill, but still, it’s a PITA when you do it every single time. Every. Single. Time. As long as it’s within spec, I don’t think minute variances in brass length will make too much difference. Removing this step also means less work on your brass.

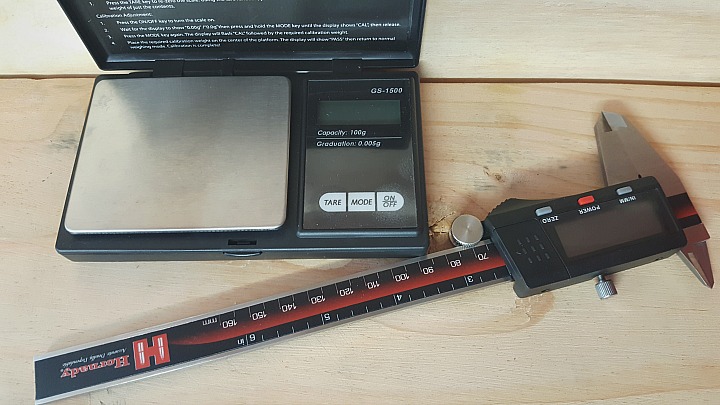
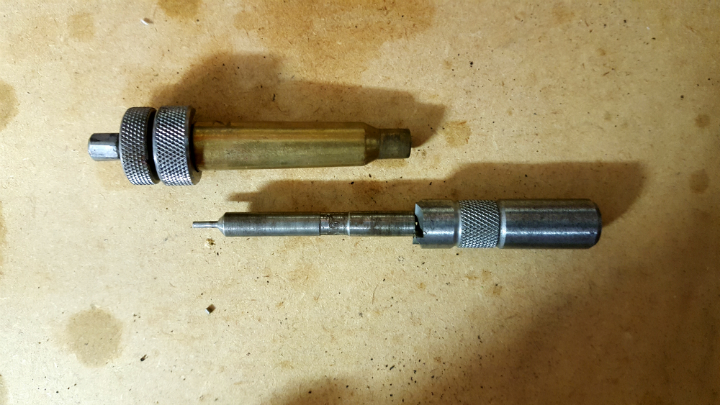
I use Lee length gauges to size my brass, and as you’ll find in any aspect of brass or ammunition sizing, different manufacturers err on different sides of SAAMI specs. When I size with my Lee length gauges, I remove material almost every single time. It’s crazy, but your brass really does grow that much each firing, especially if you are FL sizing or neck sizing over an expander button, which draws the brass as well.

Lee case length gauge and cutting tool.

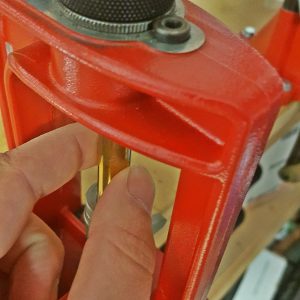
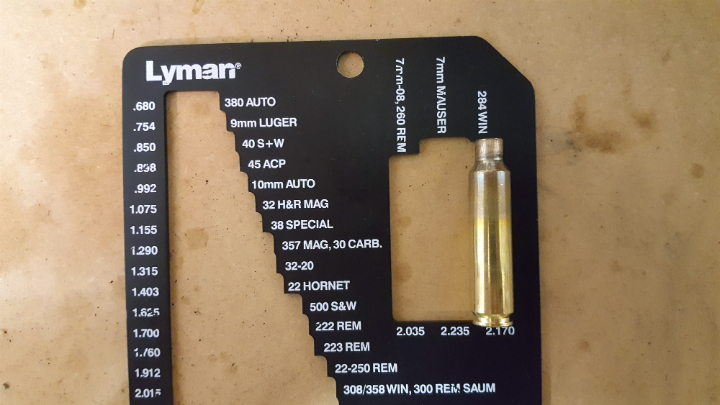
So, when I was in a hurry one day, I decided to size all my brass (it was 5th or 6th firing), and put it through my Lyman length gauge. Such a handy tool. If it didn’t fit in the gauge, I’d set it aside and size another piece, otherwise I’d load it (yes, I was loading 2 hours before a competition – go figure). And guess what? I found I had plenty of room to spare on every single case, even though they had been fired since they were last trimmed.

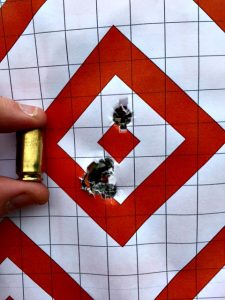
After this startling find, I decided to keep it up. I sized this batch of 22 cases without trimming every time I reloaded, and only after another 3 reloads did some of the cases need trimming (this is for the 6.5×55 which I NS with the Lee collet die). After 4 loads most of the brass needed a trim. I noticed absolutely no decrease in accuracy while letting the brass grow a bit. All I did was save myself a lot of time.

The Lyman case length gauge has multiple calibres and is a very quick way to check your brass length.

So, why do the two gauges have such different results? The SAAMI specs are a range of minimum and maximum tolerances. If you’re inside the range on any particular measurement, you’re deemed to be safe.

The Lee length gauges appear to favour the minimum length specs, hence it removes material with every firing, with just the slightest stretching in brass. The Lyman gauge, while still in SAAMI spec, seems to be towards the maximum end of the range (at least with the cartridges I have reloaded), hence giving you many more reloads and brass stretching before you need to trim back.

So, using these two tools, I can save myself a lot of time and effort in trimming brass, and save my brass the work. Using the maximum end of the spectrum means I size less often, and sizing to minimum specification means I have more room for the brass to stretch before it meets that maximum range where I need to trim again. That’s a good little cycle that saves me a lot of time, and means I can do fiddly things, such as rotating my brass and projectiles, without greatly extending my reloading sessions, and maintaining good levels of accuracy and concentricity.

So, a final reminder, in case you lost the point of the article given how long it ended up being. Refining your reloading process, doesn’t only mean adding in new and innovative steps, it also means removing or replacing steps which are unnecessary or less effective.

Product review: Annealing Made Perfect (AMP)

The process of annealing brass has interested me from very early on in my reloading journey. There seemed to be some mystique around it, and only the most hardcore of reloaders really did it. I must confess that I was clearly never hardcore enough and am only now, many years on, beginning to anneal myself. For this reason I thought it would be a good opportunity for me to write an article right from the start of my annealing journey so that those who are interested can learn with me as I go.

Why anneal brass?

To start with, for those who have no idea what I’m talking about, in layman’s terms brass is a soft metal, each time we work a brass case (that may be sizing it, expansion as it is fired, or contraction as it cools and is ejected) the brass becomes more and more “work hardened”. Without trying to oversimplify it too much annealing is the process of heating the brass case neck to a very specific temperature in order to “soften it” back to its natural state.

There are a few benefits of this, firstly it means we can try and achieve a more consistent neck tension, by ensuring we have a consistent start point between reloads. This in turn affects pressures and ultimately potentially affects accuracy. It also extends the life of the case due to the fact that as cases become more and more work hardened they eventually become brittle and split.

It is important to note here that we only want to anneal the case neck and shoulder, we do not want to be softening the case body or base – doing so could be dangerous.

Brass uniformity – how much of a difference is there?

"Annealing Made Perfect" - a pretty bold claim. Does it live up to the name?
“Annealing Made Perfect” – a pretty bold claim. Does it live up to the name?

How is brass annealed?

There are a couple of main ways brass is annealed by reloaders, One of the most common ways is by using a temperature sensitive product which is painted on the inside of the case neck, the case neck is the rotated through a flame (most commonly a gas blowtorch) or cases are partially submerged in a water bath leaving the necks exposed and blowtorched, until the temperature sensitive paint shows the case has reached optimum temperature. There are a few different methods and machines available that follow this basic process which for many reloaders works OK, or at least they believe it to. But there are a number of variables with this process to consider. Firstly ambient temperature and gas levels will both affect the temperature of the flame.  Distance from the flame, angle of flame, time spent in the flame, case calibre, brass thickness, brass type and brand will all have an impact. This many variables, combined with having to use an open flame blowtorch in the house are really what prevented me from getting into annealing sooner.

Then a couple of years ago I came across a product “Annealing Made Perfect”, which I didn’t realise at the time was made in New Zealand. What the guys at AMP were doing seemed to be quite different to the above process and while I wasn’t an early adopter I started keeping more and more of an eye on the reviews and coverage of the guys at “AMP” while I continued to expand my knowledge of annealing and reloading in general.

The process that the AMP machine uses differs in that it uses a magnetic field to pass the brass through in order to create heat, because this magnetic field is electronically controlled it gives the potential for far greater temperature and time control as well as greater consistency and repeatability than the common method of using a gas flame. This method has allowed the guys at AMP to test many combinations of calibre, brass type, brand, thickness, etc., to create an extensive database and various programs within their machine for each type of brass. You are not reliant on using temperature sensitive paint and adjusting everything to get it just right, you now have the ability of selecting the right program and pushing the start button.

AMP machine with pilots and shellholder.

Another really great service that the guys at AMP offer, and, in fact, recommend, is you send them samples of your own brass and they will test it in their laboratory to identify its unique properties and they will let you know the perfect settings. This service is completely free, and is intended to get you, the customer, the best achievable result. This type of service to me really signals the values of the company and their intent to work with the reloading community rather than just selling them a product.

They have also included a USB port on the side of the machine, and computer link cable in an effort to future proof the machine, in the event of any updates AMP will provide these to be downloaded onto the machine, ensuring your unit is not going to be redundant in a year’s time.

Getting started with the AMP machine

I have recently been lucky enough to get my grubby little hands on an AMP machine to do some testing with, while as said above I haven’t had any experience with the blowtorch methods of annealing and therefore can’t compare the two, I am able to compare annealed vs un-annealed loads.

The first thing I noticed when I opened the box was the thought that has gone into it all, the machine was very well packed, as were the accessories. The user manual was incredibly simple, even for those of us who never read user manuals (Lots of step by step pictures). Realistically, it is so simple that it could even be compressed into one page.

Setting up the machine took all of 2 minutes, literally to take it out of the box, screw in the little rubber feet, plug in the power cord, and you’re ready to start annealing.

A quick check on the Annealing Made Perfect website settings section, selecting my calibre and brass brand from the dropdown list, and I was told what pilot number, and setting number to use.

You'll be ready to anneal in a matter of minutes - it doesn't get easier than that!
You’ll be ready to anneal in a matter of minutes – it doesn’t get easier than that!

The Pilots are semi calibre specific (many calibres may use the same pilot i.e .243/7mm-o8/308 use the same pilot, but it will depend on what calibres you load as to what pilots you will need), and they simply screw into the top of the machine to hold the brass at the optimum height.

The machine has 3 buttons on the front, a “+” button, a “–“ button and a “start” button. Simply press the “+” or “-“ button until the LCD screen shows the correct setting for your brass, place a case into your shell holder (the shell holder is used to handle the hot brass), drop the brass into the hole on the top of the machine and press the start button.

The start button will glow red for a short time (depending on brass and setting this time will vary, but likely to be around 3-4 seconds), and you’re done, pull the brass out using the shell holder being careful not to burn yourself on the extremely hot case and drop it into a metal tray or container.

The start button glows red while the operation is underway.

It really couldn’t be more simple and the part I like the most about this machine is it repeatability. With other methods I have seen, people tend to set up their machines for a single calibre. They were often reluctant to change, as doing so would mean a lot of setup to try and recreate the same results next time. It also meant people would do big batch runs of brass as the setup involved and lack of repeatability meant that small runs became an annoyance. With the AMP machine you could literally anneal one piece of brass, then a week later anneal another and the results would be the same. This seemed like a definite benefit to me as it allows me to anneal between each reload, and not have to save large number of brass up each time to get very consistent results.

Are there any downsides?

I will highlight that the two potential issues that some people may find with this machine-

The first is that it anneals one piece of brass at a time, and unlike some other systems which use an automated hopper type setup you have to manually insert and remove each piece of brass. Personally this isn’t a problem for me as I am annealing my brass after each shoot, so I am only doing 30ish pieces at a time. This is taking me less than 10 minutes in front of the TV to do and personally the benefits of this system over others outweigh this slight negative. But for those people who want to stockpile their brass and anneal it in a large batch AMP are currently working on a robotic system and case feeder to insert the brass and remove it, so you can set it and do something else, The system is not currently available, but there are videos on their Facebook page showing progress so far and I can’t imagine it will be too long until we see these out for delivery. The new robotic unit will fit existing AMP Machines.

The other thing I have seen people comment on is the “Thermal Cut Out”. Again for my application I don’t see any real problem here but I know that it comes up a little from time to time, so I thought I should address it. The machine is naturally going to get hot – its purpose is to produce heat after all! AMP have done a great job of addressing this and the machine is built with a number of internal fans (these fans are very quiet and for the most part do the job, with the outside of the machine remaining cool to the touch).

AMP have also built into the software a thermal cut out which monitors the internal temperature of the machine and if it reaches high levels it will place the unit into a cooldown mode where it will essentially stop annealing brass and run the fans until the temperature is reduced. Depending on the program / cartridge you are running AMP indicate this may be between 50-200 cases. The most I have put through nonstop in one hit was around a hundred 6.5 Creedmoor cases running program 53 and I did not reach this cut out, in fact the unit still felt very cool to the touch and the air being blown from the fans also felt cool. Once again I now anneal my brass after each shoot, so after my initial annealing of my existing brass stockpiles I won’t be doing any overly large batch runs so this isn’t a problem for me at all, in fact its quite comforting to know that the machine has this protection feature built in.


Testing the annealed cases

Now I guess you are all wondering, does it work? Well again I’m not a scientist by any means, so I urge you to do your own research in general, but I will say that I recently did a test comparing both annealed (through the AMP machine) and un-annealed loads in a newly broken in 308 build. The loads were essentially the same however there were TWO variables that potentially both impacted the test.

  1. One set of loads was Annealed and one was Not Annealed.
  2. The set that was Annealed were the 10 cases I had with most uniform neck wall thickness, and the set that was not annealed was the next most uniform 10 cases.

Both sets were selected from brass which had around 10 firings through them and were the 20 most uniform (neck wall thickness) cases of 150 measured.

This is the annealed group. One cold bore shot and then 9 in the same hole. 9mm case for scale.

Measuring both sets of loads through a Magnetospeed Chronograph, the Standard Deviation of the 10 loads which were Not Annealed was 16.4. The Standard Deviation of the Annealed set was 9.4. The groupings of both sets at 100m was very good (one ragged hole, excluding a cold bore shot with each set) and I could not in fairness distinguish between sets, except for a single flyer on the Not Annealed set which while I don’t believe it was the result of shooter error, I can’t rule that out.

How important the Standard Deviation reduction is depends on you and what you are doing with the load. Both sets (Annealed an Non Annealed) would have happily taken down game out a long way, but for ringing steel or punching paper or shooting out at distance the reduction in SD (and ultimately grouping size/vertical dispersion) could well be worth it.

Overall, this is a great piece of kit. I plan to continue to update this article as I go and the machine is tested with as many calibres, brands and environments as I can. In the meantime, in New Zealand machines can be purchased from Serious Shooters in Auckland, and international purchasers can see their local stockists on the AMP website

[Editor’s note: If you enjoyed reading this article from Chris (or any of his others), you may like to follow Chris on Facebook]


Product review: Tac-Pac ammo storage boxes

I stumbled across Tac-Pac while browsing gearlocker.nz for hearing protection. I’d been thinking of a way to store my pistol reloads without paying ten bucks per ammo storage box, and I couldn’t believe how perfect these boxes appeared to be as a solution.

I ordered some… well, I ordered a fair few. I got ten each of the small, medium and large rifle boxes, and ten pistol boxes. At the time of writing there is a 5% discount when you order 10 or more, or a 10% discount when you order 25 or more. At $1.60 per case for the small pistol boxes I was looking at just over $15 to store 500 rounds, compared to $40 – $60 if I went and bought some MTM Case-Gards.

I do have several MTM and Plano ammo boxes, and they’re great, but for storing large volumes of ammo, I’d much rather have a cheaper solution.

The Tac-Pac small pistol case is similar in dimension to a factory box, so doesn't take up too much space. The MTM case on the right does fit 100 rounds (compared to 50) in a similar space, but costs $8 - $12, depending on where you shop.
The Tac-Pac small pistol case is similar in dimension to a factory box, so doesn’t take up too much space. The MTM case on the right does fit 100 rounds (compared to 50) in a similar space, but costs $8 – $12, depending on where you shop.
The 50 round small pistol cases stack nicely (as they all do), and as you can see, these half-dozen cases actually take up less room than 6 packs of factory ammo.

Tac-Pac positives

  • Clear cases. Be 100% sure of what ammo you are grabbing when you leave the house for a hunt or a trip to the range
  • Cheap. You can buy stacks of ammunition boxes compared to the hard-case ammo containers available
  • Water-resistant. Much better than cardboard boxes when it gets wet out there
  • Stable and secure packaging
  • A range of sizes to suit your rounds
  • Recyclable
7.62x39 rounds don't fit particularly well, being too large for the small case and too short for the medium case. But hey, not many people reload these, so if you're stocking up on Russian ammo, it's probably in spam cans.
7.62×39 rounds don’t fit particularly well, being too large for the small 50 round case and too short for the medium 20 round case. I think they would fit in the small 20 round case, but I don’t have any on hand to try out. Anyway, not many people reload these, so if you’re stocking up on Russian ammo, it’s probably in spam cans.

Tac-Pac negatives

  • Certain sizes are less space efficient than factory boxes or hard-case containers
  • Will probably not last as long as a hard-case (but will far out last cardboard packaging)
  • Not all cartridges are going to have a Tac-Pac box to call home

Tac-Pac users

So, who is the Tac-Pac storage solution for? I’d say it’s perfect for volume reloaders and competitions shooters. If you load hundreds of rounds at a time, these stackable, clear containers are perfect for storing your rifle or pistol rounds. For those competition shooters who want to keep weight down in their bags, but still take hundreds of rounds of ammo, these light containers are perfect, and the price means you won’t feel nearly as bad if you lose one or two when you pack up at the end of the day.

You might also consider yourself a volume reloader if you load for yourself and friends or family. These would be the perfect way to keep your orders separate and visible. Speaking of which, I use these to separate out identical looking rounds for different rifles.

For example, my 6.5×55 Tikka has 4 different loads I regularly use. The 142 gr SMK and 143 gr ELD-X for target shooting inside 600 metres, and the ELD-X for larger deer. The 123 gr SST for goats and fallow. And a load I’m working up with the 140 gr ELD-M for 1000 m shoots (they get humming when seated on top of some ADI AR2209). I also have 123 gr SST, 129 gr Interlock, 140 gr A-MAX, 142 gr SMK and 143 gr ELD-X loads for my 6.5×55 Husqvarna M38. The Husky loads are obviously loaded to very different pressures, and need to be kept separate.

The medium rifle case on the left is ideal for my M305 .308 Win loads, while the large case on the right houses my 6.5x55 ELD-X hunting loads for my Husky.
The medium rifle case on the left is ideal for my M305 .308 Win loads, while the large case on the right houses my 6.5×55 ELD-X hunting loads for my Husky.

The target loads live in Plano boxes, while the hunting loads now live in Tac-Pac cases. This means I can label them individually and have plenty of each on hand for whatever shooting I intend to do. It’s fantastic knowing I can grab a clear box of 20 rounds, know which rifle they are for and how many are fired or unfired at a glance. I also think a box of twenty is ideal for a one or two day hunt, giving you a few rounds to check your zero and warm your barrel, and plenty for any unlucky creatures you encounter.

I used to save factory ammo boxes for uses like the above, but when the cardboard gets wet they fall apart, and if you load longer than factory spec, the rounds often won’t fit.

Overall, these are a great product for those who have a use for them, and I would highly recommend grabbing some. Check out the Tac-Pac website for more details and a size guide. If you are in New Zealand, you can buy them from Kerry at the Gearlocker.


Brass uniformity – how much of a difference is there?

Brass uniformity affects a few things – but how much of a difference can you expect from brand to brand? If you have highly consistent brass you’ll notice similar life spans across your reloads, as they stretch at the same rate. You’ll have near identical case capacities, the result of uniform wall thicknesses. There’s a whole lot more to case uniformity, but what I want to focus on is the amazing difference from brand to brand.

Five lots of 10 brass - which came out tops?
Five lots of 10 brass – which came out tops?

Here’s a quote from an article on .233 brass at 6mmBR:

From a reloading standpoint, the important thing to note is the rather substantial variance in case capacity from one brand of brass to another–as much as 2.6 grains! So, you cannot assume that a particular “pet load” will work if you change brass brands–you’ll have to do new testing.

Two-point-six grains – that may not seem like much, but for the little .223 case, it’s a fair amount. Bear in mind, the brass compared in that article is mostly higher-end stuff.

Our brass uniformity test

I’ve just started loading for 7mm-08, and as I undertook loading for an OCW test, I thought I should start with the most uniform brass possible, so that the results of various powder charges are more meaningful.

I had 5 brands of once-fired brass, that I’d put through my Mossberg 100 ATR. I didn’t have a huge quantity of each, so I just took a random sample of 10 of each. The brands ranged from budget to middle of the road. We looked at Prvi Partizan (PPU), Highland, Remington, Winchester and Hornady.

Unlike the .223 test at 6mmBR, I noticed 17.44 gr difference in average weight from the highest to the lowest. This is probably a result of both looking at a larger case and also looking at wider variety of brass quality.

Results:

The heaviest brass was PPU, coming in at 181.79 gr on average. Highland (produced by PPU) interestingly came in quite different on average at 171.67 gr. The more middle-end manufacturers (we weren’t looking at the likes of Norma or Lapua here), came in more similar: Remington at 168.07 gr, Winchester at 164.35 gr, and; Hornady at 165.69 gr.

Winchester and then Hornady came in the lightest, which would hint at more internal case capacity, but you couldn’t say that for sure without testing H2O capacity, which I didn’t get into. I did the entire test using a digital scale and digital calipers, to identify overall uniformity.

Simple tools for a simple test.

Weight:

Winchester had the lowest standard deviation in weight (0.48 gr), and the least difference between highest and lowest (1.60 gr). The highest was surprisingly Hornady at 1.33 gr standard deviation and a difference of 4.90 gr between highest and lowest. The S.D. for Remington, PPU and Highland were as follows; 0.74 gr, and 1.07 gr and, 1.05 gr. Respectively, the differences between highest and lowest were; 2.40 gr, 3.40 gr and 3.30 gr.

Length:

After one firing, most brands didn’t have much of an increase in overall length. All eamsurements below in millimetres.

Brand  Standard Deviation Difference High-to-low
Remington 0.02 0.07
Highland 0.03 0.08
Winchester 0.03 0.12
Hornady 0.03 0.10
PPU 0.05 0.16

Neck diameters and wall thickness:

All brands except Hornady and PPU had extremely uniform outside diameters for their necks (0.00 mm S.D. and high-to-low differences of 0.01 and 0.02 mm). Hornady and PPU both had 0.01 mm S.D.s and high-to-low differences of 0.02 mm.

The inside diameter showed a bit more variation, as a product of both brass thickness and softness.

Brand  Standard Deviation Difference High-to-low
Winchester 0.01 0.02
Hornady 0.01 0.02
PPU 0.01 0.05
Remington 0.02 0.06
Highland 0.03 0.08

Which brass did I choose?

All of these brands had similar factory loads, with 139 gr or 140 gr projectiles. The differences in the once-fired brass was quite illuminating. Also interesting, but not deal breaking, was that Remington and Winchester both had a single silver primer out of a box of 20 cartridges, when the other 19 were brass-coloured. After this series of tests I decided to stick with Winchester brass for my 7mm-08, as it was the most uniform in every category except length, where it came middle of the pack.

One of these things is not like the others #Winchester #7mm-08 #factoryammo

A photo posted by The Gun Rack (@gunracknz) on

It’s important to note that these were small samples, and that brass in other calibres may vary quite differently from what we saw with the 7mm-08. There are also a whole bunch of brands we didn’t consider.

However, if you’re looking at lower priced ammo to generate good quality brass for reloading in 7mm-08, my money would be on Winchester – I even bought another pack of Super X today.


New product announcements – optics, stocks and brass

We truly live in the golden age of civilian firearm innovation. As various shooting sports gain popularity around the world for their challenging formats and supportive communities, manufacturers have been given the feedback and audience required to push their product lines ever-further.

While shooting sports and hunting have always benefited from advances in military tech, we’ve now reached (and well passed) the tipping point where armed forces personnel look to the likes of PRS and 3Gun competitions to evaluate equipment they would not otherwise have come across. In this recent interview with Kerry from The Gearlocker, the 6.5 guys describe how the lack of gear restrictions in PRS-style shoots becomes a wealth of knowledge for military and LE types.

Here are 3 very recent new product announcements from some of my favourite manufacturers.

Vortex “Huey”

Vortex Optics has recently announced the UH-1, which they’ve affectionately nicknamed the Huey. It’s a holographic optic in its own class. The release in their VIP newsletter describes the UH-11 as having fewer moving parts than your average holo sight, increasing reliability, as well as a near elimination of forward signature of the illuminated reticle – a first for this type of sight.

Loving that camo look? One of the Vortex staffers performed a spray can overhaul on this optic.
Loving that camo look? One of the Vortex staffers performed a spray can overhaul on this optic. Image credit: Vortex Optics.

The reticle itself is the new EBR-CQB. The term CQB and  the feature of being near invisible to anyone/anything forward of the shooter hints that this sight is more suited to military and LE applications. This is one of those situations where battlefield considerations lead to the development of an optic that many civvy shooters would love to own for multigun style competitions, or even just for fun.

I also love the fact that it can use rechargeable batteries and has an onboard charger port. These are the kinds of user-focused features that most manufacturers would put in the ‘too hard basket’.

If you want to read more about this product, or any new announcements from Vortex, make sure to subscribe to their newsletter.

Boyds stocks for the Howa 1500 Mini

Earlier this year Howa released a ‘mini’ action, for shorter-than-short-action calibres. While this is limiting for some who might want to rebarrel down the line, it’s a boon for those who want to save weight, decrease bolt throw and action length, and increase reliability for their smaller cartridges in a dedicated platform. To those who think a rebarrel may be in the cards – get yourself a standard short action or long action!

Which would you pick? The Varmint Thombhole in Pepper laminate would be my choice. Image credit: Boyds Gunstocks
Which would you pick? The Varmint Thumbhole in Pepper laminate would be my choice. Image credit: Boyds Gunstocks

The problem with introducing a brand new, and very unique, action length and profile, is that even though shooters may be familiar with the 1500 platform, aftermarket manufacturers have nothing to support the product any longer.

Thankfully, Boyds Gunstocks is forever expanding their range of stocks to upgrade your favourite hunting or competition rifle. The latest announcement concerns the Howa 1500 Mini;

“The Howa 1500 Mini was released in March 2016.  Boyds now makes gunstocks for this hot little beauty in all three of its barrel configurations: The Lightweight barrel, which is a #1 contour; the Heavy barrel, which is a #6 contour; both at 20 inches; and the Standard barrel, which is a #2 hunting contour at 22 inches in length.”

Boyds has made sure that all of our favourite stock designs are available; Classic, Featherweight Thumbhole, Heritage, Platinum, Prairie Hunter, Pro Varmint, and Varmint Thumbhole designs. And for those of you that always get left behind with new product development (yes, I’m talking about left-handed shooters), don’t worry, Boyds has you covered too with many LH options as well.

If you’re reading this, wishing Boyds made something for your obscure rifle, check out their website, it’s all there. And if you can’t find it, use the product request form to ask them to consider your action for their next product development.

To keep up-to-date with the latest happenings from Boyds, make sure to subscribe to their mailing list using the form on their website, or hop onto their Facebook page.

Lapua brass for 6.5 Creedmoor

Last, but not least, the 6.5 Creedmoor has gained enough ground swell for Lapua to consider it as a worthy cartridge for their premium brass.

Small primers and flash holes FTW. Image credit: Nammo Lapua

This doesn’t just mean high quality brass for those riding the Creemoor train, but also brass with precision shooting in mind. Lapua has developed its Creedmoor brass in line with its other target brass, including their popular .308 Win. Palma brass, in that it has a small rifle primer and a non-standard smaller flash hole of 1.5mm as opposed to the standard 2mm. Lapua claims this aids in consistent ignition of powder and more accurate down-range performance.

All you 6.5 Creed fans can expect to get your mitts on some shiny new Lapua brass early in 2017. You can read more about this latest Lapua product release here.

Feature image credit: Nammo Lapua

What do I need to start reloading? Part 1: Materials

Good question – glad you asked! There’s a lot of stuff you could buy if you wanted to start reloading, but actually only a few essential things to start your first load and get hooked with the reloading addiction. This is a quick list of the bits and pieces you’ll need to get going.

Beware – any loads mentioned in this article are my own, and are not to be taken as gospel! Use a reloading manual or manufacturer’s instructions to find the right load for your firearm and application.

Oh, and here’s the difference between handloading and reloading if you were wondering!

Why reload?

Okay, before we get straight into the list – why reload? Ammunition is expensive. Each time you pull the trigger on a rifle, you’re sending $2 – $5 downrange, depending on your calibre and ammo preference. My 6.5×55 reloads cost $1.27 to shoot, roughly. But it’s not just about cheap and cheerful. I could cut that almost in half if I bought cheap projectiles. No, that’s $1.27 for ammo that I would call “match grade”. The results speak for themselves – see below:


#oneraggedhole #tikkaT3 #SMK

A photo posted by The Gun Rack (@gunracknz) on

Aside from being economical, reloading allows you to fine tune your ammunition depending on your rifle and intended application. I have two identical loads for my Tikka T3, one for target shooting and one for hunting – the only difference is the projectile and COAL (cartridge overall length).

There’s a lot you can do with reloading, so take the time and get stuck in – you’ll save some money, improve your accuracy/performance, and develop what is really a whole new hobby.

If you’re going to sight in and hunt once a year, then no worries, a pack of factory ammo will last you plenty of trips!

What are the essentials?

Obviously you need a firearm to shoot the ammo in! You also need safety glasses for while your reload (primers are explosives!). You need yourself, a solid reloading bench, some basic maths skills, and a whole bunch of other really obvious stuff. But, I’ll be splitting what you need into materials and tools. This is part one on materials.

Even if you aren't reloading yet - start saving your brass now!
Even if you aren’t reloading yet – start saving your brass now!

Brass

This is what makes reloading economical. You can reuse your brass many times over, which turns into a considerable saving. If you neck size and reload for one rifle only, reusing your brass will also increase accuracy. Where to get brass? You can buy it online, or from stores such as Reloaders Supplies or Serious Shooters. Or, what I do is buy ammo, shoot it, and reuse the brass.

I shoot and reload PPU or Sellier & Bellot for cheap plinking ammo (.303, 7.62×39, etc.). For my 7mm-08 and .308 I use a mixture of Hornady, Remington and Winchester. For my “match” 6.5×55 ammo, I shoot and reload Norma ammo. Lapua is also a good candidate. For 9mm pistol rounds I use whatever I have at hand.

Using brass from factory ammo also means you have a base line to start with, figuring out what your gun does and doesn’t like.

Cost example:

ADI 300 Blackout brass x 100 – $69 from Reloaders Supplies. That’s 69 cents each, and anecdotally you’ll be getting around 10 loads per, so call it 7 cents per round.

Federal American Eagle loaded 300 BLK ammo x 20 – $55 from Serious Shooters. That’s $2.75 per round if that was that. But if you plan on getting another 9 loads (at least) out of the brass, then call it 27.5 cents per round (including your first, loaded shot). It’s not as cheap, but you do get that first shot, and you get to experiment with different weight projectiles without buying a bunch of different types.

Projectiles

Projectiles (bullets) are likely to be your biggest expense if you’re aiming to make quality ammo. My most expensive pills are about $1.03 each, depending where you buy em. There are plenty more expensive out there. Plenty! But if you shoot a cheap/common/small calibre, like .223, you’ll be able to pick up bullets for much, much cheaper. Have a look at your usual stores and you’ll see what I mean.

Different projectiles will enable you to experiment with your firearm and produce application-specific ammunition.

You can get cheaper still with cast lead or plated projectiles, but these come with their own challenges and idiosyncrasies. Stick with copper jacketed bullets as you start out and life will be simpler.

Make sure you choose a projectile specific to your needs. Manufacturer websites are pretty clear, otherwise, read up on your calibre in Nathan Foster’s knowledge base, or ask your local gun store staff. A good example is, Sierra Matchkings (SMK) are super accurate, but dicey performers on game. Hornady ELD-X is great on game, and pretty accurate to boot. Prvi Partisan .31 calibre lead-tipped projectiles are actually great for effective wounding on game, but certainly not match accurate.

Cost example:

Prvi Partisan 6.5mm (.264) 139 gr projectiles x 100 – $60 from Gunworks. That’s 60 cents per round.

Berger VLD Target 6.5 mm (.264) 140 gr x 100 – $106.95 from Workshop Innovations. Looking at $1.07 per round. As you can see, there is a vast difference, but these two projectiles are for vastly different applications.

For comparison, a bag of 500 ADI 22 calibre 62 gr projectiles would set you back $100. That’s 20 cents a round for cheap AR-15 plinking ammo.

Powder

Powder is a big expense up front, but lasts for ages. It’s good to have a few varieties on hand for different loads and applications, but once you find one that you definitely will use a lot, buy in bulk to save even more money. Also, buying in bulk eliminates the variance you can get between batches of powder, as you’ll be working from the same batch for longer.

As I’ve said before, I’m a big fan of ADI powder. ADI (based in Australia) produces a bunch of powders for other brands, so if you find Americans talking about Varget, it’s fine because you can buy ADI AR2208, which is the same thing. But, where it becomes awesome is ADI powders are sold in 500 gram containers for around the same price of an American or European brand 1 pound container, which is about 454 grams. Immediate savings!

Different powder for different uses, but ADI is always a safe bet. Buy in bulk to make your reloading $ go further!

There are many good powder brands, and if you will end up reloading for multiple calibres, try and find loads that like the same powder to save on cost even more. My 6.5×55, .303, .308 and 7mm-08 are all fed a steady diet of 2208. Funnily enough, they’re all similar charge weights as well. This leads to multiple efficiencies.

You should definitely get yourself a reloading manual, but if you do decide to stick to ADI, they provide some awesome reloading data on their website.

Cost example:

ADI AR2208 500 g – $65 from Broncos. I use around 40 grains for most loads with this powder, so let’s call it 34 cents per round. If you bought the 4 kg container, your cost per round would drop to 30 cents.

IMR 4198 1 lb – $69 from Reloaders. I use 26.5 grains of this for my 7.62×39 loads. That’s 264 rounds, so 26 cents per round.

Primers

The things that go bang! I won’t spend too much time on primers except to say that they are actually different. It’s good to experiment, but when you start loading in volume, try and stick to one type of primer, otherwise you should realistically back off your load and work up again as the reaction inside the chamber will be different. Better yet, buy in bulk. I have found all of my loads requiring a large rifle primer tend to like Federal Gold Medal match primers. So I buy boxes of 1000 at a time.

Again, not only are you saving more dollar dollar bills y’all, but you’re keeping consistent by staying in the same batch of primers. Primers are quite cheap, so buying in bulk is not such a big deal.

Cost example:

Winchester Large Rifle primers x 100 – $12.99 from Gun City.

Federal Premium Gold Medal Large Rifle primers x 1000 – $90.95 from Workshop Innovations.

Primers are another area where buying in bulk saves a little bit of cash, but also improves consistency.

What will my first lot of materials cost me?

Let’s use the common 308 as an example. Using the ADI Powders load data and some prices from NZ shops, let’s figure out the minimum you would have to spend to load your first 100 rounds, as well as how economical you can get by buying in bulk.

Supplier Item Quantity Cost Cost per round
Reloaders Suppliers Sierra 30 cal 155 gr HPBT Match 100 $78.00 $0.78
Broncos ADI AR2208 powder 500 g $65.00 $0.37
Broncos ADI AR2208 powder 4 kg $465.00 $0.33
Gun City Winchester 308 Win brass 50 $69.99 $1.40
Gun City Winchester 308 Win brass (10 x) 50 $69.99 $0.14
Workshop Innovations Federal GM210M LR Primers 100 $9.95 $0.10
Workshop Innovations Federal GM210M LR Primers 1000 $90.95 $0.09
Cost per round for first 100 only (will have left over powder) $2.65
Cost per round with bulk buying and 10 loads from each case $1.34
Cost per round of equivalent factory load low end manufacturer $3.00
Cost per round of equivalent factory load high end manufacturer $3.40


As you can see, depending on the life of your brass, you can half the cost of your ammo and produce some excellent results. Especially when you consider that you can set your seating depth and a host of other things that will increase your accuracy from a given load.

Having said that, there’s more to getting started than bullets and brass. The cost of reloading equipment will factor into your decision to start loading your own ammo or not. Make sure to check back for Part Two in this series, in which we will look at the easiest equipment to get started with.