The old .303 has been a staple of the Kiwi bush for decades, and will most likely continue to be around for decades to come. Usually the pristine, fully wooded specimens are locked away in gunsafes and taken out for service rifle shoots, and even old sporters get treated with a degree of respect, reflecting their heritage from the culling days.
However, some sporters are the perfect base for a project that’s a little bit fun – a little bit different. So, looking out for the perfect beginning of a bush rifle project, an easy scope mounting scenario was high on the list for me.
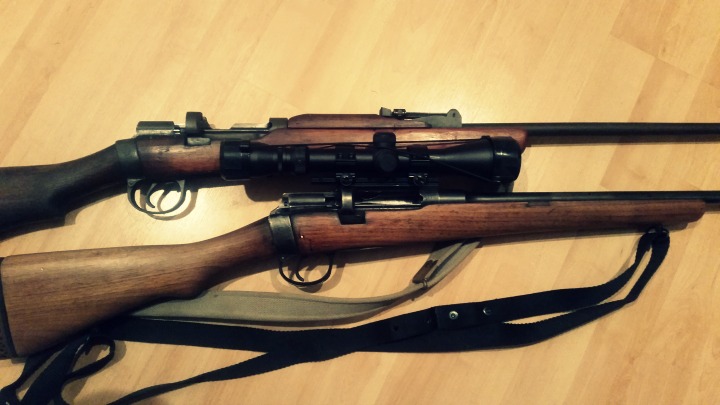
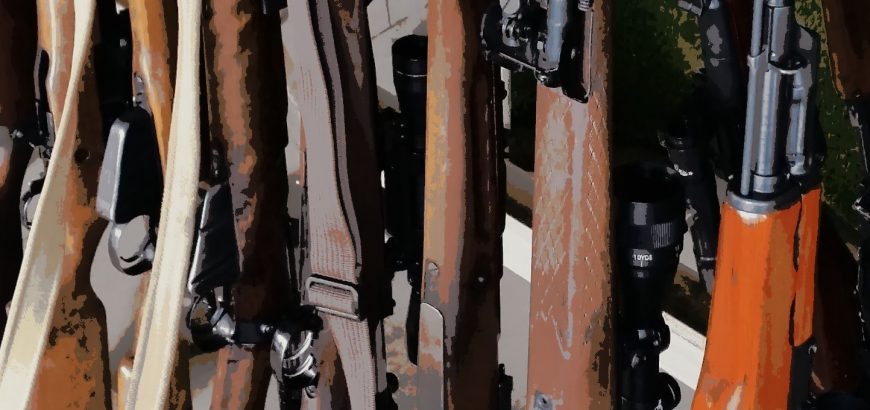
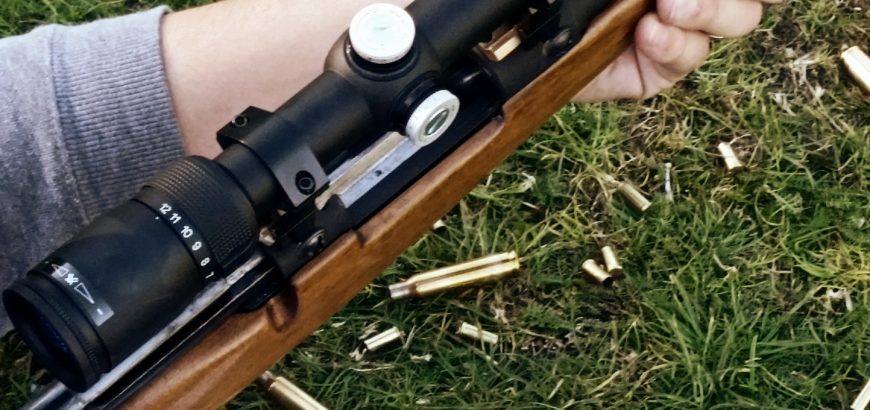
Comparing two SMLEs, one with original fixed sights and one with a scope mounted and iron sights removed.
Most of the older rifles with scope mounts have rails that bridge the gap between the front of the action and the stripper-clip/bolt guide. I think I’ve only seen one with weaver-style rings jimmied into place, and one with a scout-type mount that fit over the rear sight – similar to what you see on some Mosin Nagant scout projects.
Anyway, these older rails – they all tend to lack any Weaver or Picatinny type cross sections – the slots where the recoil stop sits. If you try and fit modern rings to one of these older rifles, you’ll find that after a few shots, the rings will start to slide back or loosen.
So, this means if you buy a rifle with one of these old rails you have a couple choices.
Find some old rings
You could try and find some old style rings that lack a cross-bar. These are similar to the dovetail rings you get for rimfire rifles and for modern Tika rifles. The difference is the width of the ring bases, so you may not be able to find a modern type that will fit your older rifle – especially if the angle of the lips doesn’t mate up with the angle of the rail.
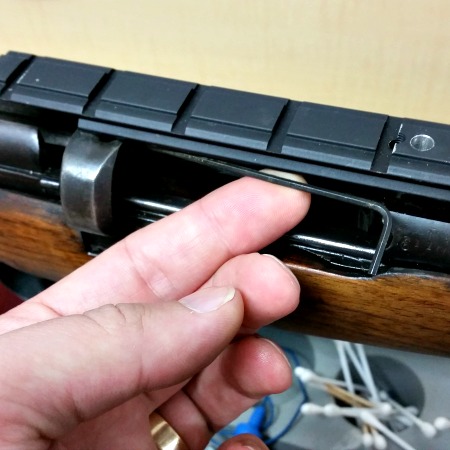
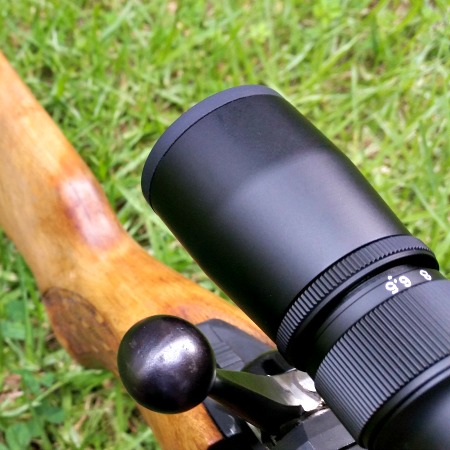
With the ATI scope mount, a longer allen key will be very helpful for the rear grub screws.
So, you may have to try and find some old school rings. However there are two downfalls to this approach. Firstly, older rings were phased out for a reason. The cross bar on picatinny and Weaver style scope rings means the rings cannot slide back on the rail under recoil.
The second downfall is that you will be getting an unknown quantity. They will probably be for 1″ tubes only, and you won’t know whether they’re good quality, well-aligned, etc.
Remove the rail and replace
There are a few modern rail types that you can fit to your .303. There are ones that you drill and tap into the side of the action – I’m not a big fan, but others like them. They’re quite similar to the kind of aftermarket rails you’d use on an AK, Mosin or SKS – basically actions that aren’t designed for scope rails.
The grub screws in the rear of the ATI scope mount use tension to keep the rail in place.
Because the rear ring of the action is quite different to modern actions, your standard MOA rails probably won’t be much help. However, ATI produces a mount that uses one screw into the front ring of the action and a couple grub screws against the rear ring of the action. While these two rear screws are not drilled and tapped into the action, the force they apply seems to be strong enough to keep the rail in place under recoil.
I’ve been using one on a project .303 for a while now, and have had no complaints.
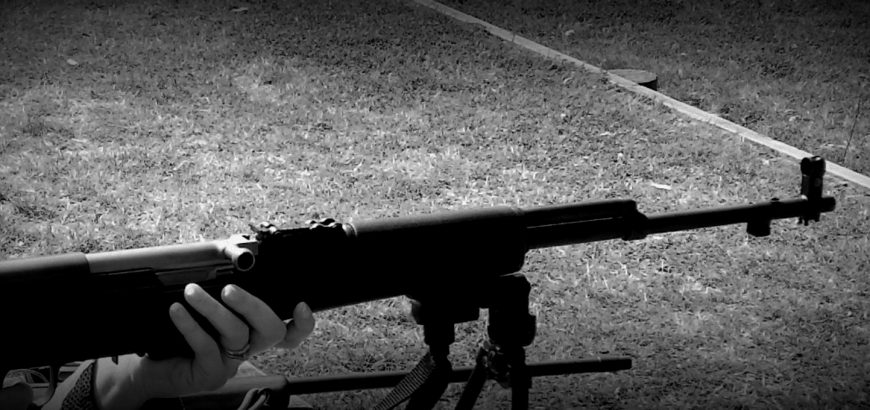
With any aftermarket scope mounts on an SMLE, you’re going to have a pretty high scope. So, you’ll probably need to look at an aftermarket stock or some sort of cheek riser to allow easy and repeatable eye relief. More on that in another article soon, as this project continues to evolve.
Every now and then you come across a product that presents you with the best of dilemmas. The problem I have with my new 40/44 scope is choosing which rifle to fit it to. Now, I may sound like a gushing schoolgirl at this point, but read on and let me explain why this scope’s versatility is a nice problem to have.
Price range
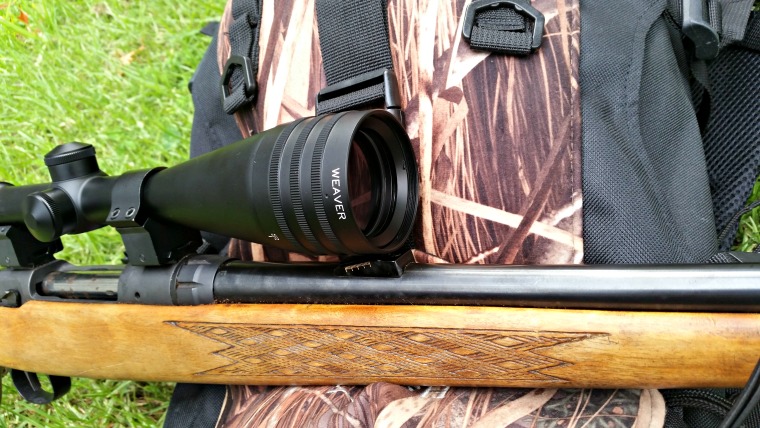
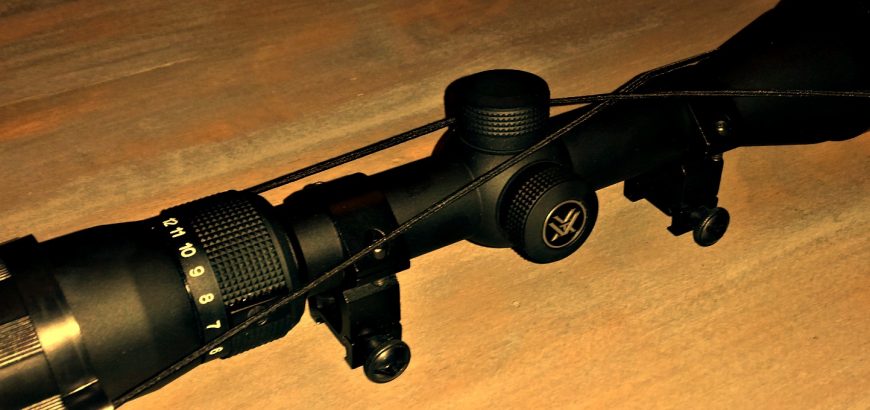
The ocular bell allows plenty of clearance for bolt handles and gloved fingers.
Let’s not kid ourselves, when you’re purchasing optics the first thought you have is, ‘How much is my wallet going to bleed to get the kind of clarity/magnification/quality I want?’
There’s a common saying that if you put a $300 scope on a $1000 rifle, then you’ve got a $300 rifle. I would argue that the 40/44 Series 6.5-20×44 is the exception to this platitudinal rule.
The manufacturer suggested retail price (MSRP) listed on Weaver’s website is roundabout $320-330 USD, depending on the specs you go for. If you’re lucky, you can catch it on special or find a store/site with free shipping and get it to your door for around that price. But! Does it shoot like it belongs in the $300 – $500 USD ($450 – $600 NZD) range?
Quality
Finish
The first thing I did when I unpacked the 40/44 was mount it on a Savage .243 to check out the fit and function. Unfortunately I installed it with rings that were a tad snug, and immediately had some long scratches after I pushed and pulled the scope around finding a comfortable fit.
The objective bell clears the rear sight on this Savage nicely.
Feeling pretty upset with myself for ruining a brand new scope (before I’d even had a chance to photograph it for this review too!), I tried to rub the marks out a bit with my thumb. And they lifted. The black, hard-anodized matte finish is built for such rugged use that even scraping it along in tight metal rings didn’t leave any permanent marks on the finish. I’ve had much more expensive scopes (especially with matte finishes) end up with unsightly scratches even from a trip to the range, let alone hiking through the bush.
Mechanical
If there’s one thing that’s a tell-tale sign of poor – or even average – manufacturing quality, it’s sloppy elevation and windage adjustments.
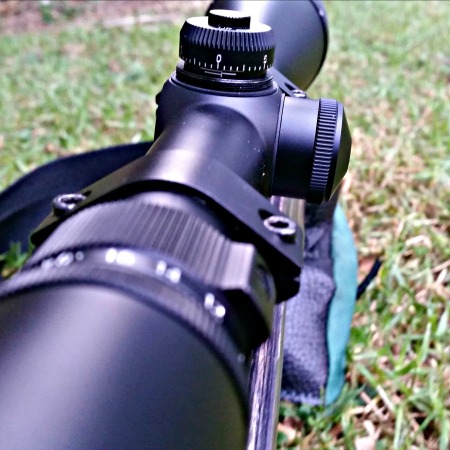
The fine gearing makes for smooth use and precise adjustments.
Even when I was just playing around with the scope before actually going to the range, I could tell that the 40/44 Series was just a little bit better made in this area than most. The clicks were tight and consistent, and there was no play in the adjustment turrets. After taking the turret caps off, adjustments can be made with your fingers, with no special tools or coins necessary.
The parallax and magnification adjustments have a bit of a longer throw than other scopes in the same price bracket. This is actually a good thing. What this indicates is finer internal gearing, which means more precise adjustments can be made. The movement of these parts is also smooth, but resistant enough to the point where you don’t have to worry about unintentional movement.
Optical
The optical quality is really what most people get giddy about when choosing a new scope, although I’d maintain that mechanical quality is just as important.
In my experience there are two major indicators of optical quality in a scope. The first (and most obvious) is light transmission. Is the scope clear, bright and easy to use? The answer in this case is yes. The second, and certainly equal, indicator of quality materials and craftsmanship is the ability of a high-magnification scope to continue to provide optimal light transmission at the high end of its zoom range.
In other words, if I were hiking around the back country with the magnification set around 10 for medium-range shots, but then decided to take a longer range shot requiring all 20x zoom power – at dusk – could I expect the same level of optical clarity?
Many competitor scopes at this level – and certainly the cheap no-name brand scopes on TradeMe – start to get murky towards the end of their range. I had a 6-24x power scope that I realistically couldn’t use beyond 18 or 20 without losing too much light. I’ve also owned an 8-32x scope that may as well have been an 8-24x for all the use the upper range was.
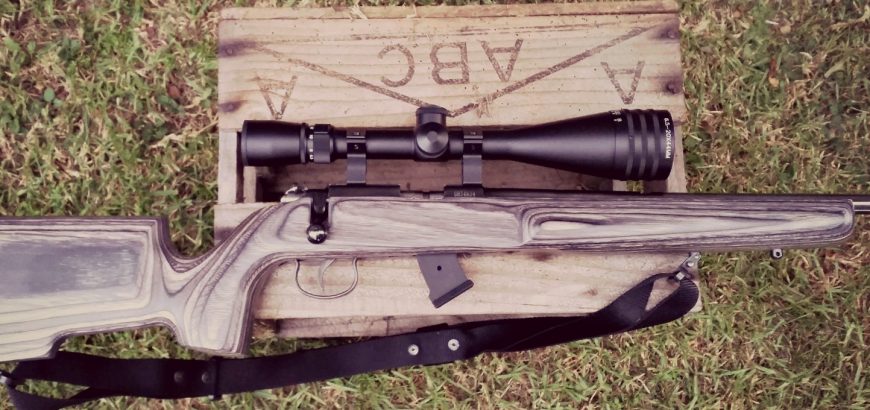
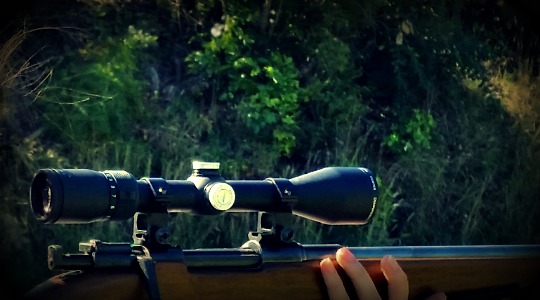
It may be a hunting scope, but it’s perfectly at home on this rimfire rifle, along with the aftermarket Boyds stock.
I’ve glassed tree-lined creek beds with this scope in failing light at maximum zoom, and also used it at maximum zoom at an indoor target range, and in both situations found the light transmission to be excellent. So much so that I would be confident in saying I could use the full potential of this scope, and not just stick to the lower ranges.
Specified use
Of course, how you intend to use any particular scope is up to you. However, certain optics are created with particular uses in mind. According to Weaver’s website, the primary use for the 40/44 in 6.5-20×44 with Dual-X reticle is as a large game hunting setup.
The 6.5-20x version of this scope comes with three reticle options – the Dual-X, Ballistic-X and Varminter. All are variations on the duplex reticle and the use for hunting is readily apparent. The thick posts draw your eye naturally to the finer crosshair in the centre, making for quick target acquisition.
The Ballistic-X version has some elevation holdover hashes for those who prefer to holdover rather than adjust their turrets – useful for shooting on the move, rather than from a prone position. The Varminter crosshair features a round dot in the middle of the reticle to form a natural point of focus for the eye.
If you choose the Dual-X (like I have) or the Varminter, you’ll likely be making elevation adjustments in the field. Using a ‘cheat sheet’ calculator, you can quickly figure out what adjustments you need to make and have these on a card taped to your rifle for quick reference. Alternatively, some time at a range with multiple distance options can help you figure out exactly what your load/rifle/optic combination requires.
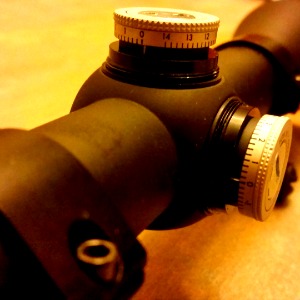
Thankfully the 40/44 is designed with quick adjustments like these in mind. After removing the turret caps, you’ll notice the turret markings are easily visible from the shooter’s position.
The turret adjustments are easily seen from the shooter’s position.
The ocular bell is also quite compact, which has multiple benefits. It’s easier to see past when making turret adjustments for starters. But more importantly it means more clearance between the bolt handle and the scope. This makes for easier mounting on older rifles, as well as convenient use with gloves when you’re in the mountains.
Overall impressions
It’s easy to see how this scope could be favoured by hunters the world over. It’s not a Super Slam, but for the budget-conscious shooter or the back-up rifle, it’s great value for money with many of the same features as the more expensive scopes. It’s no surprise that it’s a ‘best rated’ product on Optics Planet.
The ruggedness and mechanical reliability means a lifetime of use, while the optical clarity makes it perfect the times of day you really expect to be hunting in New Zealand. The uncomplicated reticle and ease of adjustment makes for more confident shooting in the field too.
While this scope was originally mounted on a .243 Winchester for hunting use, it’s found a new home on my bolt action .22LR along with a Boyds Pro Varmint stock for target shooting. While it may seem a strange application, indoor smallbore target shooting involves known distances without wind variation, making the simple reticle ideal. The high level of magnification also means precise shooting and knowing what your score is before you leave the mound. The large objective lens also means plenty of visibility indoors under artificial lighting. Lastly, the adjustable objective means you can shoot at high magnification at ranges as close as 25 yards.
But, as I mentioned at the beginning of this article, this scope could sit on almost any of my rifles and be fit for purpose. It could go on my 6.5×55 and be used for F-Class, or thrown onto my 7mm-08 for a light, bush-ready rig. Like I said at the start, it’s a good problem to have!
I’ve never had good luck with a shoot at Waiuku. I’ve been to the range twice before and both times been hit torrential rain and gales, making shooting uncomfortable, if not impossible. Well, third time was the charm as I attended the Waiuku service rifle shoot this Saturday past.
Firstly, let me say that Waiuku has great facilities that enable a wide range of shooters to enjoy themselves. It’s also one of those rare clubs where pistol, rifle and shotgun are all welcome. However, I’ll leave a review of the range for another post. For clarity’s sake, this isn’t the same Waiuku range were ASRA does their winter shooting (The Farm).
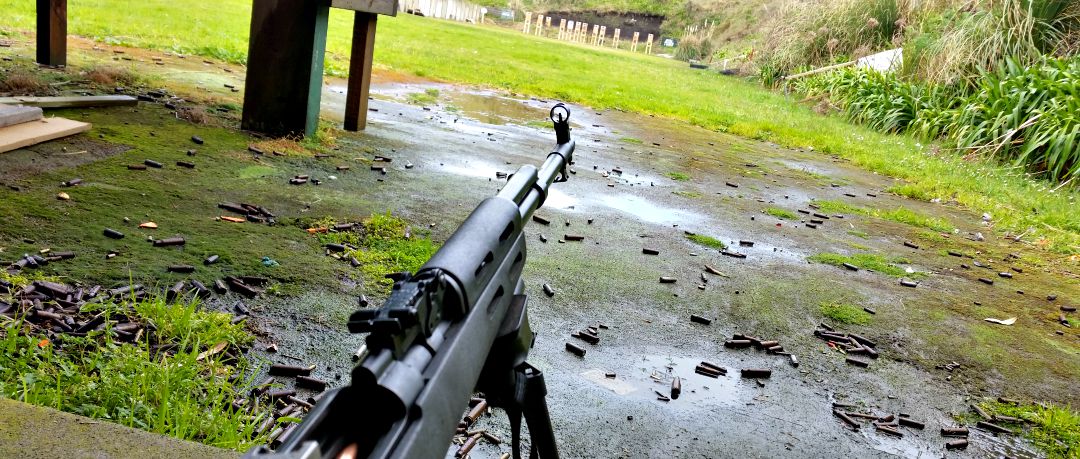
On to the shoot itself. Well, it’s a 45 round shoot which I was hoping to do with my .303, until I realised that morning that I only had 20 rounds in the safe. With an abundance of 7.62×39, it turned out that the trusty SKS would get a work out this morning.
Service rifle shoot
If you’re into your military surplus rifles, going along to a service rifle shoot should definitely be top of your list of things to do. With everything from WWI Lee Enfields, through to Mausers and AK47s and AR15s, every major armed conflict in recent history was represented.
The shoot was run in two details and as previously mentioned, was 45 rounds. This consisted of a Trinity and Action M match and a 10 round sniper shoot.
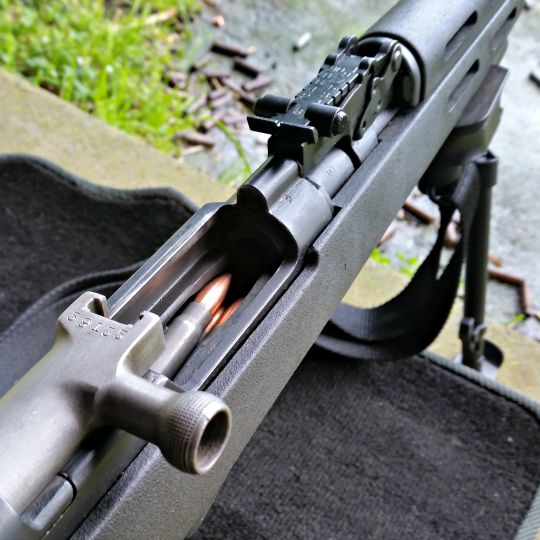
The Soviet weaponry and rusted casings are reminiscent of the Nicholas Cage movie Lord of War.
The trinity shoot is 5 rounds each in the standing, kneeling and prone positions. With no sighters or spotting scopes, you’ve got to know you’re rifle well. The SKS performed well, but was shooting low – which was more me than the rifle, as my wife was shooting too high with the same gun. One thing I may consider doing in the near future is replacing the front sight post with a skinnier one that doesn’t blot out the entire target. Those rifles that were scoped were limited to a magnification of 4x.
After those fifteen rounds, targets were checked, which is when a few of us actually got to see where our rounds were going. For myself, another shooter with an unsighted SKS and another with a new suppressor on his AR, the results were less than stellar.
The next ten rounds allowed us to compensate where we needed to, but the faster pace and movement involved in the Action M shoot means you can’t spend too much time trying to compensate, especially with open sights at 100 metres.
An Action M is usually shot in 60 seconds (at least it was when I last shot one at the Auckland Service Rifle Assn), and consists of 2 rounds prone, 2 rounds standing, one kneeling – reload another 5 round mag or clip – one kneeling, 2 standing and 2 prone. It’s 75 seconds for bolt actions, which is okay if you have a removable box magazine or stripper clips. However, when I shot this last with a Swedish Mauser and no stripper clips, it was certainly challenging. The rules for different types of matches are made by the NZ Service Rifle Association.
In light of the range of rifles and abilities present on the day, and the generally non-competitive nature of the shoot, no strict timing was done, although everyone went as quickly as they could.
The sniper shoot allowed for rests or bi-pods. Handy hint; your car’s floor carpeting can be used if you forget your shooting mat.
The last ten rounds was a sniper shoot which allowed shooting aids, such as rests, bi-pods and spotting scopes – this is where many people were able to turn the tables – despite the smaller targets. Having someone spotting for you is also very helpful when you’re on iron sights.
Although I didn’t place highly, I did enjoy the day and seeing all the old relics shooting (and their rifles too). About a third of the shooters were from HSSRC, so there were some friendly faces, and a few us enjoyed shooting some silhouettes with the rimfires on range 2 afterwards. All-in-all, for $20 and the cost of ammo, a good day was had all round.
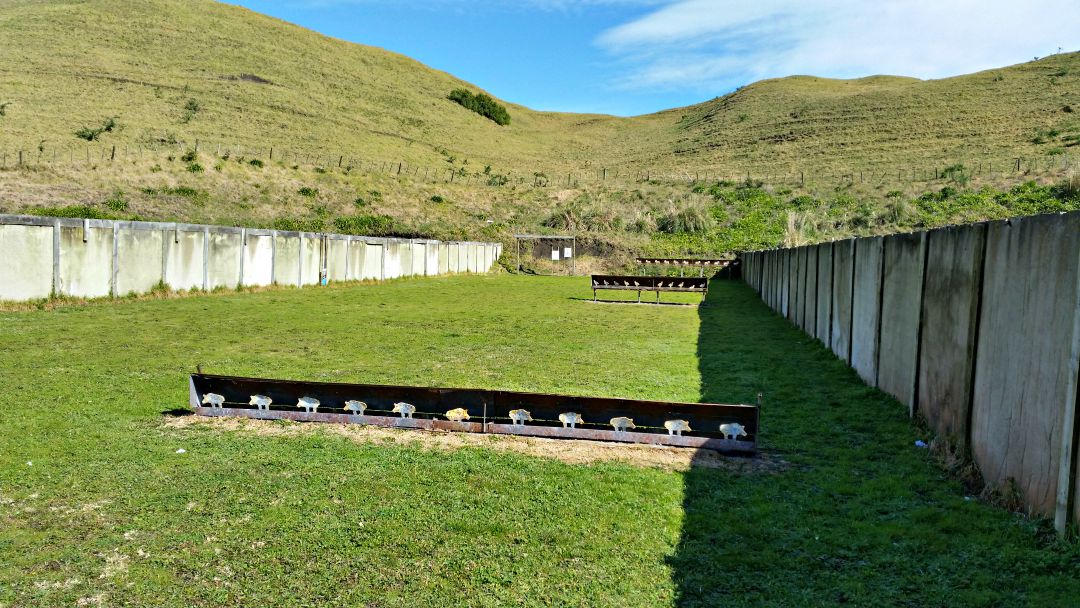
Finishing the day off with some silhouettes at 25, 50, 75 and 100 metres was good fun.
If you’re putting together a rifle for the first time, or you’ve just bought a package deal that was loosely thrown together, you may not be aware of the intricacies involved in proper scope mounting. One of the questions often debated in forums all over the internet is whether or not to apply Loctite to scope base screws, and if so, which colour to use?
Well, I made the rookie mistake of driving three and a half hours to do some target shooting after reassembling a rifle I had coated with a nice new finish. I completely forget to Loctite to the scope bases. I sent a few factory rounds down range to foul the barrel, and got a group size under 2 inches at 100 yards. Sounds about right.
I then painstakingly went through shooting 3-shot groups with my reloaded ammo (I was working up a new load), and watched in absolute horror as my groups opened up to 3 or 4 inches. Thinking I may have overheated the barrel, I gave the old shooting iron a rest and threw some lead downrange with a few other toys while it cooled off.
Taking up the prone position again I looked forward to drilling some really expensive Sierra Matchkings into ragged little holes 100 yards away. No such luck. I was shooting groups that opened up to 7 inches. What the…? I could not figure out how I had screwed up this batch of reloads so badly. Until I adjusted the scope settings for a friend of mine to shoot at 50 yards. Wait – was that a bit of wiggle in the scope mounting? Indeed it was. I had managed to get about $50 worth of ammo down range with no particular success before I realised that my loads were fine – the scope bases had come loose.
Don’t make my mistake
Frustratingly, after driving home for three and a half hours I noticed the blue bottle of Loctite sitting on my gun bench, like a big fat “I told you so” from the universe.
In short, don’t make my mistake – Loctite your scope base screws. I took a perfectly good 1-inch shooter and turned it into a minute-of-dinner-plate loser by forgetting this simple step. And I’m sure my scope didn’t appreciate flopping around like that either.
Make sure your threads are completely clear of debris or grease when you do this. And while some people say red Loctite is okay to use, I prefer to use blue – I find it is much easier to remove. While you may not take your scope bases off regularly, if you want to upgrade or change to a 35 MOA rail, or whatever, you’ll wish you had used the blue variant.
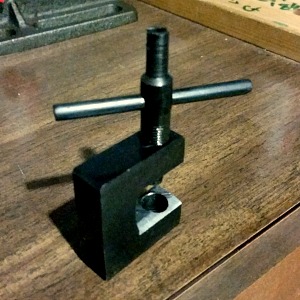
The SKS is an immensely popular rifle in New Zealand. Whether it’s for budget-conscious hunting or recoil-reduced plinking, there are plenty of reasons to have one or two of these fun-makers in your gun safe. However, if you’ve picked up your favourite communist rifle and found that the grouping is out, you’re going to need to invest in a front sight tool – something I’ve recently done. Here are my do’s and don’t of this process.
This is what you should do when buying a front sight tool
As you can see I have filed down the inside edge of the tool to fit around the hooded front sight.
You should definitely shop around. How much are they at the gun store – 50 bucks? Forget that. Go to Quartermaster Supplies and pick one up for $20. Most tack-on accessories for milsurp rifles can be found there for cheap. I paid $28, including all tax and couriered to my work. Sure beats paying almost twice as much at some of the big-name stores, and wasting time and petrol too.
You will probably need to file down one edge of the tool. I think these would fit an AK-style rifle without it (don’t have one on hand to check), but you’ll definitely need to shave off one of the inside edges of the U-shaped device, so that it can accommodate the round post-protector ring. This took me all of 5 minutes with a file, and a quick sand to debur. Just one edge is fine – you can flip it around to adjust the other way.
Sighting in should be done with the FORS principle in mind. That is Front Opposite, Rear Same. If you move the front sight to the left, the point of impact shifts to the right. If you raise the post, the POI will move down. If that just doesn’t make sense, check out the video below. This guy explains it fairly well – and it’ll save me repeating myself.
This is what you should not do when buying a front sight tool for the SKS
Do not try and drift the sight across with a hammer and punch. I have – naively – tried this, and not only is it frustrating, but you’ll soon end up with scuffs all over your bluing and you probably won’t move it much in the end. Spend the $28 – it’s worth it.
Don’t adjust your front sight while the gun is loaded. Seriously. Load one round at a time when sighting in if you have to, but don’t put your hand near the dangerous end of the rifle, and your body or face over the action when it’s loaded. Doesn’t that just sound like a recipe for disaster? The best safety is an empty chamber.
Don’t try and sight it in alone, unless you want a long and frustrating day at the range. Get someone on a spotting scope telling you where you’re impacting – it’s easier, and it’s always nice to have company.
You shouldn’t assume one shot is enough to determine where the rifle is shooting. I prefer to shoot a group of two or three before adjusting iron sights on a rifle like this at 100 or 200 yards. If it was a scoped target rifle on a bipod, with a more accurate round, then yes, one shot would be enough to figure out where to move your POA.
And lastly, don’t sight in with your plinking ammo and expect it to be spot-on with your good stuff. Sight in with the ammo you need to be most accurate with. The difference isn’t much, but the SKS can sometimes need all the help it can get when it comes to extracting every last bit of accuracy out of it. At least most bullets are of a similar weight and diameter when it comes to the SKS, so there won’t be a great deal of difference.
Firstly, buying this scope was a mistake. But it’s a mistake I’m very glad I made. I intended to buy the adjustable objective version of the Vortex Diamondback 4-12 x 40 BDC, but ended up with the fixed-parallax type. I couldn’t return to the store and swap it, because I had just left the country where I purchased it.
With the AO version, my idea was to use it at its maximum zoom at a 25 yard range on a rimfire target rifle. However, without that AO bell, the scope just won’t focus at 25 yards at any magnification greater than 8 x or 9 x. So, I reluctantly told my wife we’d need to take this brand new scope off her rimfire rifle and put it on my 6.5 x 55 that was in need of some glass. This is the point where I’m glad this happened.
The technical specs
The parallax setting on this scope is 100 yards – perfect for getting sighted in at the range, and more than adequate for the average hunting shot in the New Zealand bush. The adjustments go out 60 MOA in elevation and windage. With my 6.5 x 55 it was pretty much bang-on at 100 yards, maybe a total of 7 clicks left and a few up or down, I can’t remember. If you’re aiming to shoot long distance (600 – 1000 yards) you’re probably going to want to mount this on a 20 MOA rail.
The Bullet Drop Compensation (BDC) points are graduated in MOA, and so is your turret adjustment. How many times have you bought a mildot scope and found out later it has MOA turrets? So, this is nice to know right off the bat.
The turret markings are easy to see from behind the gun.
The turrets are capped and resettable. This is nice, as now that I have my zero I can use the windage or elevation adjustments to my heart’s content without worrying about getting my 100 yard zero perfect again. The caps are nice and low and are easy to grip. Be careful when resetting the zero that you don’t damage the turrets, as I found them to be very tight and had to hold them in place with vice grips while I used a screwdriver to loosen the turret. Any extra pressure while doing this and you could have tool marks on your nice new scope. I covered the surface of my grips with masking tape to prevent teeth marks.
You have a total of 5 points of vertical aim, including the crosshairs and the top of the post. You also have 3 hash marks either side of the crosshairs horizontally, as well as the post edges. How to use the BDC? Check out this video from Vortex.
Quality and ease-of-use
The scope has the usual things that manufacturers claim, such as fog-proof, shock-proof and weather-proof everything. Except, this scope really does. I have mounted two scopes on this rifle – the other I won’t name. The unnamed piece-of-junk was used on one range trip for about 3 hours. Yes, there was wind, rain and sun. When I took it off to mount the Diamondback I noticed that the unnamed scope’s exterior coating was peeling off. After one trip!
Subjected to the same conditions, the Vortex scope still looks brand new. That’s probably why they provide an unlimited, unconditional warranty. Which, to be honest, is half the reason I bought it – that shows confidence!
The clarity was exceptional, and the lense coating wasn’t just for show. I had plenty of light, no glare and just a great shooting experience. The scope also features a fast focus adjustable eye-piece with a decent amount of range on it. This was perfect for when different shooters wanted to try it out. Also, the markings on the turret are easy to see without changing your shooting position much – which is not something I can say for every scope in my safe.
Adjustments on the range are done with ease.
Quality of manufacture is something that really shows when you shoot at an outdoor range. It’s also something that greatly determines how long a scope will last and whether you’ll enjoy shooting with it or not. In my humble opinion, the Vortex range is excellent. They are also reasonably priced. In the USA (where I bought mine) they were very affordable. In NZ, they are probably middle of the road. Either way, still worth it for the high-quality optic you’ll be getting. I would definitely purchase another scope from their range.
You also get some handy extras with your scope. There are the standard removable lense caps and a *really nice* cleaning cloth. I would suggest making use of Vortex’s incredibly intricate Long Range Ballistics Calculator. Not only will you be able to figure out your elevation and windage hold, but you’ll probably convince yourself to buy some new rifle while you check out all the ballistics tables you can produce for just about every calibre known to man.
You know the old addage of spend as much on your glass as you do on your rifle? Well, this is one scope that breaks that rule. I would happily mount Vortex optics on rifles that would generally be seen toting the latest Swarovski or Leupold glass.