Product review: Annealing Made Perfect (AMP)

The process of annealing brass has interested me from very early on in my reloading journey. There seemed to be some mystique around it, and only the most hardcore of reloaders really did it. I must confess that I was clearly never hardcore enough and am only now, many years on, beginning to anneal myself. For this reason I thought it would be a good opportunity for me to write an article right from the start of my annealing journey so that those who are interested can learn with me as I go.

Why anneal brass?

To start with, for those who have no idea what I’m talking about, in layman’s terms brass is a soft metal, each time we work a brass case (that may be sizing it, expansion as it is fired, or contraction as it cools and is ejected) the brass becomes more and more “work hardened”. Without trying to oversimplify it too much annealing is the process of heating the brass case neck to a very specific temperature in order to “soften it” back to its natural state.

There are a few benefits of this, firstly it means we can try and achieve a more consistent neck tension, by ensuring we have a consistent start point between reloads. This in turn affects pressures and ultimately potentially affects accuracy. It also extends the life of the case due to the fact that as cases become more and more work hardened they eventually become brittle and split.

It is important to note here that we only want to anneal the case neck and shoulder, we do not want to be softening the case body or base – doing so could be dangerous.
Brass uniformity – how much of a difference is there?

"Annealing Made Perfect" - a pretty bold claim. Does it live up to the name?
“Annealing Made Perfect” – a pretty bold claim. Does it live up to the name?

How is brass annealed?

There are a couple of main ways brass is annealed by reloaders, One of the most common ways is by using a temperature sensitive product which is painted on the inside of the case neck, the case neck is the rotated through a flame (most commonly a gas blowtorch) or cases are partially submerged in a water bath leaving the necks exposed and blowtorched, until the temperature sensitive paint shows the case has reached optimum temperature. There are a few different methods and machines available that follow this basic process which for many reloaders works OK, or at least they believe it to. But there are a number of variables with this process to consider. Firstly ambient temperature and gas levels will both affect the temperature of the flame.  Distance from the flame, angle of flame, time spent in the flame, case calibre, brass thickness, brass type and brand will all have an impact. This many variables, combined with having to use an open flame blowtorch in the house are really what prevented me from getting into annealing sooner.

Then a couple of years ago I came across a product “Annealing Made Perfect”, which I didn’t realise at the time was made in New Zealand. What the guys at AMP were doing seemed to be quite different to the above process and while I wasn’t an early adopter I started keeping more and more of an eye on the reviews and coverage of the guys at “AMP” while I continued to expand my knowledge of annealing and reloading in general.

The process that the AMP machine uses differs in that it uses a magnetic field to pass the brass through in order to create heat, because this magnetic field is electronically controlled it gives the potential for far greater temperature and time control as well as greater consistency and repeatability than the common method of using a gas flame. This method has allowed the guys at AMP to test many combinations of calibre, brass type, brand, thickness, etc., to create an extensive database and various programs within their machine for each type of brass. You are not reliant on using temperature sensitive paint and adjusting everything to get it just right, you now have the ability of selecting the right program and pushing the start button.
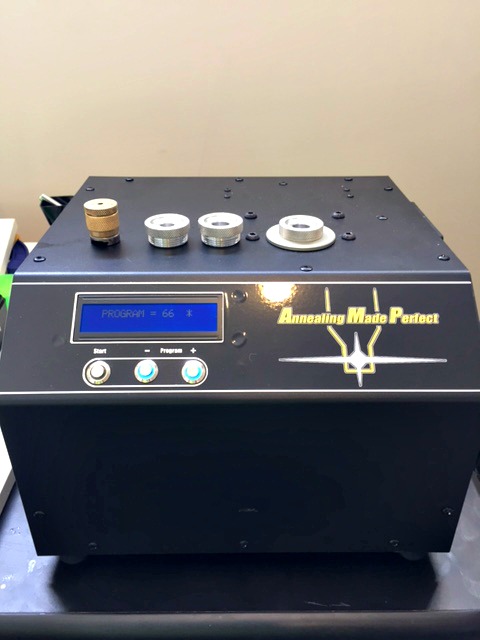
AMP machine with pilots and shellholder.

Another really great service that the guys at AMP offer, and, in fact, recommend, is you send them samples of your own brass and they will test it in their laboratory to identify its unique properties and they will let you know the perfect settings. This service is completely free, and is intended to get you, the customer, the best achievable result. This type of service to me really signals the values of the company and their intent to work with the reloading community rather than just selling them a product.

They have also included a USB port on the side of the machine, and computer link cable in an effort to future proof the machine, in the event of any updates AMP will provide these to be downloaded onto the machine, ensuring your unit is not going to be redundant in a year’s time.

Getting started with the AMP machine

I have recently been lucky enough to get my grubby little hands on an AMP machine to do some testing with, while as said above I haven’t had any experience with the blowtorch methods of annealing and therefore can’t compare the two, I am able to compare annealed vs un-annealed loads.

The first thing I noticed when I opened the box was the thought that has gone into it all, the machine was very well packed, as were the accessories. The user manual was incredibly simple, even for those of us who never read user manuals (Lots of step by step pictures). Realistically, it is so simple that it could even be compressed into one page.

Setting up the machine took all of 2 minutes, literally to take it out of the box, screw in the little rubber feet, plug in the power cord, and you’re ready to start annealing.

A quick check on the Annealing Made Perfect website settings section, selecting my calibre and brass brand from the dropdown list, and I was told what pilot number, and setting number to use.
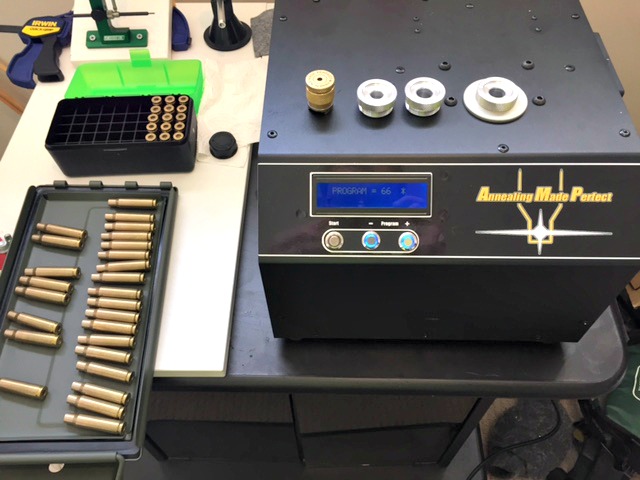
You'll be ready to anneal in a matter of minutes - it doesn't get easier than that!
You’ll be ready to anneal in a matter of minutes – it doesn’t get easier than that!

The Pilots are semi calibre specific (many calibres may use the same pilot i.e .243/7mm-o8/308 use the same pilot, but it will depend on what calibres you load as to what pilots you will need), and they simply screw into the top of the machine to hold the brass at the optimum height.

The machine has 3 buttons on the front, a “+” button, a “–“ button and a “start” button. Simply press the “+” or “-“ button until the LCD screen shows the correct setting for your brass, place a case into your shell holder (the shell holder is used to handle the hot brass), drop the brass into the hole on the top of the machine and press the start button.

The start button will glow red for a short time (depending on brass and setting this time will vary, but likely to be around 3-4 seconds), and you’re done, pull the brass out using the shell holder being careful not to burn yourself on the extremely hot case and drop it into a metal tray or container.
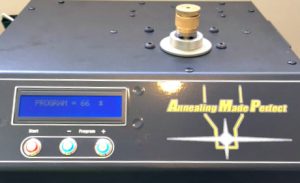
The start button glows red while the operation is underway.

It really couldn’t be more simple and the part I like the most about this machine is it repeatability. With other methods I have seen, people tend to set up their machines for a single calibre. They were often reluctant to change, as doing so would mean a lot of setup to try and recreate the same results next time. It also meant people would do big batch runs of brass as the setup involved and lack of repeatability meant that small runs became an annoyance. With the AMP machine you could literally anneal one piece of brass, then a week later anneal another and the results would be the same. This seemed like a definite benefit to me as it allows me to anneal between each reload, and not have to save large number of brass up each time to get very consistent results.

Are there any downsides?

I will highlight that the two potential issues that some people may find with this machine-

The first is that it anneals one piece of brass at a time, and unlike some other systems which use an automated hopper type setup you have to manually insert and remove each piece of brass. Personally this isn’t a problem for me as I am annealing my brass after each shoot, so I am only doing 30ish pieces at a time. This is taking me less than 10 minutes in front of the TV to do and personally the benefits of this system over others outweigh this slight negative. But for those people who want to stockpile their brass and anneal it in a large batch AMP are currently working on a robotic system and case feeder to insert the brass and remove it, so you can set it and do something else, The system is not currently available, but there are videos on their Facebook page showing progress so far and I can’t imagine it will be too long until we see these out for delivery. The new robotic unit will fit existing AMP Machines.

The other thing I have seen people comment on is the “Thermal Cut Out”. Again for my application I don’t see any real problem here but I know that it comes up a little from time to time, so I thought I should address it. The machine is naturally going to get hot – its purpose is to produce heat after all! AMP have done a great job of addressing this and the machine is built with a number of internal fans (these fans are very quiet and for the most part do the job, with the outside of the machine remaining cool to the touch).

AMP have also built into the software a thermal cut out which monitors the internal temperature of the machine and if it reaches high levels it will place the unit into a cooldown mode where it will essentially stop annealing brass and run the fans until the temperature is reduced. Depending on the program / cartridge you are running AMP indicate this may be between 50-200 cases. The most I have put through nonstop in one hit was around a hundred 6.5 Creedmoor cases running program 53 and I did not reach this cut out, in fact the unit still felt very cool to the touch and the air being blown from the fans also felt cool. Once again I now anneal my brass after each shoot, so after my initial annealing of my existing brass stockpiles I won’t be doing any overly large batch runs so this isn’t a problem for me at all, in fact its quite comforting to know that the machine has this protection feature built in.


Testing the annealed cases

Now I guess you are all wondering, does it work? Well again I’m not a scientist by any means, so I urge you to do your own research in general, but I will say that I recently did a test comparing both annealed (through the AMP machine) and un-annealed loads in a newly broken in 308 build. The loads were essentially the same however there were TWO variables that potentially both impacted the test.

  1. One set of loads was Annealed and one was Not Annealed.
  2. The set that was Annealed were the 10 cases I had with most uniform neck wall thickness, and the set that was not annealed was the next most uniform 10 cases.

Both sets were selected from brass which had around 10 firings through them and were the 20 most uniform (neck wall thickness) cases of 150 measured.
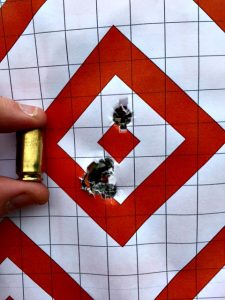
This is the annealed group. One cold bore shot and then 9 in the same hole. 9mm case for scale.

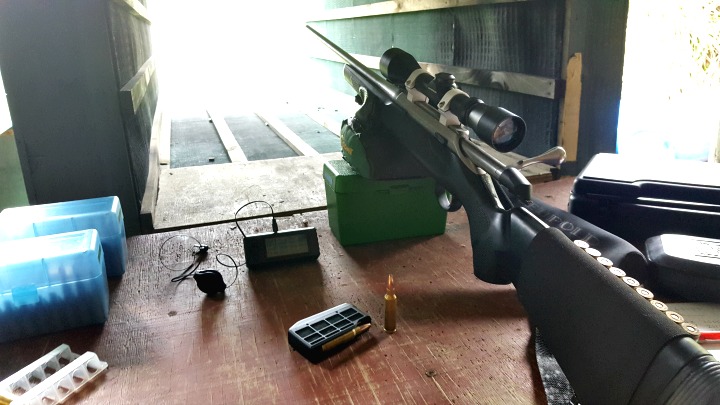
Measuring both sets of loads through a Magnetospeed Chronograph, the Standard Deviation of the 10 loads which were Not Annealed was 16.4. The Standard Deviation of the Annealed set was 9.4. The groupings of both sets at 100m was very good (one ragged hole, excluding a cold bore shot with each set) and I could not in fairness distinguish between sets, except for a single flyer on the Not Annealed set which while I don’t believe it was the result of shooter error, I can’t rule that out.

How important the Standard Deviation reduction is depends on you and what you are doing with the load. Both sets (Annealed an Non Annealed) would have happily taken down game out a long way, but for ringing steel or punching paper or shooting out at distance the reduction in SD (and ultimately grouping size/vertical dispersion) could well be worth it.

Overall, this is a great piece of kit. I plan to continue to update this article as I go and the machine is tested with as many calibres, brands and environments as I can. In the meantime, in New Zealand machines can be purchased from Serious Shooters in Auckland, and international purchasers can see their local stockists on the AMP website

[Editor’s note: If you enjoyed reading this article from Chris (or any of his others), you may like to follow Chris on Facebook]
 

How to: Apply for a Pistol Licence (B Endorsement)

I often talk to friends or people at the range and shooting events about pistol shooting, it seems many people who are already interested in shooting activities are keen to try pistol, but don’t know how or where to start. I know that information can be hard to come by at times, and often it seems like people are deliberately making it difficult. For this reason I thought I would give a bit of a shakedown of the current process here in New Zealand.

I will start by pointing out what I would hope is already generally understood information; Firstly It is illegal to shoot a pistol anywhere in New Zealand other than a pistol range which has been approved by the police for this purpose. You must have a specific endorsement on your firearms licence in order to possess a pistol (B Endorsement), and you may only transport it from your pre-approved security (safe) to the pistol range and back again (with the exception of to a gunsmith / store).

It is possible to attend a training course at a pistol range in New Zealand without first having a firearms licence (under strict supervision), but many clubs require that you have at least begun the process towards getting your licence. It is also a police requirement that, after 3 visits as a visitor, you must become a financial member of the club in order to progress your training.

Basic firearms licence

If you don’t have a basic sporting (A Category) licence, you will need to follow the following steps to get one:

  • Attend a firearms safety course (generally one or two evenings)
  • Sit a test on the information you have learned at the course (And pass of course)
  • Pay an application fee (paid at an NZ post shop)
  • Complete an application form from your local arms office (This application will require you to provide details of at least two character references)
  • Install security measures such as a safe / strong room
  • A police vetting officer will then visit you and your chosen character referees to discuss the reasons you would like to own firearms, ensure you are a person of good character, and check your security measures are appropriate
  • If all goes well, you should receive your licence in the mail.

Once you have your licence, endorsements such as the “B” endorsement for pistol shooting can be added to your licence. Or you can apply for endorsements at the same time as you apply for your licence.

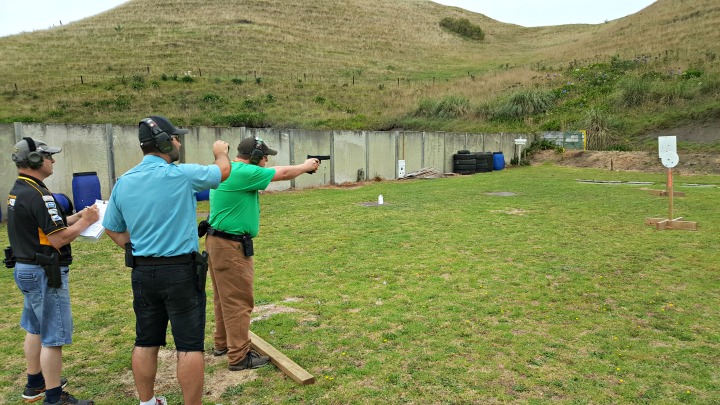
The author engages some steel downrange.

Applying for your B Endorsement

In order to apply for your “B” Endorsement you will need to follow the steps listed below:

  • Join a pistol club, attend and complete their training programme (which should comprise of  at least 12 days supervised training and lessons)
  • Join Pistol New Zealand
  • Complete a club range officer examination
  • Complete a 6 month probation period with the club
  • Apply to the club to get permission to apply for your endorsement (the club must deem you as a safe and competent shooter)
  • Visit your Arms officer and get a form (POL67F), or download from the police website (you will need to get it witnessed by a police officer though)
  • Provide your POL67F to your club who will complete their section and send it to Pistol NZ
  • Pistol NZ will then complete their section and forward it onto the arms office [Editor’s Note: I am in the process of applying for my pistol licence, and the AO suggested that PNZ might mail the form back to me, and I could electronically submit back to the AO (i.e. via scan/email)]
  • You will also need to pay an application fee, again via NZ Post
  • You should then expect a visit from a police vetting officer to discuss the reasons why you would like to shoot pistols, inspect your security (you must have a “B” endorsed safe, not your basic “A cat” safe as there are much more stringent measures set on safes for endorsed firearms which can be found on the police website)
  • The vetting officer will also contact at least two referees again. Generally these referees will be people who have a reasonable knowledge and understanding of your shooting activities, rather than just character references
  • All going well you should then receive your new licence with relevant endorsements in the mail

Once you have your endorsed licence you may begin looking to purchase a pistol. Hopefully during your training period you will have had the opportunity to shoot a variety of pistols and types of events, and you may have established an understanding of what you want.

Acquiring a pistol

Once you have decided on a pistol and a place you are purchasing it from, you need to talk with your club and get an Application for a Permit to Procure “Pinky” form which will be signed off by a member of the club executive, authorising you to apply for a Permit to Procure. You take this form with you to your Arms Office and you will be issued two copies of a POL67C Permit to Procure form.

Once you have this Permit to Procure you take it with you to the person or store you are procuring the pistol from, and they will complete their section on the forms. You then take the completed forms and the pistol to your Arms Office who will inspect the pistol to ensure it is the same as the one originally applied for. They will keep a copy of the form so it can be entered in their records and you will be allowed to take the pistol, and your copy of the permit for your records.

Why is it so much effort?

I know that in reading this, it sounds like a long-winded process. To be honest, it is. I would estimate it taking about a year (or longer depending on circumstances) to fully complete the process. There is a reasonable amount of start-up and ongoing costs associated with owning pistols to be aware of (Application fees, Pistol Club joining fees, annual Pistol Club fees, Pistol NZ Fees, not to mention cost of firearms, ammo and equipment). However, after completing the process, I can understand why it is set up this way.

Pistol shooting is great fun, and you will meet some great people, but safety is key (things have the potential to go pear-shaped very quickly with pistols and their very short barrels). By completing the whole process, it ensures that only those people who are very motivated and keen, as well as competent and safe have access to these endorsed firearms. You don’t want to be competing in a match at your range with guys you don’t feel safe around. The knowledge that everyone you are shooting with has completed the above process does provide that assurance of competence and safety.

If you’re interested in shooting pistols, I would highly recommend contacting your local pistol club and enrolling in their next training programme. Visit the Pistol NZ website for a directory of pistol clubs throughout NZ.

Beginners guide to buying a hunting bow

Bow hunting is one of those things I have always liked the idea of. It complements the usual rifle hunting so well, but adds a number of different elements. In recent years I have seen more and more bow hunting photos and trips popping up on my favourite hunting shows and Facebook pages, which started to whet my appetite even more.

I decided I would try and get myself behind a bow to give it a go, I had never even shot a compound bow before, so didn’t really know if I was going to enjoy it or not.

Full disclaimer time, I’m writing this as a reasonably knowledgeable newbie, I’m not an expert by any means. There are plenty of very knowledgeable “pros” on the internet so please do plenty of your own research, I’m writing this to help others who may have thought about giving it a go to get into the sport from a novice’s perspective.

Initially I did a fair bit of internet research, saw what you should look for in a bow, how to shoot one, what others were using, and what sort of things I thought I might want in a bow, should I ever get one. I gave myself a bit of a budget to keep in the back of my head. It wasn’t huge, as I had all my hunting gear and it was only the bow-specific things I needed, but I also didn’t want to buy something cheap and nasty, which I would outgrow in a year or so.

Stag..gering. #CarbonDoneRight @OutbackOutdoors | #IAMDEFIANT #GetSeriousGetHoyt #HoytTaggedOut

A post shared by Hoyt Archery Inc. (@hoytbowhunting) on

Fit for purpose

With all this in mind, I rang a couple of local archery stores, told them I was a complete newbie and asked what I should be looking for, and if they had anything that may suit me. Everyone I spoke to was extremely helpful, and I learned a great deal from the phone calls alone. In particular, how important it is to get a bow fitted to the shooter, rather than just grabbing something off the shelf. You need to adjust draw length, poundage, arrow length, peep sight placement, etc., for each individual shooter. This is all easily done by an experienced archer, but for the completely uninitiated, I would highly recommend going along to a store and getting fitted correctly, rather than just buying off the shelf.

During one of my phone calls the guys from Advanced Archery invited me down after work one evening to shoot a few different bows and get a feel for it. Obviously an opportunity I couldn’t pass up.

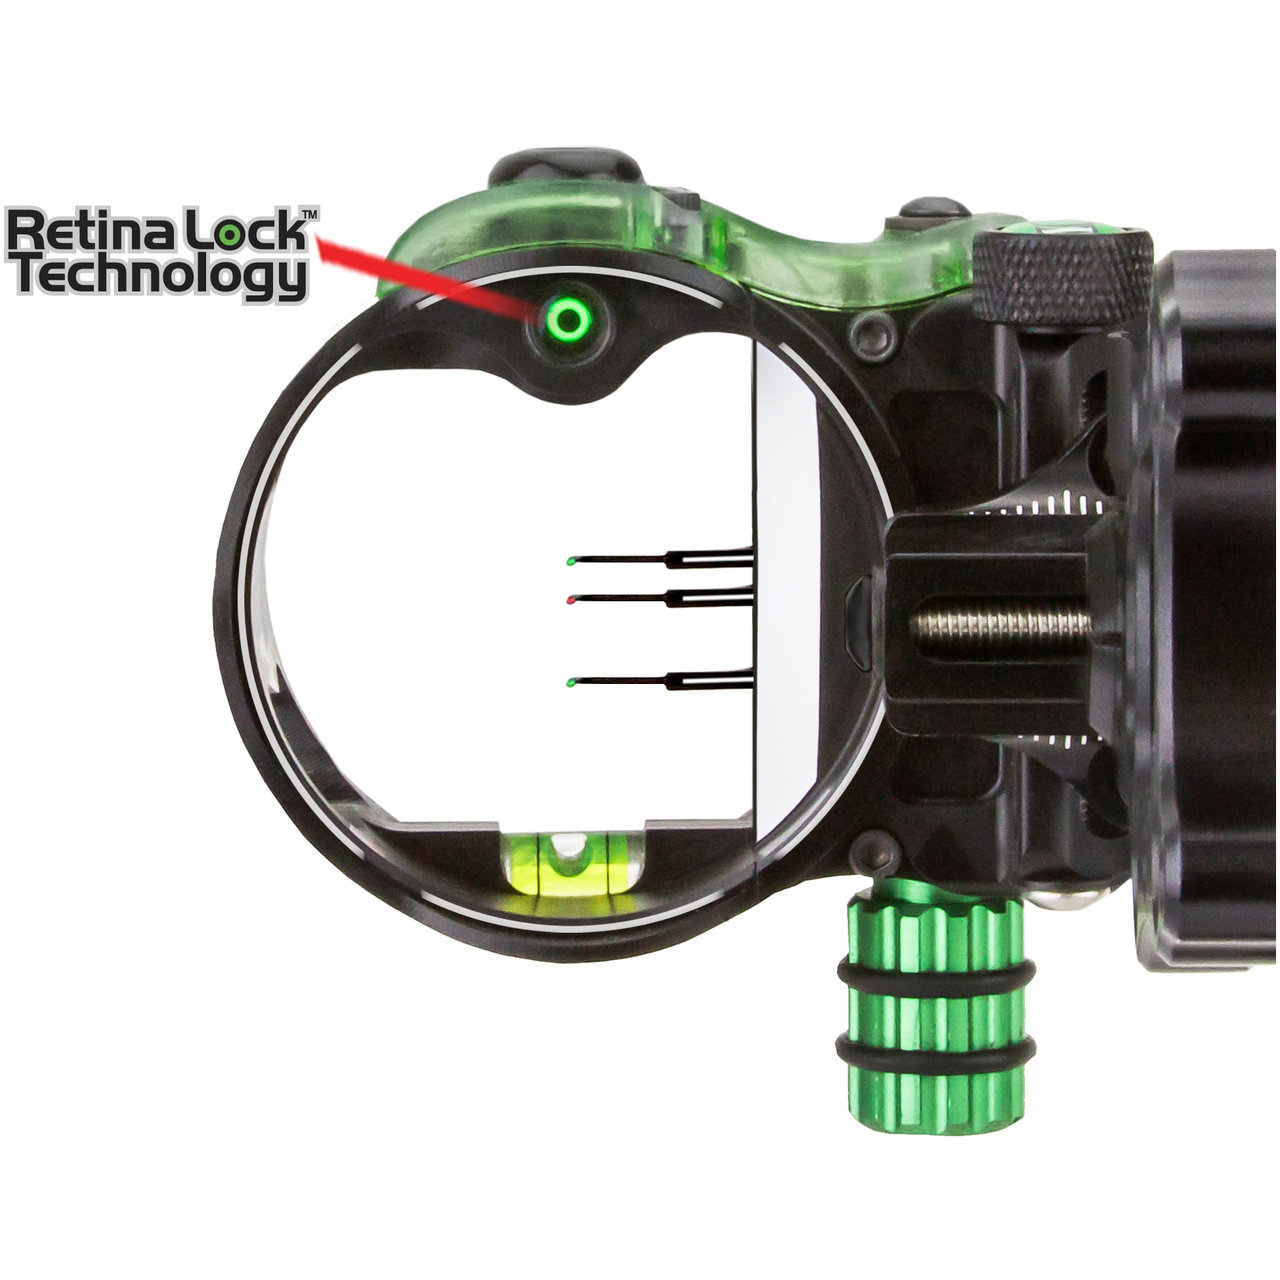
Compound bows and their accessories are probably quite a bit more modern than you expect. Pictured - bow sight with holdover pins. Image credit: Advanced Archery
Compound bows and their accessories are probably quite a bit more modern than you expect. Pictured – bow sight with holdover pins. Image credit: Advanced Archery

Getting measured

I walked into the store having never shot a bow and knowing only what I had read about, or seen on videos. The guys at Advanced Archery sized me up and showed me a huge range of bows that could be adjusted to fit me. They suggested I try them all and were only too happy to spend the time setting each one up for me to shoot. We spent several hours on their indoor range, shooting all different types of bows in all different configurations, and learning lots of little tips and tricks. By the end of the evening I was shooting like a pro (well, shooting a heap better than I was expecting to), and knew exactly what I liked and what I didn’t.

This type of customer service and support is fantastic to see, and as such I would highly recommend going along to check them out! (I have no affiliation with them other than being a happy customer).

What should I look for in a bow?

So, if you’re interested in getting a bow, what sort of things do you need to be looking at?

Well, obviously, each person is unique and has their budget in mind, but in general I would highly recommend getting a bow that has a good adjustment range. Some of the very expensive bows are quite specific. Yes, they are probably better at their intended job than the cheaper bows, but as a newbie you probably want a slightly more forgiving bow (you don’t want to try and learn to drive in a Formula 1 car), but likewise you don’t want a bow that you’re going to outgrow in a short time. For this reason all the big bow makers have started releasing a range of bows that cover a wide range of users (Hoyt Inferno and Mission Craze both come to mind).

There are higher end bows that are modular, and will allow you to adjust by adding or removing modules. There are also adjustable cam models. Of course, this comes down to how much you plan on spending on your bow hunting venture.

Draw length is the adjustment that determines how far back you have to pull the string to load the bow. This is usually measured based on the height of the shooter (Da Vinci taught us that height = arm span) so it’s a fairly simple calculation for those who know what they are doing. There are a few more variables to consider, such as the draw length on your left- and right-hand-side, so getting a custom fitting is a great idea for those new to the sport. Its important to get this measurement right as it will have a huge impact on your repeatability and overall accuracy. A bigger adjustment window will mean it will suit a wider range of shooters (and therefor may help with resale if you ever decide to sell).

What will you be hunting?

Bow Poundage is the next measurement, Most high-end hunting bows should give you a range of at least 10 lbs. This means a 70 lb bow can be adjusted down to 60 lb, a 60 lb bow to 50 lb, etc.  There are a couple of schools of thought on what you should set it at, one is that more is best, the higher the bow poundage the further it will fly and more powerful your shot will go. There is some truth to this, however based on conversations I have had with some of the countries best bow hunters there seems to be a feeling that most new bow hunters here tend to over poundage for our conditions, think shooting turkeys with a 50BMG.

The down sides of too much poundage is that it takes more effort to draw the bow, this has a direct result on how steady you can hold it and how many shots you are comfortable making in a session.  You have to remember with a bow you’re not shooting for long range distance, your shots are generally going to be between 10-40 yards, so you only need enough poundage to humanely kill the animal you are hunting at that range, any more is really a waste and has impact on your accuracy.

What you intend to hunt will have a direct result on where you should set your poundage.  (For those who haven’t shot a compound bow before, when you draw you are pulling through the maximum weight. When you get the bow drawn completely back, it hits what they call the valley in the cams, and the poundage you are then holding is only a quarter or so of the bows actual poundage. This means it is relatively easy to hold at full draw). Again a proper fitting from an experienced shooter will help here as they can watch you shoot and adjust the bow accordingly.

Selecting arrows for hunting

Most shops will sell packages of everything you need (walk in, walk out, go hunting), expect to pay $850 to $1400 ish for a middle of the road bow package or $600 to $1200 for just the bow. Obviously just like firearms you could spend less or spend a lot more, but for a starter package your not going to grow out of in 5 minutes this is what I would suggest.

Can your broadhead do this? #canyours #ragehole #rageinthecage #dothis #wow

A post shared by Rage Broadheads (@ragebroadheads) on

Arrow length, weight and thickness are more variables that are best left to the experts. There is a calculation to be done which takes into account your draw length, the poundage you are shooting, and what you are going to be shooting at. This will all have a direct impact on how the arrow will fly, and therefore accuracy. Arrows aren’t overly expensive, expect to pay $12-$15 each for your first set of arrows depending on what you need, and you can use them many hundreds of times (until you lose them). These will be included in most packages. I’m not going to go into detail on arrow tips in this article, your arrows will come with field points (sharpened tips for target shooting) which can be unscrewed and switched out for hunting tips, tips are a whole article on their own…

Peeps & sights for bows

A "glowpeep" which gets spliced into the string. Image credit: Advanced Archery
A “glowpeep” which gets spliced into the string. Image credit: Advanced Archery

Sight wise, as you would expect, much like rifle shooting there are a number of options. Hunting Bow sights have two parts, the front sight and the peep sight. The front sight attaches to the riser of the bow near the grip, they generally have 1, 3 or 5 pins that extend into a circle, which are set like crosshairs at different ranges (e.g. 20, 30, 40 yards). Again these will come with the packages, but if you want to buy one separately expect $60 – $350, depending on what you want (some come with inbuilt lights, bubble levels, etc.).

The peep sight is a smaller circle which is spliced in to the bow string at the point at which your eye sits when you draw the bow, the idea being you look through the peep sight to align the front sight.

Quivers

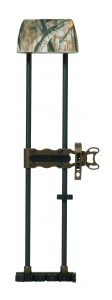
Quivers. These attach to the bow to hold your arrows close at hand and keep the sharp tips covered while you’re climbing through the bush. Again as you would expect there are plenty of manufacturers and styles available so its down to personal preference, but one thing to consider is by putting weight (quiver and 5 arrows) on one side of your bow it will want to cant to that side when you draw it.

Tight Spot quiver. Image credit: Advanced Archery

Not a problem for many people but If I was doing it all again I would pay a bit more to buy a quiver that is light and fits close to the side of the bow to reduce this cant instead of the one I got with my bow. (A company called Tight Spot makes a great quiver for this but expect to pay for it). Packages will come with a basic one which will be fine, or you could buy a basic one for $40ish but if you want a Tight Spot or similar expect to pay around $200ish.

Release aids

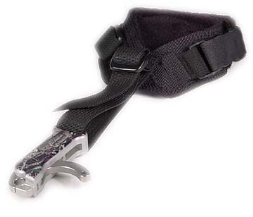
Release aids, when you picture olden day archers you think of people grabbing the string with their fingers and drawing the bow back. These days bow hunters and the majority of target shooters use release aids. For hunting, these generally consist of a strap which tightens around your wrist with a small clamping device which extends out. The idea is you clamp a small string loop which is spliced into the main bow string behind where the nock in the arrow sits, this holds the string tight and allows you to pull the string back without any weight on your fingers. When you’re ready to take the shot you pull a small trigger that extends out just like a rifle.

A release aid - this shouldn't be too difficult a concept for those familiar with firearms. Image credit - Advanced Archery
A release aid – this shouldn’t be too difficult a concept for those familiar with firearms. Image credit – Advanced Archery

Again there are plenty of different brands and models available, they essentially all serve the same basic function, but you are paying for the cleanness of the break much like aftermarket rifle triggers. Most packages will come with one that will work fine, but if buying one expect to pay $40 to $250 depending on what you want (and more if you’re really keen).

A good trigger release aid is one that has no trigger travel. It’s worth the spending the money on, as it will make you a better shooter. If you have any more money in the budget over and above the minimum, this is the first thing to spend a bit extra on – it will make you a better shooter.

That’s essentially all you need to get out there and do it.. If you’re a hunter looking for a new challenge, or a way of simply complimenting your shooting sports I would highly recommend adding a bow to your Gun Rack.

I’ll try to keep you updated with my progress as things happen, but if you have any questions let me know and if I can’t answer them ill find someone who can.

Link to source of feature image

The dark arts of Chronographs

Chronographs are getting more and more common in shooting circles these days, and you will likely see at least one on your next visit to the range. So what exactly do they do? Well, on a basic level, they tell you how fast the projectile you are firing is traveling once it leaves the rifle.

Why is this important to know? Well, a couple of reasons. Firstly, all things being equal, the more consistent speeds your projectiles travel at, the more consistent you groups should be (ignoring all other factors which contribute to overall accuracy). Secondly, and perhaps most importantly, by knowing how heavy our projectile is, how aerodynamic it is, and how fast it is travelling when it leaves the barrel we can accurately calculate the bullet’s trajectory over any given distance.

Ballistic Precision Chronograph G2 - A light operated chrony by Caldwell Shooting Supplies [image credit: BTI Brands]
Ballistic Precision Chronograph G2 – A light operated chrono by Caldwell Shooting Supplies [image credit: BTI Brands]
As a bit of background on me, having worked at several paintball fields over the years using chronographs to check the speeds of every paintball marker each time it entered the field, I can comfortably say I have spent more time using chronographs than most recreational shooters. I have also previously owned a radar chronograph and currently own a magnetic chronograph. That being said, I’m by no means an expert on the topic, and the purpose of this article is really to  help those new to the topic understand a little bit more about these instruments.

What types of chronographs are there?

The first thing you need to know is that there are three main types of chronograph available to us as shooters; Light Chronographs, Magnetic Chronographs and Radar Chronographs.

I’ll try and explain a little about each below:

Light Chronographs

Light chronographs use a series of light sensors (usually two, but sometimes more) placed at a controlled distance apart in order to measure how long it takes for a projectile to break each of the light beams and calculate speed based on this. These chronographs are set up at a specific distance in front of the rifle or pistol on a tripod or bench (i.e. in front of the firing line, for those shooting on a range this may be a problem) and shots must be made in a way that breaks both beams.

Light chronographs are considerably cheaper to manufacture than the other types, and so can often be purchased for a reasonable amount. This type of chronograph is however affected by ambient light, so much so that even clouds passing in the sky may have an impact on speed readings. To get around this many manufactures create plastic hoods to help control the light above the sensor with varying degrees of success, but the same round is likely to show a slight variation day to day depending on conditions.

For this reason, light Chronographs are generally considered less accurate by nature than the other types available. This may not be an issue in reality however, as 10 or so feet per second variation between shots when you’re talking about 2800 fps is really quite minimal so may be fine for what many shooters require.

One thing I personally don’t like about light chronographs however is I find them hard to read. This is very much a personal thing and I’m sure 95% of people won’t have this issue, but I find trying to read a small LED screen that is 2-3 m in front of me, with a sun reflection, quite difficult. And because it’s in front of the shooting line I can’t just go up for a closer look. Some units do allow aftermarket screens to be connected which are either larger or sit closer to the shooter to get around this (just something to consider).

Having a screen at the shooters position makes life a lot easier.
Having a screen at the shooter’s position makes life a lot easier.

Magnetic Chronographs

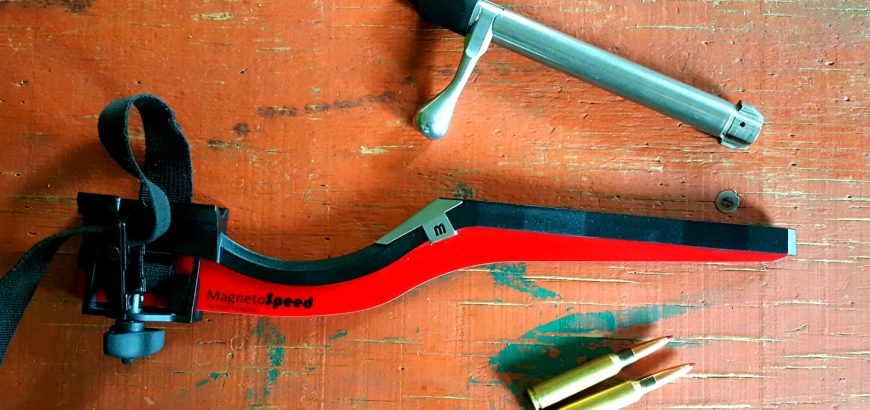
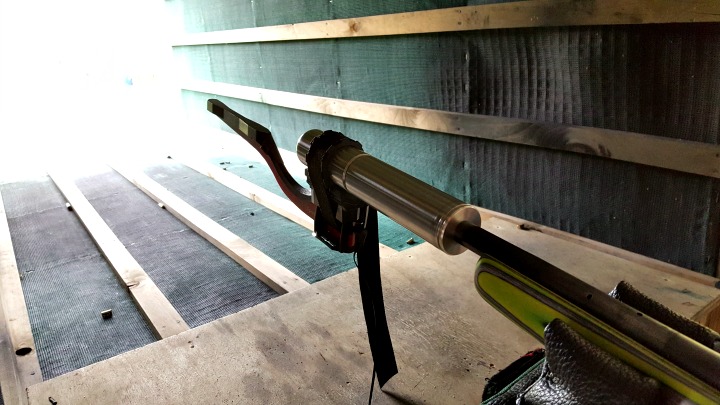
The second type of chronograph is a magnetic chronograph. These types of chronographs use sensors which produce magnetic fields and then measure metal projectiles as they pass through this field. These types of chronographs often mount to the rifle, or have a platform the rifle sits on when firing in order to keep a constant distance from the projectile as it passes.  

The types that mount onto the rifle have positives and negatives, the positives are that the measurements are consistent and accurate as the chronograph and rifle move together it eliminates any error created by the shooter’s/rifle’s position repeatability, it also means that a shooter doesn’t have to go in front of the firing line in order to set it up, and this type of chronograph has the ability to register very fast strings of fire (i.e the ability to register and measure every shot on a full-auto AR-15 without skipping a beat).

If you're going to shoot subs or cast lead bullets, don't forget to adjust your sensitivity settings.
If you’re going to shoot subs or cast lead bullets, don’t forget to adjust your sensitivity settings.

The negative is that you are strapping something to your rifle which has the potential to affect harmonics and adjust your point of impact. I will say I own a barrel mounted magnetic chronograph and have not had any change in point of impact as a result of using it and neither have many shooters I have spoken to. However, I have heard from some shooters who have had very slight point of impact shifts. This may or may not be a problem for you depending on your setup and requirements.

This type of unit may also be difficult to use on certain pistols, particularly those without rail mounts on their frames. One other negative is that solid lead rounds may be difficult to detect without sensitivity adjustment (jacketed bullets are fine), as lead has a very low magnetic field.

[Editor’s note: As long as you remember to adjust your sensitivity settings, you should be fine. I’ve used this type of chrono on subsonic (~950 fps) cast lead bullets with good success.]

Radar Chronograph

The third type of chronograph is a radar chronograph, and you guessed it – this type uses a radar (Continuous Wave Doppler) signal to project downrange and calculate the speed of the projectile as it travels through the radar wave zone.

The benefits of this type of system are that you set it up parallel to your shooting position, so there is no need to go forward of the shooting line. They also don’t touch your rifle, so have no possibility of impacting harmonics, and unlike an on-barrel magnetic chronograph, you set it up once per session and you don’t need to move it in order to test different rifles.

Some radar chronographs also give you the ability to set a tolerance range and any shots outside that range will be indicated by an audible ‘beep’ so you are getting instant feedback without having to monitor the output screen. The downside to this type is that they often struggle to distinguish between different shooters / projectiles as they pass through the radar waves. If you are at a range with people shooting next to you, it’s potentially not going to know whose shot is whose and may give you readings for the guys next to you, also.  Some units have different methods of trying to prevent this, such as microphone triggers / built in software etc.

These units may also struggle to work in some shooting tunnels both due the their need to be set up near the shooter and project forward and also the radar wave “bouncing” off the tunnel walls giving false signals.

Test fire and choosing a chrono

Some recent basic testing we did using a magnetic chronograph and a light chronograph showed 6-7 FPS variation between the two respective readings for the same round, with the light chrono reading faster than the magnetic. With the speeds we were shooting this equates to around a 0.2% variation between the two units which I would suggest is more than accurate enough for most recreational shooters to know what they want to know.

How much you want to spend on a chronograph is up to you, as always there are cheaper and more expensive units out there, and what features you want will also impact price. In general, light chronographs start around $200 NZD for basic models and go to about $500. Magnetic and Radar chronographs start about $400 and go up to about $1000 depending on what functionality you want.

Some of the positives and negatives discussed above may or may not be applicable to you and how you intend to use it. Hence the cheapest light chrono may be fine for your purpose, or you may feel you need to spend $1000 + on a radar unit with all the bells and whistles.  I would suggest if you’re looking for your first chronograph that you will probably use a few times a year to develop loads for hunting, then the cheapest light chronograph will likely tell you everything you need to know.


Eight Gun Competition

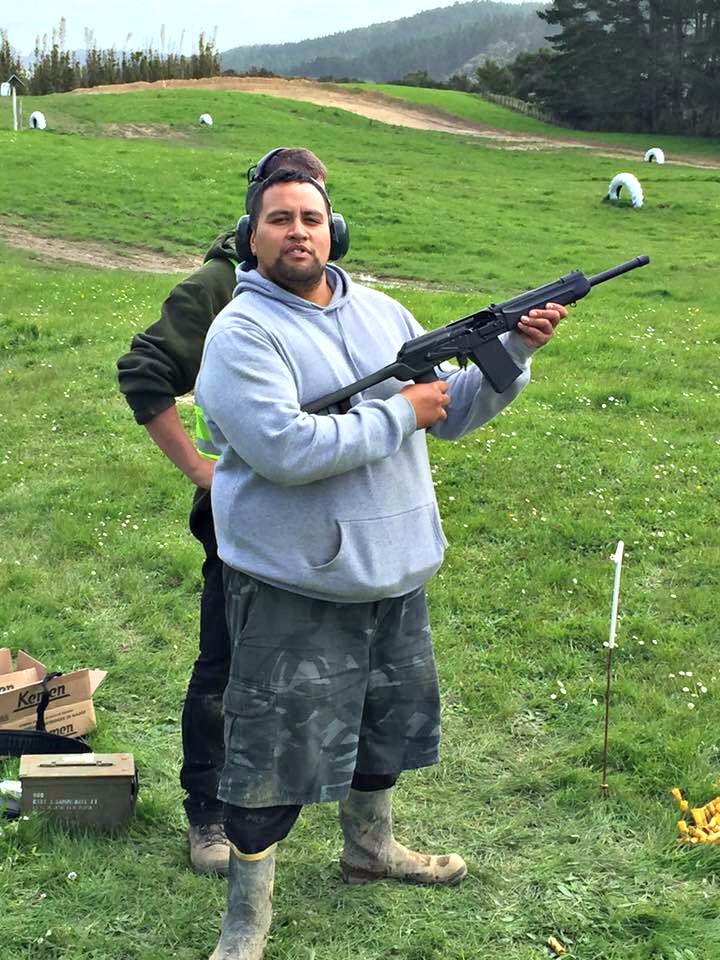
Just prior to Christmas I was lucky enough to get a call from a friend who told me he was helping out with an 8 gun competition shoot the following day, and would I be interested in entering.

I had no idea what an 8 gun shoot was exactly, but hearing there would be shooting out to about 800m involved, I was in! (Those sorts of distances don’t come up too often living in the city).

There was a reasonable entry fee, but I was also told I didn’t need to bring any ammo or guns as it was all covered in the entry fee. I was given directions to a private farm about an hour north of Auckland and told to arrive before 9am.

Ammo include, and trying out some new toys? Why wouldn't you?
Ammo included, and trying out some new toys? Why wouldn’t you?

Arriving bright and early in the morning I was guided by a person in Hi Viz to a carpark area and told someone would be along to collect me shortly, after a few introductions with others in the carpark area, we all jumped in various 4wds and were driven to the staging area.

Still not really knowing what I was in for, the organiser Shawn gathered us all around and explained we would all be given a scorecard to carry with us at all times, as we rotated through 8 shooting stations throughout the day and would be scored by the range officer at each station.

A good result after a great day of shooting.

The stations were:

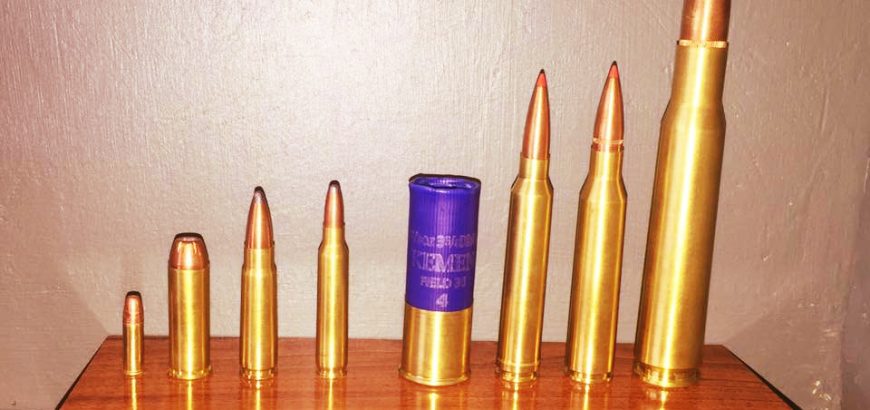
  • Shooting spinning targets at about 25m meters with a .22LR
  • Shooting a lever action .45 at falling steel plates
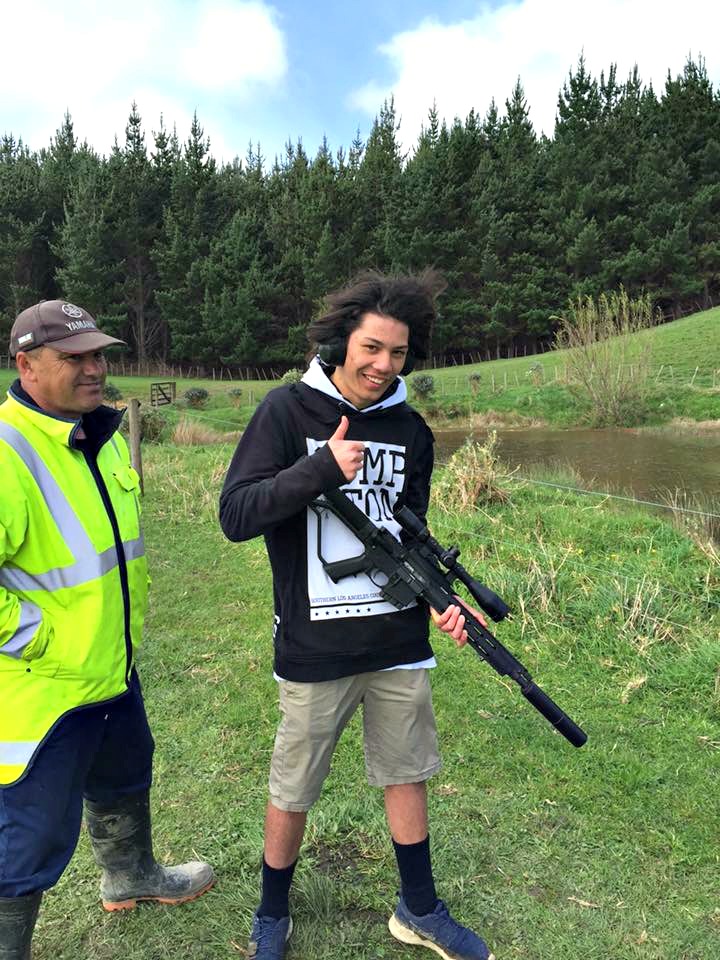
  • An AR15 chambered in .223 at a set of bowling pins
  • An AK-47 in 7.62×39 at a set of bowling pins
  • 20g shotgun with a series of flying clays
  • .300 Win Mag at 350m
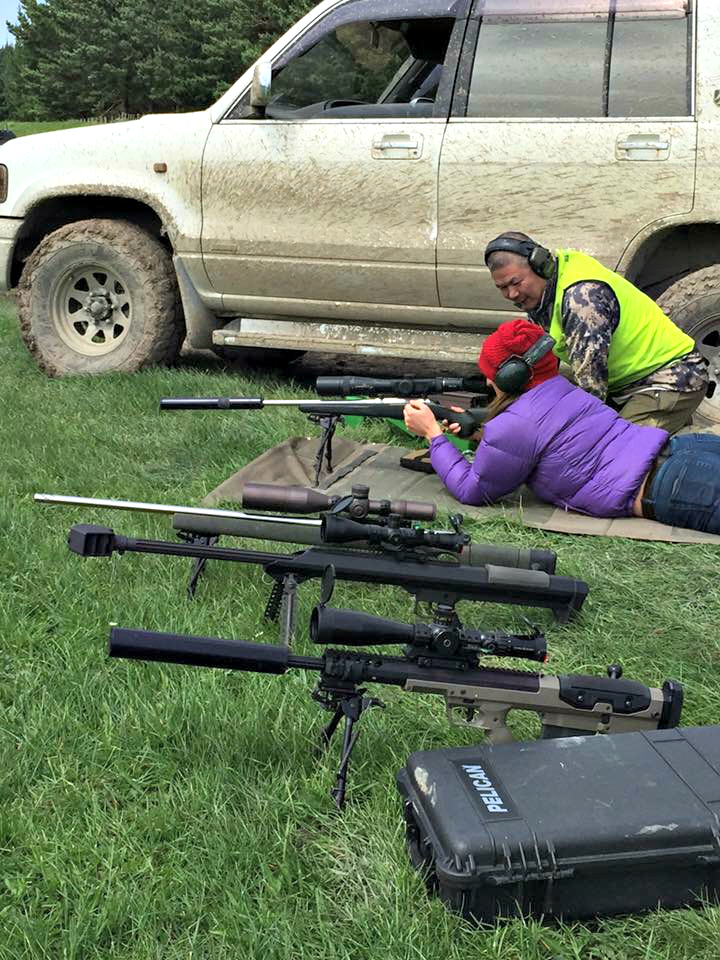
  • .338 Lapua at a series of distances out to just shy of 800m, and;
  • A 50BMG with incendiary rounds at an engine block at 300m

Each shooting station had a “range officer” in Hi Viz who explained the course of fire, helped where required, and scored each shooter.

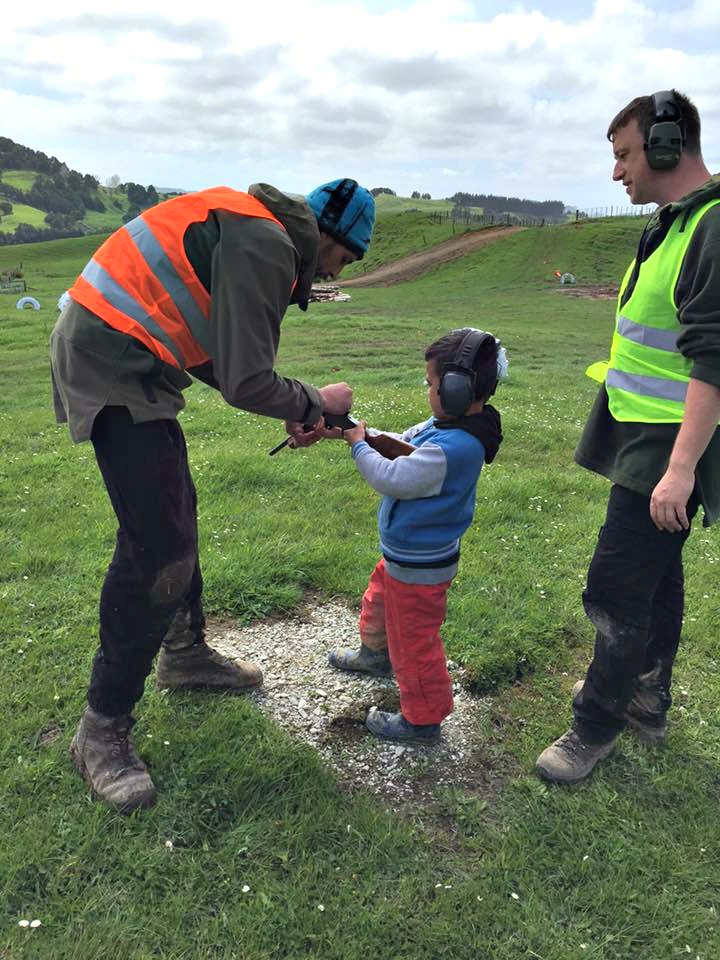
With some 30-odd competitors, experience was varied from people who had never shot before, to those with substantial experience. This event catered for all. Even the locals from neighbouring properties were invited along and it was great to see them coming over and showing their support for such a great event. Some of the young ones also got a chance to have a shoot with the smaller calibres under supervision.

After a great day’s shooting and meeting some like-minded people, we were invited back to the house for a BBQ and informal prize giving.

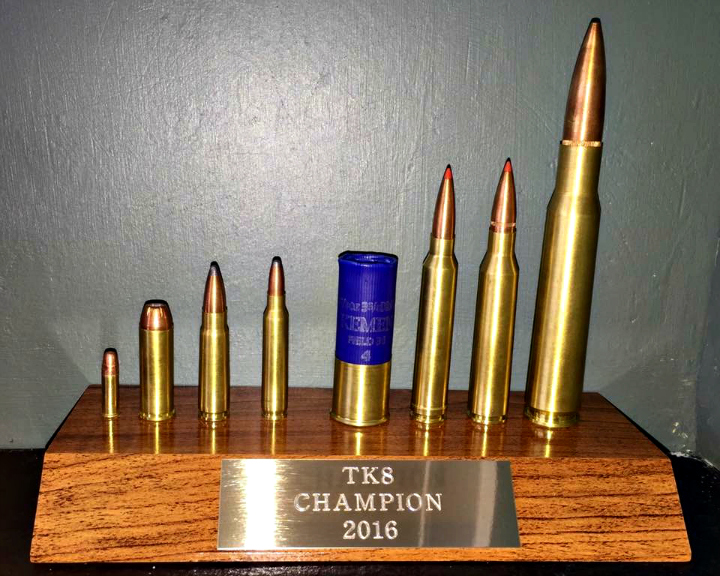
The only thing better after a great days shooting than a cold beer and a BBQ was the awesome trophy I managed to score, winning the event!

Over all it was a great day out, and I would highly recommend it to shooters of all levels.

If you’re interested in attending the next one (planned for March 2017), contact Shawn at 77shawnking@gmail.com or 021 180 3823 to register your interest.

Pretty cool trophy!
Pretty cool trophy!