
PSNZ22 – Practical rimfire shooting event

Firstly, where the hell did March go? Between shooting events, reloading, work, and an overseas holiday, I can’t say there’s been very much time to write anything. However, I did make time to attend Precision Shooter’s inaugural PSNZ22 practical rimfire shooting event.

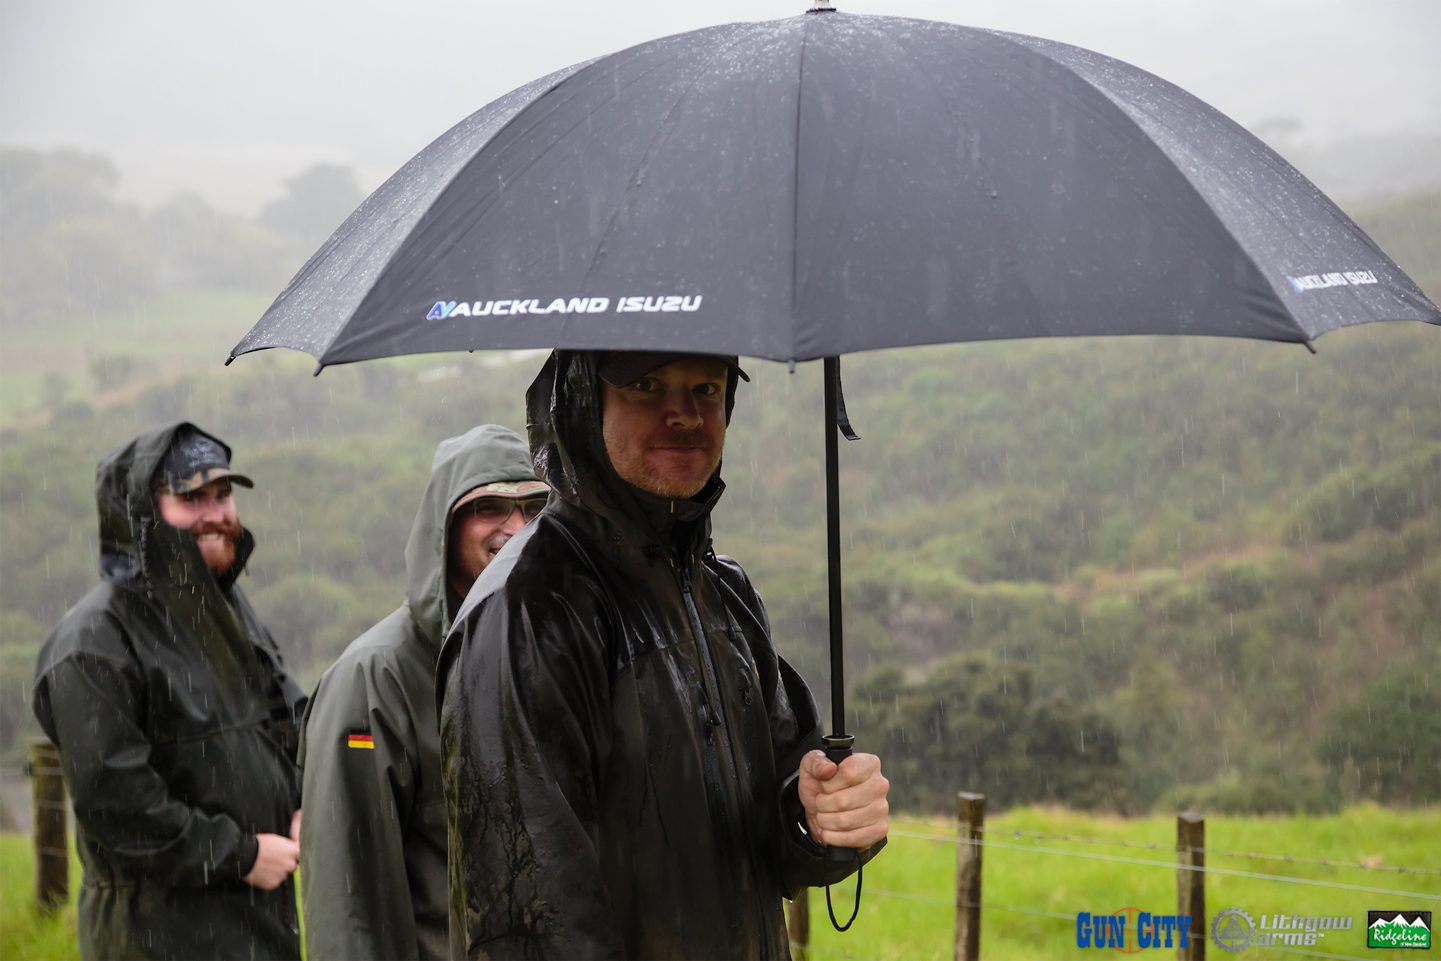
Remember that horrendous rain and flooding we had a few weeks ago? Yes, we were shooting in that. I have never shot in such wet and miserable conditions in my life – and it was great fun! Being RO for our detail of 6 also presented its own challenges in the rain (i.e. keeping scorecards dry – which didn’t happen).

The test shoot

I was lucky enough to be invited by Kerry Adams to the test shoot a month prior, where we shot the course and provided feedback for the competition proper. It couldn’t have been in more different conditions. I walked away dripping in sweat, and completely sun burnt, but having had a great time.

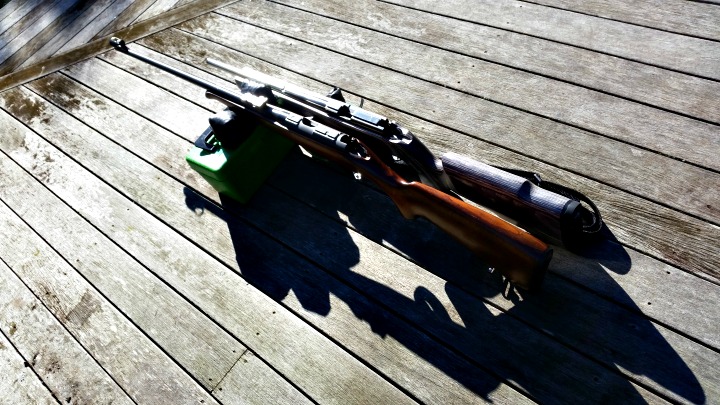
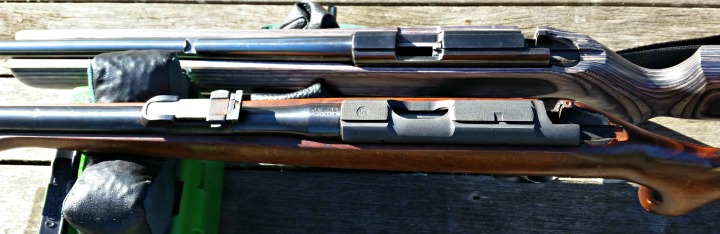
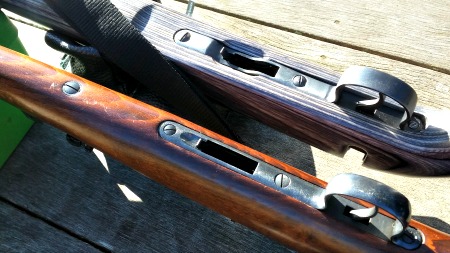
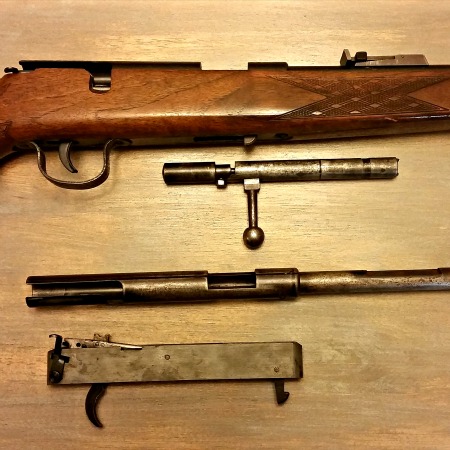
I shot the test shoot with my bolt action Norinco JW-15 in a Boyds Pro Varmint stock, topped with a 6.5-20 x 44mm Weaver 40/44. The stock was great, and I was glad I had a bipod, as I used this to lean on fences and obstacles (even when folded), which avoided damage to my rifle. I also used one leg folded out as a foregrip on the tank trap and barricade obstacles with great success.

Chris takes alternating left- and right-handed shots at the practice shoot, with the entire detail watching, Kerry videoing, and me taking photos. No pressure.

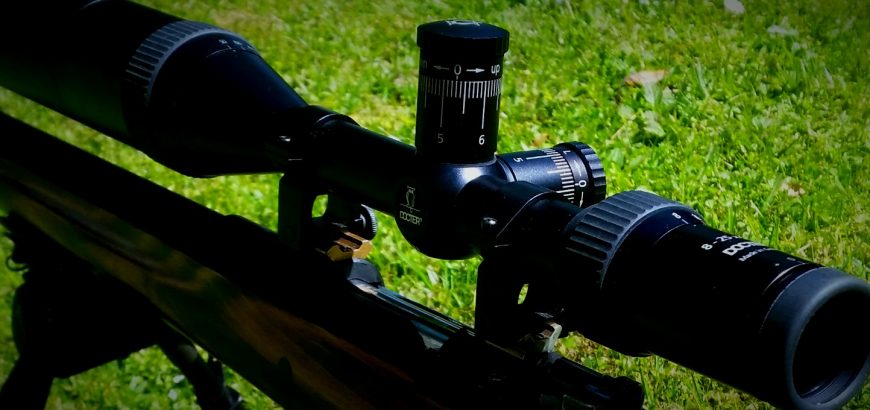
The scope was an interesting choice – but the only one I had on hand at the time. The course was not designed for taking wind and dialing elevation – it was designed for holding over and snap decisions. With a duplex reticle and capped turrets, I was going to have a hard time.

So, what I did was sight in at the range  the day before at 75 metres, and figure out my drop to known ranges of 50, 75, 100 and 150 metres. I did this by firing a group at a target at the known distance, and then using the magnification to zoom in or out, until one of the posts lined up with the group. I then tested the holdover and it worked fine.

This was far from ideal as I shot 50 m targets at 20x and 150 m targets at 6.5x. The latter is fine, but shooting close targets at high magnification while moving around is pretty difficult.

If you have a FFP scope, or a reticle with drops that you know at each magnification setting, then a magnification range like this is not the worst idea.

The test shoot was a success, and we provided Kerry with our feedback, which we were happy to see was integrated into the final course. The feedback was around timing, clarity of course of fire, etc. In other words, exactly why you have a test run.

PSNZ22

The day of the shoot we all came prepared with wet weather gear, wondering if it would be called off. Spoiler: it wasn’t.

Although it absolutely bucketed down, we never got to a point where it would have been unsafe to continue. The only thing the rain affected was how we carried and covered our equipment and rifles, and again, the score sheets got soaked, but each team came up with a way to keep track of their scores.

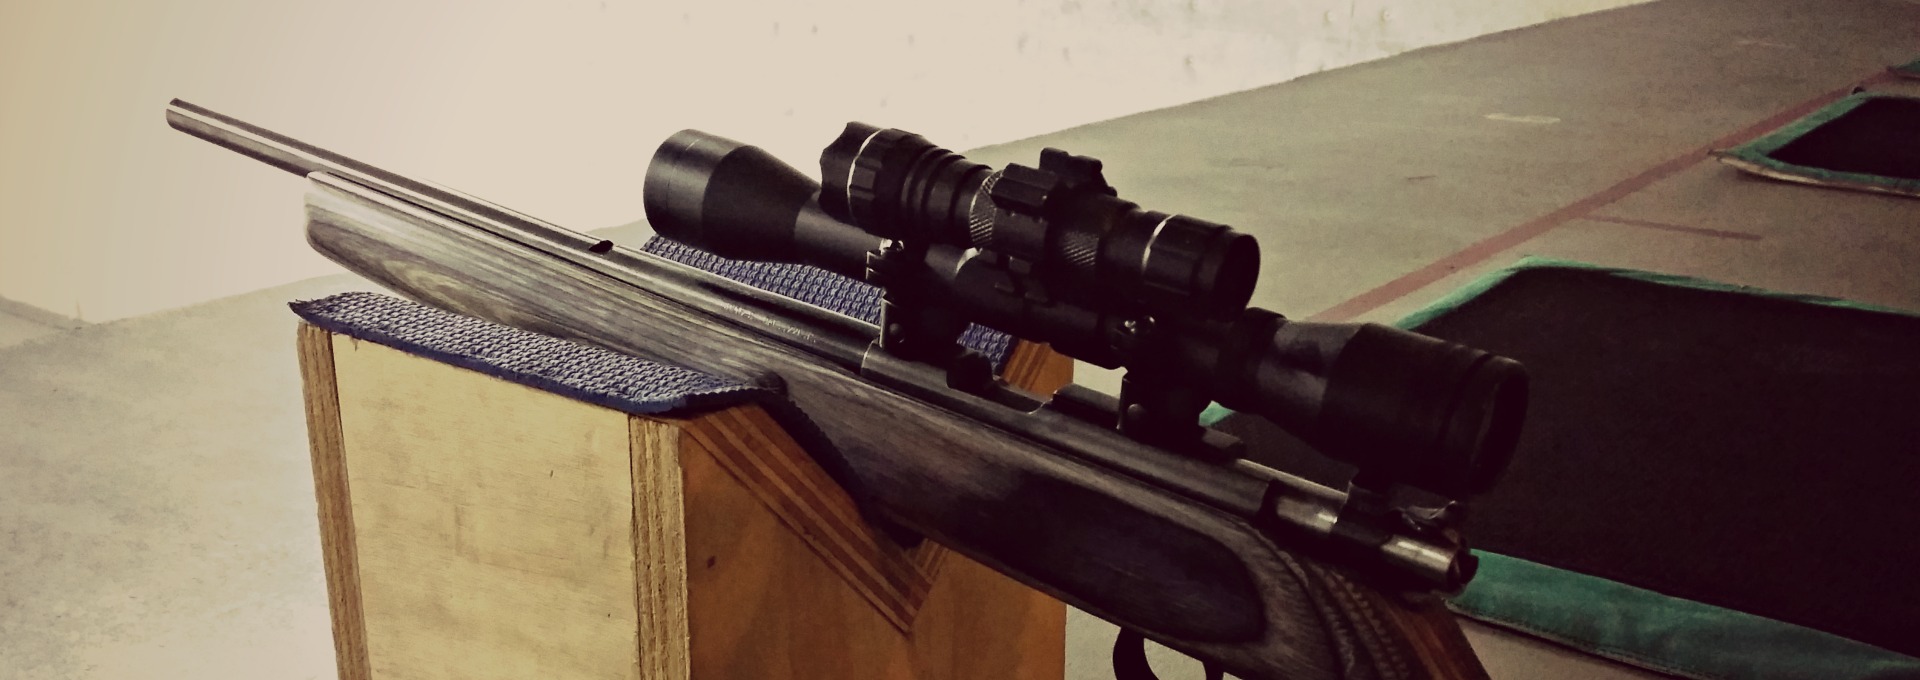
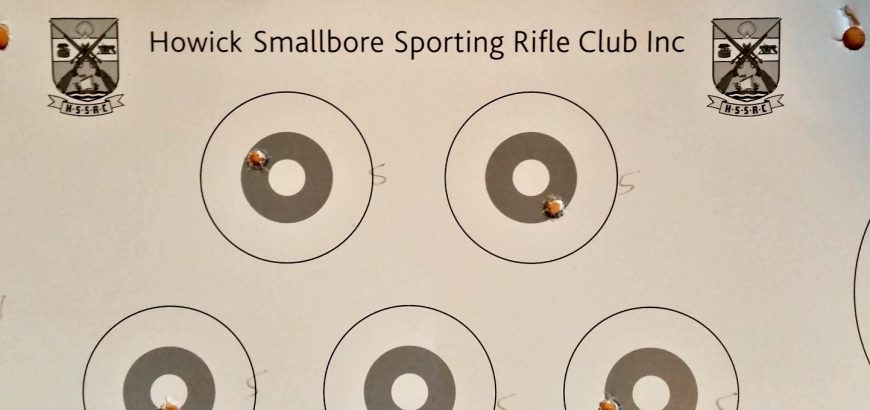
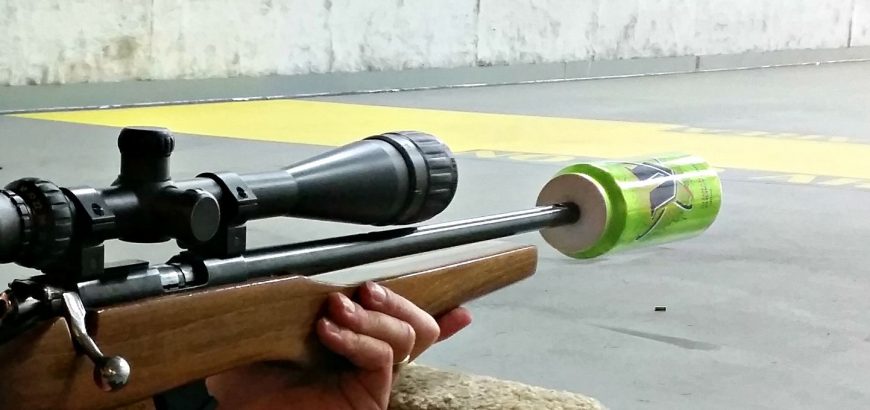
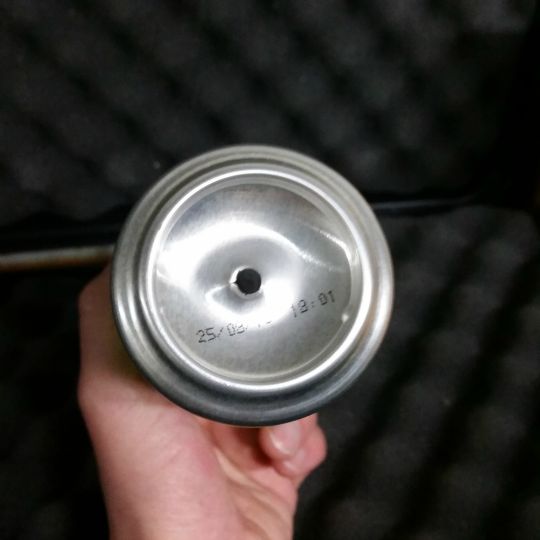
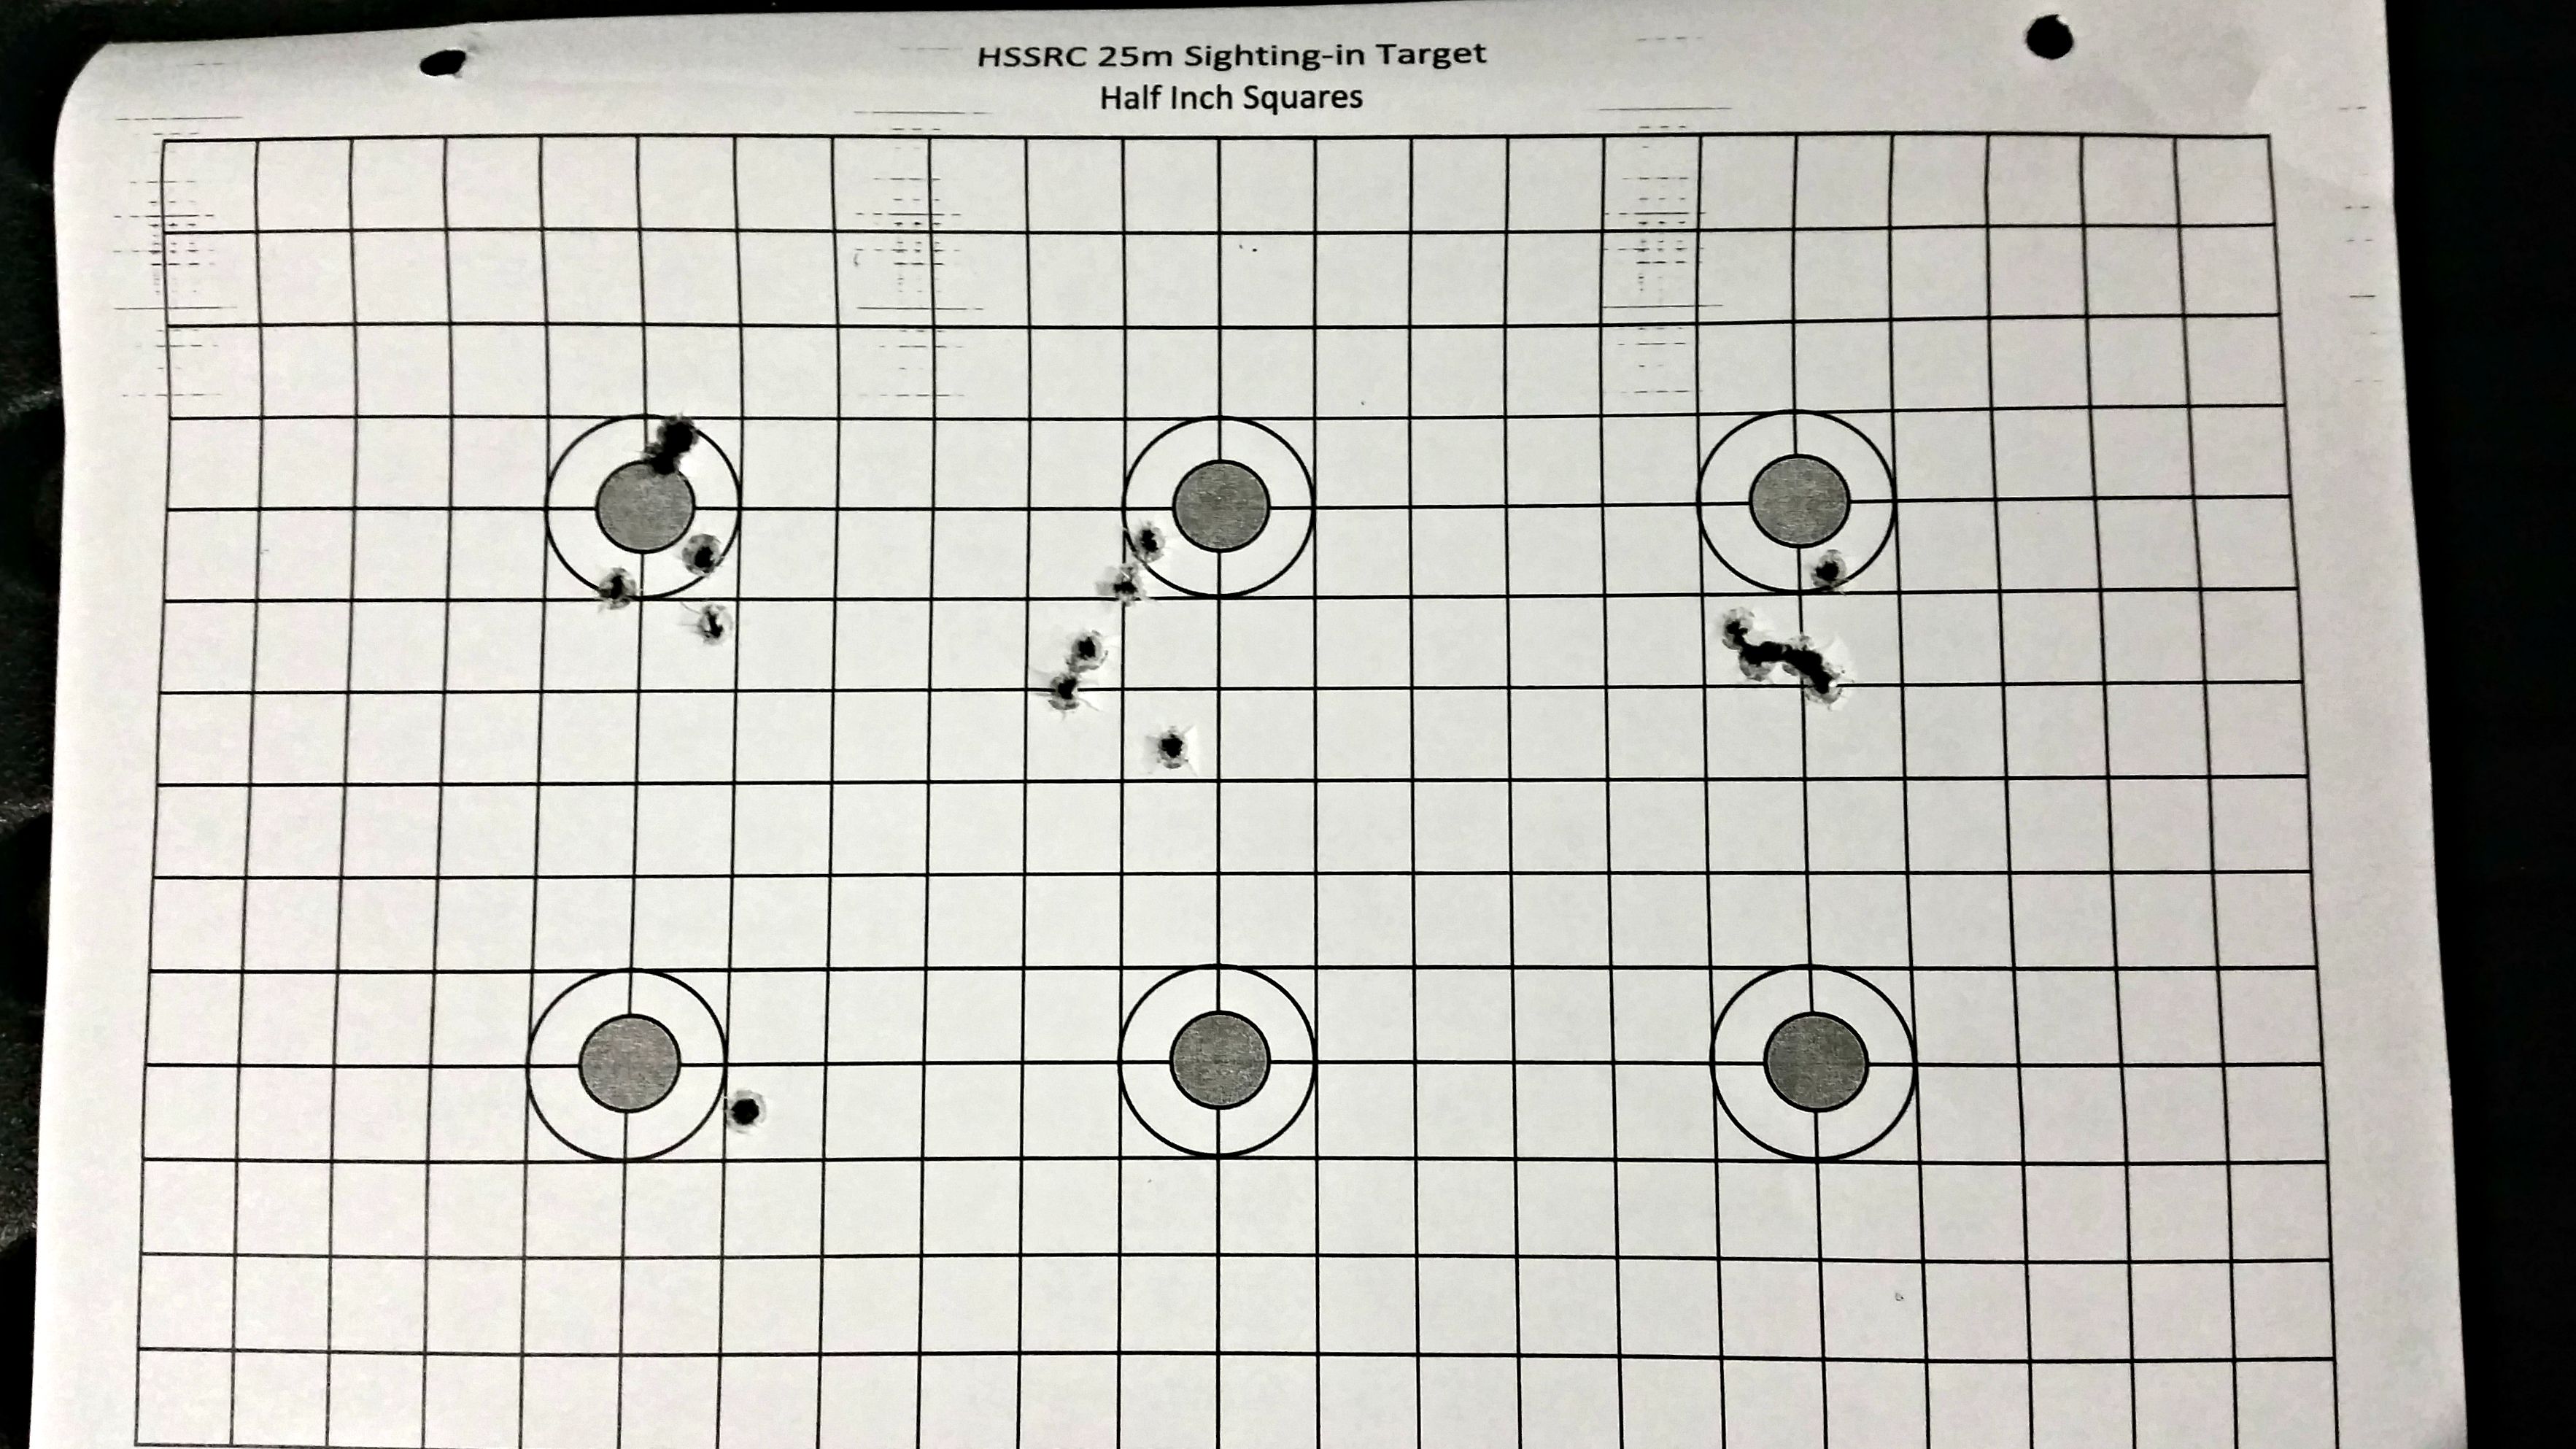
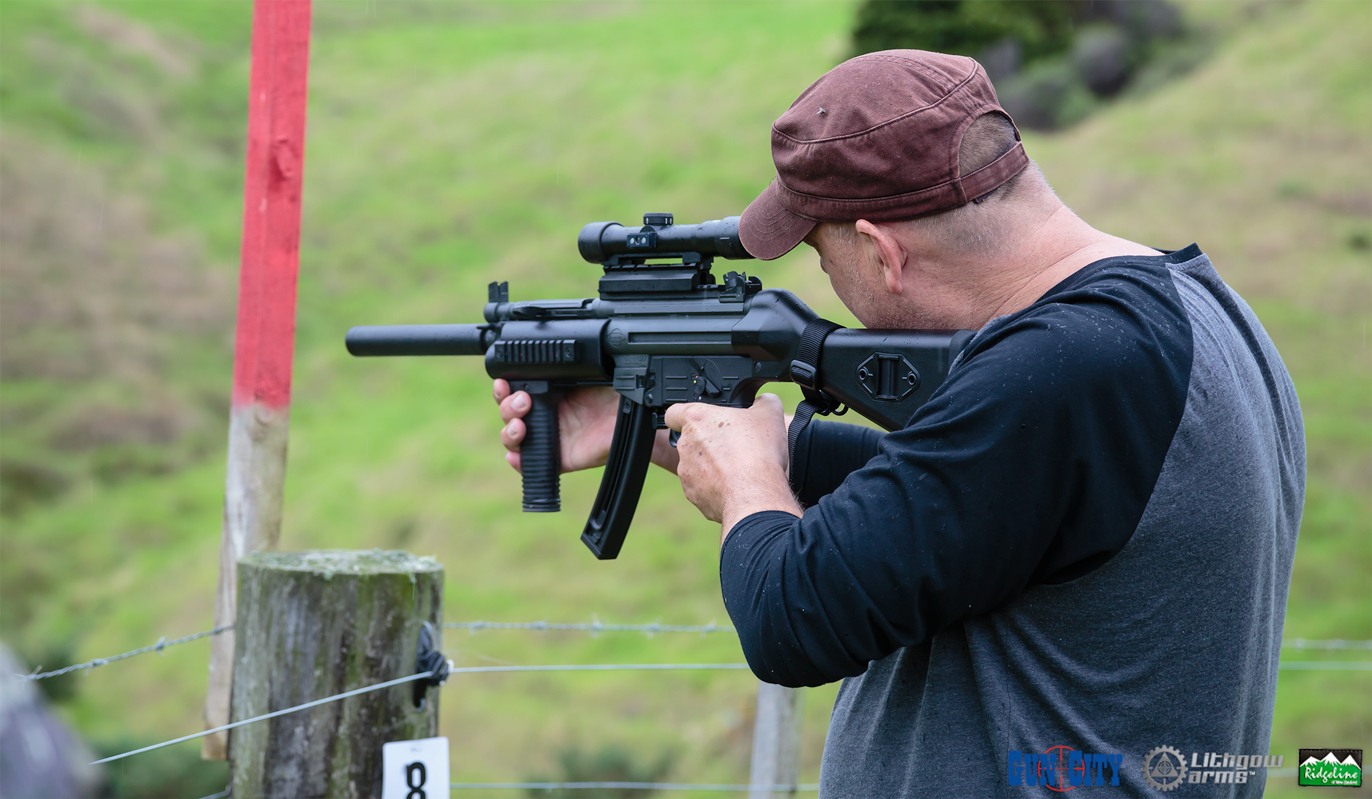
I was highly impressed with my equipment. I shot with a different set up this time around. I had an HK 416 D145RS .22LR, topped with a Vortex Strike Eagle 1-6 x 24mm with AR BDC reticle. The HK, manufactured under licence by Carl Walther, stood up to some serious abuse. I had only shot it once prior, which was the day before, when I tested ammo and sighted in. After chowing through 300 odd rounds of eight different types of rimfire ammo, I found CCI Standard to shoot very well and Winchester Target 22 shot almost as well. Hey, if the best ammo happens to be the cheapest one tested too, who am I to complain?

Both of the above brands shot less than an inch at 50 yards, off a bipod, with the butt stock unsupported. The CCI was closer to 0.8 inches.

The eight types of ammo tested in the HK 416 .22LR, with CCI standard coming in tops, and Stingers throwing the worst groups.

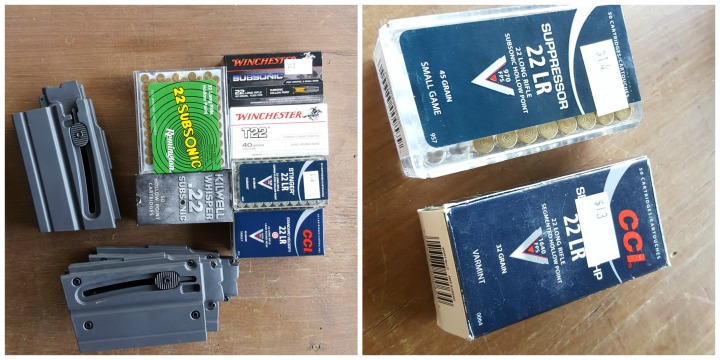
I didn’t clean the rifle thoroughly after testing, but ran a bore snake through twice, with a few drops of Hoppes No. 9. Generally speaking I leave a rimfire rifle for 500 – 1000 rounds before cleaning the barrel (or as soon as I notice accuracy starting to drop off). However, with a brand new rifle I didn’t want to take the chance.

I missed my cold bore shot on the first target, which was extremely disappointing, as it was worth 5 normal shots. The gun walked on to target within 5 rounds as the match grade barrel liner leaded up nicely. I shouldn’t have run the damn boresnake through. The course was roughly 90 rounds over about 4 – 5 hours, and even though the rifle was exposed to pouring rain almost the entire time, it never jammed once. The blowback mechanism did a fine job, and the magazines held up well, feeding reliably, and remaining super easy to load, thanks to the tabs on the side which hold down the spring and follower.

The scope performed beautifully. The AR BDC reticle is designed primarily for .223 Rem ballistics, and lines up nicely with average loads. It’s also pretty good with a .308 as well. To use the .22LR I used the Vortex LRBC to enter the data for CCI Standard ammo.

I did a different reticle print out for each magnification setting, and confirmed these at the range the day before. For some shots I used the full 6x magnification, but for most I used the 4x, as with a zero at 50 metres, I had convenient holdovers at each hashmark that approximated 75, 100, 130 and 170 metres.

This scope was way easier to use, but again highlights the need to either know your magnification, ranges and subtensions, or use an FFP scope for field shooting.

The only equipment failure I had was when my rail-to-stud adapter crapped itself, and my bipod fell off on the tank trap stage. I was annoyed, but it didn’t slow me down too much, and really, the rest of the shoot went fine. I went into Serious Shooters the other day to get a replacement (turns out the hole in the stud was a bit low, and the radius on the stud a bit high/wonky). They sorted me out with another stud, so that’s all good for next time.

Thanks Auckland Isuzu for thinking of us poor shooters out there in the wet, and providing brollies to keep us dry (...ish). Image credit: Precision Shooter
Thanks Auckland Isuzu for thinking of us poor shooters out there in the wet, and providing brollies to keep us dry (…ish). Image credit: Precision Shooter

The course was innovative and challenging, and kept everyone moving along at a reasonable pace. Some of the running stages highlighted how unfit we were, while the fine wording of the Course of Fire was tested by some of the more competitively natured among us. The obstacles and shooting parameters were a good test of skill, as shown by the vast range in scores at the end of the day. My advice – slow down. Finishing a stage with 15 seconds to spare doesn’t mean squat if you miss 4 or 5 shots (yes, that was me…).

The wet weather slowed us down a bit, but we reached the end of the course eventually. I came in around the middle of the field, which I was okay with, with a new rifle and a different style of shooting. As the scores were being tallied, the prize draws began.

Ridgeline had already provided every single shooter with a pack of goodies, including bright orange blaze gear for the ROs. In addition to these packs, they provided some awesome prizes too. The real draw card of the day was a Lithgow LA101 Crossover, which was done as a random draw. After the main event, shooters raided the table for swag from Ridgeline, Auckland Isuzu and Gun City (including $50 vouchers – thanks!). The Gun Rack proudly supplied some ammo as a prize.

The top shooters on the day were Hennie, Shane and Simon Gillice, with a tied first place, and only one shot making the difference between tied first and coming in third. If I recall correctly, all placing shooters used a bolt action rifle (I could be wrong, but I’m pretty sure!).

There were some pretty interesting rifles there on the day.
There were some pretty interesting rifles there on the day. Image credit: Precision Shooter

The day was a great success, and Kerry and the team who put it on deserve all the thanks and congratulations they received. It was an excellent time, ringing steel in the rain with inexpensive ammo and lots of good banter. The pub afterwards was full of stories from the day, as well as general shooting chatter and hunting stories, as you’d expect.

Hopefully the next one is not too far away, so keep an eye out on The Gearlocker website, and subscribe to their newsletter for regular updates!

Feature image credit: Precision Shooter

Can you put a BRNO Model 2E or CZ 452 in a JW-15 Stock?

In late June I had a question from Ken in Gisborne about whether or not you could fit a BRNO Model 2E in a JW-15 plastic after market stock. Immediately you probably have two questions.

  1. Why am I only answering this question now; and,
  2. Why would you put a beautiful European-crafted rifle in a cheap, ugly stock?

So, I’ll quickly answer those:

  1. I replied to his email, so don’t you worry!
  2. Ken is unable to obtain an original stock – and I imagine his beautiful rifle is pretty hard to shoot without a stock!
Comparing the JW-15 and BRNO Model 2, you'll see a lot of similarities, but even more differences.
Comparing the JW-15 and BRNO Model 2, you’ll see a lot of similarities, but even more differences.

Easy way to find out stock dimensions

If you ever come up against a similar issue yourself, you may need a quick work around to see if you can do something similar. The other question you often get is “Can you put a CZ 452 in a JW-15 stock?” Usually this comes from people who want a light, farm-ready 22LR, without having to ruin their wood stock or buy a new rifle. FYI, the CZ 452 and BRNO Mod 2E are practically identical. Here’s a nice little write up that someone has done on the BRNO, which saves me repeating a lot of the same points.

Essentially, as with many European brands, there was sharing of parts and designs, and eventually a merger. The rifle was largely unchanged. And the difference between the 2E and the 2 is that the 2E is the luxe version. Nicer stock, etc.

Anyway, I digress. A quick, easy way to confirm barrel and action dimensions for stocks? Head on over to the Boyds’ Gunstocks website. They give you the barrel dimensions and centre to centre measurements between action screws for all their house actions (that they base their aftermarket and OEM stocks on). While you’re there, you may be tempted to buy a whole new Boyds stock, and why not? They’re awesome quality, solid wood and modern designs!

So, using my little cheat, this is what the Boyds website reveals:

Boyds barrel measurements. Image from Boyds' website.
Boyds barrel measurements. Image from Boyds’ website.

BRNO Model 2E measurements:

Barrel Dimensions: Point A = 1 1/16″ and Point B = 15/16″

  • Center to Center of Action Screws: 6 1/8″
  • Over All Length of Part: 30″
  • Comes with Boyds’ 1/2″ Rubber Recoil Pad.

CZ 452 measurements:

Barrel Dimensions: Point A = 1 1/16″ and Point B = 15/16″

  • Center to Center of Action Screws: 6 1/8″
  • Over All Length of Part: 30″
  • Comes with Boyds’ 1/2″ Rubber Recoil Pad.

Norinco JW-15 measurements:

Barrel Dimensions: Point A = 59/64″ and Point B = 43/64″

  • Center to Center of Action Screws: 3 25/32″
  • Over All Length of Part: 31 1/2″
  • Comes with Boyds’ 1/2″ Rubber Recoil Pad

Other differences

The biggest barrier is the difference in action size.

While my quick cheat above provides a very useful starting point for stock comparison, there are other things to consider as well. When considering a rifle like the JW-15, which is essentially the cost-saving, poor cousin of the BRNO/CZ, you’ll usually get differences in dimensions where changes have been made in the manufacturing process to reduce costs. Often you’ll find this in stamped instead of milled parts, simpler contours, thinner barrels, etc.

Below are some of the basic differences that unfortunately make this stock swap a no-go.

Action shape

The BRNO/CZ action is longer, thicker and circumference and a little bit different where inletting is concerned (this last isn’t the biggest concern in stock swapping, as you can alter inletting). Somehow the Mauser-action origins seem more apparent in the lines of the BRNO, even though the JW-15 has a similar, but simplified, shape.

Barrel contour

The Chinese rifle has a much simpler barrel contour, while the Czech rifle follows traditional lines. The thickness of the barrel is a fair bit different, but where it meets the larger action is the biggest difference, as the BRNO barrel swells up to meet the threads.

The BRNO barrel is close to what we'd consider a bull barrel in a modern rifle, and the contour differs significantly to the JW-15.
The BRNO barrel is close to what we’d consider a bull barrel in a modern rifle, and the contour differs significantly to the JW-15.

Action screws

Another clever simplification in the Norinco is reducing the amount of screws and metal work by merging the forward action screw with the recoil lug. Looking at the image below you’ll see three screws on the JW-15 and four on the BRNO. The rear screw on both is a wood screw, which secures the trigger guard to the stock.

The next screw forward on both rifles is a simple action screw. In front of the trigger is the last action screw. In the JW-15, this screws up into a recoil lug dovetailed into the action. The BRNO has another screw, independent and forward of the floor metal. This screws up through a steel collar into a recoil lug that forms the hidden part of the rear sight assembly.

Differences in inletting and dimensions are indicated by the presence of fewer screws in the Norinco.
Differences in inletting and dimensions are indicated by the presence of fewer screws in the Norinco. Also notice the softer metal the screws are made of.

Bits and pieces

There are various other bits and pieces that differ, such as the mag well and the trigger unit. The trigger in the Model 2E is a fine example of a single stage trigger, with adjustable over-travel, and a clean break around 3 lb. This is streets ahead of the simple, but practical, trigger in the JW-15. These can be toyed with to produce more acceptable results, as detailed in this previous article on JW-15 trigger improvement.

Verdict

If you are considering swapping things up with either of these rifles, an aftermarket stock specific for the JW-15 or BRNO would be far better than trying to adapt one to the other.

Choosing a scope for rimfire plinking

Choosing a scope for your rifle comes down to many competing factors. There’s quality, availability, price, and often competing recommendations from friends, magazines or internet forums. One often overlooked variable is fit-for-purpose. IS the scope you’re looking at ideal for the type of shooting you want to do?

A 6-24×56 with Milrad reticle is great, but not necessary for scrub hunting in New Zealand. Equally inappropriate would be a 3-9×40 with duplex reticle on an F-Class rifle. While either situation could be made to work, neither would produce outstanding results.

I’ll be doing a series of articles on fit-for-purpose scopes, to help with choosing a piece of glass for your next project.

4x32 with torch
This simple 4×32 with attached torch is great for possum hunting and can be used for plinking as well. Not so great for target shooting.

Rimfire plinking

Shooting tin cans or pieces of paper on your own land, or just at the range for fun, does not require an expensive or elaborate scope setup. Often this kind of plinking is done open-sighted, but for those with failing eye-sight or those who just like to practice with optics, a low-magnification scope such as the Classic Rimfire range from Weaver would do the job well.

Rimfire scopes are often not made to stand up the recoil of centrefire rifles, so if you plan on swapping scopes between rifles, you should probably look at a low-magnification centrefire rifle.

If your budget is seriously lacking, you can look at the Kilwell Huntsman or Nikko Stirling Mountmaster, both offered by Serious Shooters and various others. A 3-9×40 with duplex reticle, it’s all you need to get started. These are often the types of scopes included with package deals. You should eventually upgrade to something a bit higher spec if you intend hunting with it.

In the same vain, don’t buy cheap scopes off Trademe, unless you are looking for something for airsoft or paintball. I’ve checked these out and while a few are acceptable, many are sloppily built and have magnification ranges vastly different from what is stated, as well as adjustments that are inaccurate. These can do the job if you are buying your first .22, but do not attempt to hunt with these. Low-quality scopes can lead to unethical kills.


Voere 22LR Bolt Action

No bolt, no mag – what to do?

It’s not unusual for an older rifle to make its way through the family tree and lose its bolt or mag along the way – especially .22s which can be used and abused. The other way no mag/bolt guns fall into our hands is through Trademe auctions, usually run by gun stores that have used older rifles for parts, and no longer need the barrelled action and/or stock. So, is it worthwhile trying to restore these firearms to their former glory?

What’s the value?

If it’s a family heirloom, it could have enough sentimental value for you to undertake the project regardless of cost. However, if you’re eyeing up an auction, it’s probably because you want to get a rifle together on the cheap. Depending on your scenario, it may or may not be worth the time, money and effort to restore the firearm.

A word to the wise – thoroughly research your intended purchase before assuming you can find the parts to complete the project. As an example, I wanted to put together a cheap shotgun and bought an SKB semi action and stock, missing the forewood and barrel. I had seen some barrels online, and figured it would be easy enough to put this thing back together.

However, I found out (like an hour after the auction), that the SKB factory had been shut down, and that the barrels that I had found in the States were not ideal. There are some available locally – for over $900. There goes the idea of a cheap shotgun. So I paid $29.50 for something that probably won’t ever be used for anything, except perhaps testing out gun blue or stock reconditioning products.

What’s the cost?

Sometimes you can source the parts, but you have to be inventive to keep the cost down. The thing is, if it was cheap to do, the gun store would have bought the parts and sold a complete rifle for more – so you know it’s not going to be a walk in the park.

A good example of getting creative is a rifle I got from my father-in-law. It’s a .22LR bolt-action from sometime around the ’70s or ’80s. It was sold by a trading house by the name of Wischo Kg Erlangen in Germany originally, essentially assembled from parts provided by various European manufacturers. The rifle is basically a Voere.

The rifle came into my possession for the princely sum of a nice bottle of wine. It had a decent looking barrel and a crisp two-stage trigger. However, it was missing the rear sight, magazine and bolt. By keeping my eyes open, I managed to spot a Voere parts auction on Trademe.

The auction was for an action and bolt, with about 8 inches of barrel attached. See below video of me firing this weird thing, after fitting it to the stock from the rifle I had acquired.

Included in the “barrelled” action was the rear sight – a stroke of luck. Also in the auction I got a 6mm garden gun without bolt, which is just a wallhanger in my office. Oh well. I’m never even going to try solve that mystery.

The Wischo rifle sporting the Voere sight, pictured next to the Voere bolt, action/barrel and trigger group.

The issue then became whether the parts I bought on an (educated) whim for $40 would fit my rifle – as technically they were not from the same gun. Well, it turned out I was right with my assumption that the trading house rifle was a Voere in disguise, however the bolt wouldn’t close nicely and the rear sight was obviously different, as it had a larger dovetailed base.

A machinist/engineer friend of mine helped me take a small piece of metal off the action around the bolt, which got it cocking smoothly, and extended the dovetail to take the sight off the parts gun. This cost me a box of Heineken.

All that’s left to buy is a magazine, which I can get from here, or here, for between $100 and $150. So, all up, for the cost of a bottle of wine, a box of beer, $40 for parts and around $150 for a mag, I’ll have a nice wee shooter with a bit of character and a story worth telling. By throwing in some of my own time and effort, I can reblue the rifle and varnish the stock, and it will end up being a really good looking little gun too.

So, again, it can be worth it – but you’ve got have the time, and sometimes know the right people, to make it worthwhile restoring a non-functioning rifle.

Regular target at HSSRC

Auckland smallbore interclub

Smallbore shooting is both enjoyable and competitive, and never more so than during the interclub season. Hosted in turn by the various Auckland sporting clubs, it’s pretty much for bragging rights and continues through the winter and spring months.

The format

Each interclub shoot is completed on the target of the host club. This means every year you get shoot a few different targets from your usual, including groupings, application targets, snap shoots, silhouettes and all shot in various positions.

The nights are hosted at either the Howick or Waitakere ranges, and there is a Saturday shoot in Riverhead at the Auckland NZDA. Some years the North Auckland NZDA puts on a fun shoot as well.

All of the shoots held at Waitakere are shot in every position except standing, as the mounds don’t have much headroom. The Howick rifle range features shoots in all four positions (standing, sitting, kneeling, standing), as does the NZDA shoot. The Auckland NZDA shoot is the only one shot at 50 metres, while the others are at 25.

The 50 metre shoot (which happened to be today) is 40 rounds, ten each in the four positions mentioned above, with 2 minutes of sighters to start. Without the snaps and silhouettes to explain and call, it’s a pretty easy shoot, but the extra distance adds some challenge – especially for the standing. All of the shoots are between 40 and 50 rounds, so one box of ammo will be fine.

What’s on the line?

Each club puts together a team of five shooters (or tries to), and a team of juniors as well. The top four scores counting on the night. There is recognition for the top team, top junior team, top gun and top gun junior.

As mentioned above, it’s pretty much bragging rights. If we’re honest, Waitakere has some of the best shooters out there, so they take out the top spot almost exclusively, but it’s still a very competitive atmosphere and there’s certainly a lot of jostling for the other spots on any given night.

Usually there are pins or boxes of ammo as prizes, and at the end of the year there are trophies to dole out as well.

At the end of the day, it’s a great way to meet more of the shooting community, try different targets and shoot at a couple different ranges. If you’d like to find out more about the competition or smallbore in general, go along to a regular shoot at your local club and ask a committee member or the captain, or simply leave a comment below.

Home made suppressors

As long as there have been firearms, there have been people trying to improve their performance. Quicker, quieter, lighter, more accurate – these are the motivations of the backyard tinkerer, qualified gunsmith, field armourer and firearms designer alike.

A suppressor, otherwise known as a silencer, sound moderator or sound suppressor, has always been a favoured project for the budget-minded or mechanically curious. One such person recently listed a “V” can suppressor on Trademe, and I couldn’t help but get in touch.

Alan from Hamilton took it upon himself to build a “can suppressor”. The term can suppressor came about as sound moderators tend to look like a beverage can, especially the thicker muzzle-forward variety. This example is literally made from a V can.

The Trademe listing humorously asks;

“Do you want to give your bullets “A guarana and caffeine charged V energy Woo-Hoo”?”

And the answer should be, “Yes, yes I do.”

The tech specs

The top (the end that you drink from) is cut out, and has been replaced with a moulding of ultra high molecular weight polyethylene (UHMWPE). If you just got totally lost, replace UHMWPE with plastic and you’ll get the general idea. This is then drilled and tapped to accept a male 1/2x20UNF thread, the most common thread for rimfire rifles. There’s always the exception, like the Ruger 10/22 anniversary edition, but hey, what can you do?

V can suppressor
The exit hole is cut with a subsonic hollow point.

The other end of the can is a blank canvas, waiting for your first round to punch a perfectly lined-up exit hole. Two things about this. Firstly, it does produce a jagged edge. You could deburr this if you like, but realistically, because it sits below the rim of the can, you probably won’t get your fingers anywhere near it. Secondly, use a subsonic round to do this.

Not only is there less chance of developing too much pressure in the contained environment, but the hollow point should help you create a slightly oversize hole for the following rounds to fit through easily.

The good and the bad

Well, on the positive side, it’s dirt cheap to make if you’ve got the skill. And if Alan chucks a couple more up on Trademe, they are pretty inexpensive to buy – not that economy rimfire suppressors are hard to come by. Also on the plus side of the list is the novelty factor. If we’re honest, everyone’s going to want to check it out and have a go. Lastly, it’s very, very light.

Does it reduce sound? Remarkably – especially when compared to not having a suppressor on at all. In a follow up post, I will do a proper test with a sound meter. The test will be done with two barrel lengths – 16″ and 22.5″ – and with three different sized cans, compared to a regular suppressor and a bare muzzle.

Unfortunately due to technical difficulties, we weren’t able to capture all five rounds I put through the can on video, but we did get the last one. For comparison, listen to how loud it is when I work the bolt afterwards.

On the negative side, you won’t be able to try this trick with a centrefire rifle – you’ll likely end up with a pretty, green mess at the end of the barrel. Also, because this is a relatively simple construction without baffles, the sound is “tinny” – excuse the pun – even if it is reduced.

Of course, being made out of a drink can means that it isn’t the sturdiest object in the world, and if you whack it into a tree or drop it on the ground, you’ll probably end up with a very skew and unusable suppressor. Of course, you didn’t think it was going to be a hardy, hunting-ready solution, did you?

At the end of the day, for a very reasonable cost, you get a novel sound-reduction solution that will help you keep the noise down at the range or in a field full of rabbits or possums. If you do plan on taking it out in the bush, take care of the muzzle end of your rifle – which is much easier with a short or cut-down barrel. For bush use, you should probably think of this as a disposable option. And at such a low cost – why not?

The top right target is 5 CCI SV rounds put through the V can suppressor, showing no loss in accuracy. The bottom left is the initial HP Sub through the bottom of the can.