Hopefully you’ve read part one in this two-part series, and figured out you could not only save a lot of money by reloading, but produce match-grade ammo at the same time. In this article we’re going to look at some of the basic pieces of equipment you will need to make your own ammunition.
Context
So, when will you be reloading? For most shooters it will be in the garage or the gun room, with something on the telly or radio, cranking through a 20 or 100 rounds at a time. However, this has not always been the case (and for some, it still isn’t). Manufacturers used to put a lot of effort into creating reloading kits like the shotshell one in the video below, that you could use on the range, or wherever.
They’re not that common these days, but you do get handheld metallic cartridge reloading tools which will do exactly what your bench mounted press will do. Sometimes you will see these at competitions or when someone is working up a load on the range, or if they simply don’t have much room for a massive setup at home. Still, by far the most common types of reloading setups you will find will be single-stage or progressive reloading presses, which are bench-mounted. These are what we will concentrate on.
The manual
Don’t skimp. Buy at least one reloading manual. There is plenty of stuff online, sure. But you should always have an authoritative source of reloading info on hand. It’s a great tool to compare the internet forum wisdom to as well. ADI does publish a good selection of data on their website, and some other powder and component manufacturers do too.
I personally quite like the Lyman reloading manual, and have it alongside a few others on my bench as well.
The press
You will most likely start out with a single stage press. That is, it is designed to do one operation at a time. So, you decap and resize all your brass in one step, you then trim the cases as needed, prime them and fill with powder, before changing the die in the press to a bullet seating die, and seating your projectiles. There are extra steps you can take, and limitless variations on the process, depending on your load, tools, preferences, etc., but this is essentially what you do.
If you are a high volume shooter (or plan to be in the near future), you might start with a progressive press. This is a press that has several stations, into which you load all of your components, and each time you pull the handle, you get a complete, loaded round. There’s a bit more to it than that, but that’s the guts of it.
In between these two options you have a “turret” press, which gives you more flexibility than a single-stage, but much less “process automation” than the progressive.
Single stage press
There are many fine manufacturers of single-stage presses, and they are not all equal. You can get top-end presses from Forster, Lyman, Redding, and more, which are all very precise. You can even get arbor presses that take you into a next level world of precision and measurability, for bench rest and F-Class type shooters. However, most first-time reloaders will make their press choice based on their budget, and upgrade to one of the above setups as they expand their reloading bench beyond the basics.
For those looking at the cheaper end of the single stage press spectrum, you will land on a Lee press as a matter of course. They are affordable, and sturdy units and will last you a lifetime if you don’t ever feel the need to upgrade to a higher-end press. For a basic Lee press, you are looking between $80 and $200, depending on the style that floats your boat, and also depending on where you buy it.
If you intend to only load for rifle, and only a few calibres, then a single-stage press should be sufficient for your needs. You may want a turret press or even a second press, so you can have one for sizing and one for seating. For a good press line up, check out Workshop Innovations.
If you want to load for shotgun, Google “Lee Load All”. I don’t know many people that load for scatter guns, as the ammo is pretty cheap. But, you can save some $$$, and customise your loads as you like.
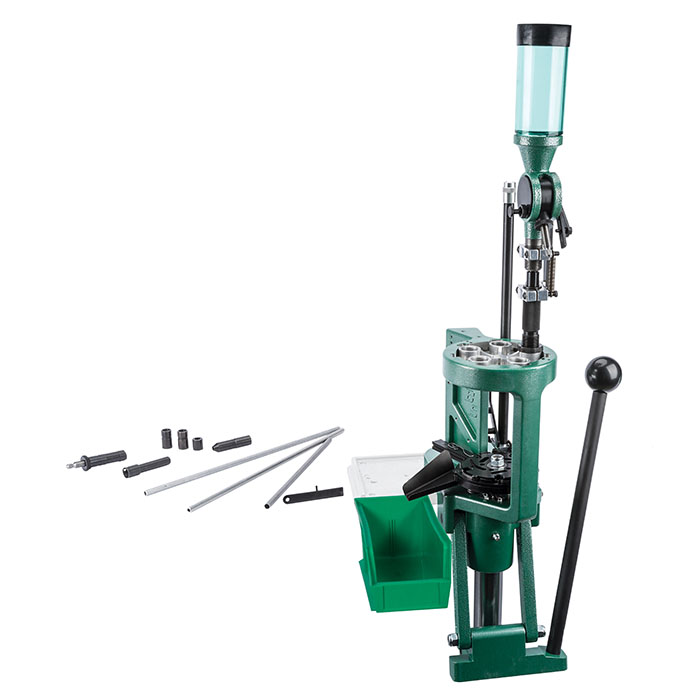
Progressive press
As mentioned before, a progressive press spits out one loaded round for every pull of the handle, with minimal intervention in between (some models require you to place the projectile, or whatever). Of course you don’t skip your brass prep stage, as you do all of this beforehand. But, once you are setup with all of your components ready to feed in, you are good to go and can churn out dozens, or even hundreds, of rounds in an hour.
For this reason, a progressive is almost essential if you want to take up reloading for pistol. Given the sheer volume of ammo expended in most matches, you won’t want to be doing this on a single stage press. There are those who are proponents of loading rifle on progressives too, and again, high-volume shooters would find this the way to go. For example, a 3-Gun shooter may buy their shotgun ammo, and load their huge amount of pistol and rifle ammo on the same press, by changing the tool heads, etc. There are also plenty of tools and attachments to get your progressive churning out match-grade, super consistent, ultra concentric rifle ammo – depending on how far you want to take it.
If you’re looking on the cheaper end of the scale, you will again encounter Lee as the basic of basics. The Lee Pro 1000 is probably the cheapest progressive I have seen (at time of writing, $489 from Reloaders Supplies). It has its place in the market, but if you’re going to invest the money in a high-volume reloading setup, you may as well do it once and do it properly.
If you’ve looked at progressives before, you’ve seen the big blue machines. Yes, Dillon dominate the progressive market, but there are green, red and other colour progressives out there too. Being so prolific, many people have put a lot of time and effort into creating add-ons and betterments for Dillons, and you will find an endless array of optional extras. Every progressive machine I’ve ever seen has a huge range of optional extras, so make sure you find out exactly what you need before you purchase, as the base price on the machine is often only the beginning.
If you don’t know where to start, check out these Dillon setup “builders” which take you through all you need for your new blue machine.
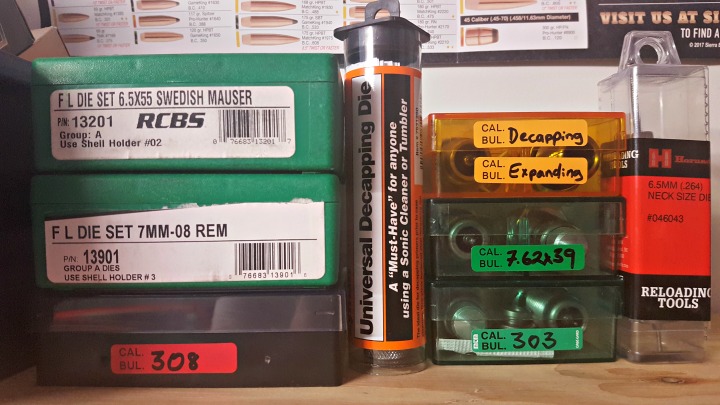
Dies and shellholders
Dies and shellholders are calibre specific, so they won’t usually be included with the press you buy. In order to use your press, you will need a shellholder for your intended calibre (this is what you seat the case in). These are about $10 – $15, or you can buy a set of them for multiple calibres to save some money in the long run. Depending on your die set, a shellholder may be included.
For starting out loading rifle, you will need a minimum of two dies. One to full length size your cases, and another to seat the projectile. Lee produces a basic set of RGB (Really Good Buy) dies that consists of simply these two dies, and they have them for most common calibres at a very cheap price, usually less than $50, depending on where you go. The quality of these dies is great, so don’t be fooled by the price. They will, however, not have some of the extras other die sets have, such as shellholders, neck-sizing dies, crimp dies, etc. Your more highly specced die sets will probably run you around $80 – $160, depending on what flavour of die you want.
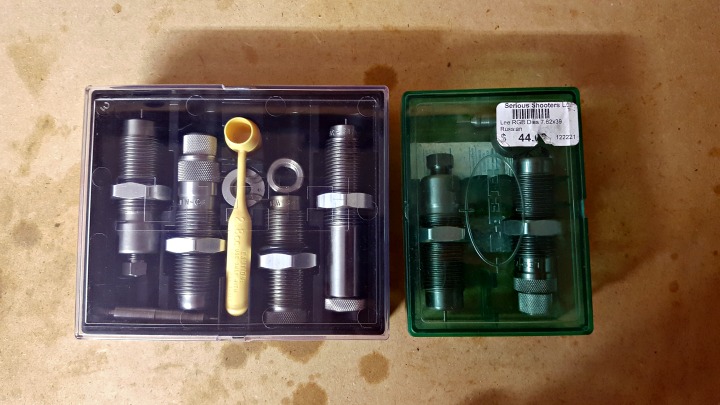
The great thing about dies and presses, is that they are almost all compatible and have common thread dimensions. Most FLS (full length sizing) and seating dies will do a great job, so my advice would be to get what is available for your cartridge and in your price range. If you want to start getting into precision seating dies with micrometers, etc., then you’re probably not even reading this article, as that is more advanced than the basics of getting started in reloading.
Neck sizing is something you will hear about when researching dies and reloading. I really like the Lee collet dies, as they do not require any case lube, and they size over a mandrel, instead of use a pull-through sizing button, which induces excessive stresses on the neck and can push imperfections around in the brass. If you want to load for hunting only, or if you’re tight on cash, skip the NS (neck-size) step for now. If you want to get really accurate ammo for a specific rifle, either invest in a die set that has a NS die included, or buy a separate one. Reloaders Supplies in Onehunga usually has a good stock of the Lee collet dies, or could order one in for you if needed.
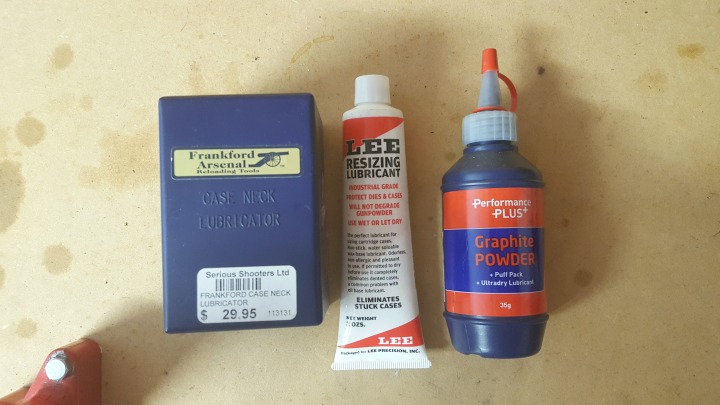
Case lubricant
When you are using a FLS or most NS dies, make sure you are using case lube or some kind of powder. I find graphite powder great for neck sizing when not using a mandrel-type die, and it doesn’t react with gun powder. Lanolin spray on lube is apparently the bees knees for case lube, but I’ve not personally tried it. Watch this interview with the 6.5 Guys and they’ll convince you of its merits.
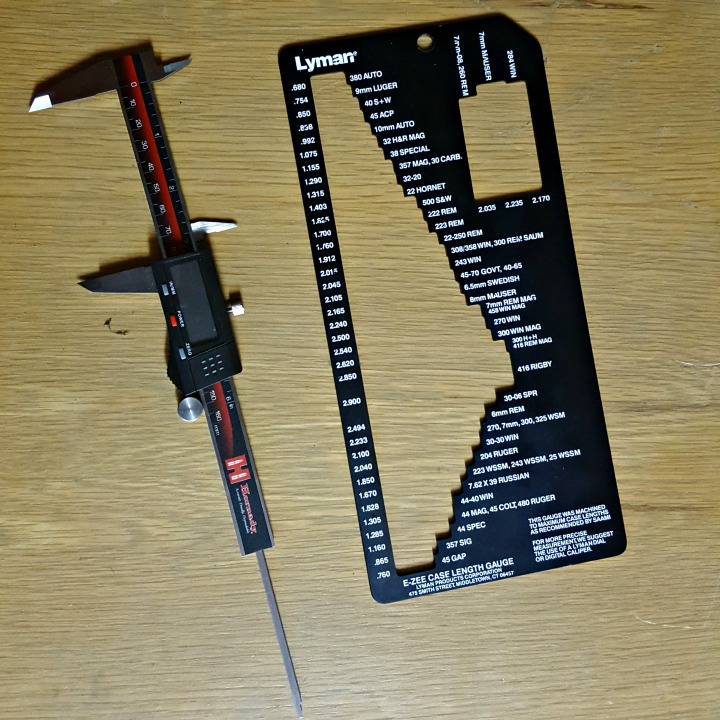
Case trimming and measuring
When you reload your spent cases, you will need to ensure that they have not stretched beyond maximum tolerances for that cartridge. You can get a cartridge specific case gauge, or you could get a multi-calibre case gauge. Again, showing my preference for red reloading equipment, I quite like the Lee case trimmer and lock stud. When combined with a (different type of) shellholder and a cause gauge guide, it will measure and trim your cases in one easy step. I use these with an electric screwdriver to speed up my case prep.
Once you’ve trimmed your cases to size, you’ll want to chamfer the edges for uniformity of escaping gasses, as well as ease of bullet seating, and easy chambering. Don’t forget to clean out the primer pocket too.
A vernier caliper is a great tool for checking trim length, as you can use it again for COAL length (tip to tail, not to ogive to base) and other measurements. You can get these with normal scales, like a ruler, or with a digital or dial readout.
Priming tool
Simple decision here, you can either get a hand priming tool or a tool that mounts to your press. It’s really user preference. Do you like the feel of seating the primer exactly by hand? Do you want to prime your cases while you watch the rugby? Or do you want to have a mechanical stop on your primer-seating depth, and prefer to do all your stages in one go at the reloading bench?
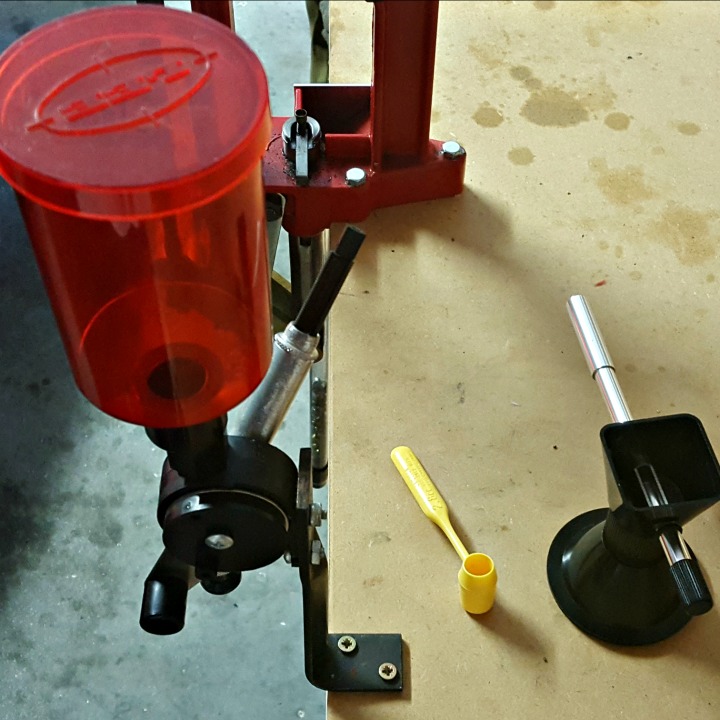
Powder measure or scale
Your simplest way to measure powder is by volume. A powder thrower will “throw” a relatively consistent volume of powder each time you pull the handle. Great for loading pistol, hunting rounds or high-volume stuff. Don’t forget you will need to weight it to start. and check the weight every now and again, to make sure you are throwing the right amount.
Your most accurate way to measure powder is by weight. You can use a simple (yet effective) balance beam scale, or you can use a handy-dandy digital one. Both can be had relatively inexpensively. If you want to get into super-accurate reloading for precision shooting, you’re going to want to drop some serious cash on lab-grade equipment. Usually a powder trickler/meter and scale combo can be bought.
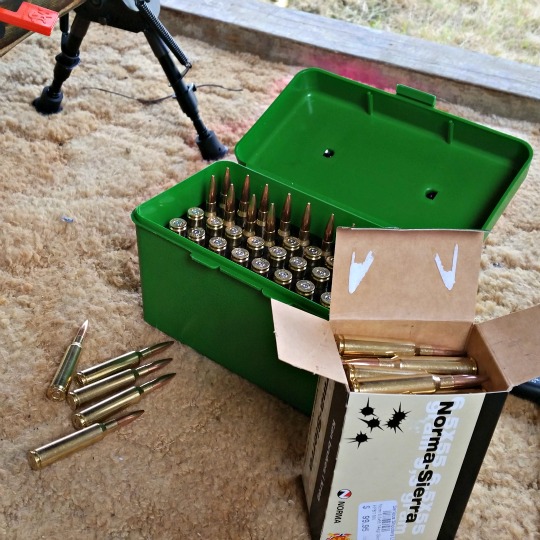
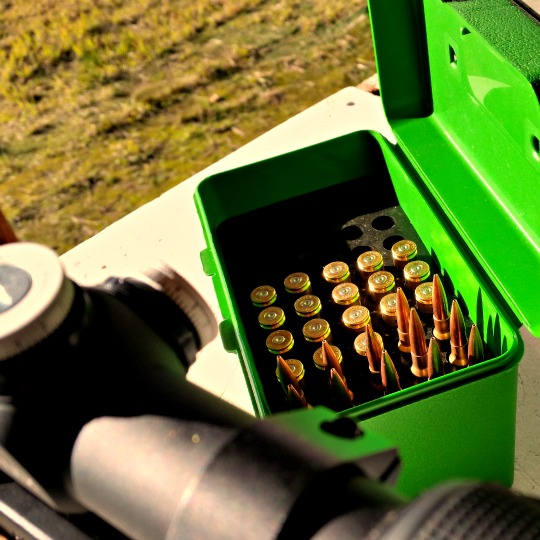
Ammo case
You’ll need something to store all of your shiny, reloaded ammo in! Any old gun store will have MTM or Plano boxes for you to keep your freshly rolled ammo. However, if you’re planning on doing a lot of reloading, or loading for multiple guns and chamberings, it may be more economical or easy to use TAC-PAC clear ammunition boxes. They are cheap, stackable, and come in a multitude of sizes.
What about a starter kit?
Excellent question! As you can see from the above, there is a lot of variety out there. If you want to customise your setup with bits and pieces from different manufacturers, or based on the recommendations of friends (or people who write stuff on the internet), you may want to go and buy each thing individually.
However, if you really are budget conscious, or if you just want enough to get started because you don’t really know your left from your right yet, anyway, then you should probably get a starter kit. A Lee Anniversary kit will set you back $249 – $259 if you know where to shop. Or $399 if you don’t. You can get high-end kits closer to $800 or a grand, like the Lyman T-Mag II Expert Reloading Kit Deluxe from Workshop Innovations for $939.95 at the time of writing.
If you get the Lee, the press itself will last you for ages, and you will probably upgrade the accessories as you go. If you go for the more expensive kits, you may find it will be quite a while before you spend anything else on reloading gear (yeah, right…).
With any kit, remember there will still be things you need to purchase, so factor that into how much you spend. Ask at the store or check online to see what else you will need. You will need a case gauge (unless a universal one is supplied) and you will need dies and shellholders for all the cartridges you intend to start reloading with. My recommendation is to start with a single chambering, because you will have a lot to learn. It also means you won’t have to shell out too much on reloading consumables as well, at the start.

Extras you don’t need now, but will want in the future
- Loading trays and die trays (I prefer to keep my dies in their boxes with silica gel packets anyway)
- Universal decapping die
- Ultrasonic cleaner or media tumbler (or both! I hear wet tumbling with stainless media is a dream)
- Primer pocket uniforming tool
- Run out gauge
- Micrometers for bullet seating depth adjustments
- COAL gauges for optimising depth relative to lands
- A second press
- A much larger bench – maybe even a reloading room
- A million extras for progressives, I’m not going to list them all here