There’s something about shooters, and reloaders in particular – we are always striving for the next best thing. There’s always another gun to add to the collection, or another chambering to take our hunting to the next level.
When it comes to reloading your own ammo, this dissatisfaction with the status quo is both a source of frustration, and an aid to achieving ever-greater downrange results. It also means we’re always learning. And, to no small extent, it also keeps the industry moving, and is probably often subject to marketing and other trends.
I’ve recently acquired a progressive press to load 9mm for IPSC and 3 Gun, and this is going to open up a whole new world of reloading refinement for me. However, I’m still making tweaks to my single stage reloading process.

Adding new steps to your reloading regime
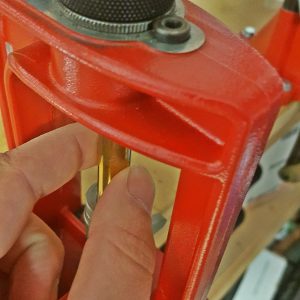
For example, I’ve started rotating my brass in the die when neck sizing over an expander button. Necking up my shiny new Lapua 6.5-284 brass to straight .284 Win, requires a lot of force (comparatively) and imparts stresses on the brass. To ensure greater concentricity and (hopefully) extended brass life, I lower the handle until I feel resistance and the neck has opened up, then I back off and rotate it roughly 90 degrees. I repeat this process twice more, opening up the neck further each time, until the neck is completely sized and the brass is completely inside the neck sizing (NS) die. Lastly, as I back it out, I rotate the brass once more as I pull it back over the expander ball.
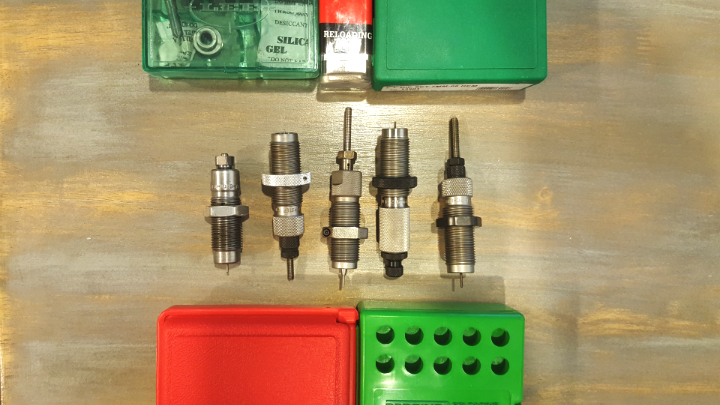
For those who want to know, I am currently neck sizing my brass with Redding Competition dies, and I am seating my 180 gr Berger VLDs with the Forster Bench Rest seating die. The combination of these two seems to be producing some excellent results so far. I have the Forster die set for the Bergers, and then the seating die that came in the Redding set is used for practice rounds or trying out new loads.
I have found a noticeable difference in the concentricity of bullets seated with the two different dies. And that’s not saying Redding is terrible and Forster is good. The Redding die seats very well, but the Forster die seats exceptionally well. And you would hope so, given the extra cost and the fact it has “benchrest” in the name. The Forster die I bought also came with a full length (FL) sizing die, which I will use should the brass ever need a reset.
One more thing I will probably add to the reloading repertoire, is annealing. Chris recently did a review on the AMP machine, and I think I may ask him to give my Lapua brass a once over, after it has all been sized up and fired at least once. Given the stress neck sizing up imparts on the brass, it would be good to soften it up again.
Now, you don’t need incredibly expensive dies to achieve great concentricity. My 6.5×55 loads for my Tikka T3 are neck sized with a Lee Collet die. This die was a previous addition to my reloading bench, after I full length sized for a while with RCBS dies, and then moved to a Hornady NS die to try improve accuracy in this rifle in particular.
The Lee collet die is very different to dies that use an expander button, in that it uses a set of compacting jaws to push the brass over a mandrel to size it. Firstly, this means no more lubing cases – that in itself was a reason to give it a go! But, I also find it works the brass much less, and keeps the pressure completely even on the neck when sizing it. It does produce less neck tension, but if you want more, you can back off, rotate the brass and size again. The one key to really good ammo when using this die, is consistently applied pressure when lowering the arm of the press.
So, to increase the concentricity of ammo for this rifle, I have picked up one of Nathan Foster’s tricks, and I start seating the projectile (140 gr Hornady ELD-M), back off, rotate the case 180 degrees, and then complete the seating process. For seating, I’m using an RCBS die, which is quite standard, but does a great job.

Removing steps from your reloading process
If you keep adding steps indefinitely, you’ll end up with a very time-consuming process at the end of the day. So it’s important to also consider which steps are not giving you much value.
For a while, I cleaned my brass every couple of reloads. This is okay, and doesn’t add too much time, but it does mean adding a different step into the process. One of the benefits of ultrasonic cleaning, or tumbling with wet stainless media, is cleaning out the primer pockets – which means you need to decap your brass, which is usually part of the sizing process. But another benefit of cleaning your brass is removing debris that would mark or wear down your sizing dies. You see the problem?
So this means getting a universal decapping die and removing spent primers before cleaning so you can get both these benefits (and others) of cleaning.
The other annoying thing about cleaning is that you necessarily have to have two reloading sessions for the same brass. Once to decap, clean, and dry, and again to size, prime, charge and seat. Not the end of the world, but a little bit annoying, unless you work it into your routine and do other things at the same time – or if you load in batches, this works too.
So, I don’t clean my brass that much. I feel the scorn now as some of you read this, but I can live with that.
It really doesn’t offer me enough benefits, when I neck size only and I can clean the primer pocket in a second or two with a small tool. I do batch clean my pistol brass, as you always end up getting other peoples’ brass and what have you as well, so it’s good to be able to see any imperfections, and keep your semi auto pistol running smoothly with evenly sized brass. I also clean any brass I pick up off the range (of course). But for my main competition rifles that go through a shed tonne of brass in any given month, it’s not worth the extra steps when I struggle to find the time to shoot, let alone make my brass shiny.
I have also stopped trimming my brass every reloading session. My word, what a laborious task. I speed this up with an electric drill, but still, it’s a PITA when you do it every single time. Every. Single. Time. As long as it’s within spec, I don’t think minute variances in brass length will make too much difference. Removing this step also means less work on your brass.
I use Lee length gauges to size my brass, and as you’ll find in any aspect of brass or ammunition sizing, different manufacturers err on different sides of SAAMI specs. When I size with my Lee length gauges, I remove material almost every single time. It’s crazy, but your brass really does grow that much each firing, especially if you are FL sizing or neck sizing over an expander button, which draws the brass as well.

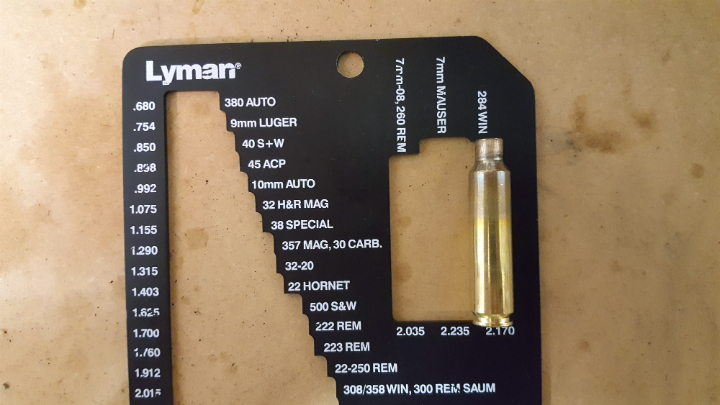
So, when I was in a hurry one day, I decided to size all my brass (it was 5th or 6th firing), and put it through my Lyman length gauge. Such a handy tool. If it didn’t fit in the gauge, I’d set it aside and size another piece, otherwise I’d load it (yes, I was loading 2 hours before a competition – go figure). And guess what? I found I had plenty of room to spare on every single case, even though they had been fired since they were last trimmed.
After this startling find, I decided to keep it up. I sized this batch of 22 cases without trimming every time I reloaded, and only after another 3 reloads did some of the cases need trimming (this is for the 6.5×55 which I NS with the Lee collet die). After 4 loads most of the brass needed a trim. I noticed absolutely no decrease in accuracy while letting the brass grow a bit. All I did was save myself a lot of time.

So, why do the two gauges have such different results? The SAAMI specs are a range of minimum and maximum tolerances. If you’re inside the range on any particular measurement, you’re deemed to be safe.
The Lee length gauges appear to favour the minimum length specs, hence it removes material with every firing, with just the slightest stretching in brass. The Lyman gauge, while still in SAAMI spec, seems to be towards the maximum end of the range (at least with the cartridges I have reloaded), hence giving you many more reloads and brass stretching before you need to trim back.
So, using these two tools, I can save myself a lot of time and effort in trimming brass, and save my brass the work. Using the maximum end of the spectrum means I size less often, and sizing to minimum specification means I have more room for the brass to stretch before it meets that maximum range where I need to trim again. That’s a good little cycle that saves me a lot of time, and means I can do fiddly things, such as rotating my brass and projectiles, without greatly extending my reloading sessions, and maintaining good levels of accuracy and concentricity.
So, a final reminder, in case you lost the point of the article given how long it ended up being. Refining your reloading process, doesn’t only mean adding in new and innovative steps, it also means removing or replacing steps which are unnecessary or less effective.


