Removing and disassembling the bolt of a Swedish Mauser is a pretty simple affair and may need to be undertaken for any number of reasons. Most commonly, you’ve picked up a rifle nearing a century in age, and there’s a lot of gunk and crap in there that needs to be cleaned out. The other scenario is that you could be modifying your bolt to cock on close, or reduce lock time with lighter materials and a stronger spring.
Hopefully if the latter is your reason for stripping a Mauser bolt, you’ve inherited or bought a sporter – there are fewer and fewer whole specimens left.
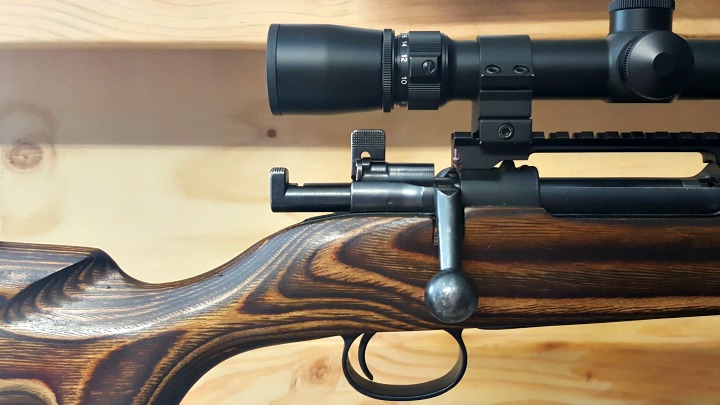
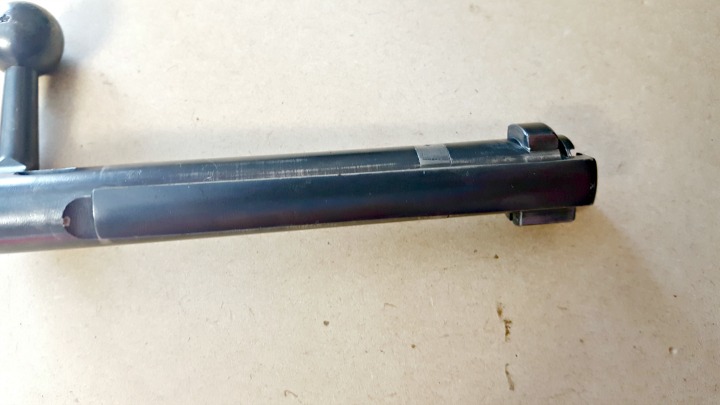
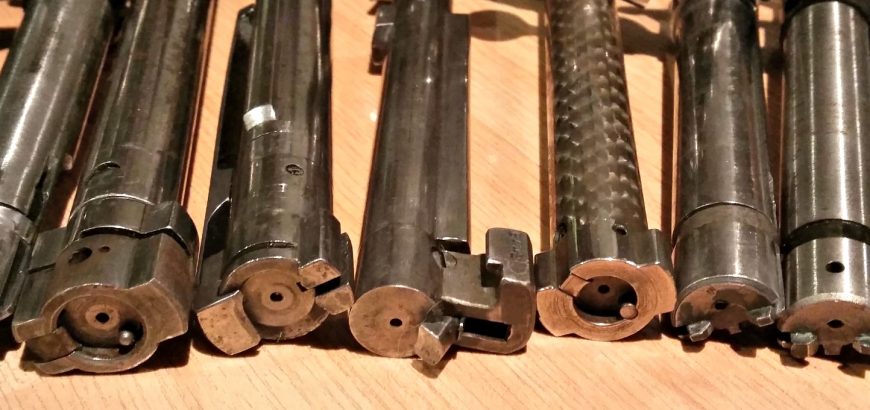
Below are a series of pictures showing how to disassemble a Mauser bolt (small ring, not a K98). If your bolt looks different, don’t fret. This is from a commercial rifle, not a military conversion. It has a blued finish and a bent bolt handle, which thankfully clears my Weaver 44/40 scope, thanks to an EGW 20 MOA rail. If you’re wondering how the extra height affects consistent cheek weld and sight lines, a Boyds stock with adjustable cheek rest helps out there.
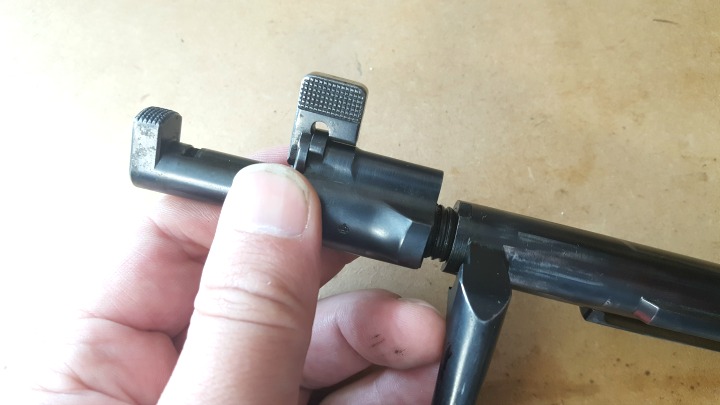
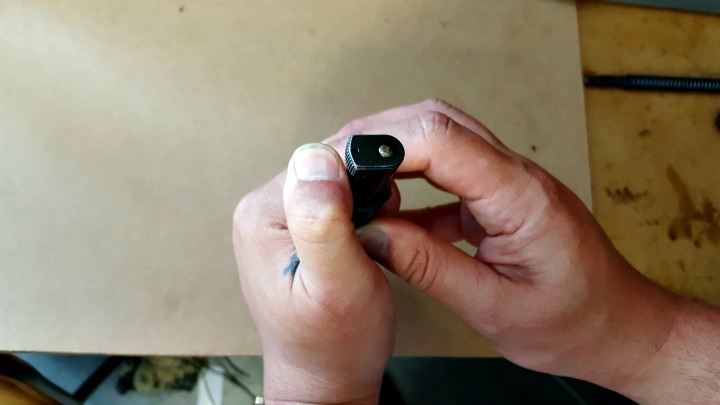
Step 1 – Get the firing pin out of the bolt body
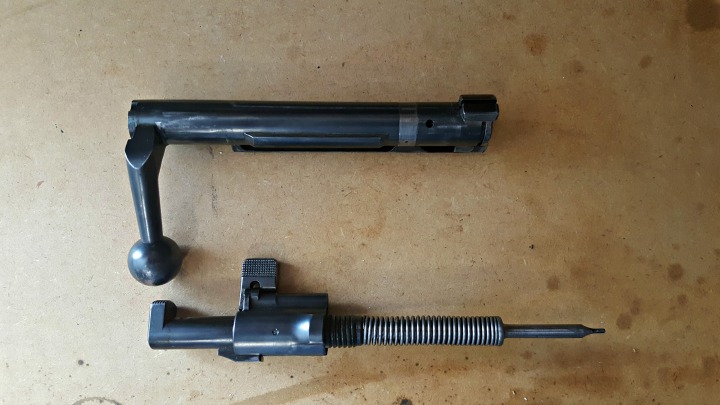
After checking the rifle is unloaded, close the bolt fully.Lift the safety lever into the upright position and remove the bolt without lowering the safety. You may need to remove your scope if the safety won’t clear it.The bolt shroud should easily unscrew from the bolt body now. Note the cocking piece is held under spring tension by the safety lever.The firing pin separated from the bolt body. Again, note the spring and firing pin are locked back – if you don’t do the next step carefully, the spring, cocking piece, and firing pin could separate with a fair amount of speed and force.
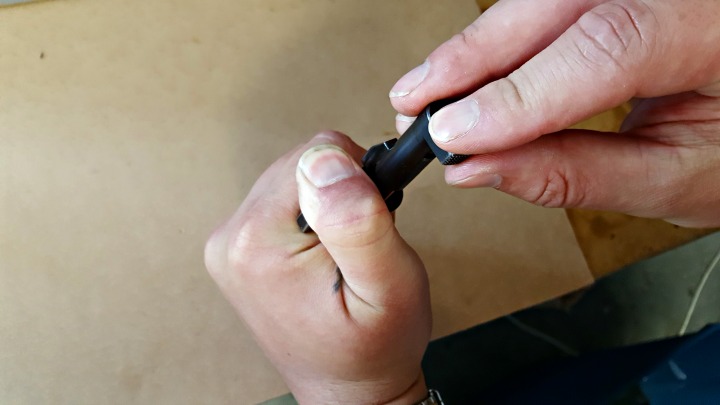
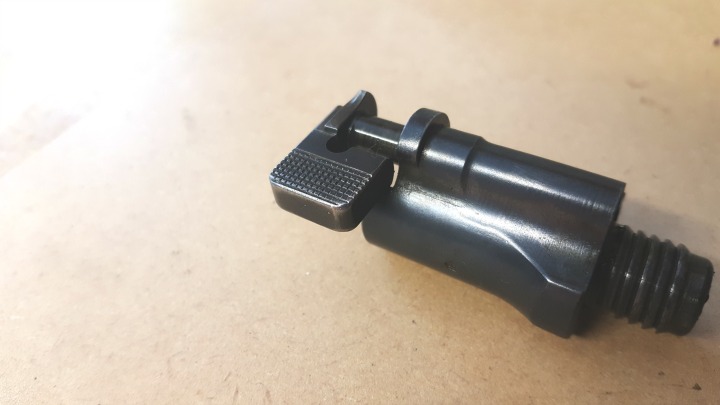
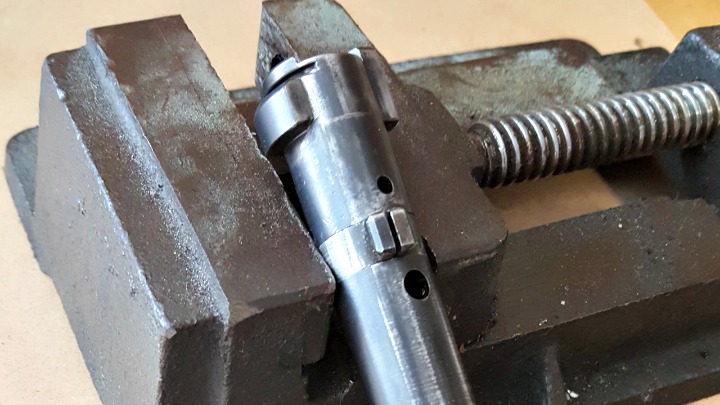
Step 2 – Separate the firing pin from the bolt shroud
Find a hard surface you don’t mind denting. Or, if you have an original stock with brass disc, you can use the indent for this step. With the firing pin against your hard surface, force the bolt shroud downward. The safety lever provides a good amount of purchase.Twist the cocking piece 90 degrees. At this point make sure you have a firm grip on the bolt shroud and firing pin, and slowly release the spring tension to avoid sending pieces flying.Fold the safety lever all the way over and pull it back to separate it from the shroud.Shroud, cocking piece, spring, safety lever, and firing pin.
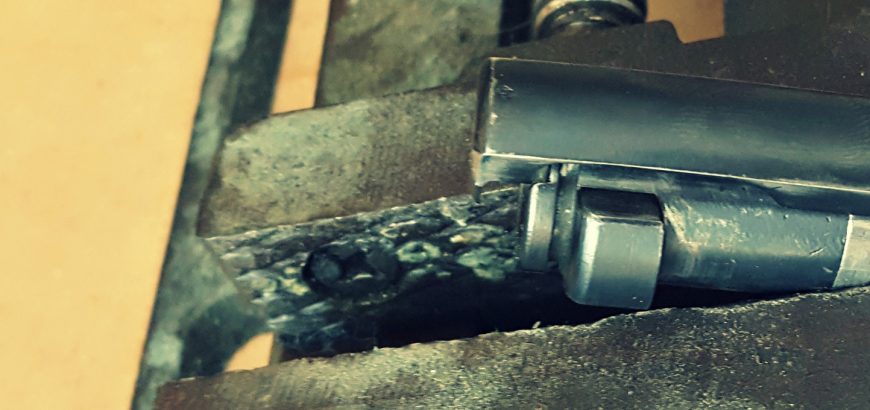
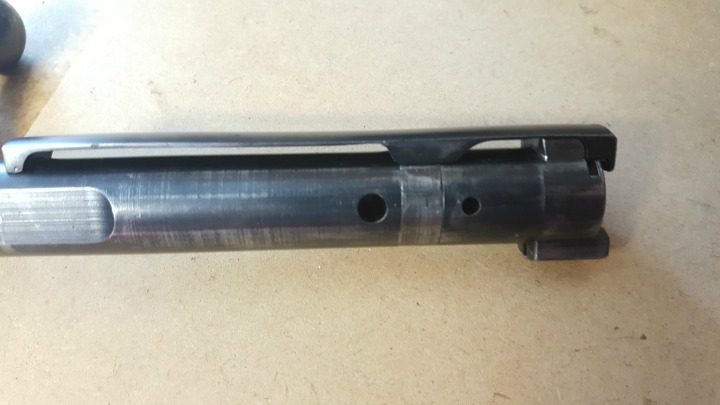
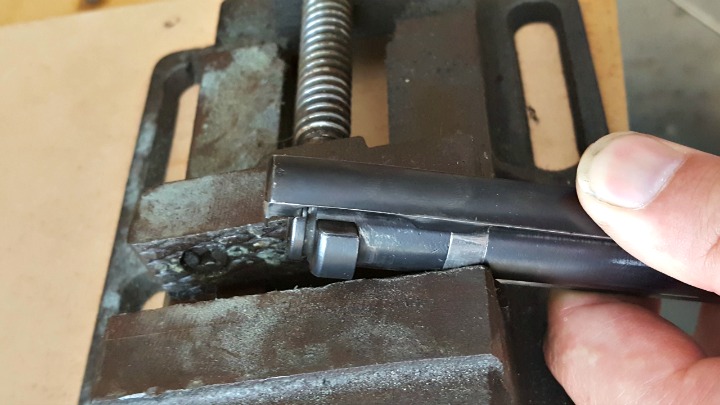
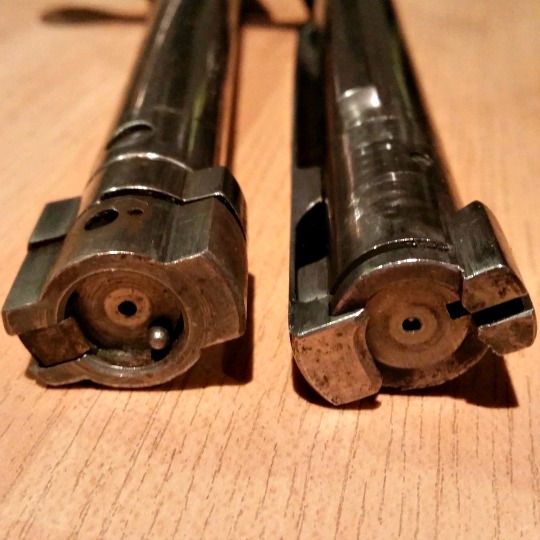
Step 3 – Remove the extractor from the bolt body
Note the extractor sits in a groove just before the bolt face.Rotate the extractor about 90 degrees so that it exits the notch.Apply downward pressure with your thumb, as you slide the extractor forward. Remember this sweet spot, as you’ll need to apply pressure in the same spot to get the extractor back on.Getting this collar off is easy, but you will stretch it as you do so. A flat screwdriver can be used to pry it open if needed. Getting it back on once it has been taken off is harder, and a vice of some sort will be handy, as you’ll need both hands to get the extractor back on.When reassembling the bolt, getting the extractor onto the collar is probably the hardest bit. If you have locking pliers or a small vice, it shouldn’t be hard to slide the slot on the underside of the extractor onto the collar. Remember where you applied downward pressure to remove the extractor – this is the same spot you need to apply pressure to as you slide it back on.
From here on, the rest of the reassembly is easy, and is simply the reverse of the above.
In the first part of this blog series, I looked at the rifle stock I’ve chosen for this project – Boyds Prairie Hunter – as well as the bedding compound I’ll be using – Matchgrade Bedding Compound. In this piece, I’ll go over the initial fitting of the stock, and the bedding process.
Prepping the stock
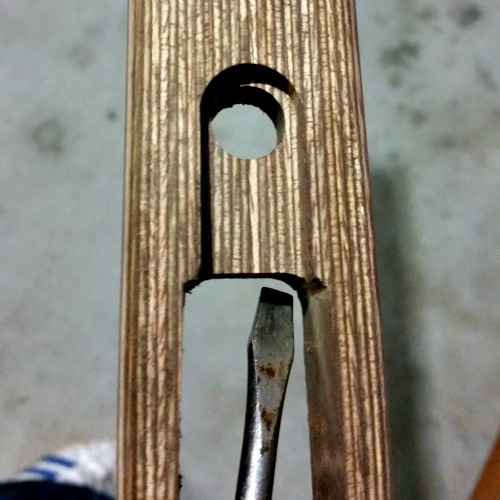
A hacksaw blade gives nice, crisp edges.
Whether you choose to bed your stock or not (you should choose to 99% of the time), your stock may need some prep work. The Prairie Hunter is quite a classic shape, with a nice cheek swell and elegant lines forward of the action. Supplied with sling swivels and a nice butt pad already in place, there’s not much you need to do to get this stock looking great.
Because of my model of rifle, I had to remove material to provide the clearance for the bolt handle. For this reason, my stock was provided unfinished (uncoated). Fortunately, with the bent M38 handle, there wasn’t much to take out. I simply used a hacksaw blade to achieve the angle and depth of of relief needed, and removed the material between the two cuts with a small file, and then some sandpaper. By doing the two cuts on the outside, the relief is quite crisp and even.
Next I had to deal to the plastic nose cap. There are several options you can go for here, ranging from the synthetic (cheapest), through to rosewood and others. Of course, for a more simple appearance and cheaper project, you may choose to exclude this option.
A dremmel makes quick work of evening out the nosecap.
The nose cap and the pistol grip cap where both ground to fit, however, the barrel channel of the nose cap needed some relieving to ensure the barrel is free floating. These caps are obviously produced to allow for common barrel dimensions without having excess clearance, which would look terrible and accumulate dust and grime in the field. So, in this sense, having to clear this out for your particular barrel shape is actually a benefit, as you can ensure you have a free floating barrel, with a minimum of clearance to keep your barrel channel free of any foreign debris. Of course, you’ll want to make sure it matches up nicely with the lines of your stock.
Aside from that, my Boyds stock was good to go. However, as I’m bedding this rifle as well, I chose to leave the final coating of the stock for after the bedding process. This way, any spilled bedding compound or other marks can be easily removed when I do the final sanding before oiling the stock.
Glass bedding the action
The term ‘glass bedding’ comes from the fibreglass-like products that were used in the past to mate barrelled actions to their new homes. Material choice has improved in leaps and bounds, however there are a few prominent bedding systems that seem to have really got it right.
There are a couple that you can find on Brownell’s (if your in the states), or Gun City, Reloaders, Serious Shooters, etc., in New Zealand. However, far and away my most preferred bedding compound is Nathan Foster’s Matchgrade product. It’s easy to use and provides a solid and stable platform on which to achieve repeatable and accurate results with your rifle.
The first time I used this product it came with printed directions, which I have stashed in my drawer somewhere. The second time it came with a basic info sheet and instructions to find the directions online in a PDF. To be honest, I think this is great. It saves on paper and keeps the cost of the product from increasing, but also, it’s so much easier to use your phone to view instructions.
When using your phone or laptop you can use ‘Ctrl + F’ to find exactly what you’re looking for.
In the thick of it
I won’t waste my time repeating Nathan’s instructions, which you can find here, but there are certainly some points to note.
Bedding a rifle is pretty much a one-time job. Undoing a crappy bedding job is an immense amount of work, and the cured product will harden like steel to whatever surface it is on. For this reason, you need to have your barrelled action and the stock completely prepared beforehand.
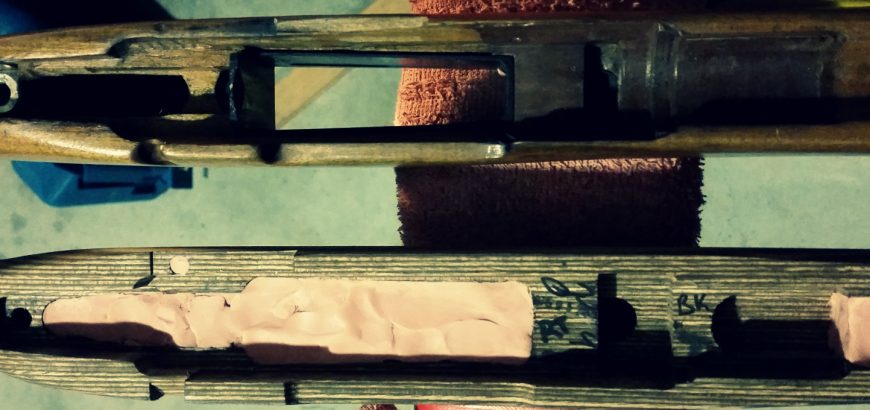
The Prairie Hunter stock ready to receive a full-length bedding job. You may wish to wrap your stock in plastic to protect its finish.
The stock will need to be dammed up, so the compound doesn’t run through the action screw holes, the mag well or down the barrel channel. The action needs to be protected with masking tape and graphite to ensure it doesn’t end up permanently glued into the stock. You also need to ensure that the bead of bedding compound around the action doesn’t creep over the tang or into the ejection port – trapping the action.
Once you’ve started pouring, there’s pretty much no going back.
You also need to make sure your working space is completely ready for all stages. You need to be able to keep the compound at a reasonable temperature (no problem in this summer heat) for it to cure properly. However, in winter, this can mean heaters, hot water bottles or any number of weird contraptions. I tend to make a tent of sorts over my workplace once complete (it’s hard to shift the rifle to a different area once you have poured the compound), and use a small heater to warm it up.
Now’s the hard part – you need to be patient and wait for it to cure. In the next part of this series we’ll look at getting the rifle out of its mortice, and how to finish the stock up to a beautiful satin sheen.
Whenever there is more than one option, shooters around the world will have vastly differing opinions for and against each. The same could be said for push vs controlled feed bolt action rifles. However, after over a hundred years of having both on the scene, it seems a sort of stalemate has been reached.
So, what’s the big deal?
People still have their preferences, but realistically, there are much more important factors to consider when choosing a bolt action rifle, and the feed/eject mechanism is almost ancillary to other concerns. That being said, there are differences.
The double feed
A push feed action is exactly what it sounds like. The round is pushed by the base of the bolt into the chamber. Once the bolt is fully closed the extractor claw will engage the rim of the cartridge, so that the ejector plunger can push it out when it’s clear of the chamber again (once the bolt is pulled rearwards).
The oft-quoted push action double feed can occur if you do not fully close the bolt upon chambering a round. This means the round will not eject as the extractor claw has not engaged the cartridge. If you move the bolt forward again, you’ll feed a second round into the base of the first.
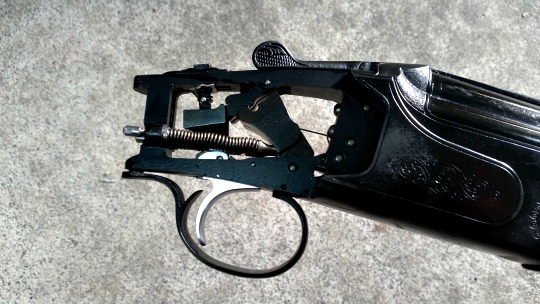
The bolt in this .243 Stevens literally pushes the round without grabbing onto the rim until the action is fully closed.
This situation is very unlikely to occur, except through clear operator error. We all like to think we’re beyond such simple mistakes, but stress can cause us to do funny things. When might you be this stressed? Hunting dangerous game, or perhaps in fast-paced action matches like the Precision Rifle Series. However, most competitors use modern push feed actions without any issues. Big game hunters on the other hand, are probably the biggest proponents of the Mauser-style controlled-round feed.
Making life easier
The main reason for the proliferation of push feed rifles is that they are cheaper and easier to manufacture. Having said that, some very expensive, reliable and accurate rifles use push feed actions.
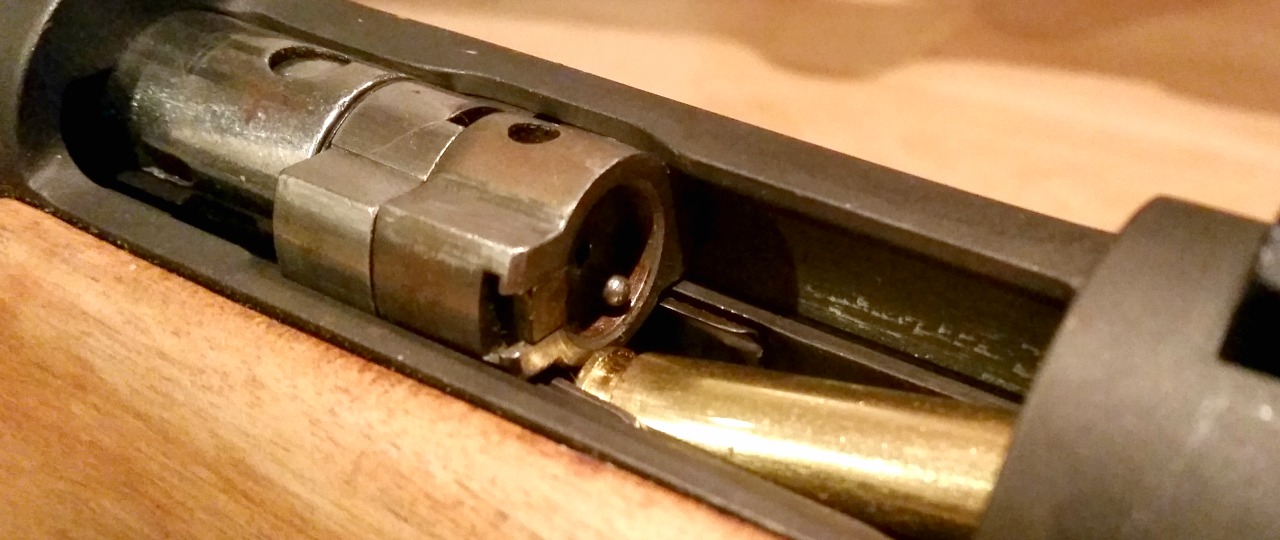
There’s one thing that just makes like easier with a controlled-round feed. You don’t have to push the bolt fully closed, or completely work the action, to pick up and eject a round. And no, this isn’t the same point above worded in a different way.
This Mauser action with its large claw extractor grips the round upon picking it up out of the magazine.
If you spend a lot of time on the range drilling small holes into paper, you’ll come across plenty of situations where you have to clear your rifle so someone can go forward. This may be for a change of targets, a ceasefire in a match or some other situation where rifles need to be made safe.
If you have a box magazine, no issues either way. However, if you have a blind magazine, emptying a full mag with a push feed action can be annoying and time consuming. A good example of this is the Mossberg 100 ATR which I recently reviewed. A nice, slick bolt action, but you can’t pull the magazine out or drop a floorplate if you want to quickly empty your rifle.
With the Mauser-style actions built by CZ, Winchester (some model 70s), Ruger, Kimber and others, you can simply move the bolt a fraction of the way forward and pull it back again to solidly pick up and eject a round. I do also find that the bolts are generally less sloppy in the action, as the long extractor acts as another guide to keep the bolt going forward and not sideways.
These sound like silly points to favour one rifle over another, and they are. Although it’s a feature I really like, it wouldn’t influence which rifle I bought if I was choosing between two (unless they were otherwise identical, which isn’t going to happen).
If you want to dig a bit more into the subject, there’s plenty on the web, including this well-illustrated article at Lucky Gunner.
There are a few centrefire rifle events every year that are just thoroughly enjoyable and worth attending. The Auckland NZDA Prize Shoot is one, as is the Thames NZDA shoot. The Hangiwera Station Sniper Shoot is definitely up there, and so is the Swiss Club’s Any Sights Any Rifle 300 metre shoot.
This year was my first shoot at the Swiss Club, although some of my shooting buddies have been going for years, and I attended on their recommendation.
An enjoyable shoot
The shoot is well organised, and is accommodating for younger or inexperienced shooters. There are club rifles available and the RO is very helpful with sighting in. The club rifles are either straight-pull Karabiners (K31s), chambered in the venerable 7.5×55, or modern semi-autos in 5.56 NATO/.223 Remington.
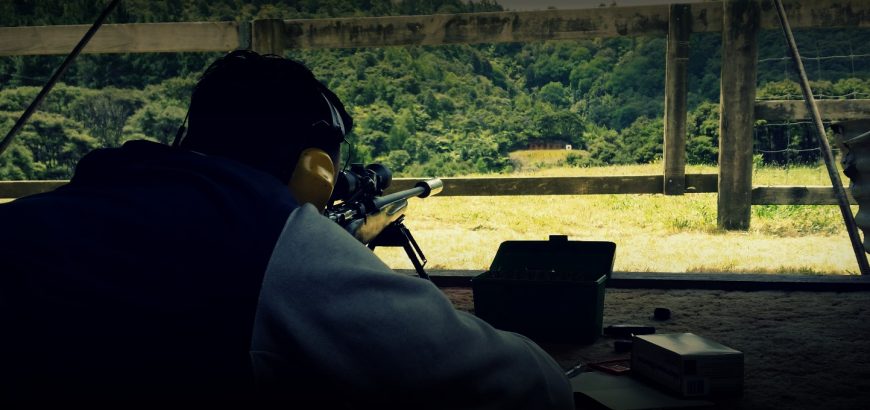
If you’re bringing your own rifle (as most do), you can use anything you like. If you’re really ambitious, you can try your open-sighted SKS and see what it will do at 300, but you’ll be going up against Bench Rest rifles that hit 10.1 more often than not. Most rifles on the day were a mix of F-Class, BR, sporting and service rifles. Because there is such a variety of shooters and equipment, it’s more likely that you will be competing amongst your group of friends than with the top of the table – unless you’re an excellent BR shooter.
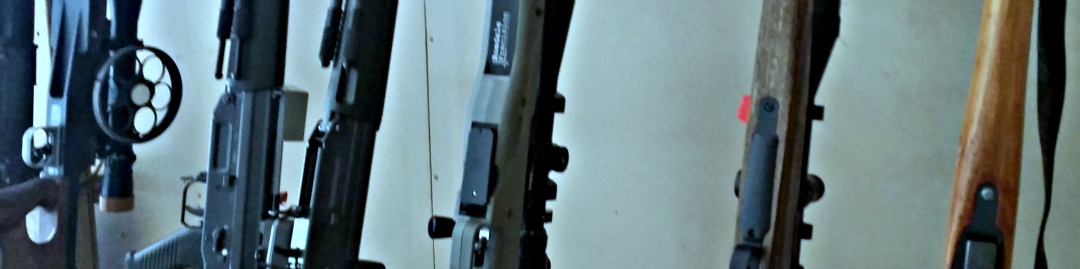
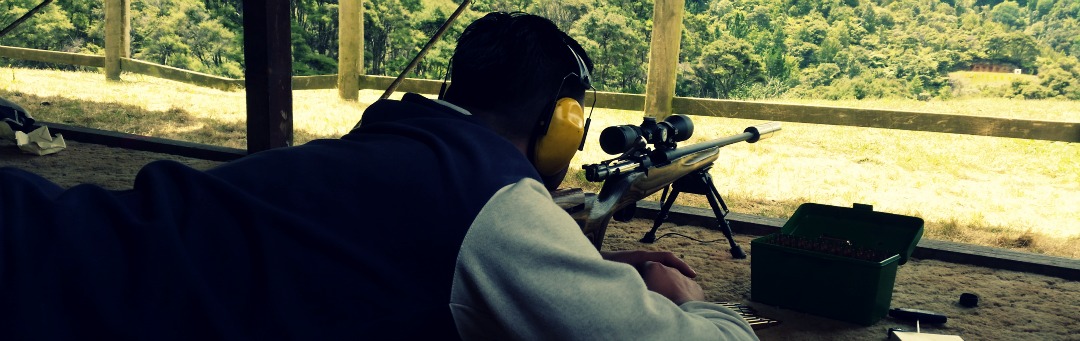
The variety of rifles on the range is a joy in itself.
Although I knew there was no way I could beat the top BR shooters with my modest sporter, this did not diminish my enjoyment of the day at all. I’m pretty competitive by nature, but found myself comparing my scores to my wife’s and those of the other Howick shooters. It also meant I got to see a bunch of really cool guns that you wouldn’t usually see in one competition.
Three-hundred metres is a pretty challenging distance if you haven’t shot past a hundred before. There were even a few who had not shot at all before. However, with the help of the club’s rifle master, these young shooters were hitting paper in no time.
The cost of the shoot is not prohibitive, with a range of $20 on the day, and of the cost of 25 rounds of ammo. The Swiss Club has a really good website for the ASAR shoot, which lets you book your position on the mound ahead of time. With several details across a few days of shooting, you’ll definitely find a time to shoot, and you may even try and better your score on another day.
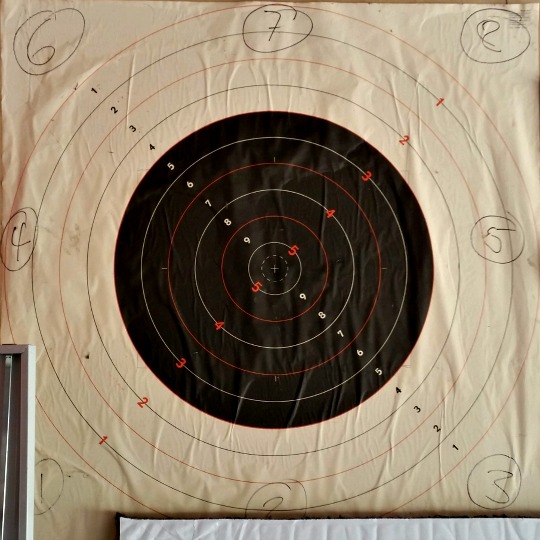
Swiss Club target.
The format
The shoot starts with 5 individual sighters. Each shooter on the line takes a single shot from the prone position (all shooting is prone), after which the targets go down and the scorers call back the score and location of the round to the RO via radio. A notepad and pen are handy, as you try and figure out where your sighters are landing. The shots are called out like “9 at 3 o’clock” or “7 at at 1 o’clock”, with the first number being the score (1-10) and the position on the clock helping you to identify which segment of the target you are landing on.
After you’ve gone through your 5 sighters, there are 10 individual scoring shots, shot in a very similar fashion. Each shot is still called out, helping you adjust your shot placement, especially if the wind picks up downrange.
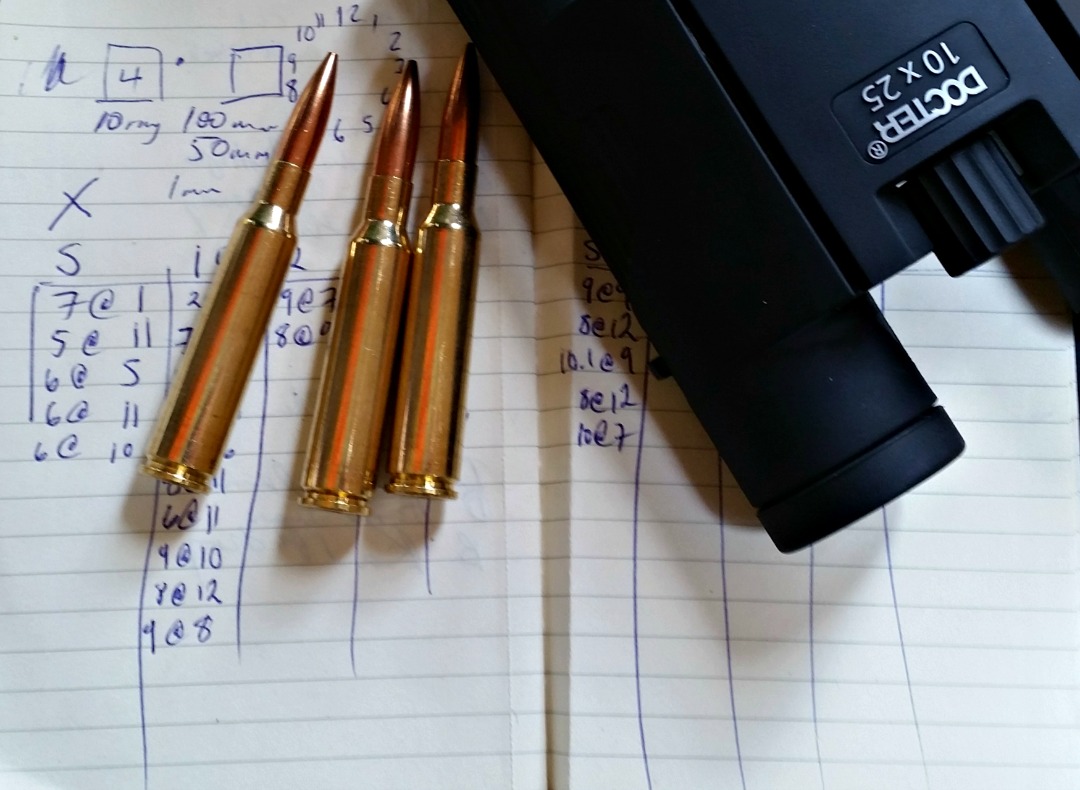
A notepad is essential to sighting in at 300 metres.
After the individual shots, you have “rapid” groups of 2, 3 and 5. I say rapid, but it’s really not. It’s simply a few shots in a row. There is no pressure to hurry up, and there are plenty of people single loading their shots.
All shots are still called out, except for the final group. This means you can adjust your shot placement right up the last minute.
How hard is it to hit the 10 ring? You’ll need to be shooting around MOA (just over) to consistently hit the 10 ring at 300 metres. If you want to notch up a bunch of 10.1’s, you’ll need to be shooting around between 0.5 and 0.66 MOA.
The experience
I thoroughly enjoyed the shoot. I went a bit early to watch some of my mates shoot, but also to familiarise myself with the format and calls. I did end up waiting around a bit, but I ended up being there for most of the day, as I had some “technical difficulties”.
After watching the 11 am detail, I hung around over lunch time before taking up my spot on the mound. I was a bit nervous as I was shooting my rifle in its complete configuration for the first time. Since the last time I had shot, I had fitted and bedded my Boyds Prairie Hunter stock, had a new bolt handle machined, and modified my magazine follower. Also unfamiliar to me was a 6-24 scope that I had been sent to review.
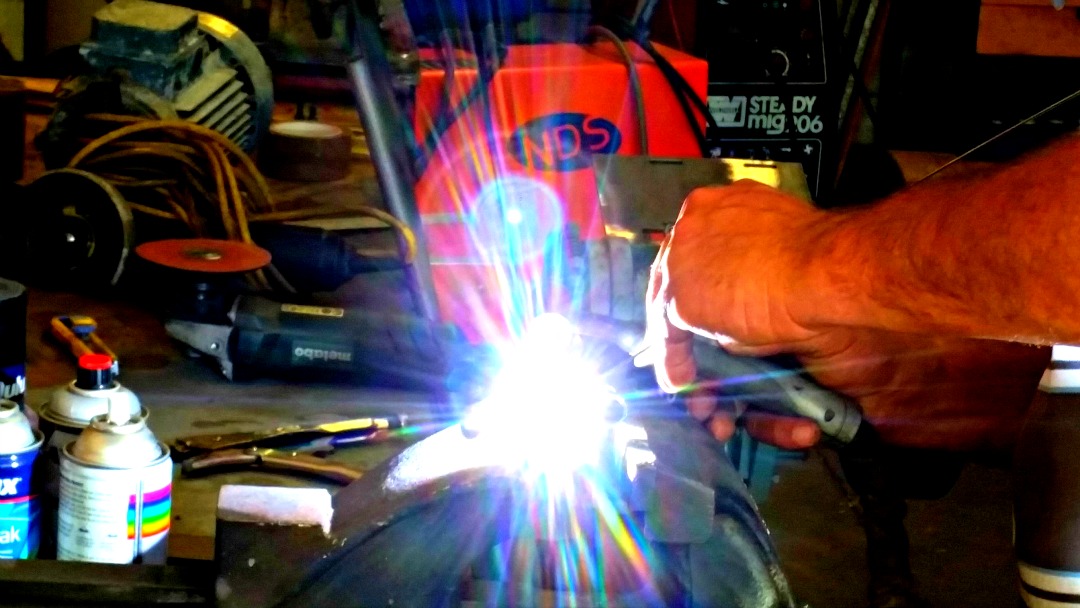
One new bolt handle coming up, thanks to my mate Thomas.
Unfortunately the scope did not perform and was unable to be zeroed on the day. This meant I had to wait through an entire detail, pushing out my wife’s shoot as well. However, I used this time to fit my trusty Vortex Diamondback 4-12×40 BDC, which I brought just in case. I have learnt my lesson with taking unfamiliar equipment to a shoot.
Unfortunately this meant I had to sight in from scratch, however, I was on paper on my 3rd shot, and the rest was just fine-tuning. By the end of my shoot I had it right were I wanted it, which meant my wife had the rifle ready to go for her shoot, and actually did quite well. Results can be seen here.
Overall I was very happy with the my complete sporter set up, and with some more powerful glass, I think I’d be comfortable taking this rig out onto the F-Class range.
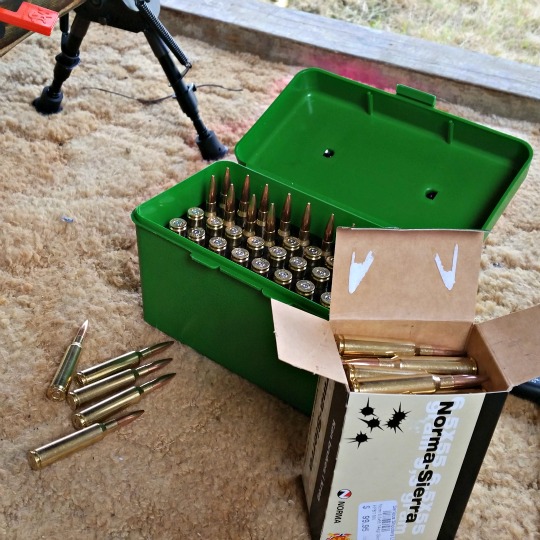
Looking forward to some Norma brass at the end of this.
I think the load development still has some way to go, particularly as the barrel on this rifle is quite short. Not having developed a satisfactory handload, I shot this competition with factory 6.5×55 ammo. I used the Norma-Sierra 144gr HPBT, and the round seemed to perform pretty well. To be honest, I was more interested in the brass than anything else, as I think this rifle will prefer lighter projectiles, in the 130 – 140 grain range. Over the holidays I’ll be testing out the 129 gr Hornady Interlock and 140 gr A-max. I’ll be comparing this projectiles side-by-side with the 142 gr SMK and the 144 gr OEM projectile in the Norma-Sierra load.
At the end of the day, the shoot was enjoyable, and definitely an experience worth repeating. You can shoot multiple times on one day, or on multiple days across the competition. If I have the time next year, I’ll probably try shoot it on a few days. Being located only 45 mins or so north of Auckland, the range is really accessible, although it is also rarely accessible. The Swiss Club is, of course, a club for Swiss nationals, and as far as I know, this shoot is the only time of the year that the range is opened up to the general public.
If you would like to try a different range and format, and perhaps a longer distance than you usually get to, you’ll definitely enjoy the Swiss Club’s ASAR shoot.
If you’re more familiar with the build of a bolt action rifle, removing a shotgun stock can be puzzling at first. No obvious action screws and a bunch of stuff hidden inside. Here’s a quick run down on replacing a shotgun stock.
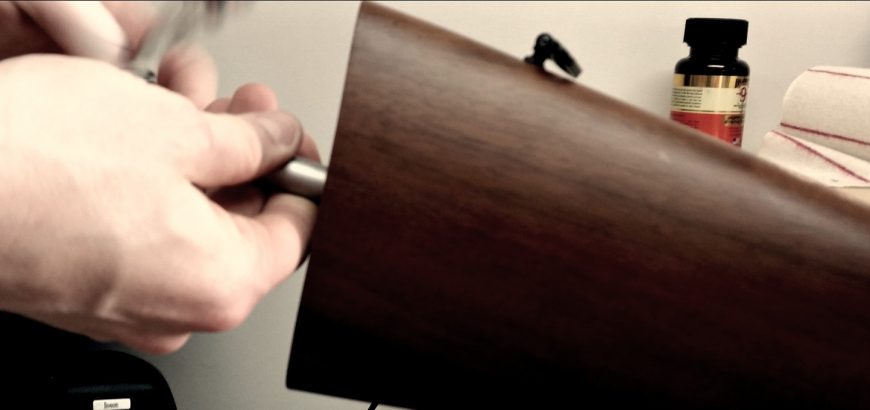
Step one: Remove the recoil pad
The reason you can’t see any action screws holding the wood to the metal is that you have one long bolt hidden in the buttstock that keeps it all together. Removing the recoil pad will reveal a hole in the centre of the stock, through which you can access that bolt.
A Phillips head screwdriver is usually the tool for the job.
If the screws holding your recoil pad to the stock are hidden in the rubber and you can’t see what tool to use, try a Phillips head screw driver. Most manufacturers still use these.
What’s missing from this SKB? You’ll never know if you weren’t paying attention in the first place.
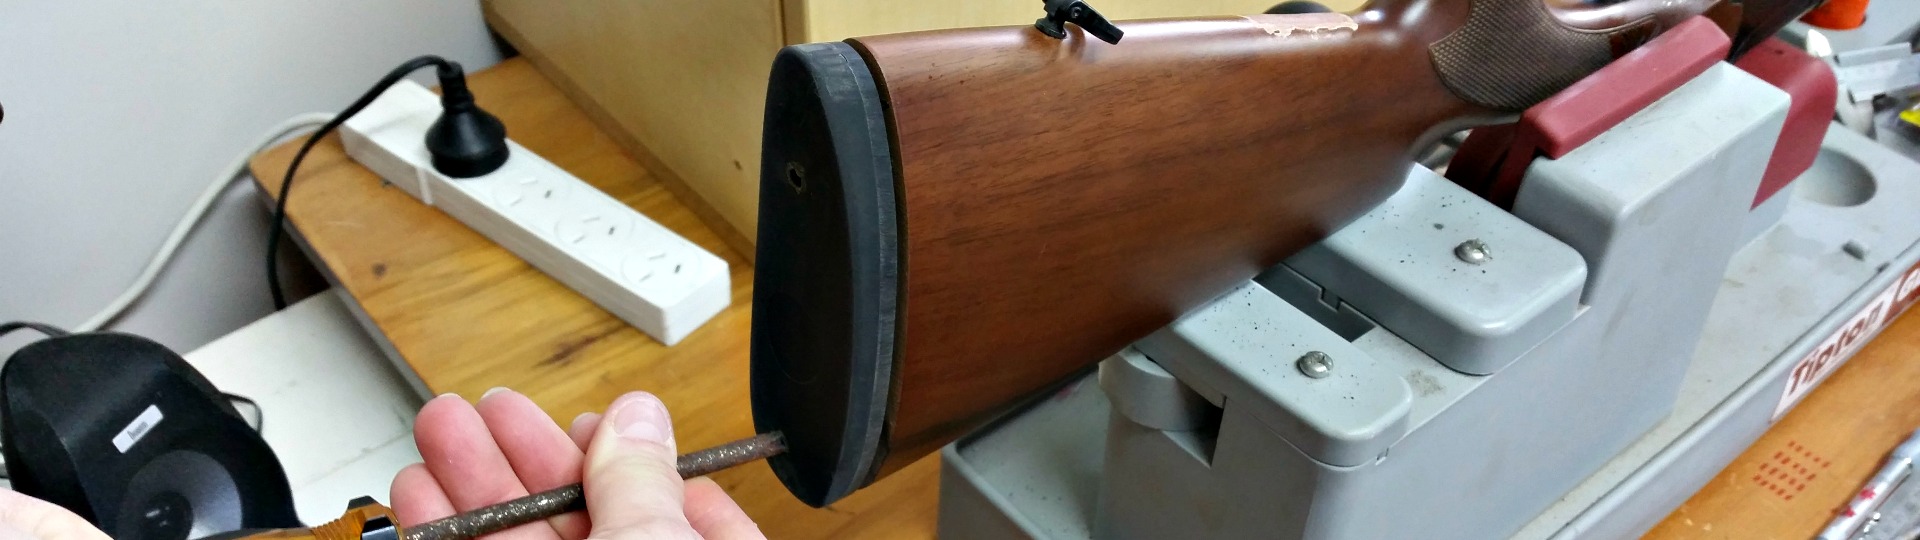
Step two: Remove the stock bolt
These are usually pretty easy to remove, and all you need is a socket wrench with appropriate extensions and the correct size socket. Trial and error will help you find the right socket size, as each firearm is different.
Because these bolts are not overly tight, the slight differences between imperial and metric should not be too much trouble.
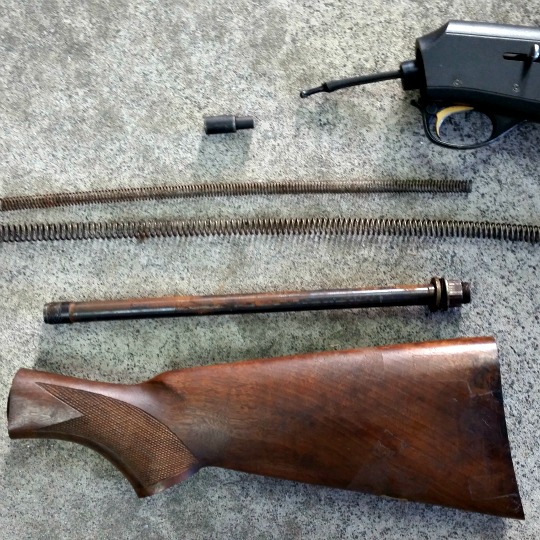
CAUTION: If you’re working on a semi-automatic shotgun, there are a lot of parts (including springs) that will shoot out if you do not hold the stock and action together and carefully remove the bolt and other pieces. Watch how they come out, as you’ll have to put it back together.
Step three: Do whatever it is you were going to do
This is the part where you clean your action, replace your stock, repair any cracks, or whatever it is that motivated you to remove the stock in the first place.
Step four. Reassemble
Putting it all back together is pretty simple, especially for U/O, SxS and pump-action shotguns. If you’re working on a semi for the first time, I hope you paid attention when you took all the bits and pieces out, or you may end up with a click but no bang the next time you go out shooting.
There may be some fining up to do at this point. If you’ve replaced your buttstock, you may have to grind the old recoil pad down to size, or you might want to use some sawdust, stain and oil to fill up fine gaps between the action and the replacement stock (if necessary).
This Hatsan Optima O/U got a good clean while the stock was off for replacement.
Step five: Function test
With an empty chamber or dummy rounds (snap caps), test the firearm for function. This means loading, firing and unloading. This is the time you want to find out about it. Not in the blind or on the range.
Sometimes you find a winning combination. Something that just works for you. This has been my experience with the Prairie Hunter rifle stock from Boyds, combined with my 1943 Husqvarna Mauser – a dream come true. What makes this such an epic combination? There are several factors that combine to make this gun incredibly shootable, but for now, let’s look at the fancy piece of wood it’s sitting in.
The looks
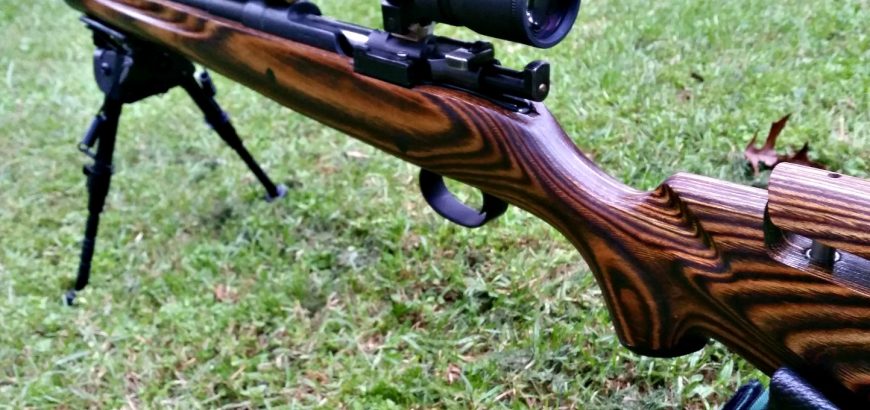
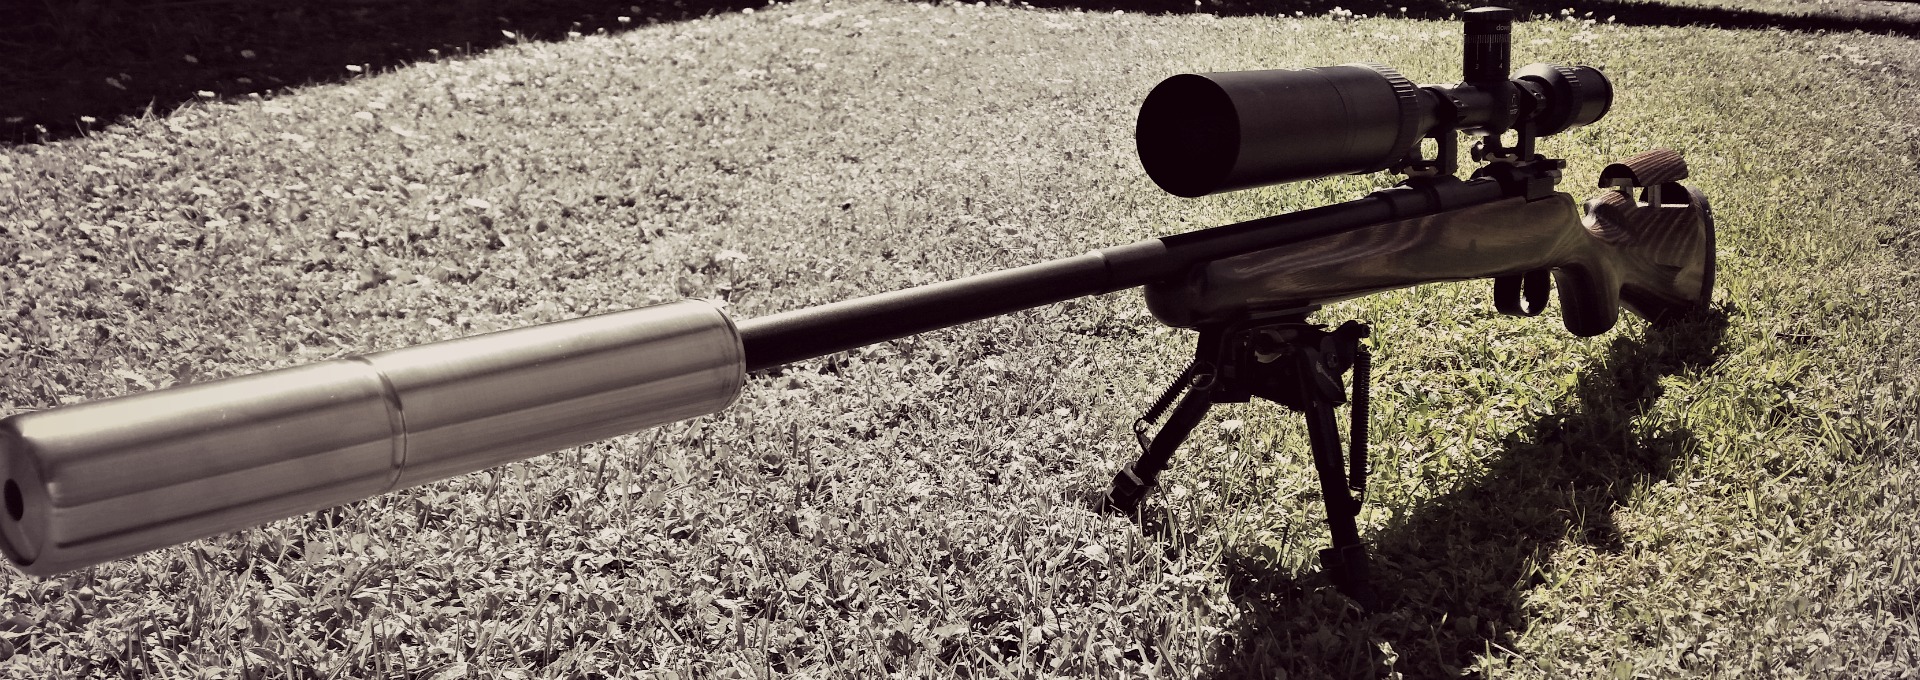
The old Mauser looks perfectly at home on the range in its Prairie Hunter stock.
The Prairie Hunter is a good looking stock, no doubt about it. The first time this rifle was on the range in its new configuration, an old time shooter said “such a pretty stock for such an old rifle!” And he wasn’t the only one. Laminates are known for being hardy, heavy and beautiful in an age of synthetic rifle stocks.
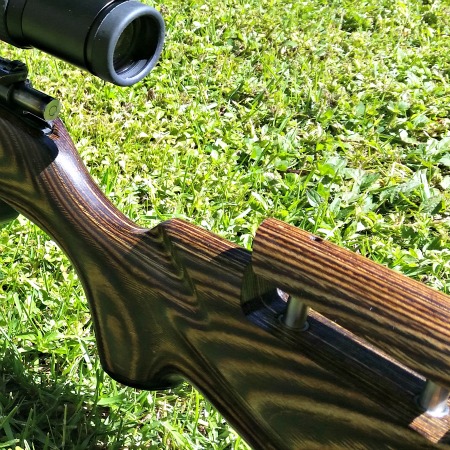
In the looks department, this stock was certainly helped along. Boyds provided this specimen with a nice, thick Limbsaver recoil pad and synthetic caps for the nose and grip. What adds to both the functionality and visual appeal of the rifle, is an adjustable cheek piece. The adjustments are made from the top, with an allen wrench, which means no adjustment knobs on the side of the rifle.
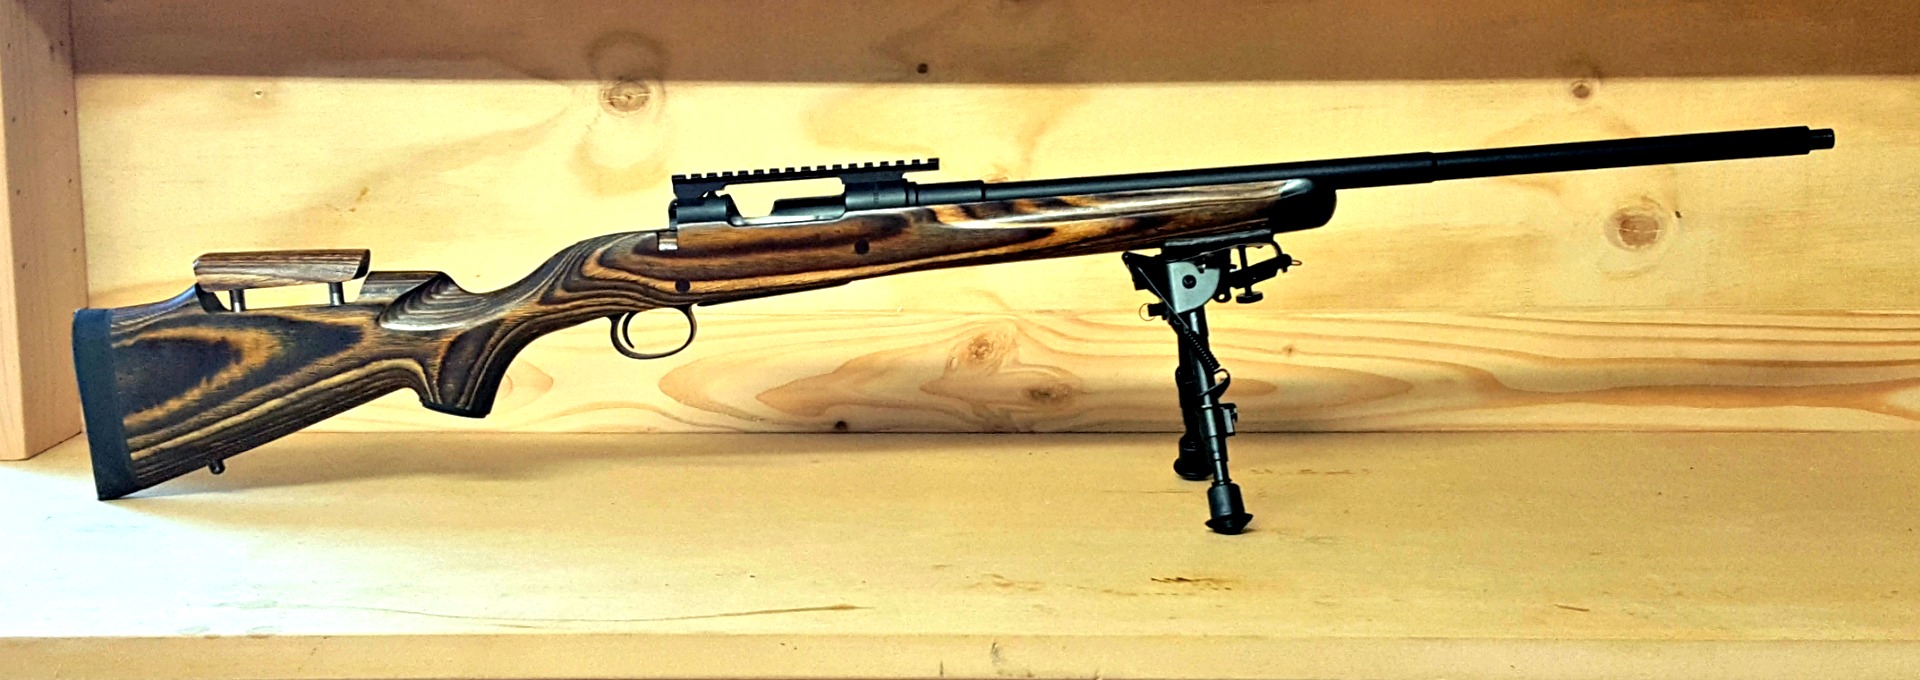
Full profile picture of the Boyds Prairie Hunter stock with adjustable cheek rest. This picture is here especially for Zach.
Final fitting needed
Boyds does advise that their stocks are made to their house actions (imagine how many actions they have!), so final fitting may be needed for your rifle. For this particular project, I received my stock in ‘unfinished’ condition. This means a final sanding and some polyurethane are needed. The reason for this, is that old Mausers come with several different bolt configurations, depending on the life they’ve had. This means that the channel that the bolt handle fits into should be determined by the end user, depending on their particular model. With a bit of work to do, Boyds doesn’t send you a finished stock, that you will then have to cut into and sand down anyway. Makes sense.
Some relieving of material was needed at the front of the mag well.
The bolt handle notching was easily done, and is covered in my series of articles on bedding and finishing stocks. With this particular stock, I found that the floor metal was a couple millimetres further back than I needed it to be. All I needed to do was to relieve some material from the front end of the mag well to get the metal sitting where it should, and mating up to the action.
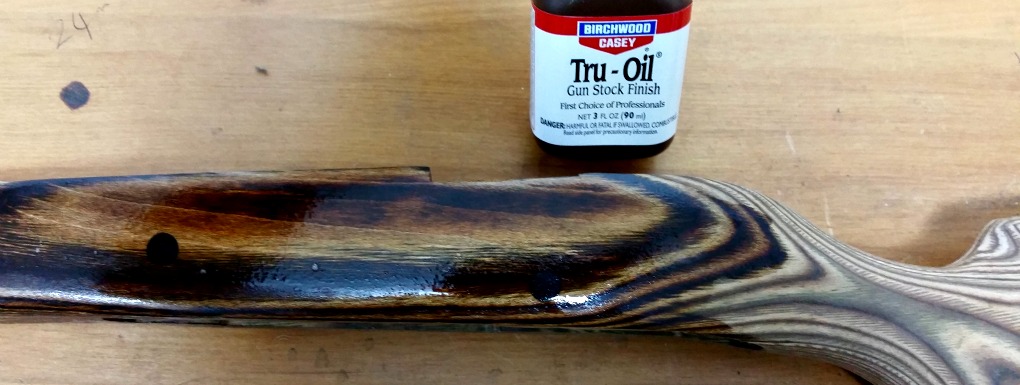
I chose to bed my action, which was a bit more work still, and instead of polyurethane, I opted for a hand-rubbed finish, using Birchwood Casey Tru-Oil and Stock Sheen and Conditioner. The oil even gave a nice gloss to the plastic bits on the stock as well. Learn my lesson without doing the hard yards though, tape off the recoil pad if it’s rubbery. The oil will make this super sticky, and you will get all sorts of fluff on your butt pad for a while. You will eventually be able to rub it all off.
The Tru-Oil immediately brings out the character in the laminate.
Performance
Oh what a joy. I couldn’t be happier.
And that’s not sarcasm!
The 6.5×55 is not known to have heavy recoil, but if you have a shortened barrel and sporterised stock, you feel every bit of it. Having purchased this rifle second-hand with the intention of restoring it, I was happy enough with the home-made sporter stock, but it was certainly made for a shorter person, and the lightweight nature of it didn’t do much to tame the kick of the old service round.
The extra weight associated with the laminate stock meant all sorts of recoil-reduction. I would definitely recommend going for this or a walnut stock over most of the synthetic options out there. The normal-person-sized length of pull also helped, along with the 1″ recoil pad. Don’t get me wrong, the stock isn’t overly heavy either. With a hollowed out barrel channel for free-floating and weight reduction, the balance and weight is nice. Most of the heft is around and behind the action – where you need it most.
Tall scope mounts are no problem with the adjustable cheek rest.
Combining this with my MAE 6-30 ST suppressor, recoil concerns are now a thing of the past. So much so, that I can shoot off the bipod with my off-hand under the grip as a stabiliser, instead of holding down the fore end to stop myself getting a scope in the face, as I had to do with the synthetic-stocked Mossberg ATR a month or so ago.
Shooting with this configuration and my wife’s Vortex 4-12X Diamondback with BDC reticle, my wife and I were hitting 9’s and 10’s at the 300 metre Swiss Club shoot a couple weeks ago – even a 10.1! And this is with factory loads (Norma-Sierra 144gr).
Adjustable cheek rest
One of the major selling points of the configuration I now have is the adjustable cheek piece on the Boyds stock, and I would highly recommend this option on the next stock you buy. Below are a few of the reasons I love this feature:
easily adjust for different users and eye-relief
raise your line-of-sight for scopes that are mounted high due to large optic bells, iron sights or bolt handle clearance
quickly lower the cheek piece when needed for cleaning rod access
ensure proper cheek-weld to maintain repeatable, accurate shot placement
Overall impressions
There is a lot to be said for keeping old military rifles in their original condition. However, if you’ve bought yourself a bit of a project, or inherited a less-than-perfect specimen, a great place to start with your customisation efforts is a replacement stock from Boyds.
You can get a stock that is more suited to varminting, target-shooting or tactical-style precision matches than the military wood. These old stocks were made to be shot with full winter clothing, and to be light as well. As such, they transfer a lot of recoil to a normal-size shooter. You can also help your sweet Swede look as good as it shoots. With a nice-looking stock, like the one I have in a Nutmeg finish, you won’t feel out of place next to the Howas and Tikkas on the range.
The Boyds stock completes the set up, along with an MAE suppressor and BOLD Trigger unit.
Bear in mind, when you order a stock from Boyds and you are not in the States, you have to keep your order under $100 to avoid costly permits which make the process impossible. If you or someone you know is making a trip to the USA, take advantage. Or get friends and family over there to help you out. Worst case scenario, you can still get an amazing stock, but you may have to forego some of the bells and whistles.