
Auckland NZDA Prize Shoot

The annual NZDA Auckland branch Prize Shoot is a great day out for Auckland shooters of all abilities. Falling in September each year, the weather can be a bit hit and miss, but aside from that, it’s a perfectly pleasant day on the range with your favourite rifle and some mates.

This year – the 46th Prize Shoot – I shot for my second time and my wife completed her first centrefire competition. We both did fairly well, but she truly excelled. I’ll claim that it’s because I sighted the rifle in through my shooting (we shared a rifle). However, all credit to her, as she outshot some great shooters.

The field

That’s another thing that makes the day enjoyable – there are shooters of all abilities. I placed well ahead of some very experienced shooters, but was beaten by someone shooting for their first time ever. And vice versa. It really is a great field of competitors, where everyone can benchmark their performance against others.

NZDA 100 metre standing shoot
100 metres is more than enough from the standing position.

At the top of Division A were the usual suspects, including Paul Carmine. My wife, Kassie, took out Division B – which got her called up second in the order of prize recipients, allowing her to choose a really nice Hunting and Fishing backpack for her prize.

This year there were four ladies and two junior shooters. In total, there were just under 40 shooters, making up two details. Last year there were around 60 shooters (despite the inclement weather), and apparently previous years have had a similar turnout. Perhaps timing a competition to coincide with Bathurst wasn’t the best move…

The format

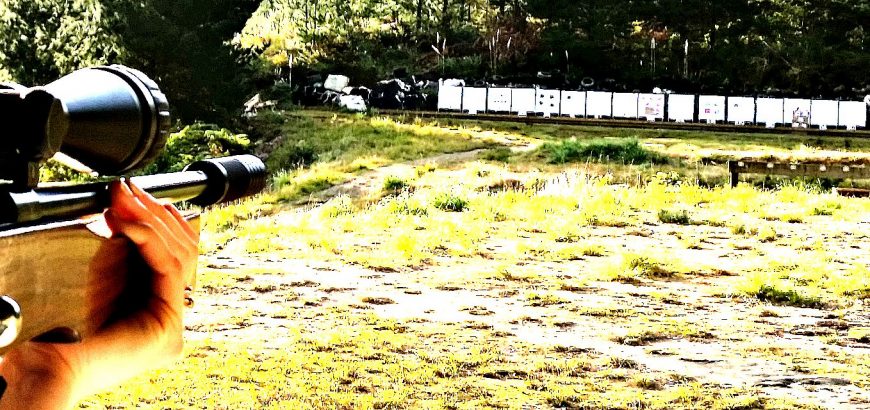
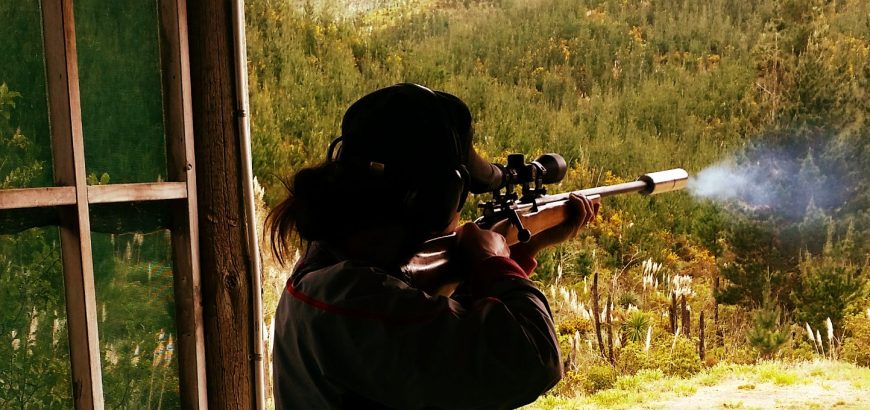
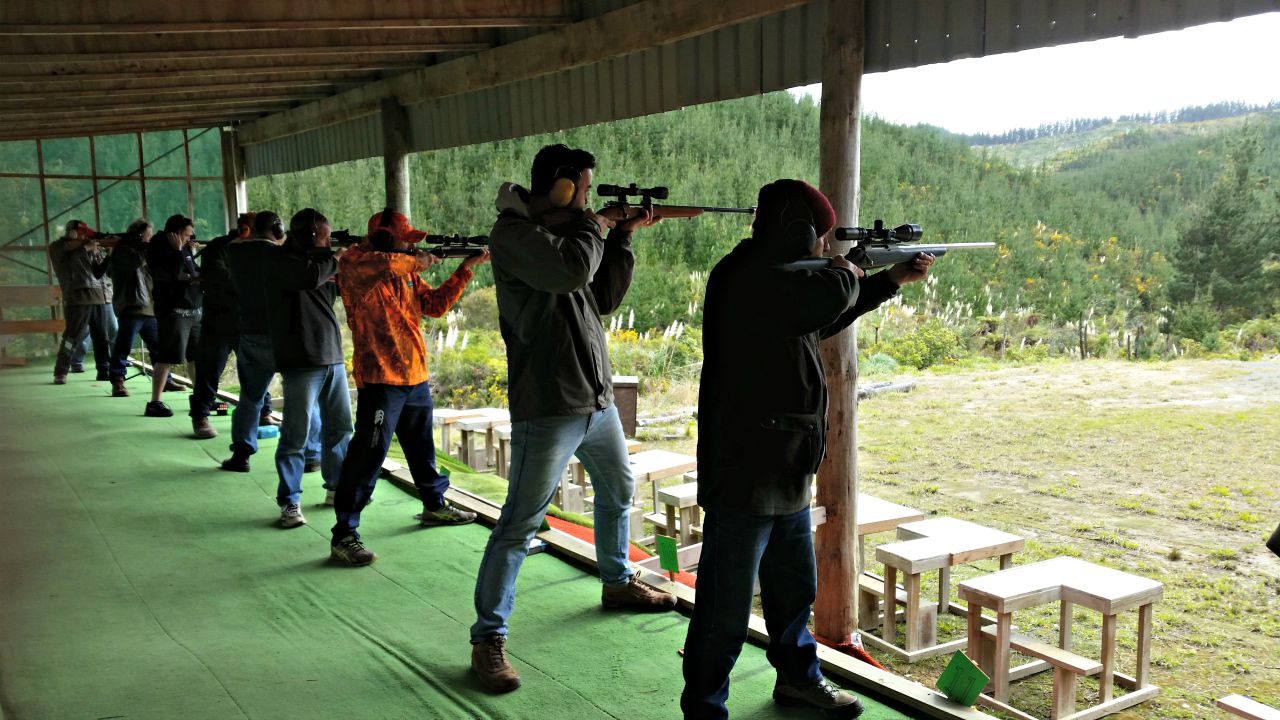
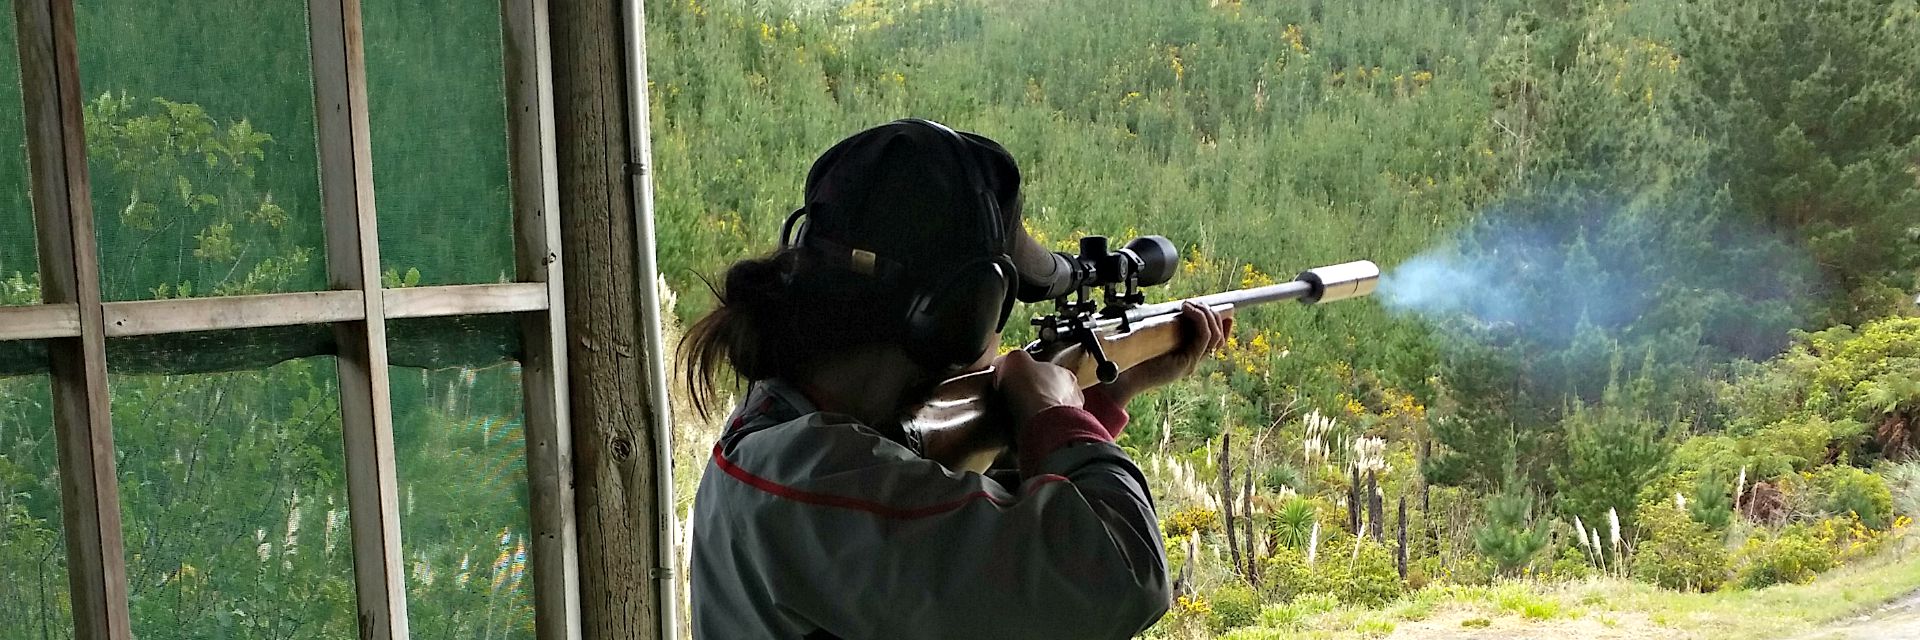
The format of the shoot is very simple and easy to follow. Once the safety instructions and competition rules had been read out, the first detail (Squad A) went to the mound for sighting in and the prone target shoot.

Rest and bipods are allowed for sighting in, however, you want tomake sure you're sighted in before competition day if possible.
Rest and bipods are allowed for sighting in, however, you want to make sure you’re sighted in before competition day if possible.

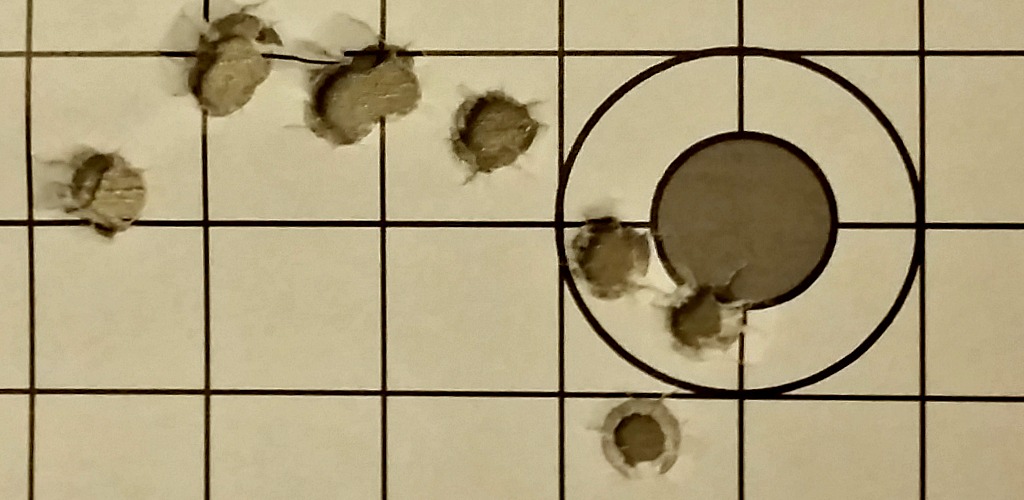
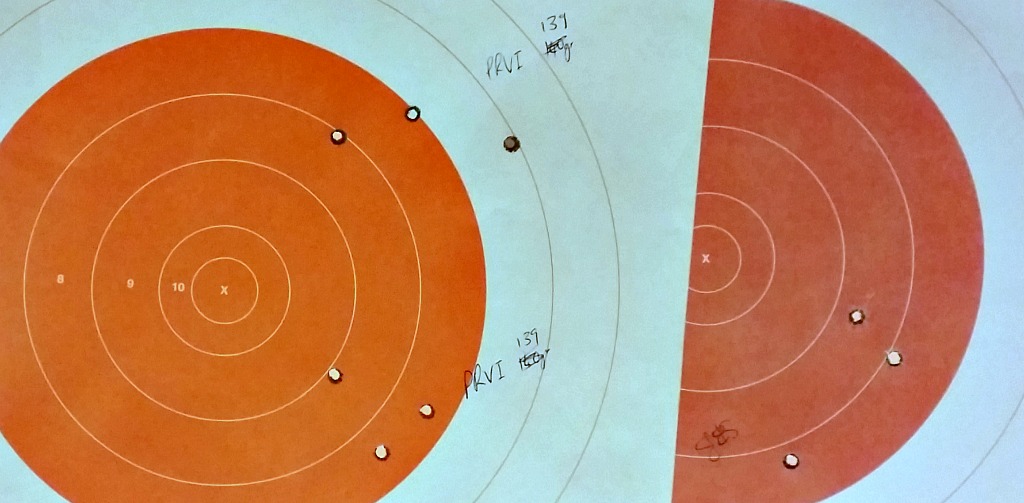
Sighting in is done on a target on the right hand side of the frame, and five minutes are allowed for unlimited sighters.  The range for the competition is 100 metres. I got 13 rounds off in this time, trying to get my rifle on point. The lesson here being to always sight your rifle in before competition day if you’ve done some work on it. After 13 rounds, there was a decent amount of mirage created by the heat of the barrel and my new MAE suppressor. However, by taking my time this didn’t affect my prone shoot.

You can use a rest or bipod to sight in, however the rest of the competition is shot without any aids (aside from a shooting mat and a kneeling roll).This means no slings, jackets or gloves.

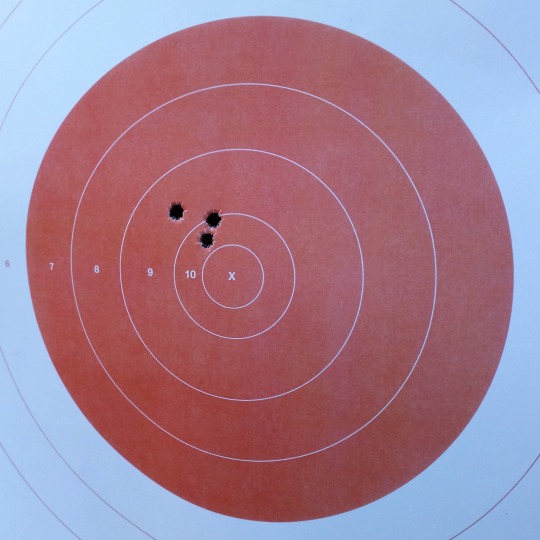
The prone shoot is 5 shots in 7 minutes – plenty of time. After this is finished and the rifles are cleared and removed from the mound, scorers go forward to retrieve targets. Squad B is next, but in the meantime, people stand around chatting and enjoying the all-day sausage sizzle.

After Squad B, the same process is followed and Squad A goes up for 5 rounds in the kneeling position, also in 7 minutes. Rinse and repeat for Squad B. The last shoot of the day is 5 rounds standing, again in 7 minutes. This is what separates the men from the boys. Some of those scoring in the 40’s in the prone event struggle to scrape 20 together in the standing position.

In between these, there is a 5 round rapid shoot on the 25 metre range, to be completed in 40 seconds. Again, making sure you know your hold under/over and your parallax settings before competition day is invaluable. If you’re sharing a rifle with your partner or buddy, you will be accommodated with an extra rapid at the end – although you’ll probably have time in between while targets are retrieved and people yack on about how they pulled that one shot. Targets are also given out once scored, so there is plenty to talk about during the day.

The rifles

Generally speaking, the rifles are hunting rifles in hunting calibres. There are some rifles that would look more at home in an F-Class shoot, and some that would be quite comfortable in the lineup for a military service rifle shoot. The most exotic calibre of the day was probably .310 Cadet, with one .22 Hornet and a 6BR making an appearance.

As far as I could see, the only semi-auto was a Norinco M305 (the Chinese version of the M14), whereas last year a couple AR-15’s placed very highly in the field. At the 2014 Prize Shoot I did take an SKS – what a mistake. The iron sights had not been sighted in and after I took the muzzle brake off, the scope’s zero was so off that I wasn’t on the paper. It was an exercise in frustration, and using the iron sights and a whole lot of compensation, I managed to get some scoring shots in the kneeling and standing events.

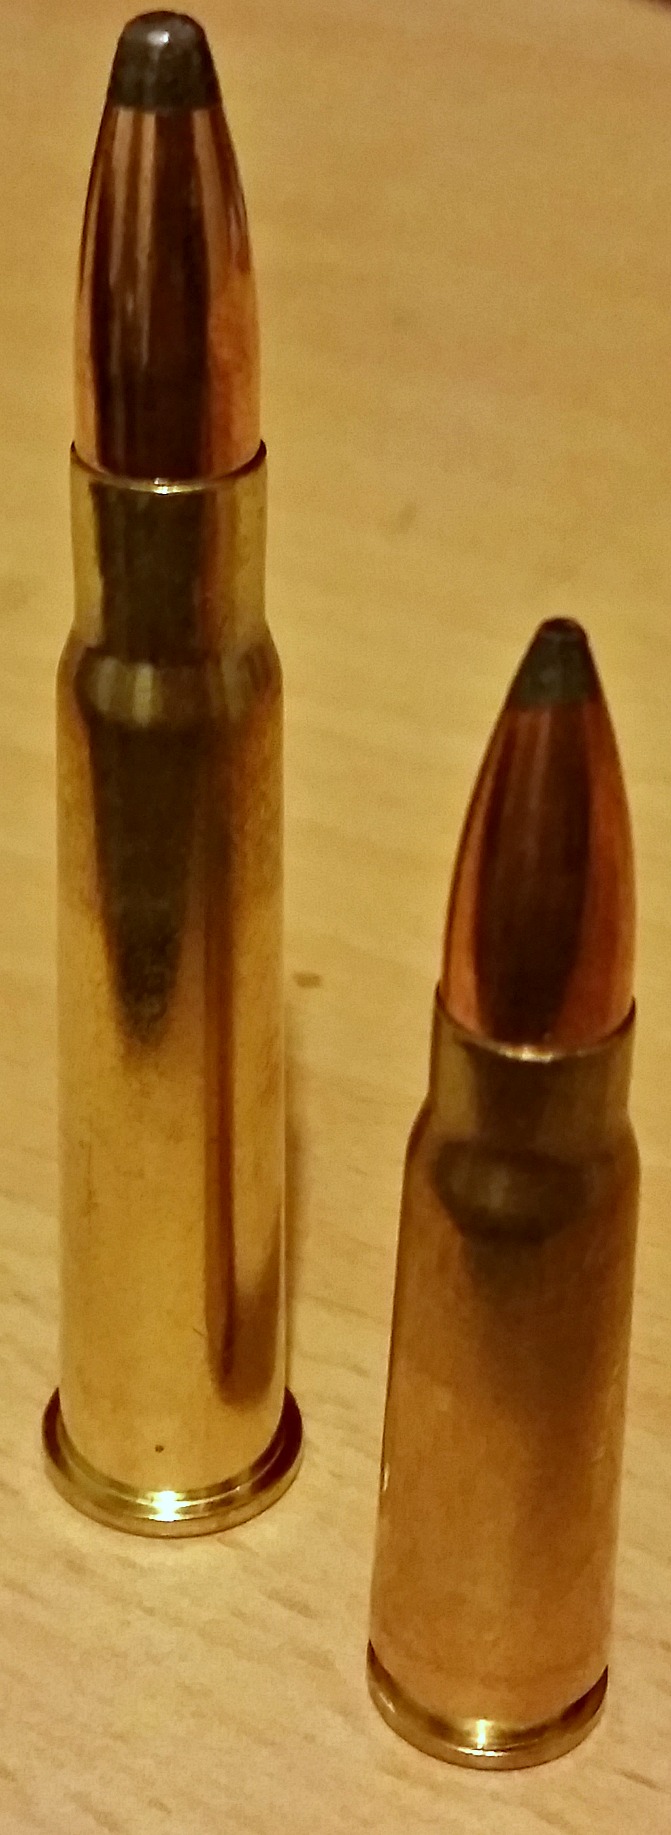
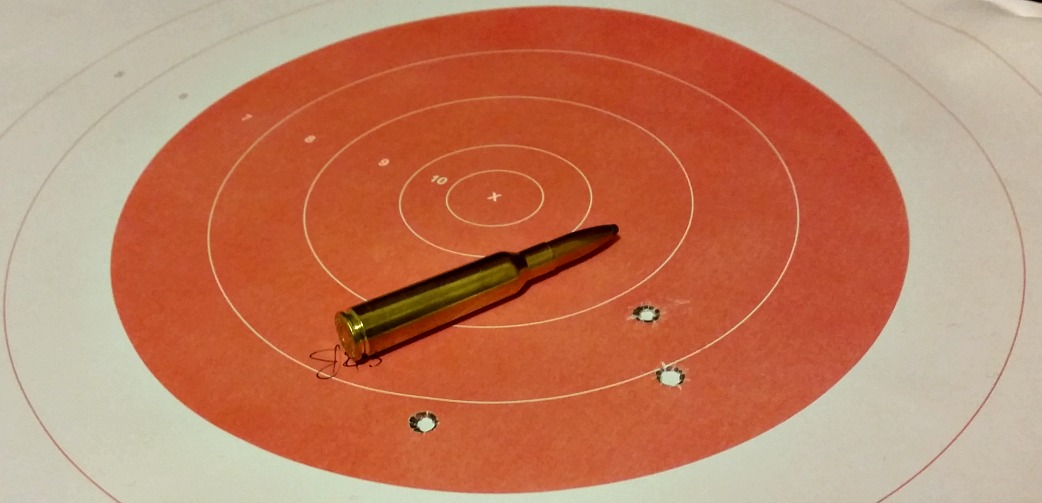
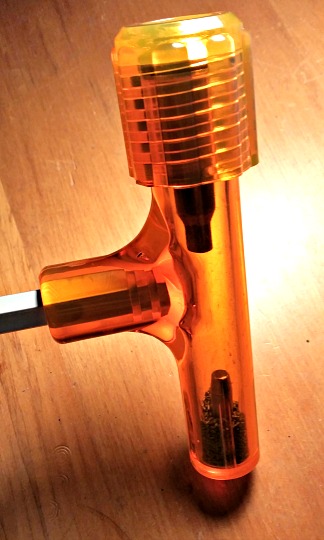
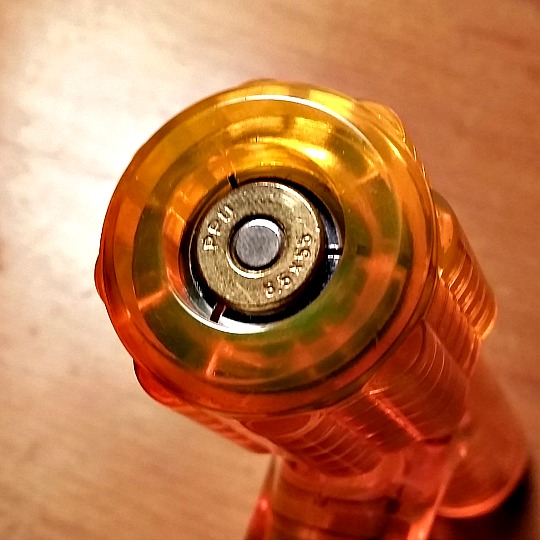
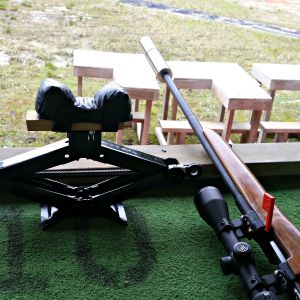
This year I went armed with my 1943 Husqvarna M38, chambered in 6.5×55. This rifle was sporterised when I got it, and has since been modified even more. Over the last ten or so months it has a new matte black coating applied, the bolt has been replaced and the cocking piece cut down to reduce lock time. I’ve also installed a Vortex Diamondback BDC 4-12 x 40, and a new adjustable BOLD Trigger, which was kindly supplied by Boyds. Completing the setup was a brand new MAE suppressor, which thoroughly impressed my shooting buddies as well as those that heard it perform.

I also have a new Boyds Gunstock waiting to be fitted to this rifle, but I didn’t want to rush the bedding and finishing before this shoot. It should be ready before the 300m Swiss Club shoot in November. And I’ve learnt my lesson – sight in beforehand!

The load I was shooting was as follows:

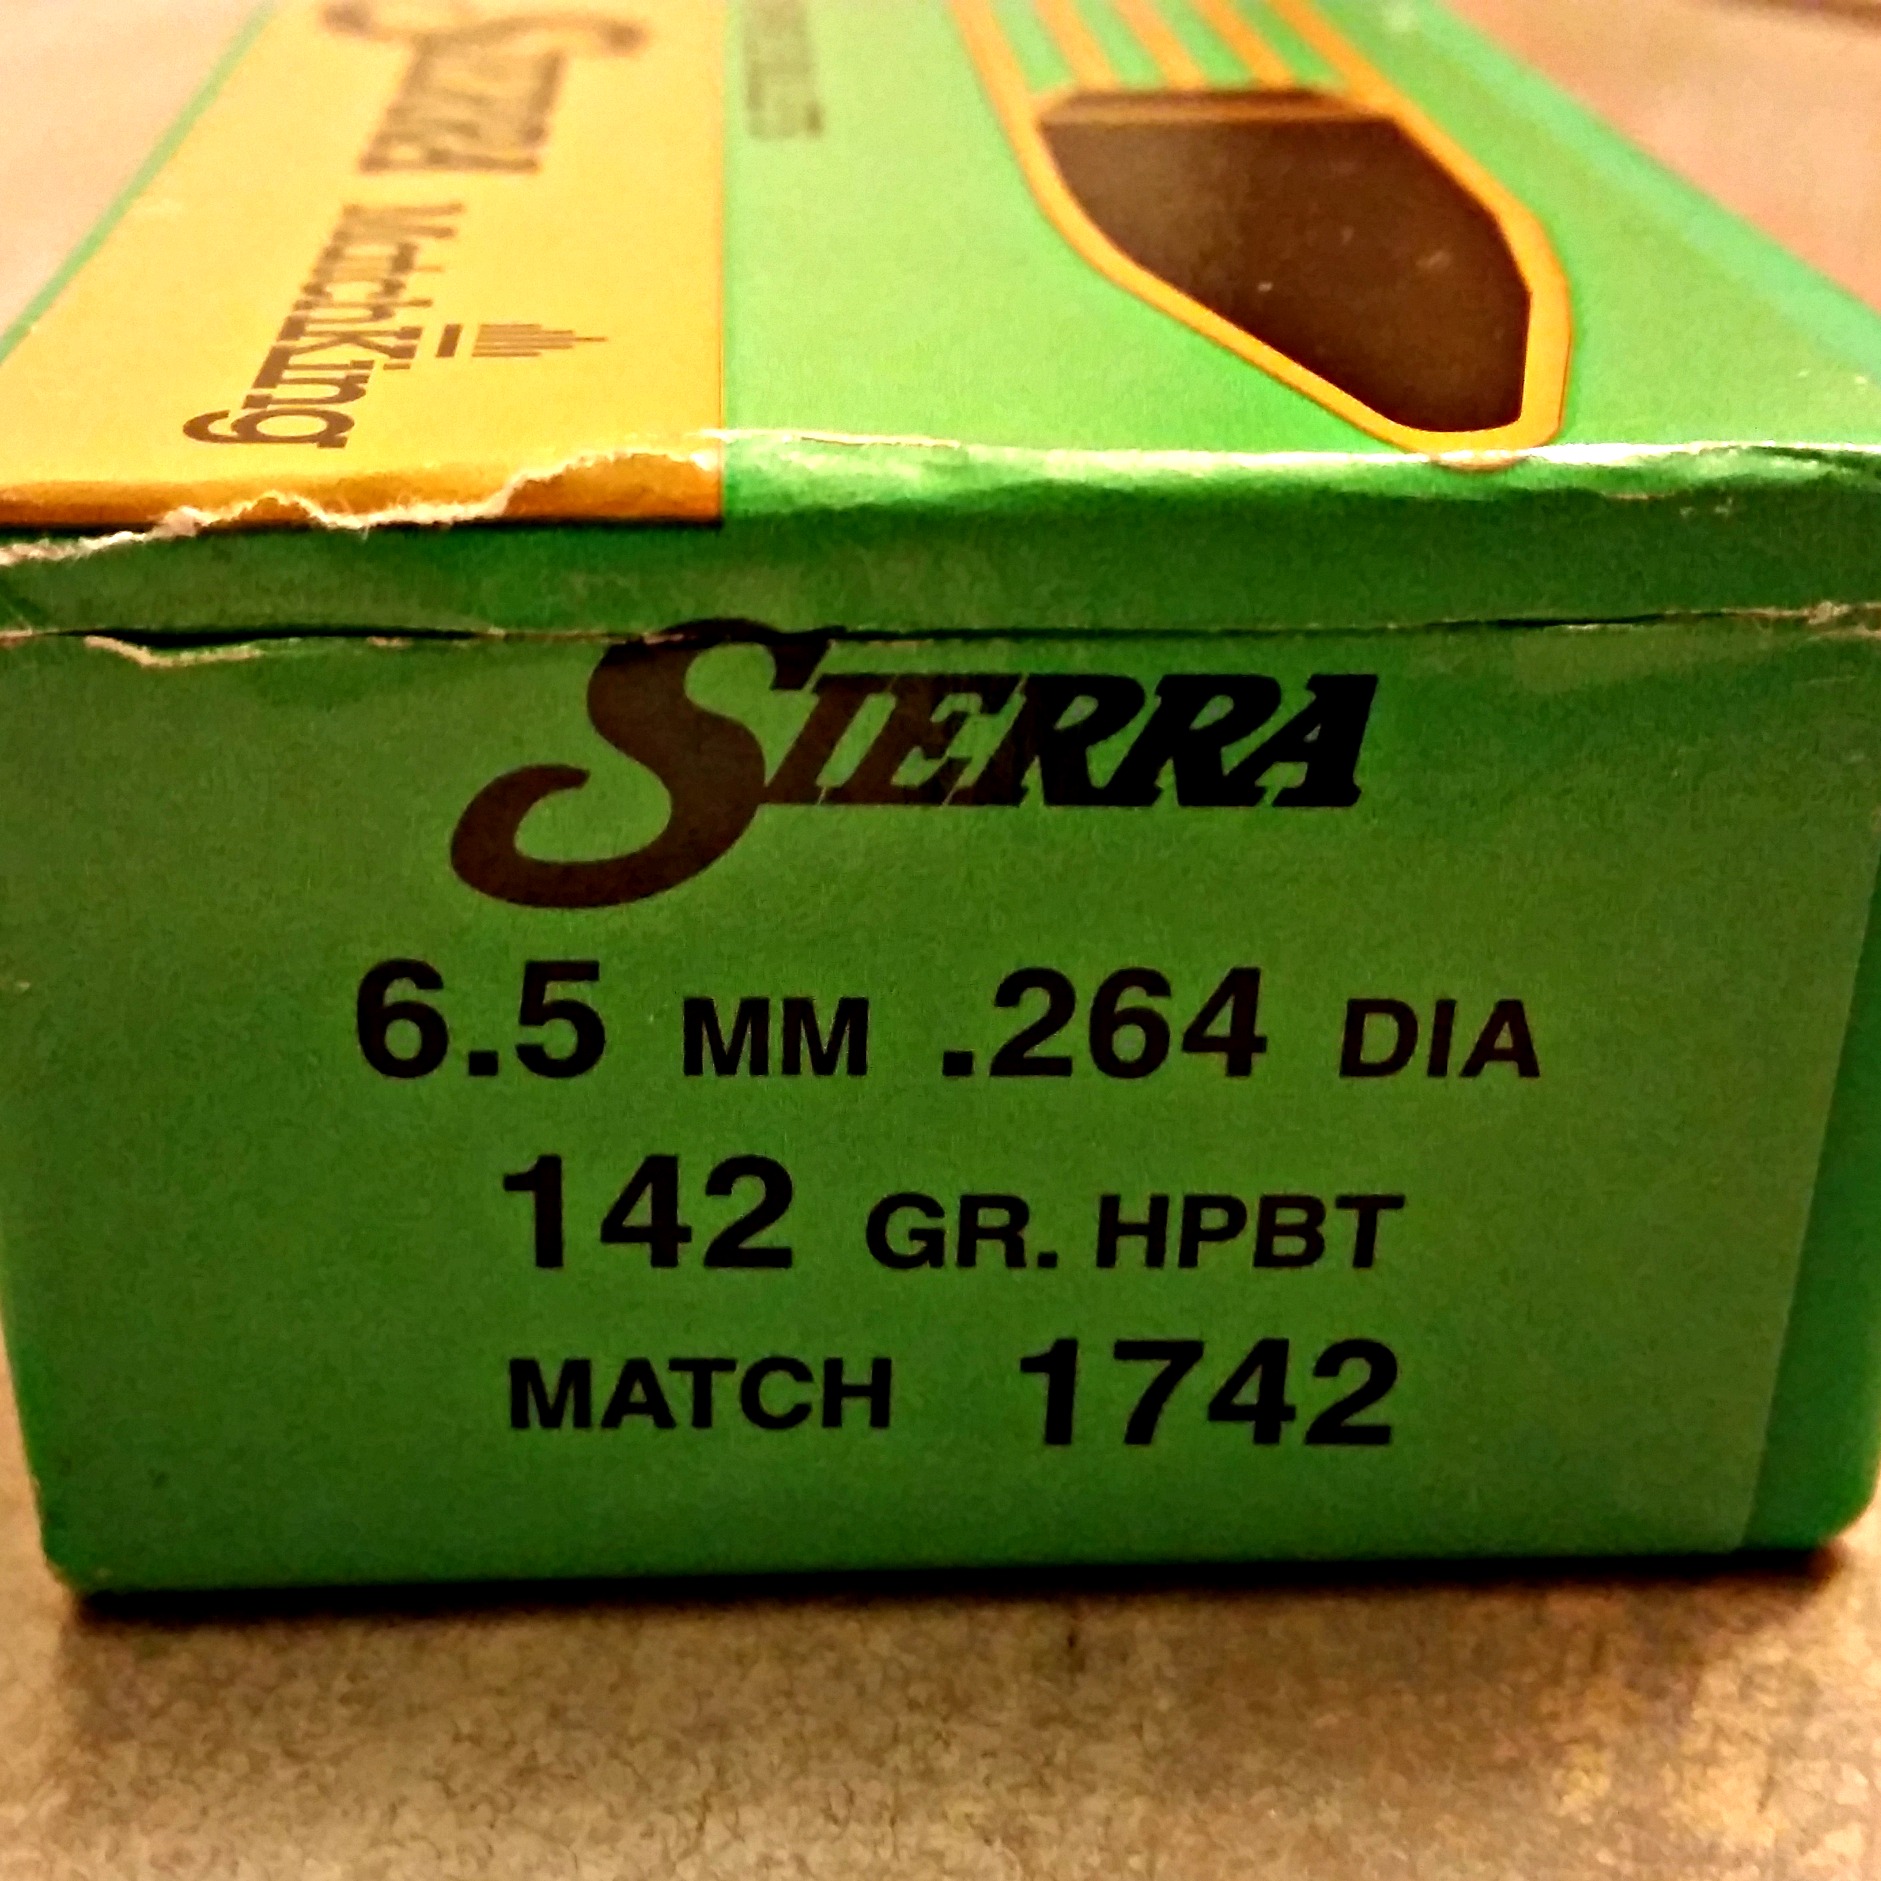
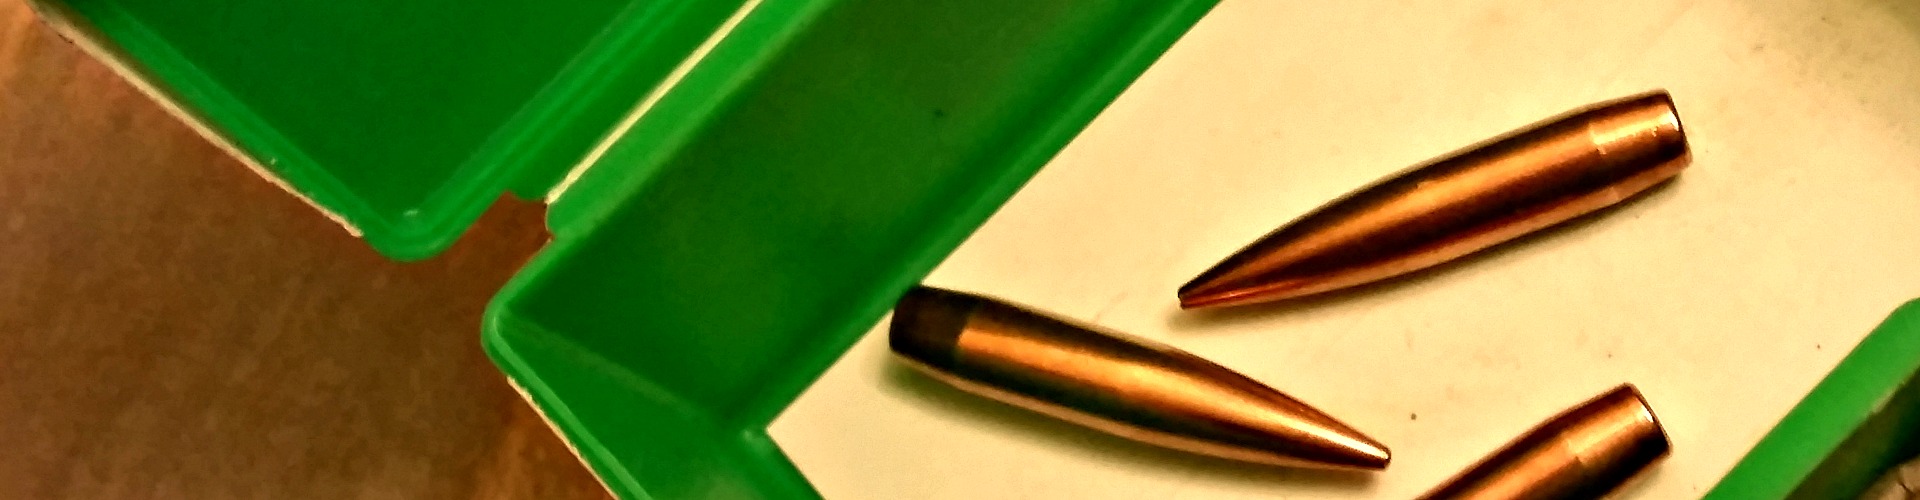
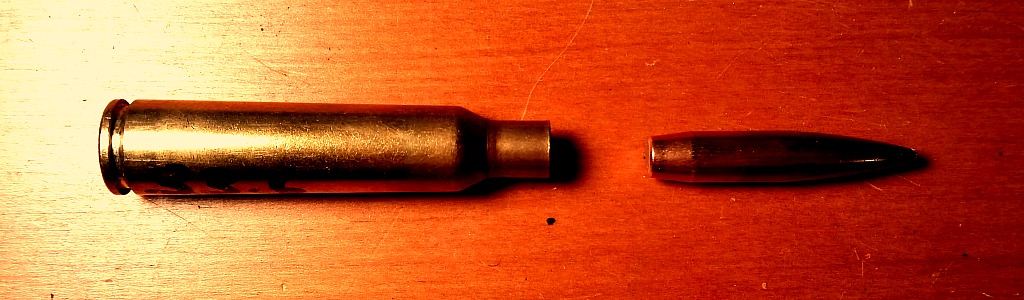
Projectile: SMK HPBT 142 gr
Powder: ADI AR2208 34.7 gr
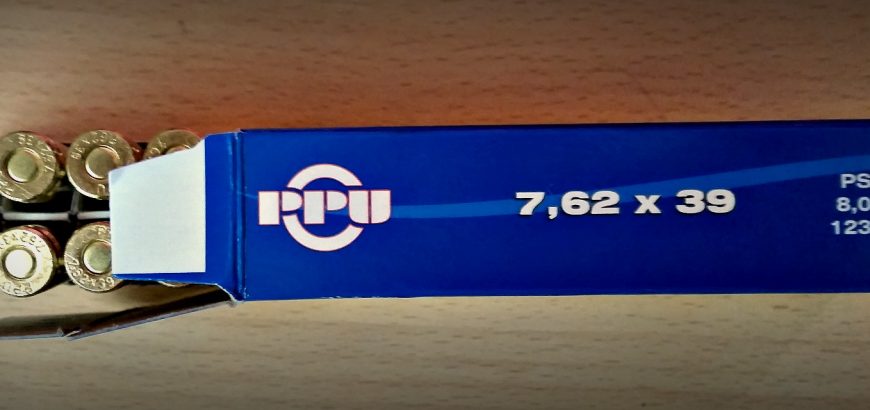
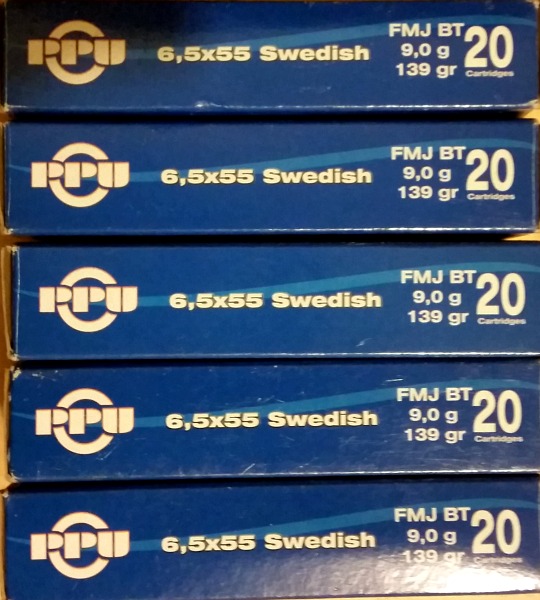
Brass: PPU (twice fired)
Primer: Federal Gold Medal Large Rifle Match

Aside from my wife and I, there was one other person shooting 6.5×55. The most common calibre by far was  .223 Remington, with 14 shooters using this round. There was one .243 and three .270s, with eight .308 rifles as well. The winning rifle was a .222. There were also four other rifles in this calibre on the day, two placing very low in the field and the other two coming in near the top.

The MAE suppressor cut down felt recoil and the loud crack of the rifle, making it a pleasure to handle.

The prizes

The prizes for the shoot are kindly donated by several sponsors, including major Auckland gun stores, as well as private individuals and club members. Also on offer was a one-year membership to the club, as well as a couple magazine subscriptions.

There were some great prizes to be had, including four of these Leupold knives.

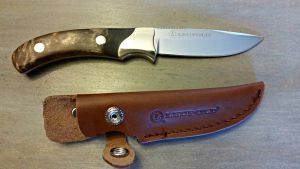
Dotted along the prize table were all sorts of cool items for the garage, range, shed, field or bush. Ranging from knives and a machete to ammunition, books, cleaning products, car accessories and even a leather-working voucher.

Everyone walked away happy, having picked a prize that was probably worth more than the $25 they paid to enter the competition. With free sausages all day, and a lot of shooting to do, it adds up to a very worthwhile day.

With the prizes on display all day, everyone eyes up what they want, and probably spend a fair bit of time vacillating between equally awesome prizes. Last year the knives were first to go, however this year they stuck around for a bit. There were a fair few on offer, and myself and two other members of HSSRC managed to score three out of the four limited edition Leupold hunting knives. The first place junior made a bee-line for the machete, which was clearly something he’d been eyeing up all day.

Whether you only break out the centrefire rifles a few times a year or you regularly enjoy taking your hunting rig out, the NZDA Annual Prize Shoot is a rewarding experience in more ways than one, and is something I’d definitely recommend.

Cutting down a .22

Sporter barrels on .22s are usually long and thin. This means they’re lighter when carried in the field, but they can also be whippy and harder to control than bull-barrelled rifles. Another way to achieve that relative stiffness in the barrel is to reduce the length of it.

I’ve had two Norinco JW-15s, and while the 22.5-inch barrel is okay, the 16-inch barrel is a real shooter. If you head on over to nzrimfire.com you’ll find plenty of people who have taken full length Norincos and cut them down to as little as 13 inches with great success. I guy I used to shoot with cut his down to 14 inches and found no drop off in accuracy.

Thankfully in New Zealand there are no minimum barrel length laws, just minimum overall firearm length rules – which means you can take full advantage of this, and make your rifle more manoeuvrable, easier to get in and out of your truck and pretty accurate to boot. In the video below I’m shooting an old Voere that I bought for parts – the barrel has been cut down to 8 inches and lets out a little burst of flame with standard velocity CCI.

So, what is the trade off with cutting down your .22? Well, you can burn off all the powder in your average .22LR case in about 12 – 13 inches of barrel. However, you still won’t have achieved maximum muzzle velocity. You’ll also get more variation in muzzle velocity, as the longer barrels allow for a more consistent burn, resulting in a more consistent muzzle velocity. While you can still gain a lot more speed out of a longer barrel, 16 inches is often said to be the “sweet spot” for .22s.

.22LR cases on bench
The humble .22LR doesn’t need too much barrel to burn it’s full powder capacity.

After that point, muzzle velocity still increases, but in much smaller increments per inch, and your follow through becomes much more important. I suppose if you wanted to teach yourself excellent shooting habits, a target rifle with a 28 or 30-inch barrel would be ideal. However, if you just want a nice shooter, go for a 16-inch tube, or do it yourself if you have the confidence/competence. Some manufacturers do release 13 and 14 inch options for their rifles (Anschutz has a 14-inch sporter), however, if you’re doing the job yourself, give it the extra couple inches to be on the safe side. I guess I should put my money where my mouth is and trim down that 22.5-inch Norinco… Oh well, add it to the list.

3 gifts you can buy for a shooter or hunter

It can be hard to find the perfect gift for someone. It can be harder if they’re into shooting and you’re not – harder still if you don’t have a firearms licence and can’t legally purchase the things they would like. However, there are a few go-to things you can consider, and they won’t break the bank either.

Things made out of ammo that aren’t ammo

Shooters like things that go bang. However, the next best things might be something that looks like it goes bang. However, not all mementos are created equal. Ask any golfer, and they’ll tell you every year they get terrible golf-club or golf-ball shaped items to bury in a draw somewhere. Every now and then they get something that’s actually kind of cool. It’s pretty similar for hunters.

It's hard to find a cooler bottle opener than this .50 cal case from Gunworks.
It’s hard to find a cooler bottle opener than this .50 cal case from Gunworks.

A barbecue lighter shaped like a shotgun may not get someone’s juices flowing, but a bottle opener made out of a .50 cal. case with a 750 gr A-MAX projectile seated in it might just get the right reaction. Yeah – 750 grains – that’s four to five times the average .308 projectile weight. My wife and I got one for my father-in-law last Christmas – and I liked it so much I got myself one too. The brass is obviously softer than bottle caps and will mark after use, but hey, it looks so freakin cool. You can get them from Gunworks in Christchurch, and because it’s not live ammo it can be sent anywhere. They have other options too.

Another cool ammo-looking option can be cuff links. These can be done poorly or very well, so be selective. The imitation 12-gauge cuff links my wife got me are not only well made, but look pretty damn good too.

A magazine subscription

If you’re significant other or best friend has a hunting magazine lying around but they don’t have a subscription to it, that could be a great option. Look for the subscription page and photocopy or scan it, or find the magazine’s website. It’ll be pretty obvious if you tear out the page…

Make sure to take a picture of the product code so you can find what you need at the store.

While everything and anything can be found on the internet, gun magazines are a great way for shooters to enhance their knowledge of local shooting spots, new equipment or competition results.

Reloading supplies

Well, you can’t buy ammunition for your partner if you don’t have a licence, but if they reload, you can buy them everything they need to make their own. You’ll still need to have ID, as primers and powder are explosives.

How do you know what to get? Go over to their shooting bench and see what’s running low. Make sure to take a picture of the item or the product code to show the guys at the gun store. Also, make sure to shop around. When you’re spending near a hundred bucks on projectiles or a box of primers, looking at different websites or stores can save you around 10 per cent.

Projectiles running low? Gift idea right there.

Should I clean my .22LR barrel?

There are many opinions, myths and vagaries about rifle cleaning. Some will tell you to clean and polish your bore after every trip to the range, others will tell you cleaning your rifle is a waste of time or a bore snake will do the trick. However, one thing’s for sure – maintaining your .22 is completely different.

What’s the difference?

Whether it’s rimfire or centrefire, some fouling is often needed to get a barrel shooting to the same, reliable point of impact. Lead rimfire projectiles are much softer copper-jacketed bullets, doing minimal damage to the bore, and the lead deposits left in the barrel don’t do any harm either. Copper not only wears down the barrel, but leaving it in the bore can lead to quicker deterioration of the rifling after subsequent shots.

So, the question then becomes – if fouling is good and lead isn’t harming your barrel, why would you clean your .22?

This picture shows how a clean barrel walks to its point of impact once it fouls up.

How often to clean your .22LR barrel

I don’t personally clean my barrel very often. The standard is “when accuracy starts dropping off”. And to be honest, I’ve never got to that point. I give my .22 a couple pulls through with the bore snake and some Hoppes No. 9 after a couple thousand rounds – give or take a few. But, lead crud is nasty on the action.

I mainly shoot bolt action when I’m shooting rimfire, which means I can feel when the bolt starts getting stiff or it doesn’t feed nicely. Semi-autos tend get gummed up a bit more, as gasses from firing come back into the action. What to do? Use some bore solvent and angled brushes, cotton swabs or cloth to clean the gunk out. Every now and then disassembling the bolt or action could be necessary to ensure reliable functioning. Some shooters also like to clean up the crown, however, I shoot with a suppressor, so I’m not super-fussed on that score.

If you have any questions or tips for cleaning your rifle – share them in the comments below.

PPU 7.62X39

Product review: Prvi Partizan ammo

Prvi Partizan ammo has been on the market for years – decades even – but has only just started to make an impact in New Zealand. Or so you thought. Abbreviated to PPU, Prvi Partizan as we know it today has been around since the 1940s, although the company traces its roots back to the late 1920s and has had a few different names as wars and politics have shaped Europe.

My Serbian friend tells me it’s pronounced “pr-ah-vi”, not “privvy” as most people sound it out. It translates roughly to “first partisan” and gets its name from the long and thing rifles produced for partisan forces by the factory in earlier years.

War – what is it good for?

Well, most of the sporting arms and ammunition we enjoy today share their history with their military counterparts. A tonne of the most popular hunting and sporting cartridges today are military cartridges from the past 100 years or more, including:

  • 7.62×51 NATO (.308)
  • 5.56×45 NATO (.223)
  • .300 AAC Blackout
  • 7.62×39
  • 7.62x54R
  • 6.5×55
  • 7.5×55
  • 7.92×57 Mauser
  • 30-06
  • .303
  • .338 LM
  • .50 BMG
The price of PPU makes it hard not to stock up.

Not to mention the endless array of pistol ammunition too. Of course the search for bigger, better and boom-ier things has led to a surge in development in the cartridge market today, much of which is driven by shooters who demand a high level of accuracy. Ammunition that used to only be available to wildcatters for varminting or bench rest shooting is now common place in the USA and is making its way over to New Zealand as well. Rimfire is also growing in leaps and bounds with the .17 WSM making waves in the shooting community.

But what about those stalwarts of scrub hunting and cheap and cheerful plinking? The cut down .303 bush guns and the semi-auto fun-makers in 7.62×39? Well, PPU is your knight in shining armour. For those that love shooting their military calibre rifles without breaking the bank, the ammunition produced by Prvi Partizan is worth your consideration.

On the plus side

While you might think Prvi hasn’t been in the New Zealand market for a while, it actually has. If you’ve shot Highland ammo, you’ve shot PPU. It’s the brand they’ve been using down here. In terms of military cartridges, Highland hasn’t been the cheapest, but it’s a step up from the dirty steel-cased stuff from Russia. It’s certainly better than putting corrosive ammo through your firearms, especially if you’re not that thorough with your cleaning.

Annealing marks on .303 and 7.62x39 PPU factory rounds.
Annealing marks on .303 and 7.62×39 PPU factory rounds.

Prvi Partizan ammunition is brass cased and generally considered to be good brass for reloading. Many Swedish Mauser fans rate the 6.5×55 PPU brass behind Norma and Lapua, but ahead of the American-made stuff. In terms of how soft or long-lasting it is, I can’t personally say. I’m on my second round of firing with this lot of brass and haven’t seen anything untoward yet, but we have a ways to go before anything should be cropping up. When I do get my brass into the higher firing counts I’ll post again to let you know, but considering I have over 140 cases for 6.5×55 alone, I doubt that will be any time too soon.

Considering how good the brass is, it’s certainly worth the price. This is especially the case with calibres like the .303 where you might only have a few options, all of which are more expensive. Not only do you get an acceptable level of accuracy out of it, but you have (I’m guessing) between 6 and 10 more reloads out of them – if not more.

What is the cost? I’ve seen the blue boxes cropping up in a few stores around the country and they’ve ranged in price from $31 to $36 for big rounds like the .303 and 6.5×55. The 7.62×39, which I’ve bought for a reloading experiment, runs at around $30, but if you go to the right Hunting & Fishing, you can pick it up for $25. Most stores will give you a bulk discount if you buy a few packets anyway.

How accurate is it? Well, how long is a piece of string? How accurate a particular round is will be determined by many contributing factors, not least of which are shooter skill and the particular firearm in question. The picture below shows PPU 139gr FMJ 6.5×55 three shot test groups, one is about 1.5 MOA and the other is 2.6 MOA. These are shot from my cut-down 20.5″ barrelled Husky M38. The other target, for comparison, is another reasonably priced brand, Sellier & Bellot 140gr SP, at 2.4 MOA.

PPU 139 gr FMJ and S&B 140 gr SP


This is not bad, considering many are happy to get 3 or 4 MOA groups with milsurp rifles and cheap ammo. However, you don’t get many people bragging about S&B brass for reloading. The picture below shows the S&B group with an unfired round for reference. Bearing in mind that the orange circle is about the size of a kill zone on a deer, this is very reasonable accuracy. If these groups were zeroed in, every shot would be a clean kill.

S&B 2.4 MOA group with unfired 6.5x55 round for comparison.
S&B 2.4 MOA group with unfired 6.5×55 round for comparison.

The negatives with PPU

Well, no one on the range is going to look at your ammo tin on the range and think your other car is a Porsche. But, if you don’t mind that, there’s not much to gripe about with Prvi Partizan. So far I have only shot .303, 7.62×39 and 6.5×55 in PPU and each has performed better than I would expect budget ammo to. I also find it to be quite clean, generally speaking.

However, if you’re wanting superb accuracy without hand loading your own ammo, this may not be the ammo for you. I would suggest trying it – your rifle may love it – but you may be better off paying one and a half or two times the price to get match-grade ammo.

0.64 MOA group shot off a bi-pod with PPU brass, Federal Match primers, 142 gr SMK HPBT projectiles and 34.7 grains of AR 2208.

There may also be variations in weight of brass and even wall thickness or hardness. This is pure, untested speculation. The only reason I say this could be possible is that the low price indicates that the machinery that produces this brass may not be as thoroughly regulated or maintained as those operated by Hornady or Lapua. The staff may not be as well compensated. But who knows?

What you may wish to do is individually weigh up the clean and empty brass out of a box or two, and see what the variation is between cases. Some spread is to be expected, but too much could have an effect on reloading. You could also see how much water each case holds to determine case-wall thickness and internal capacity. Anyway, I’ve been managing to get smaller than 1 MOA groups out of this brass, so I’m not complaining.

Overall, I think it is well worth the purchase. The accuracy is good enough for hunting ammo if you get the soft point variety, and there’s certainly a place for it in the safe if you just want plinking ammunition or a source of cheap brass.

Lyman bullet puller with 6.5x55 round in large collet.

Product review: Lyman Magnum Inertia Bullet Puller

It’s an unfortunate fact of life for reloaders – at some point, you’ll need to pull bullets and start again. For me,this happened recently when I made a mistake with my mechanical scale while reloading for 6.5×55. I was tossing up between a press mounted bullet pulling die and a ‘hammer type’ inertia puller, when my mind was made up for me.

As often happens when you’re at your local gun store, you see something that you’ve been meaning to get for ages. For me, it was a bullet puller (as well as some dies, a cleaning rod, solvent, shell holders and more, but hey…). My initial leaning towards an inertia bullet puller was (typically) the cost saving. Most hammers are able to handle a huge variety of calibres, while a bullet-pulling die requires a collet for each calibre you’re pulling.

When I saw the Lyman Magnum Inertia Bullet Puller under the glass counter, the decision was made. Most of the impact-type pullers I’d seen did not cater for larger rounds like .416 Rigby or .338 Lapua Magnum, or even Winchester WSMs or Remington Ultra Mags. According to the packaging – the Lyman does! While I didn’t need to pull a big game magnum round any time soon, I liked the idea that I could if I really wanted to.

Putting it to the test

The Lyman Magnum Inertia Bullet Puller has all the instructions you need on the packaging.

Well, how did it work? Simply and easily. I did make a simple mistake, which I’d be remiss not to share. I didn’t want to mark the plastic of my brand-new-hammer-looking-thing, so I started rapping it on a piece of timber. No dice. Then on a laminate bench. Damn… That bench top now has a massive bulge in it from being hammered into oblivion with no bullet-pulling success.

Resigned to the fact that I had made a dud purchase, I gave it a few quick raps on the concrete floor, and lo-and-behold – success!

The long and short of it

Using the Lyman bullet puller is extremely easy. It covers just about every calibre you can think of and is a cinch to use. You simply select one of the two collets, depending on the calibre you are dealing with. You slip the loaded round into the collet so the rounded edge is facing the primer end. It will sit nicely in the extractor groove.

The next step is to put the loaded round in the body of the hammer, while the collet keeps it suspended. Screw in the retaining cap and give it a few good whacks on some concrete or something to separate your ammunition into powder, projectile and primed case. I found the end cap could come a bit loose, which may require tightening after a couple blows – not a big deal really.

The instructions are on the packaging, including the size of collet you want for various calibres, so the whole process really is super easy.

I don’t like pouring powder back into the container once it’s been loaded for a while. No particular reason, I just don’t. I prefer to know the powder I’m using is 100% what it’s supposed to be when I’m loading fresh rounds. So, for that reason, powder from pulled rounds gets put straight into the hopper and used for plinking ammo. Or, if I have another jar of powder that is almost empty, I’ll put it in there and use fresh powder from a new bottle for my target loads.

Pulled SMK bullet and PPU brass.
My freshly pulled SMK ready for reloading.

The bullet itself is obviously reusable. The primed brass is too – unless, you are taking your round apart because of an issue with the primer. Now, do not try and decap an unfired primer. I shouldn’t need to explain this, but it’s basically crushing the primer from the anvil end – which will make it go bang. Not fun for your decapping pin. Not fun for you. The best way to get a primer out so you can reuse the brass is to fire the round in your rifle. You can simply load the primed case into your gun and pull the trigger (outdoors, with the muzzle pointed a safe direction – i.e. the same way you would treat it if it were a normal round). Now you can decap.

What you shouldn’t do with an inertia bullet puller

Pulled bullet with powder and case.
A pulled bullet resting in powder.

Lyman recommends on the packaging to not use the product without safety glasses. There’s not much danger in it, but you can guarantee that if anything is ever going to go wrong, it will be the one time you’re not wearing protective gear. So, as with your regular reloading (because you’re working with explosive components), chuck on some safety glasses.

You should never try and pull bullets from rimfire ammunition. It will go bang. You will regret it.

You shouldn’t expect perfect bullets if you’re using projectiles with plastic tips. Kerry from thebloke.co.nz tells how his Nosler Ballistic Tips were damaged when using this exact same puller. Bear in mind, when a bullet is moving at supersonic speeds, there is a cushion of air in front of the projectile, which means slight deformities aren’t the end of the world. This is why hollow points aren’t less accurate than FMJs. They are often more accurate because of the weight distribution.

The collet sits in the extractor groove, holding the round in place.

That’s the theory behind Sierra Matchkings anyway, and it seems to be working well so far. So, while I wound’t mind if my lead- or plastic-tipped rounds got a bit of a crumple in them, I wouldn’t use them for target loads. Repeatability leads to accuracy. I would use rounds like this for hunting at normal ranges or general plinking or practice – they’ll still do their job and expand on game.

If you are concerned about the condition of the your match rounds or long-distance projectiles, a press-mounted bullet puller might be what you’re after. However, I have used the Lyman puller for SMKs, and it’s worked out just fine, with no damage to the projectile tip that I can see.