
Guided hunt with Richard from Balnagown Hunting

I think I need to start this article off by saying my wife is awesome. Not only for all the usual reasons, but also because she’s very understanding of my shooting habit (habit, not hobby – I am addicted). So, for Father’s Day this year my one year old son, with a bit of help from my wife, booked me a hunting trip with Richard from Balnagown Hunting.

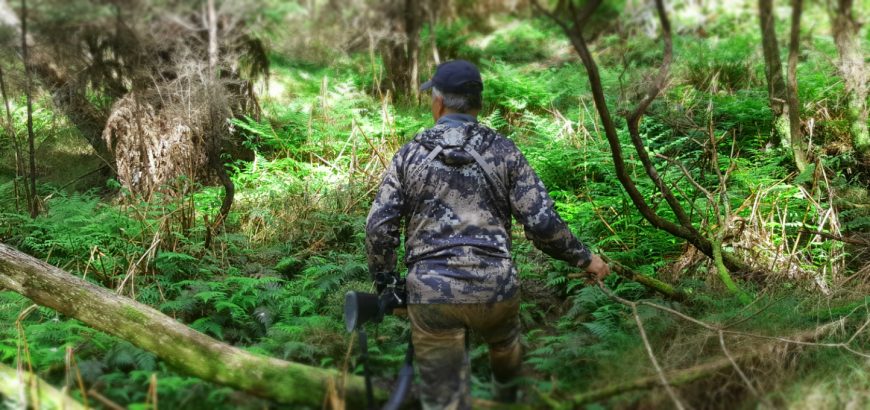
Before the start of October rolled around, I was able to get out for a day with Richard, and spend some time on his amazing property, appreciating some great game animals and other wildlife.

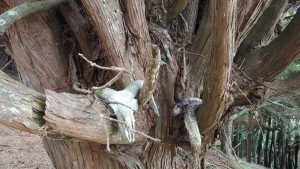
I’d already been to Richard’s place, when I attended one of Kerry’s Deer Processing courses, where Richard shared his knowledge on how to gut and skin a deer efficiently. Country Meat Processors were also there, and showed us how to butcher an animal that had been hung for an appropriate length of time (i.e. we didn’t butcher the deer we had just skinned).

Anyway, I digress. I punched the familiar address into my phone and commenced the 1 hour 13 minute drive from my place in Pukekohe, to Balnagown, which is just a bit further than Kaukapakapa.

Richard assured me beforehand that he had everything I needed, so don’t go out buying new stuff if I didn’t have anything on hand. This is great for any new hunters who don’t have the spare cash to get flash camo gear, or who don’t know what they might want to invest in long term.

Is this what they mean by finding "sign"?
Is this what they mean by finding “sign”?

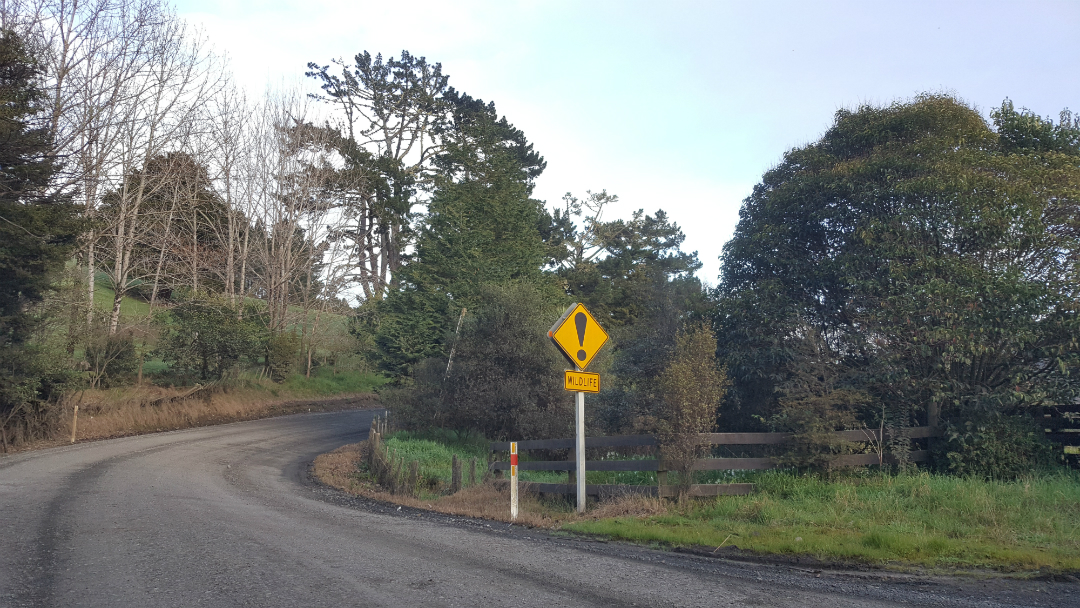
However, I came fully prepared and met Richard at the Wool Shed, where we compared our Tikka rifles and had a general chat. He took me through his safety and hunting procedures, focusing on when to load up, who will be loaded at what time, and when your finger touches the trigger, as well as reloading immediately after taking your shot. After signing in and enjoying a coffee, we checked each other’s rifles were unloaded and went for a walk.

Richard had been telling me about some previous clients who had spotted a deer 5 minutes into their hunt and wanted to take a shot. Of course Richard told them to hold on, and get a bit more out of the experience than a 5 minute walk into the pines. He reckons they were fishermen, and that a catch in the first 5 mins certainly wouldn’t be thrown back. And I get that, but after putting so much time and effort into preparing for a hunt and a hike through nature, shooting in the first 5 mins and heading home within an hour seems like a waste of an experience to me.

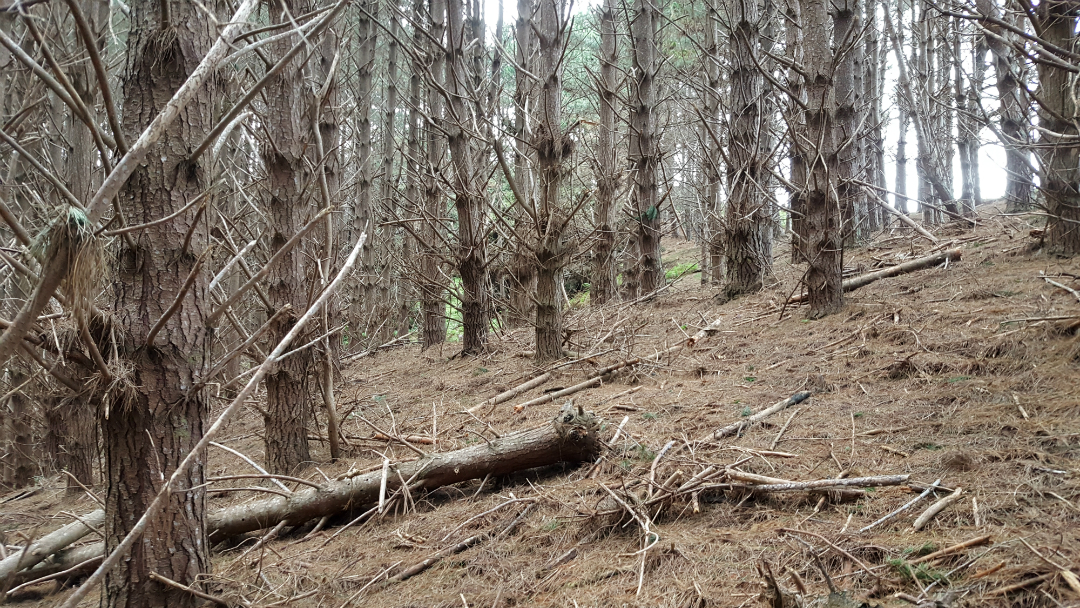
Well, true enough, we bumped into some deer within the first 10 minutes. We came across a couple that Richard spotted with well-trained eyes, and we watched them for a bit before moving on. He pointed out some does and fawns in a paddock as we progressed along the edge of the forest/bush hunting area and rounded our way into a block of pine that Richard planted when he first bought the property.

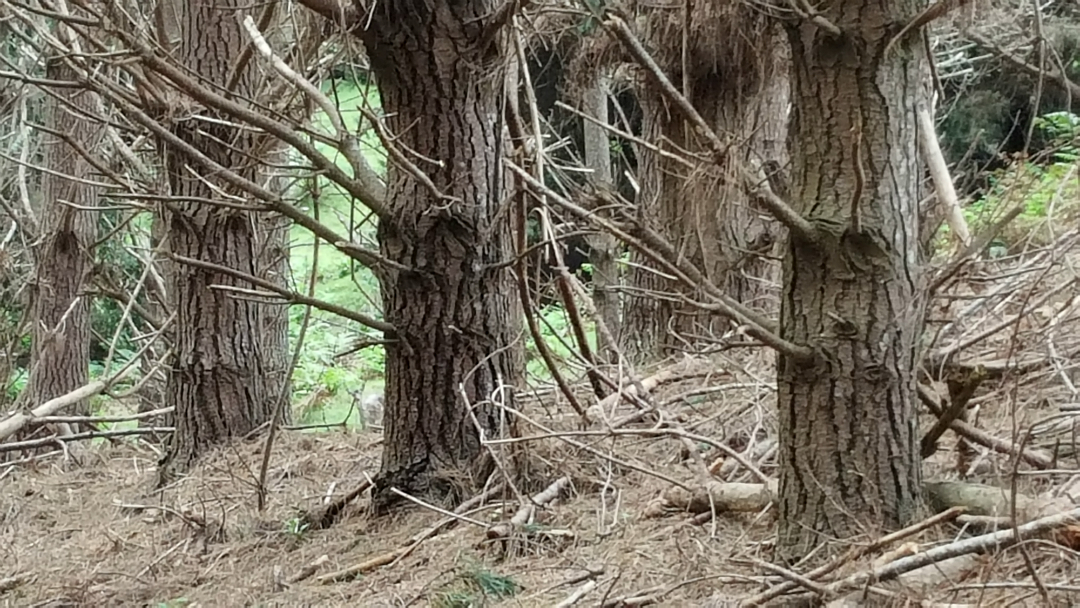
The well-established trees and dry, brown pine needles provided perfect cover for the fallow deer in between their winter and summer coats. In fact I spotted a buck across the pine block, but he was so well camouflaged that I had to check with Richard if I had seen right, or if my eyes were deceiving me.

See a deer?
See a deer?
How about now?
How about now?

As we exited the pines along a ridge, Richard shared his technique for spotting deer in a valley from behind a ridgeline, without being made out by the deer. Not only the deer down there, but also the animals across the valley on the opposite shoulder, who might see us and bolt, alerting our quarry to our presence.

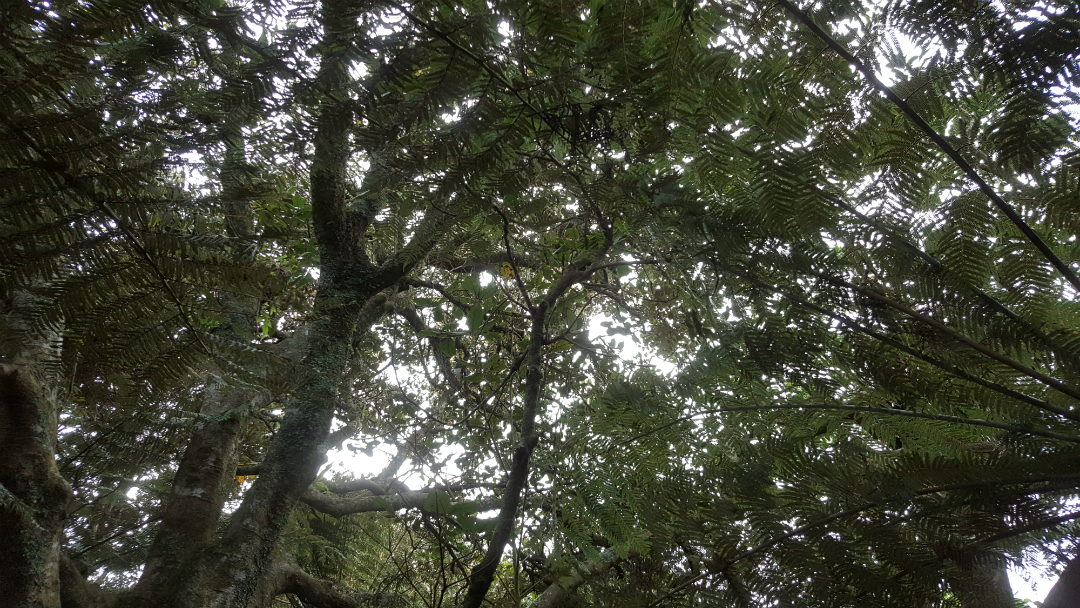
We could see a few animals here and there across the valley and around the opposite ridge, and we decided to keep going around the edge of the property, through some native bush, and circle back to a purpose-built blind where we could hopefully spot some animals to stalk up on.

We kept low as we transitioned from the pine block over the spine of the hill and into the bush. We spotted some fat wood pigeons and had a chat about possums and rats, when all of a sudden we saw ahead a beautiful doe, on the larger side, standing broadside in the middle of a clearing. We hushed and kept still, observing the animal and seeing if she had spotted us.

Watching and listening under the native canopy was great - try spot the fat wood pigeon!
Watching and listening under the native canopy was great – try spot the fat wood pigeon!

Unaware of our presence, she continued to graze and Richard whispered, “That’s not what we’re after.” We continued to observe for a couple minutes. “Don’t worry,” I eventually replied. “I’m not in a hurry.” I was there for the full experience of Richard’s guidance, and there was still plenty more ground to cover. From what I had seen of Richard in the Deer Processing course, I knew this man had a wealth of knowledge to share. I certainly wasn’t going to get gung ho and pick off an animal an hour in, just to pack up and get home by lunchtime.

We quietly moved off into the bush and made our way south west, keeping our eyes open for sign and animals. After a while we came to a clearing with some very fresh droppings, obviously where some animals had camped the night before. Richard quickly spotted a few deer amongst some dead gorse. I can’t reiterate enough how good his eyes and instincts are. It took me an age to find them, looking off in completely the wrong area. Even when I did find them keeping them in sight amongst the dead, dust-coloured gorse was definitely a challenge.

There was a buck flanked by two spikers, and Richard urged me get my rifle in place and crawl up behind it, while he kept low and spotted for me. The wind was in our favour, gusting gently at around 7 or 10 mph, straight into our faces. There was no way they could smell us.

We waited about 10 or 15 mins for them to move into a clearer patch amongst the gorse and ti trees, when Richard told me to quietly and slowly shift behind another bit of vegetation where I’d have a better shot. Once in position, I realised I had nowhere near enough elevation to make the shot at the deer which were higher than us, unless I want to try an unsupported shot, but there’s no way I could hold that position for 10 or 20 minutes and make a good shot.

I whispered that I was going to shift back a foot or two, so my body was on a better incline behind the rifle. With the bipod at full extension, I now had a good view of the deer. We waited another 10 minutes, sitting silently and stationary, with the wind in our face. Everything was in our favour, with nothing to do but wait for a clean shot.

Then they bolted.

The buck did a quick sidestep and ducked into the bush and out of sight, with the two spikers hot on his heels. Richard laughed. “They’ve got a sixth sense.” He said. And they certainly do. He couldn’t have heard us or seen us, but something didn’t feel right and he decided to get out of there. “That’s why he’s still alive,” Richard said, “Clever buggers…”

Richard has a knack for decorating.

Richard’s admiration for the animals he hunts was clearly evident throughout the day, as he discussed how intelligent and aware they were. His knowledge of their habits was equally impressive.

We picked up our bits and pieces and moved off along the edge of the property to see if we could come across the three males again. We did spot some very fresh sign, but they were gone. And the cheeky sods obviously led us through the gorse. Thankfully not too much of it. We continued through the bush, and pushed through to a large downhill slope, thinly dotted with trees. At the bottom of the hill I could see Richard’s blind.

We meandered our way down and took a seat for a while, glassing the valley to see if there were any animals worth stalking up on. There were a few groups of does and fawns, but no good game animals immediately apparent. We had a bit of a chat and Richard told me about some of his older clients who aren’t up for a long trek through the bush, and how they sat patiently in the blind with coffee and snacks and waited for deer to come into range. Not what you think of when you think of New Zealand hunting, but hey, if I still wanted to get an animal every year when I’m 80 and my legs wouldn’t take me through the bush, maybe I’d do the same.

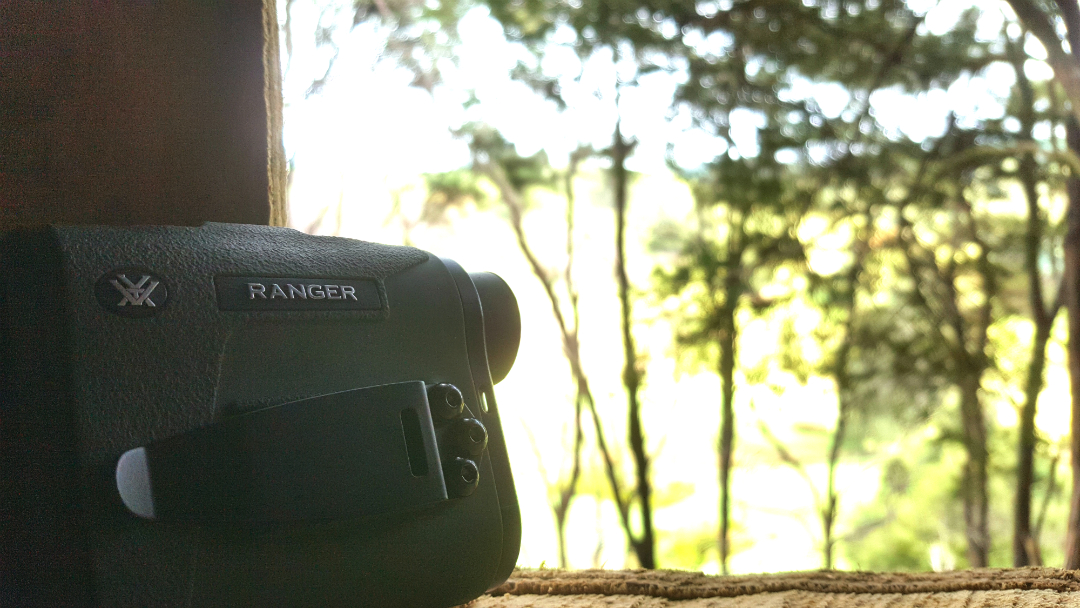
I was told to take a rest while Richard went off to scout for a few minutes. I pulled out my Vortex Ranger 1500 and spent some time practising estimating distances, and then confirming with the range finder. I won’t say what my strike rate was, but I am improving! I had a bit of water and watched as two swallows decided to play fight around the blind.

The Vortex ranger proved handy throughout the day, lining up potential shots, and was also good fun to test myself against during down time.

After a while, I began to wonder where my guide had got to. He was quiet, and invisible. Eventually, he came back, but the report wasn’t good. Although he managed to sight a fair few animals across the valley, no groups had any decent spikers, they were mostly concentrations of does and fawns.

So, we made the decision to leave the blind and climb up a ridge to look into the next valley. It was good to get moving again, even if it had only been 20 minutes or so. It wasn’t long before we were out of the trees and covering some open ground uphill to our next position. All the while, a trio of Paradise ducks had decided to fly overhead in a holding pattern, squawking away our position to every creature under the sun. Before long, we had crested the hill, taking care to peek over the top, looking for game.

After a couple furtive glances over the top, we concluded everything on four legs had retired beyond the tree line, and so we moved on a bit before taking a seat and glassing the valley. On the way, Richard showed a patch of fence that had seen better days. “Bucks have been fighting here,” he pointed out.

We sat for a while, looking over at a handful of goats to our left, seeing if a deer or two would give away its position by interacting with them. No such luck. Keeping an eye on the tree line across the valley, we saw a deer come out a couple times in the same spot, but no further activity. We glassed a bit and I played around with the rangefinder, estimating distances to where we saw the deer, the opposite side of the valley, and checking out the goats too. We took a guess at the distance to the goats, and were both surprised it came in at 103 metres.

“Doesn’t seem like a whole rugby field between us and them, does it?” I asked. “That’s just what I was thinking!,” replied Richard. It was interesting to note how the changes in terrain made distances hard to estimate.

We continued to see if there’d be any more activity at the valley floor where we saw the deer before, swapping stories. Richard told me how he had come to acquire his land, and how different it was trying to get a home or a slice of paradise back then, compared to now. Both challenging times, but different challenges. We even ended up talking politics, work, and all sorts of nonsense. The deer didn’t come out again and the goats weren’t being the deer-Judas they might have been.

So we picked up again, and rounded the shoulder of the hill, getting ready to tackle this last stand of native bush before heading in for lunch and trying our luck again. After getting under cover and out of the midday sun, it wasn’t long before our eyes adjusted and a couple young spikers made themselves apparent. Richard confirmed I was loaded and indicated for me to take the lead and begin stalking cover to cover to get a clear shot. As I progressed to cover, trying to keep the trees between myself and the deer, I realised we had walked around into the wind, and it was no longer in our favour. Thankfully it was still for the moment, but any puff of wind would carry our scent right towards our waiting quarry. The wind was the least of our concerns, as the closest spiker saw or heard a bit of movement from my direction and decided to skip along a bit.

They hadn’t seen me yet, but they were aware of my presence, or at least the presence of something that wasn’t there before. The pair went down towards a stream, putting more cover between themselves and my rifle. Over the next ten minutes of tiptoeing through the fallen leaves and branches I spotted them twice more, but only briefly each time, before they got spooked enough to run off where I couldn’t see them or catch up to them.

By this point I had descended about halfway down to the stream, and Richard was waiting a bit higher up towards the tree line. I signalled to him to see if he still had eyes on the two animals, but he shook his head. I wandered up to his position, thrilled from the chase, but annoyed I couldn’t quite close the gap.

We headed towards the bottom of the valley, and Richard gave me some pointers on stalking while we walked down. “Don’t look at the deer,” he said. “You know where they are. Just walk directly to your cover, keeping the tree between you and them – you can re-check their location when you get there.”

We talked a bit as we walked, but mostly in a low whisper. There were plenty of animals in this patch of wood, taking shelter from the heat of the day, browsing amongst the fallen leaves. Some movement ahead revealed the location of a few deer.

Right. On point again.

We weren’t far, maybe 150 metres away when we spotted the group moving around their grazing spot. I went forward, remembering Richard’s advice, moving from cover to cover in a straight line. Richard stayed back with his binos, keeping an eye on the deer. I turned back once I had reached the small group of trees to see if Richard still had the animals in his sight. He had his phone out, taking pictures or a video of me approaching the group. So I took that as a yes. No pressure!

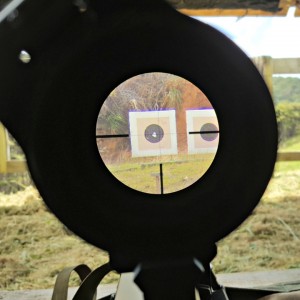
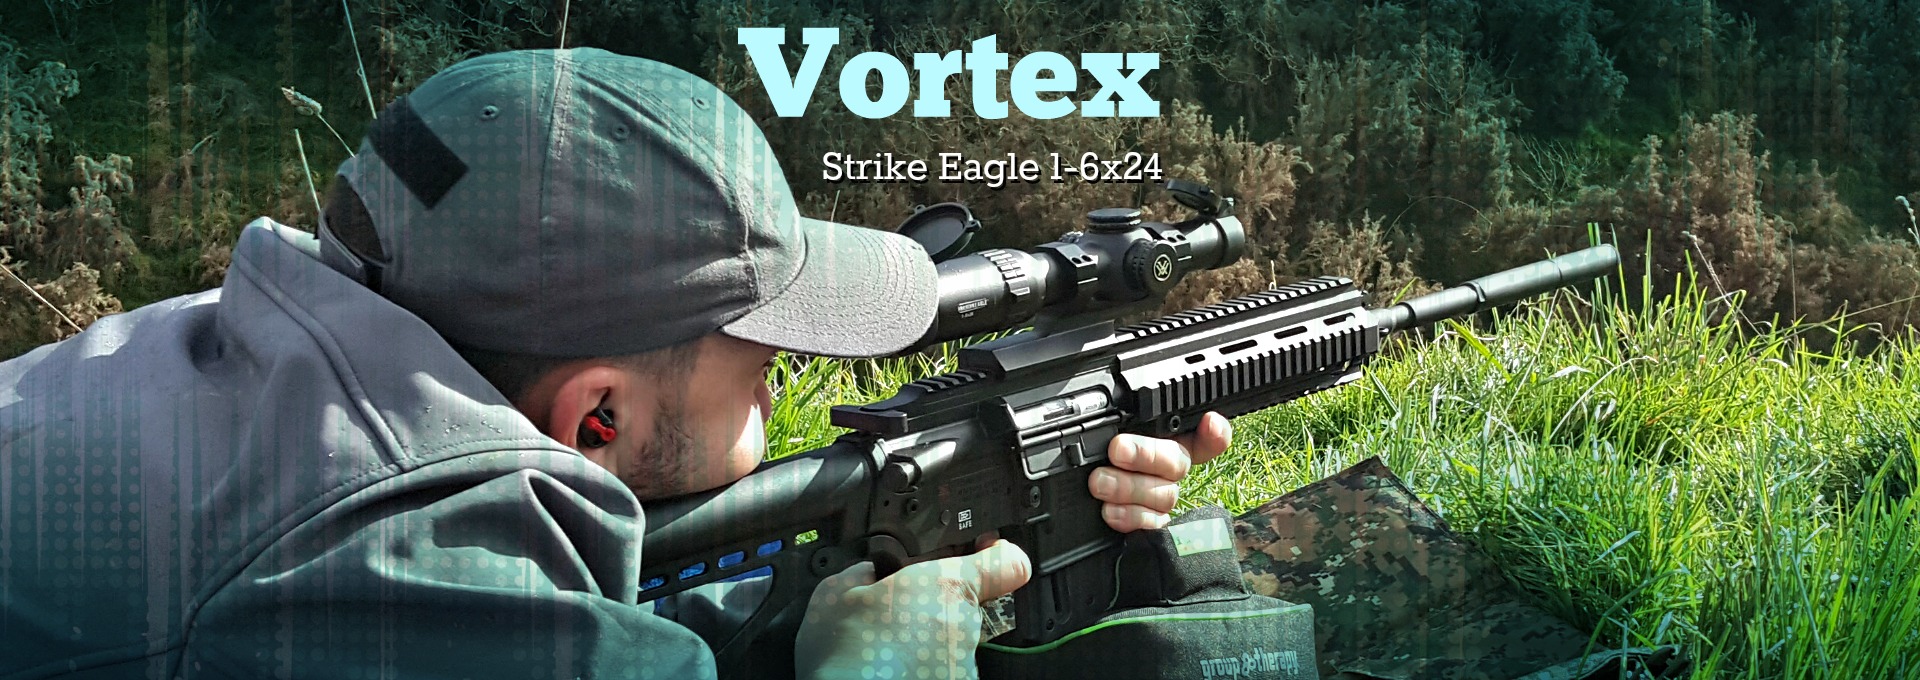
From where I stood, I was definitely close enough to take a shot. I knelt down next to a small tree, holding the forend of the rifle against the trunk with my left hand, creating a rough and ready support. I looked through the Diamondback 4-12×40 scope, and moved the magnification ring up to about 6 power so I could get a clear picture of the deer amongst the dry, brown foliage. I had a quartering shot on a smaller animal, but it didn’t feel great. The deer was moving around slightly as it nosed through the leaves and undergrowth. I didn’t want to take a desperate shot and risk shooting it in the hind quarters if it decided to turn. I knew the 140 gr ELD-M was leaving my 6.5×55 fast enough to shatter the leg and hip bones if struck there, meaning the deer wouldn’t get far and a follow up shot would be needed, but I preferred to make a clean shot that would minimise suffering for the animal, and do less damage to the meat as well.

As I was thinking all this, the deer made up my mind for me and turned to follow a couple old does off to my right. I tracked them in my scope until they came to a stop, but now I had a new problem. The multitude of native trees made for great cover for me, but also got in the way of a clean shot. Time to move.

I headed towards another small group of trees that would keep me from view, but allow me an unobstructed view of the browsing deer. I was almost to my chosen cover when a smaller doe turned around a tree, and looked straight up at me. She stood stock still. Okay, she hadn’t seen me, but she certainly saw or heard my movement. Now I had a decision to make. This young deer obviously hadn’t developed the experience of the older animals, and was still curious enough to try and figure out what was going on, when a deer a couple years older would have done a little jump and buggered off, taking the whole group with them. How much time did I have to take this shot? There was no way to try and take cover and wait for the group to present a better animal. The ponga next to me wasn’t exactly going to hide my 6’2” and 100kg frame.

Standing square on to the animal and with no support in sight, an offhand standing shot was not looking like a great idea, as I would have been way to unstable. Taking the time to move my feet into position and raise the rifle would be all the time the doe needed to make up her mind that she didn’t like the look of me. So, I tried the opposite. I slowly sat back, keeping my upper body as motionless as possible. I felt my water bottle get in the way, and wasn’t sure if I’d get a good seated position with it hanging off the back of my belt. Screw it, I was going to try anyway. I put as much weight on the bottle as possible without making a noise or unbalancing myself. Not bad. I won’t put my water bottle there again, but I was stable enough.

I was still square to the deer, with my feet out in front of me. I slowly lifted the rifle to my cheek and got my elbows settled into the tops of my legs, just behind the knee caps. Feeling pretty stable and good about my position and shot, I took the Tikka off safe with a slight move of my right thumb.

All of this positioning took seconds, even though it felt like I was moving at a glacial pace. I now had a good view. I felt calm and my breathing was good, as I had taken my time to settle into the shot. The young doe continued to look in my direction, but still not quite making me out amongst the low scrub.

Looking through the Vortex scope I could see the deer standing basically broadside to me, on a slight angle, with her head up and looking in my direction. I definitely only had a few seconds to decide on taking this shot or giving away my position and letting the group get away. An older doe walked behind the one I was glassing, and I was tempted to switch targets, given her much larger size, but the small break in the trees that I was aiming through wouldn’t allow me to shift enough to the right. The older doe moved on, heading towards my right, and I continued to check out the smaller animal.

There was a something in the way of my shot, right around the heart and lungs. I backed the scope out to 4 power and got a bit of a better focus, given the short range I’d stalked up to. The brown blob in my way was just a bunch of leaves. That’s fine, I knew where this shot was going, I could see enough of the animal. I focused on my breathing for a second, exhaled and squeezed the trigger on my Tikka.

The sound of the shot sent the rest of the animals running. I counted 6, Richard reckons 7. And I only saw 2 or 3 when stalking in. Damn these animals can camouflage. The doe dropped on the spot, falling backwards into the leaves, exposing her white belly. I watched her, knowing she wasn’t going to move at all, but I remembered to reload again anyway and continued to watch the animal for a few seconds. Richard walked up and congratulated me on the shot, shaking my hand after I had unloaded the rifle and picked up my stray piece of Norma brass (wasn’t going to leave that behind).

I put the magazine and brass in my Hunter’s Element pouch, which sat on my left hip, and pulled out the Vortex Ranger 1500. I placed the illuminated crosshair over the white belly of the doe – 53 metres. No, not a long range shot, the challenge was in stalking up close to the group. I was happy with that. I could only imagine the thrill of the chase for a bow hunter, who gets within feet of his prey. Speaking of which, Richard was talking about opening up a bow only hunting area, but that’s another story.

I walked over from my shooting position, and inspected the animal while Richard took a couple photos for me. As I was walking over I could hear a motor start up and a quad bike heading in our direction. When I got to the deer and inspected the shot placement, I was happy with what I saw. Below the spine and in line with the shoulder, the shot, taken from a higher elevation, had passed through the lung and left a decent sized exit hole on the other side, gushing blood from the wound.

A decent exit wound on this lung shot, thanks to the Hornady ELD-M.

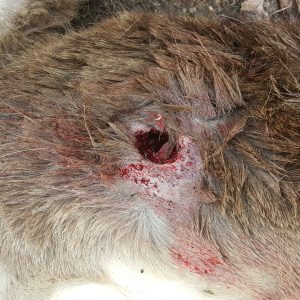
The 6.5mm 140 gr Hornady ELD-M travelling at 2740 fps was probably overkill for this size animal, and a .223 or .243 could easily have done the job, but I was happy with the clean, emphatic kill.

We only had a 100 metres or so to go the edge of the tree line, were Richard expected his son was driving their quad to meet us. We dragged the deer downhill, talking about shot placement and other bits and pieces as we went. I was still buzzing from that stalk.

We got there in a few minutes, and did a final unload and show clear, as Richard’s son pulled up on the quad. He had been preparing lunch when he heard the shot, and decided to come and pick us up. The deer was tied to the front, and we climbed on the back with the rifles, heading towards the hunting hut where we had previously done the meat processing course with Richard, and Kerry from The Bloke.

As we pulled up, there was water on the boil for a cup of coffee, and a good ol’ Kiwi BBQ spread being put on. Our timing couldn’t have been better! I washed the blood off my hands, took off my water bottle and belt bag, and sat down for a hot meal and a coffee with Richard’s family. We discussed the day’s events and other items, and before the others left and Richard and I got to gutting and skinning the deer. It had been a while since I had seen Richard’s pretty awesome technique, so I was glad to get another opportunity to learn this part of his process. If you’re ever looking to learn a bit more or refine your gutting/skinning method, one of the Hunter Education courses is certainly worth the time and money.

We packed the carcass into a vehicle and cleaned off our knives, hands, and the covered deck area where we had hung up the deer. I received a quick tour around the hut and some new “glamping” accommodation Richard was building, overlooking a waterfall and some native bush. From there, we headed back to the main house and my vehicle, my day of hunting complete. Given that I was going to be back in the area in a week, Richard kindly offered to take my deer down to Country Meat Processors in Kaukapakapa for processing into steaks and mince.

Overall, the day was fantastic, and I can see how Balnagown Hunting attracts so many repeat customers. I determined before I left that I’d definitely be back, maybe taking my wife for her first hunt.


Refining your reloading process

There’s something about shooters, and reloaders in particular – we are always striving for the next best thing. There’s always another gun to add to the collection, or another chambering to take our hunting to the next level.

When it comes to reloading your own ammo, this dissatisfaction with the status quo is both a source of frustration, and an aid to achieving ever-greater downrange results. It also means we’re always learning. And, to no small extent, it also keeps the industry moving, and is probably often subject to marketing and other trends.

I’ve recently acquired a progressive press to load 9mm for IPSC and 3 Gun, and this is going to open up a whole new world of reloading refinement for me. However, I’m still making tweaks to my single stage reloading process.

Hot off the press #dadjokes #hornady #norma #lee

A post shared by The Gun Rack (@gunracknz) on

Rotating brass between sizing steps.

Adding new steps to your reloading regime

For example, I’ve started rotating my brass in the die when neck sizing over an expander button. Necking up my shiny new Lapua 6.5-284 brass to straight .284 Win, requires a lot of force (comparatively) and imparts stresses on the brass. To ensure greater concentricity and (hopefully) extended brass life, I lower the handle until I feel resistance and the neck has opened up, then I back off and rotate it roughly 90 degrees. I repeat this process twice more, opening up the neck further each time, until the neck is completely sized and the brass is completely inside the neck sizing (NS) die. Lastly, as I back it out, I rotate the brass once more as I pull it back over the expander ball.

For those who want to know, I am currently neck sizing my brass with Redding Competition dies, and I am seating my 180 gr Berger VLDs with the Forster Bench Rest seating die. The combination of these two seems to be producing some excellent results so far. I have the Forster die set for the Bergers, and then the seating die that came in the Redding set is used for practice rounds or trying out new loads.

I have found a noticeable difference in the concentricity of bullets seated with the two different dies. And that’s not saying Redding is terrible and Forster is good. The Redding die seats very well, but the Forster die seats exceptionally well. And you would hope so, given the extra cost and the fact it has “benchrest” in the name. The Forster die I bought also came with a full length (FL) sizing die, which I will use should the brass ever need a reset.

One more thing I will probably add to the reloading repertoire, is annealing. Chris recently did a review on the AMP machine, and I think I may ask him to give my Lapua brass a once over, after it has all been sized up and fired at least once. Given the stress neck sizing up imparts on the brass, it would be good to soften it up again.

Now, you don’t need incredibly expensive dies to achieve great concentricity. My 6.5×55 loads for my Tikka T3 are neck sized with a Lee Collet die. This die was a previous addition to my reloading bench, after I full length sized for a while with RCBS dies, and then moved to a Hornady NS die to try improve accuracy in this rifle in particular.

The Lee collet die is very different to dies that use an expander button, in that it uses a set of compacting jaws to push the brass over a mandrel to size it. Firstly, this means no more lubing cases – that in itself was a reason to give it a go! But, I also find it works the brass much less, and keeps the pressure completely even on the neck when sizing it. It does produce less neck tension, but if you want more, you can back off, rotate the brass and size again. The one key to really good ammo when using this die, is consistently applied pressure when lowering the arm of the press.

So, to increase the concentricity of ammo for this rifle, I have picked up one of Nathan Foster’s tricks, and I start seating the projectile (140 gr Hornady ELD-M), back off, rotate the case 180 degrees, and then complete the seating process. For seating, I’m using an RCBS die, which is quite standard, but does a great job.

Different types of sizing dies are great to experiment with and introduce to your reloading routine.

Removing steps from your reloading process

If you keep adding steps indefinitely, you’ll end up with a very time-consuming process at the end of the day. So it’s important to also consider which steps are not giving you much value.

For a while, I cleaned my brass every couple of reloads. This is okay, and doesn’t add too much time, but it does mean adding a different step into the process. One of the benefits of ultrasonic cleaning, or tumbling with wet stainless media, is cleaning out the primer pockets – which means you need to decap your brass, which is usually part of the sizing process. But another benefit of cleaning your brass is removing debris that would mark or wear down your sizing dies. You see the problem?

So this means getting a universal decapping die and removing spent primers before cleaning so you can get both these benefits (and others) of cleaning.

The other annoying thing about cleaning is that you necessarily have to have two reloading sessions for the same brass. Once to decap, clean, and dry, and again to size, prime, charge and seat. Not the end of the world, but a little bit annoying, unless you work it into your routine and do other things at the same time – or if you load in batches, this works too.

So, I don’t clean my brass that much. I feel the scorn now as some of you read this, but I can live with that.

It really doesn’t offer me enough benefits, when I neck size only and I can clean the primer pocket in a second or two with a small tool. I do batch clean my pistol brass, as you always end up getting other peoples’ brass and what have you as well, so it’s good to be able to see any imperfections, and keep your semi auto pistol running smoothly with evenly sized brass. I also clean any brass I pick up off the range (of course). But for my main competition rifles that go through a shed tonne of brass in any given month, it’s not worth the extra steps when I struggle to find the time to shoot, let alone make my brass shiny.

I have also stopped trimming my brass every reloading session. My word, what a laborious task. I speed this up with an electric drill, but still, it’s a PITA when you do it every single time. Every. Single. Time. As long as it’s within spec, I don’t think minute variances in brass length will make too much difference. Removing this step also means less work on your brass.

I use Lee length gauges to size my brass, and as you’ll find in any aspect of brass or ammunition sizing, different manufacturers err on different sides of SAAMI specs. When I size with my Lee length gauges, I remove material almost every single time. It’s crazy, but your brass really does grow that much each firing, especially if you are FL sizing or neck sizing over an expander button, which draws the brass as well.

Lee case length gauge and cutting tool.

So, when I was in a hurry one day, I decided to size all my brass (it was 5th or 6th firing), and put it through my Lyman length gauge. Such a handy tool. If it didn’t fit in the gauge, I’d set it aside and size another piece, otherwise I’d load it (yes, I was loading 2 hours before a competition – go figure). And guess what? I found I had plenty of room to spare on every single case, even though they had been fired since they were last trimmed.

After this startling find, I decided to keep it up. I sized this batch of 22 cases without trimming every time I reloaded, and only after another 3 reloads did some of the cases need trimming (this is for the 6.5×55 which I NS with the Lee collet die). After 4 loads most of the brass needed a trim. I noticed absolutely no decrease in accuracy while letting the brass grow a bit. All I did was save myself a lot of time.

The Lyman case length gauge has multiple calibres and is a very quick way to check your brass length.

So, why do the two gauges have such different results? The SAAMI specs are a range of minimum and maximum tolerances. If you’re inside the range on any particular measurement, you’re deemed to be safe.

The Lee length gauges appear to favour the minimum length specs, hence it removes material with every firing, with just the slightest stretching in brass. The Lyman gauge, while still in SAAMI spec, seems to be towards the maximum end of the range (at least with the cartridges I have reloaded), hence giving you many more reloads and brass stretching before you need to trim back.

So, using these two tools, I can save myself a lot of time and effort in trimming brass, and save my brass the work. Using the maximum end of the spectrum means I size less often, and sizing to minimum specification means I have more room for the brass to stretch before it meets that maximum range where I need to trim again. That’s a good little cycle that saves me a lot of time, and means I can do fiddly things, such as rotating my brass and projectiles, without greatly extending my reloading sessions, and maintaining good levels of accuracy and concentricity.

So, a final reminder, in case you lost the point of the article given how long it ended up being. Refining your reloading process, doesn’t only mean adding in new and innovative steps, it also means removing or replacing steps which are unnecessary or less effective.

Product review: Annealing Made Perfect (AMP)

The process of annealing brass has interested me from very early on in my reloading journey. There seemed to be some mystique around it, and only the most hardcore of reloaders really did it. I must confess that I was clearly never hardcore enough and am only now, many years on, beginning to anneal myself. For this reason I thought it would be a good opportunity for me to write an article right from the start of my annealing journey so that those who are interested can learn with me as I go.

Why anneal brass?

To start with, for those who have no idea what I’m talking about, in layman’s terms brass is a soft metal, each time we work a brass case (that may be sizing it, expansion as it is fired, or contraction as it cools and is ejected) the brass becomes more and more “work hardened”. Without trying to oversimplify it too much annealing is the process of heating the brass case neck to a very specific temperature in order to “soften it” back to its natural state.

There are a few benefits of this, firstly it means we can try and achieve a more consistent neck tension, by ensuring we have a consistent start point between reloads. This in turn affects pressures and ultimately potentially affects accuracy. It also extends the life of the case due to the fact that as cases become more and more work hardened they eventually become brittle and split.

It is important to note here that we only want to anneal the case neck and shoulder, we do not want to be softening the case body or base – doing so could be dangerous.

Brass uniformity – how much of a difference is there?

"Annealing Made Perfect" - a pretty bold claim. Does it live up to the name?
“Annealing Made Perfect” – a pretty bold claim. Does it live up to the name?

How is brass annealed?

There are a couple of main ways brass is annealed by reloaders, One of the most common ways is by using a temperature sensitive product which is painted on the inside of the case neck, the case neck is the rotated through a flame (most commonly a gas blowtorch) or cases are partially submerged in a water bath leaving the necks exposed and blowtorched, until the temperature sensitive paint shows the case has reached optimum temperature. There are a few different methods and machines available that follow this basic process which for many reloaders works OK, or at least they believe it to. But there are a number of variables with this process to consider. Firstly ambient temperature and gas levels will both affect the temperature of the flame.  Distance from the flame, angle of flame, time spent in the flame, case calibre, brass thickness, brass type and brand will all have an impact. This many variables, combined with having to use an open flame blowtorch in the house are really what prevented me from getting into annealing sooner.

Then a couple of years ago I came across a product “Annealing Made Perfect”, which I didn’t realise at the time was made in New Zealand. What the guys at AMP were doing seemed to be quite different to the above process and while I wasn’t an early adopter I started keeping more and more of an eye on the reviews and coverage of the guys at “AMP” while I continued to expand my knowledge of annealing and reloading in general.

The process that the AMP machine uses differs in that it uses a magnetic field to pass the brass through in order to create heat, because this magnetic field is electronically controlled it gives the potential for far greater temperature and time control as well as greater consistency and repeatability than the common method of using a gas flame. This method has allowed the guys at AMP to test many combinations of calibre, brass type, brand, thickness, etc., to create an extensive database and various programs within their machine for each type of brass. You are not reliant on using temperature sensitive paint and adjusting everything to get it just right, you now have the ability of selecting the right program and pushing the start button.

AMP machine with pilots and shellholder.

Another really great service that the guys at AMP offer, and, in fact, recommend, is you send them samples of your own brass and they will test it in their laboratory to identify its unique properties and they will let you know the perfect settings. This service is completely free, and is intended to get you, the customer, the best achievable result. This type of service to me really signals the values of the company and their intent to work with the reloading community rather than just selling them a product.

They have also included a USB port on the side of the machine, and computer link cable in an effort to future proof the machine, in the event of any updates AMP will provide these to be downloaded onto the machine, ensuring your unit is not going to be redundant in a year’s time.

Getting started with the AMP machine

I have recently been lucky enough to get my grubby little hands on an AMP machine to do some testing with, while as said above I haven’t had any experience with the blowtorch methods of annealing and therefore can’t compare the two, I am able to compare annealed vs un-annealed loads.

The first thing I noticed when I opened the box was the thought that has gone into it all, the machine was very well packed, as were the accessories. The user manual was incredibly simple, even for those of us who never read user manuals (Lots of step by step pictures). Realistically, it is so simple that it could even be compressed into one page.

Setting up the machine took all of 2 minutes, literally to take it out of the box, screw in the little rubber feet, plug in the power cord, and you’re ready to start annealing.

A quick check on the Annealing Made Perfect website settings section, selecting my calibre and brass brand from the dropdown list, and I was told what pilot number, and setting number to use.

You'll be ready to anneal in a matter of minutes - it doesn't get easier than that!
You’ll be ready to anneal in a matter of minutes – it doesn’t get easier than that!

The Pilots are semi calibre specific (many calibres may use the same pilot i.e .243/7mm-o8/308 use the same pilot, but it will depend on what calibres you load as to what pilots you will need), and they simply screw into the top of the machine to hold the brass at the optimum height.

The machine has 3 buttons on the front, a “+” button, a “–“ button and a “start” button. Simply press the “+” or “-“ button until the LCD screen shows the correct setting for your brass, place a case into your shell holder (the shell holder is used to handle the hot brass), drop the brass into the hole on the top of the machine and press the start button.

The start button will glow red for a short time (depending on brass and setting this time will vary, but likely to be around 3-4 seconds), and you’re done, pull the brass out using the shell holder being careful not to burn yourself on the extremely hot case and drop it into a metal tray or container.

The start button glows red while the operation is underway.

It really couldn’t be more simple and the part I like the most about this machine is it repeatability. With other methods I have seen, people tend to set up their machines for a single calibre. They were often reluctant to change, as doing so would mean a lot of setup to try and recreate the same results next time. It also meant people would do big batch runs of brass as the setup involved and lack of repeatability meant that small runs became an annoyance. With the AMP machine you could literally anneal one piece of brass, then a week later anneal another and the results would be the same. This seemed like a definite benefit to me as it allows me to anneal between each reload, and not have to save large number of brass up each time to get very consistent results.

Are there any downsides?

I will highlight that the two potential issues that some people may find with this machine-

The first is that it anneals one piece of brass at a time, and unlike some other systems which use an automated hopper type setup you have to manually insert and remove each piece of brass. Personally this isn’t a problem for me as I am annealing my brass after each shoot, so I am only doing 30ish pieces at a time. This is taking me less than 10 minutes in front of the TV to do and personally the benefits of this system over others outweigh this slight negative. But for those people who want to stockpile their brass and anneal it in a large batch AMP are currently working on a robotic system and case feeder to insert the brass and remove it, so you can set it and do something else, The system is not currently available, but there are videos on their Facebook page showing progress so far and I can’t imagine it will be too long until we see these out for delivery. The new robotic unit will fit existing AMP Machines.

The other thing I have seen people comment on is the “Thermal Cut Out”. Again for my application I don’t see any real problem here but I know that it comes up a little from time to time, so I thought I should address it. The machine is naturally going to get hot – its purpose is to produce heat after all! AMP have done a great job of addressing this and the machine is built with a number of internal fans (these fans are very quiet and for the most part do the job, with the outside of the machine remaining cool to the touch).

AMP have also built into the software a thermal cut out which monitors the internal temperature of the machine and if it reaches high levels it will place the unit into a cooldown mode where it will essentially stop annealing brass and run the fans until the temperature is reduced. Depending on the program / cartridge you are running AMP indicate this may be between 50-200 cases. The most I have put through nonstop in one hit was around a hundred 6.5 Creedmoor cases running program 53 and I did not reach this cut out, in fact the unit still felt very cool to the touch and the air being blown from the fans also felt cool. Once again I now anneal my brass after each shoot, so after my initial annealing of my existing brass stockpiles I won’t be doing any overly large batch runs so this isn’t a problem for me at all, in fact its quite comforting to know that the machine has this protection feature built in.


Testing the annealed cases

Now I guess you are all wondering, does it work? Well again I’m not a scientist by any means, so I urge you to do your own research in general, but I will say that I recently did a test comparing both annealed (through the AMP machine) and un-annealed loads in a newly broken in 308 build. The loads were essentially the same however there were TWO variables that potentially both impacted the test.

  1. One set of loads was Annealed and one was Not Annealed.
  2. The set that was Annealed were the 10 cases I had with most uniform neck wall thickness, and the set that was not annealed was the next most uniform 10 cases.

Both sets were selected from brass which had around 10 firings through them and were the 20 most uniform (neck wall thickness) cases of 150 measured.

This is the annealed group. One cold bore shot and then 9 in the same hole. 9mm case for scale.

Measuring both sets of loads through a Magnetospeed Chronograph, the Standard Deviation of the 10 loads which were Not Annealed was 16.4. The Standard Deviation of the Annealed set was 9.4. The groupings of both sets at 100m was very good (one ragged hole, excluding a cold bore shot with each set) and I could not in fairness distinguish between sets, except for a single flyer on the Not Annealed set which while I don’t believe it was the result of shooter error, I can’t rule that out.

How important the Standard Deviation reduction is depends on you and what you are doing with the load. Both sets (Annealed an Non Annealed) would have happily taken down game out a long way, but for ringing steel or punching paper or shooting out at distance the reduction in SD (and ultimately grouping size/vertical dispersion) could well be worth it.

Overall, this is a great piece of kit. I plan to continue to update this article as I go and the machine is tested with as many calibres, brands and environments as I can. In the meantime, in New Zealand machines can be purchased from Serious Shooters in Auckland, and international purchasers can see their local stockists on the AMP website

[Editor’s note: If you enjoyed reading this article from Chris (or any of his others), you may like to follow Chris on Facebook]


How many deaths would gun registration prevent?

If you’re in New Zealand and you haven’t heard about the recent shooting in Whangarei, you’re living under a rock (where did you get internet access to read this?). This short article has nothing to do with the specifics of that horrible event and the ongoing investigation – the families of all concerned have been through enough, and there’s plenty of coverage out there if you want more “details” (read: speculation).

Because human beings tend to be macabre and sensationalist, we often focus on the details of how a person committed a crime, or killed other people, before we focus on the “why”. Thankfully, media discourse around the above case has slowly rounded the corner and is now raising questions around mental health treatment availability and suitability. How we as a society treat our most vulnerable is a stark reflection of the state of our country. So far, it’s not a good look.

Should there be a gun register in New Zealand?

When we start talking about murder weapons, satisfying that macabre and sensationalist tendency, people ask the questions – Where did they come from? Should we be able to get these? Could Police have done more? What can we do to prevent this happening again?

I’m going to answer that last question very quickly before diving into the rest; Better equip our mental health services and police force to do their distinct and relative jobs.

So, here is a breakdown of why the registration question comes up:

Media and non-shooters are unaware of what the current gun laws in the country are. Unfortunately, so are many politicians, and even Police who enforce the rules can have a serious shortage of operational knowledge.

The Greens firearm policy has not changed since 2014. All items are as expected from this party. Except number 4. This doesn't exist in New Zealand - this is from some other country's laws. Canada, maybe?
The Greens firearm policy has not changed since 2014. All items are as expected from this party. Except number 4. This doesn’t exist in New Zealand – this is from some other country’s laws. Canada, maybe?

Non-shooters are often only exposed to guns in violent media and political discourse from countries such as the USA and the UK – and this forms their perception of guns and how they are used. The reality in NZ is quite different, but unfortunately this is not communicated to them in an accessible manner.

Mr Cahill in his natural habitat. Image credit: NZPA

The Police Association (not Police, but the union-type body that represents them) likes the idea of a gun register and strong restrictions on civilian arms ownership – so when they get asked questions by those who don’t understand the law as it stands, the response is often “yes we should register, yes we should ban X type of weapon.” Chris Cahill is the President of the Association, and often its spokeperson. He is also often proven to be generating or referencing false statements, or largely inaccurate numbers, which distort the public view on firearms and legal ownership in NZ.

So, the media asks “Should we register all guns”, the Police Association says “Absolutely”, and Joe Public thinks that that sounds logical, and some very authoritative people have backed up this logical conclusion. So, the purpose of this article, before I get too far off topic, is to introduce the non-shooting, non-hunting public to facts that most shooters are aware of, but which don’t get equal voice in a discussion that would affect the rights and responsibilities of a large swathe of society with, potentially, very little or no upside at all.

Why don’t we register guns in New Zealand?

In the Land of the Long White Cloud, we do things a bit differently. And that’s generally accepted to be a good thing. Kiwis change the world by doing things differently. One thing that we do, which is very different from many countries, is that we “register” or licence the person, not necessarily the firearm.

I personally think this is a great system. In order to legally purchase, own or use a firearm, you must have been vetted by the police and found to be a “fit and proper person” to use an item which is practical, fun and cool, but has serious potential to do harm if in the wrong hands. Your spouse and other referees are consulted by a police vetting officer, and your home and its level of security is signed off as well.

When we make laws that restrict what firearms owners can do, we generally affect those law-abiding people mentioned above. Criminals are not affected by laws targeting firearm licence holders. They’re affected by laws around criminal misuse of guns, and the sentences they get for falling afoul of these rules. Most firearm owners would agree that we need to be much stricter on criminals who offend with firearms, to disincentivise illegally holding weapons, stealing them from people’s homes in the first place, or committing crimes with them. The shooting community would also love to see Police have more resource to solve crimes in which firearms are involved, especially thefts.

But we actually do register guns in New Zealand

New Zealand did have a firearms register a long time ago. Implemented in 1920, after periods of civil unrest and an influx of small arms brought home by soldiers returning from The Great War, a compulsory gun registry, including permits to procure for any firearm sale, was promoted by police and enacted as law. In the early 1980’s, after over six decades of having a gun register, the idea was abandoned, with Police citing an incredible waste of resource in maintaining a database that was increasingly inaccurate. They felt the money and time was better spent promoting other Police activities, and vetting firearms licence holders instead.

“There is no evidence to suggest there is any relationship between the registration of firearms and their control” – NZ Police Support Service Directorate, September 1982.

But, in New Zealand we have maintained registers of a few types of firearm specifically. Pistols, which are held by B-Category endorsed Licence holders, and can only be used at pistol shooting ranges for sporting purposes (i.e. you can’t shoot them on your property, or take them anywhere else, other than a gun shop, gunsmith, or the Police). A pistol licence is incredibly hard to get, and takes around a year – you can read more about the process here.

We also register any C-Category, or “restricted” firearms. These are collectors items, old WWII machine guns, heirlooms, or other fully automatic weapons. These are never, ever, allowed to fired. We also register Military Style Semi Automatic firearms (MSSAs).

We are the only country in the world to follow this last definition, and you need an E-Category endorsement to hold and use one of these. No one else is allowed to even touch the rifle once it is registered to you – even another E-Category endorsed shooter. If you don’t know what an MSSA is, it is basically any semi-automatic rifle that can hold more than 7 rounds in its magazine, or has some other external features, such as a bayonet lug, flash suppressor or pistol grip. An AR-15 (yes, I know you know that one), as standard from the factory in the USA or wherever, would be considered an MSSA. However, New Zealanders can legitimately own one of these rifles for various sporting disciplines (Service Rifle, 3 Gun, IPSC Rifle), pest control (think mobs of goats or wallabies destroying vegetation) or hunting.

If you only hold a basic A-Category licence, you can have a rifle like this, but it must be limited to 7 rounds or less, and cannot have any of the external features that make it look or function like a military weapon.

MSSAs and pistols are what most people think of when they think of gun crime or violent outbursts/mass shootings. These are the most restricted types of firearm in the country, and you have to have increased security measures at your property, go through another vetting process, and you’re subject to police checks annually for pistols, or once every three years for MSSAs. We do register these guns. And there aren’t very many of them actually.

1) Approximately 19,000 pistols held for the purpose of target pistol shooting.
2) Leaving approximately 17,000 pistols possessed for the purpose of collecting, as an heirloom or by museums and theatrical armourers.
3) About 9,700 restricted weapons possessed for the purpose of collecting, as an heirloom or by museums and theatrical armourers.

The total number of MSSAs recorded on police systems has risen from the 6,919 reported by Thorp in 1997 to 7,800 – about 80% of this increase of 900 MSSAs recorded is due entirely to the changed understanding (of what constituted a ‘military pattern free standing pistol grip) held by police 9 June 2009 to 1 March 2010. The balance (180 MSSAs) are either ‘walk ins’ (previously unlawfully possessed, ‘off ticket’ but brought within the legal system) or, in the case of about 20, imported on the basis of a special reason not requiring the 1:1 surrender of a worn MSSA.

[E-mail from Inspector Joe Green, NZ Police Licensing and Vetting Manager, 24 May 2010]

Anecdotally, even this tiny database is not consistently maintained. I’m personally a member of many shooters’ forums, and can attest that many shooters of endorsed firearms report that their check-up/review from Police Vetting Officers, included questions about firearms the license holder had never owned, or had sold (and Police administer the sales process of these guns, closely).

Should we register “Sporting Firearms”?

Sporting firearms are the ones you can own on an A-Category licence. They are the most prevalent by far, and include your granddad’s double-barrel shotgun that he used to hunt ducks and rabbits with, the .45 calibre lever action rifle your colleague goes pig hunting with, or the semi-automatic Winchester rifle your neighbour uses to hunt deer once or twice per annum, and paper targets the rest of the year.

By most estimations, there are over a million of these in the country. That’s a big number – should we keep track of these?

Let’s look past the fact that <10,000 MSSAs is a challenging database to maintain, and the fact that a $100 million gun register was rejected soundly in 1999. There are several reasons a register would either not work, or be impossible to maintain.

Police don’t have the resource or capability to enforce

I have four firearms in my safe that belong to another shooter who has an expired licence. Because we are both responsible people, I took possession of these firearms while that person sorts out their licence. I have had these guns for around two years. Police have never asked that shooter what he did with his firearms when his licence expired. When his licence expired, nothing happened.

There is either a lack of capability or resource to enforce on our database of ~250,000 shooters, so how could we manage a register of over a million guns?

Could we register everything out there?

The Thorpe report, which came out in 1997 and is often referred to by the media, points out that less than 90% registration of existing firearm stock would make a register largely useless. If we don’t know how many guns there are, or where they are, or who owns them, how can we ever be sure that we will have registered enough of them to make any sort of difference? How would we even communicate to all of those people who own firearms? Police recently acknowledged that they don’t even know if a firearm owner dies for up to 10 years after the fact (licence renewal period) – so I doubt we’d be able to reach all licence holders within 10 years of any implementation.

And as shown in the example above with my shooter buddy – they still may not find them all and talk to them (and my shooter friend mentioned above lives in Auckland’s Eastern Suburbs – not the side of a mountain on the West Coast).

Can a can register solve crimes?

Proponents for a gun register will posit that once we know where they all are, we can track them and make sure they don’t get into the wrong hands. Assume a 100% uptake of a registry. How are firearms then tracked? It will rely on a purchaser and seller both being honest, law-abiding people who want to follow the rules. Criminals generally don’t fall into this category.

Our current system does have a large component of trust and goodwill between the shooting community (who want to retain their rights – so they tend to behave), and the Police (who have a vested interest in ensuring guns are used appropriately by responsible people). If the new system relies on the same underlying principles of everyone doing what they’re supposed to do, because it’s the right thing to do, I fail to see how we will achieve anything different from the status quo, aside from spending a lot of money.

According to The Star, then Canadian Prime Minister Stephen Harper said the abolition of their long gun registry, which initially started as recently as 1995, was a major step forward for Canada, in terms of its use of law enforcement resources.

“We simply don’t need another very expensive and not-effective registry,” Harper told reporters Friday near Quebec City. “What we have needed are severe and strong and more effective penalties for people who commit criminal acts using guns.”

Proponents will point out the large reduction of gun crime involving long guns (rifles and shotguns) in Canada since the introduction of the law, but if you look at the trend over time, as shown in the below graph from Statistics Canada, this is part of a larger downward trend, and probably has nothing (or little) to do with the registry, which cost the Canadian government $1.23 billion after deducting licence fees paid by shooters.

Graph credit: Statistics Canada

Of course, a lot closer to home is the Australian ban/registry/buyback which was implemented by the Howard government after the Port Arthur Massacre. Yesterday I listened to Police Minister and Deputy Prime Minister, Paula Bennett, defend the government’s recent rejection of a $30 million licence system overhaul, a registry and a ban on online gun sales, in an interview with Lisa Owen, on The Nation. When confronted with the inefficiency of a database that would miss “[an estimated] 1.2 million guns that are in the system”, Ms Owen quoted a significant drop in gun-related crime in Australia when our friends across the ditch brought in their gun reforms, including registration. Ms Bennett replied with the fact that in New Zealand, as a percentage of all violent crime, only 1.4% is associated with a firearm – meaning there are much bigger fish to fry, for much more immediate results in saving lives and preventing harm.

But what about those gun crime stats from Australia? Again, they are part of a longer trend (similar to Canada’s figures for long gun crimes), and affected by much more than a change in laws at a single point in time. The below graph from Australia’s National Homicide Monitoring Program (NHMP) data shows murders and manslaughters on a downward trend since the reforms, but also, despite some spikes, the trend was already heading down.

The below graph, also from the Australian Institute of Criminology’s NHMP, shows guns used in homicides over a longer period of time (since records began), and for context compares to knives and sharp instruments. The trend flattens out a bit as we look at a longer span of time, but the trend is still clearly downward over time, at a similar rate over the series, with the natural exception of some spikes, or “noise” as a statistician would call it.

Image credit: AIC
Image credit: AIC

Of course we can’t just cherry pick data that reflects what we would like to show, and that’s not the point of this article, or this site. If it was proved that a gun register saved lives, this article would have a very different tone – I assure you. So, in the interest of wider context, below are some graphs from the Australian Bureau of Statistics, showing, again, a decline over time in gun-related death in Australia, regardless of the reforms implemented.

Answering the question

So, how many deaths would a gun register prevent? I can’t say that I think it would have a tangible effect in New Zealand at all. Given our low incidence of gun-involved crime, proof of non-performance from overseas gun registers, and unfortunate gaps in Police resource and support, I really don’t believe there would be a difference at all.

My personal opinion is that we could spend the amount a gun register would cost on:

  • Educating the public around what the law currently is
  • Supporting the police with additional resource to respond to gun crimes with appropriate knowledge and manpower
  • Actually solving firearms thefts (they’re already reported – we know when guns are lost, which is the one benefit a register should provide), and;
  • Most importantly, giving our country the mental health system it deserves.

Those four areas of concern would do a lot more to reduce gun crimes and deaths in NZ than a database with a bunch of serial numbers in it.

Wind reading equipment – what do I need?

Realistically, you don’t need any tools to read the wind except for knowledge and experience. Well, lots of knowledge and experience. In fact, the amount of money you spend on ammo and barrels learning to read wind, could easily cover the cost of some wind reading equipment. But which is the better way? Should you learn the hard way? Or spend the cash? Here are the options…

Kestrel with integrated ballistics info

This is the ultimate in wind-reading equipment complete with on-board ballistic solutions, tailored to your rifle and ammo combination. The list of features is almost endless, but here are some of the greatest hits:

  • Bluetooth connection to your smartphone
  • Bluetooth compatibility with Bushnell CONX Range Finder
  • Nightvision backlight option to preserve your sight in failing light
  • Bright green backlight for high visibility during the day
  • Built in Applied Ballistics software, including the ‘Litz library’ of G1 and G7 BCs, custom drage curve modelling, ballistic calibration feature, and more
  • Can be equipped with wind vane and tripod for hands-free wind direction and speed readings

I didn’t even mention the capability to accurately read wind and environmental factors – because that’s a given with the Kestrel product. This is, by far, the most advanced piece of kit you can get your hands on for reading wind and applying a ballistic solution in the field.

If you’re interested in one, check out The Gearlocker for more info.

While there are flags on this F-Class range, several shooters pulled out Kestrel wind meters prior to taking their spot on the mound.

Is a Kestrel 5700 for me?

So, who would this solution suit? Below are some of the types of shooters who might choose this option.

  • I am a long range alpine hunter. That Tahr 700 m away? That’s dinner
  • I’m an F-Class or benchrest competitor, looking to get more X’s than King Henry VIII
  • I believe in “buy once, cry once” – I’ve heard it’s the best, so I’m not going to bother wasting my cash on cheaper solutions that will probably crap out on me
  • I shoot once or twice a year, but when I do, I carry a $15,000 rifle and enough equipment to outfit a small revolution
  • I place no financial limit on my ability to ethically harvest game at distances that are challenging, but realistic for my abilities
A cheap and cheerful anemometer for less than $100. Image credit: Jaycar Electronics

Anemometer and external ballistics info

What is an anemometer? Well, it’s an instrument that measures wind. But, wait? Didn’t we just cover that? No, no we did not. We just talked about the top end of the market. Anemometers cover a spectrum of uses, and if you just want something to “get the job done”, there could be a more accessible option for you.

Most marine stores, or even specialist electronic stores, should stock anemometers, and they will range from $100 – $150 for a basic unit, which may include a tripod, to a few hundred bucks, or even thousands of dollars, for ones with more bells and whistles.

These are not shooting/ballistic specific, and really are only good for reading wind and environmental factors. You’ll have a much more affordable option, but you’ll also need a separate ballistic app or printed out table, so you can mentally convert wind readings into meaningful shooting solutions. If you can’t trust your maths skills under pressure, this may not be the option for you.

Is a non-shooting anemometer for me?

If you think you’re one of the below types of shooters, then this could be the solution for you.

  • I don’t have confidence or experience reading the wind, but my maths skills and elevation dope are on point
  • I want to have a wind meter to fit in with the PRS crowd, but I’d rather spend money on ammo
  • I’m a fan of the Budget Gun Nut. I once bought a rifle for $700 and spent $800 over 2 years, trying to get it to outshoot a $1300 gun.
  • I want to get into long range shooting, but all of my shooting disciplines kill my discretionary funds. This is a cheaper way for me to make a start, and I can upgarde later

Training and external ballistics info

Now this is one that won’t cost you anything but time. And ammo actually, lots and lots of ammo. There are a few easy formulas/tables out there that can help you interpret what the wind is doing, and make some reasonably accurate wind calls using nothing but the environment around you, or a flag, or even a ribbon attached to the front of your rifle.

With plenty of training and time in the field, you could read wind without instruments - but would you want to?
With plenty of training and time in the field, you could read wind without instruments – but would you want to?

Below are some links to websites/blogs that give you some pretty good indications on how to read wind values from your environment.

http://www.millettsights.com/resources/shooting-tips/shooting-in-the-wind/
http://www.6mmbr.com/windreading.html
http://www.rifleshootermag.com/shooting-tips/shooting_tips_determing_wind_values/

Using either MOA or MIL is up to you - but try and keep it consistent to reduce multiple layers of math.
Using either MOA or MIL is up to you – but try and keep it consistent to reduce multiple layers of math.

If you want to really learn this stuff, you’re going to not only need to do the research, but you’ll have to spend time out in the field, listening to more experienced shooters, and sending ammo downrange to judge the accuracy of your calls. You’ll still need ballistics tables, as all your rifle/chambering/ammo combinations will net different results in terms of “bucking the wind”.

It will also pay to make sure you stick to one system. If you like MIL instead of MOA, use that across all of your rifles, if possible. Make sure your turrets match your reticle. Learn your drops and holds in your chosen measurement. By making some systems uniform across various platforms, you are removing some of the mental gymnastics you’ll have to do when making a wind call.

Should I train my brain, instead of spend $$ on a wind meter?

Having a base knowledge of wind and its effects is probably something we all need, but a select few individuals will go their entire lives relying on nothing more than the feel of a cool breeze on their cheeks, or the movement of leaves and branches overhead, to determine the wind corrections they need to make to pull off that shot. So, are you one of the shooters below?

  • I carry paracord, a knife, flint and a torch. Everywhere I go, all the time. I am prepared for any outcome, and relying on battery powered wind meters is not in my game plan
  • I learned to shoot from my grandfather, and I still hunt with his SMLE No 1 Mk III. Old school is fine by me
  • I am genuinely interested in developing my all round knowledge of hunting and shooting, even if there are applied ballistics calculators that could do it in seconds
  • I think a Kestrel would be great, but I hunt under 300 metres and I only really need a good indication of wind – it doesn’t need to be perfect

How to: Apply for a Pistol Licence (B Endorsement)

I often talk to friends or people at the range and shooting events about pistol shooting, it seems many people who are already interested in shooting activities are keen to try pistol, but don’t know how or where to start. I know that information can be hard to come by at times, and often it seems like people are deliberately making it difficult. For this reason I thought I would give a bit of a shakedown of the current process here in New Zealand.

I will start by pointing out what I would hope is already generally understood information; Firstly It is illegal to shoot a pistol anywhere in New Zealand other than a pistol range which has been approved by the police for this purpose. You must have a specific endorsement on your firearms licence in order to possess a pistol (B Endorsement), and you may only transport it from your pre-approved security (safe) to the pistol range and back again (with the exception of to a gunsmith / store).

It is possible to attend a training course at a pistol range in New Zealand without first having a firearms licence (under strict supervision), but many clubs require that you have at least begun the process towards getting your licence. It is also a police requirement that, after 3 visits as a visitor, you must become a financial member of the club in order to progress your training.

Basic firearms licence

If you don’t have a basic sporting (A Category) licence, you will need to follow the following steps to get one:

  • Attend a firearms safety course (generally one or two evenings)
  • Sit a test on the information you have learned at the course (And pass of course)
  • Pay an application fee (paid at an NZ post shop)
  • Complete an application form from your local arms office (This application will require you to provide details of at least two character references)
  • Install security measures such as a safe / strong room
  • A police vetting officer will then visit you and your chosen character referees to discuss the reasons you would like to own firearms, ensure you are a person of good character, and check your security measures are appropriate
  • If all goes well, you should receive your licence in the mail.

Once you have your licence, endorsements such as the “B” endorsement for pistol shooting can be added to your licence. Or you can apply for endorsements at the same time as you apply for your licence.

The author engages some steel downrange.

Applying for your B Endorsement

In order to apply for your “B” Endorsement you will need to follow the steps listed below:

  • Join a pistol club, attend and complete their training programme (which should comprise of  at least 12 days supervised training and lessons)
  • Join Pistol New Zealand
  • Complete a club range officer examination
  • Complete a 6 month probation period with the club
  • Apply to the club to get permission to apply for your endorsement (the club must deem you as a safe and competent shooter)
  • Visit your Arms officer and get a form (POL67F), or download from the police website (you will need to get it witnessed by a police officer though)
  • Provide your POL67F to your club who will complete their section and send it to Pistol NZ
  • Pistol NZ will then complete their section and forward it onto the arms office [Editor’s Note: I am in the process of applying for my pistol licence, and the AO suggested that PNZ might mail the form back to me, and I could electronically submit back to the AO (i.e. via scan/email)]
  • You will also need to pay an application fee, again via NZ Post
  • You should then expect a visit from a police vetting officer to discuss the reasons why you would like to shoot pistols, inspect your security (you must have a “B” endorsed safe, not your basic “A cat” safe as there are much more stringent measures set on safes for endorsed firearms which can be found on the police website)
  • The vetting officer will also contact at least two referees again. Generally these referees will be people who have a reasonable knowledge and understanding of your shooting activities, rather than just character references
  • All going well you should then receive your new licence with relevant endorsements in the mail

Once you have your endorsed licence you may begin looking to purchase a pistol. Hopefully during your training period you will have had the opportunity to shoot a variety of pistols and types of events, and you may have established an understanding of what you want.

Acquiring a pistol

Once you have decided on a pistol and a place you are purchasing it from, you need to talk with your club and get an Application for a Permit to Procure “Pinky” form which will be signed off by a member of the club executive, authorising you to apply for a Permit to Procure. You take this form with you to your Arms Office and you will be issued two copies of a POL67C Permit to Procure form.

Once you have this Permit to Procure you take it with you to the person or store you are procuring the pistol from, and they will complete their section on the forms. You then take the completed forms and the pistol to your Arms Office who will inspect the pistol to ensure it is the same as the one originally applied for. They will keep a copy of the form so it can be entered in their records and you will be allowed to take the pistol, and your copy of the permit for your records.

Why is it so much effort?

I know that in reading this, it sounds like a long-winded process. To be honest, it is. I would estimate it taking about a year (or longer depending on circumstances) to fully complete the process. There is a reasonable amount of start-up and ongoing costs associated with owning pistols to be aware of (Application fees, Pistol Club joining fees, annual Pistol Club fees, Pistol NZ Fees, not to mention cost of firearms, ammo and equipment). However, after completing the process, I can understand why it is set up this way.

Pistol shooting is great fun, and you will meet some great people, but safety is key (things have the potential to go pear-shaped very quickly with pistols and their very short barrels). By completing the whole process, it ensures that only those people who are very motivated and keen, as well as competent and safe have access to these endorsed firearms. You don’t want to be competing in a match at your range with guys you don’t feel safe around. The knowledge that everyone you are shooting with has completed the above process does provide that assurance of competence and safety.

If you’re interested in shooting pistols, I would highly recommend contacting your local pistol club and enrolling in their next training programme. Visit the Pistol NZ website for a directory of pistol clubs throughout NZ.