
Product review: Boyds Field Design stock for 303 SMLE

Anyone who follows The Gun Rack on Instagram or Facebook has seen sneak peeks of a very green 303 over the past few months. I’ve really taken my time on this particular gun build, and subsequently the review of this stock, but here it is – The Gun Rack official product review of Boyds Gunstocks’ stock upgrade for the British Lee-Enfield series of rifles.

Guess which firearm is getting a makeover?

A photo posted by The Gun Rack (@gunracknz) on

The build…

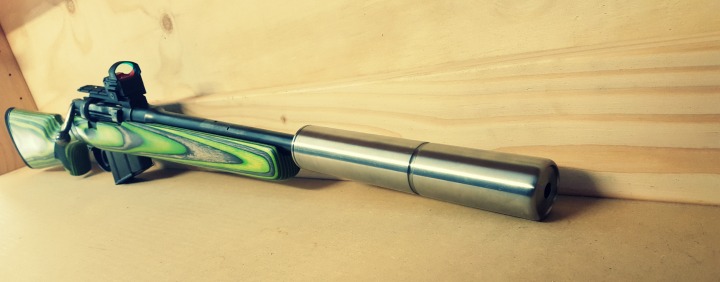
This particular rifle is a quiet bush monster. Monstrous in appearance, but suppressed and subsonic in its implementation. There’s a lot that’s gone into this particular rifle, so – fittingly – we’ll do an entire article covering the various bits and pieces, and the decisions that led to each of them.

One decision that was, unfortunately, made for us, is that I’m no longer going to have the rifle Cerakoted, as a dear and valued member of the NZ shooting community, Victor Alberts, passed away recently while on holiday overseas. Victor was the applicator and artist behind Cerakote NZ, so necessarily we’ll be looking to sort out some other means of protecting the metal on this bush gun.

The rifle that defended the free world – twice

The Short Magazine Lee-Enfield (SMLE) rifle was featured in both world wars and a host of conflicts all around the world. Its younger brother is only now being phased out of service with the Canadian Rangers, who will have a locally made, licensed version of a Sako product (T3 CTR). Other weapons have been trialled, but none compared to the reliability of the Rifle No 4 Mk 2 (since 1941 – not bad).

Even still, the old Lee-Enfield is a devastating tool in the hands of irregular forces around the world, who do not have access to more modern weaponry, or who perhaps have an abundance of old Commonwealth stock. With ballistics and firepower not too far off the .308 Win, it’s not hard to see why the rifle has kept pace.

Anyway, I digress. So, this stunning piece of history came to my possession in a sorry state. Which is okay, as I was keeping an eye out for an old beater that could be beautified without destroying a battlefield artifact.

My 1943 SMLE (above) was in a sad state when I bought it - compared to my 1942 (below) which will stay unchanged.
My 1943 SMLE (above) was in a sad state when I bought it – compared to my 1942 (below) which will stay unchanged.

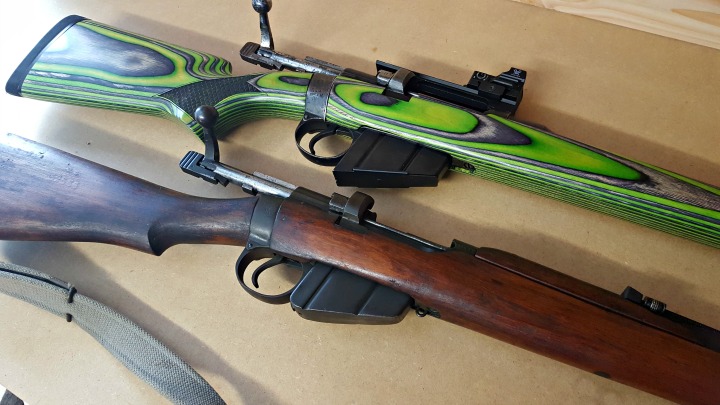
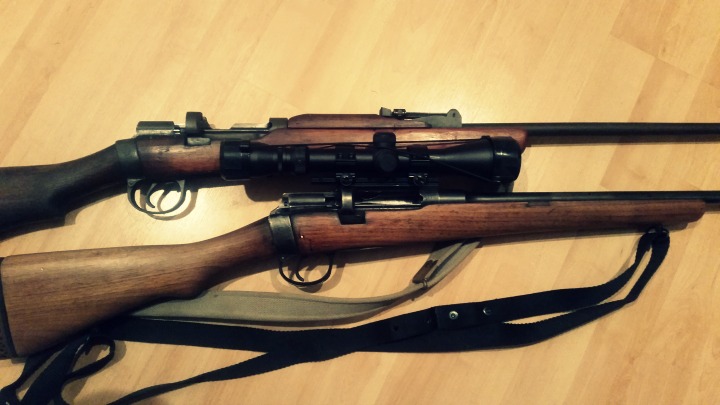
One of the problems with using a wartime rifle (1943), that was mass-produced with unique ‘improvements’ and variations across the world, is that you are bound to run into quality issues. In contrast, I do have a 1942 Lithgow rifle which is beautifully symmetrical and well-machined (even if it is left a bit rough in some areas). But this made-in-Britain wartime specimen is a product of its environment, and loose tolerances, rough surfaces, and poor bluing are to be expected.

In hindsight, I really wish I’d done this build off a Rifle No. 4 instead of an SMLE No.1 Mk iii, as the action lends itself to being rebarrelled to higher-power cartridges, but that may have taken this build in another direction altogether.

If you’re considering a build on a No. 4 or even No. 5 action, Boyds thankfully caters to those, too.

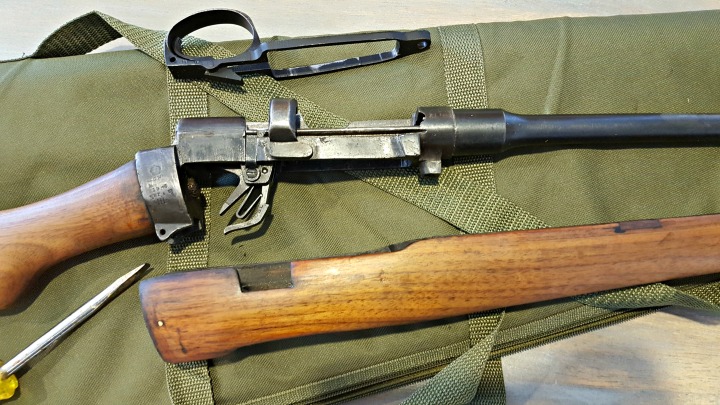
Taking apart the two-piece stock

The Lee-Enfield is everything a modern precision rifle is not. It’s not free floated, the stock is not a single piece and and the ergonomics are all wrong. However it was well-suited to winter clothing and putting a lot of lead downrange, so we can’t really judge the designers for that.

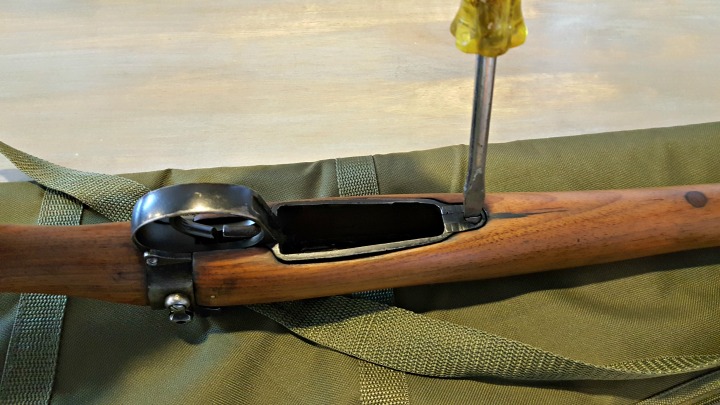
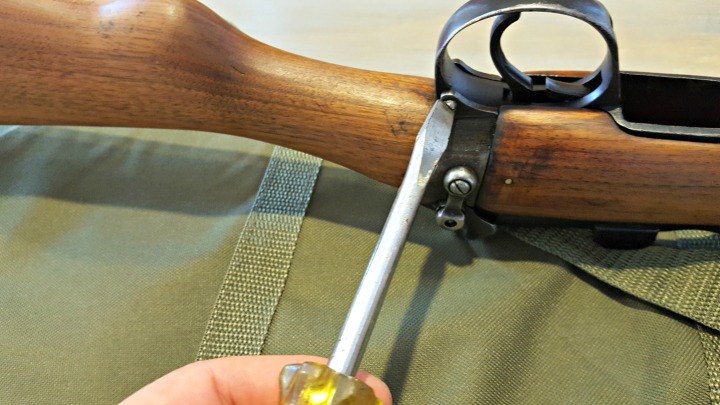
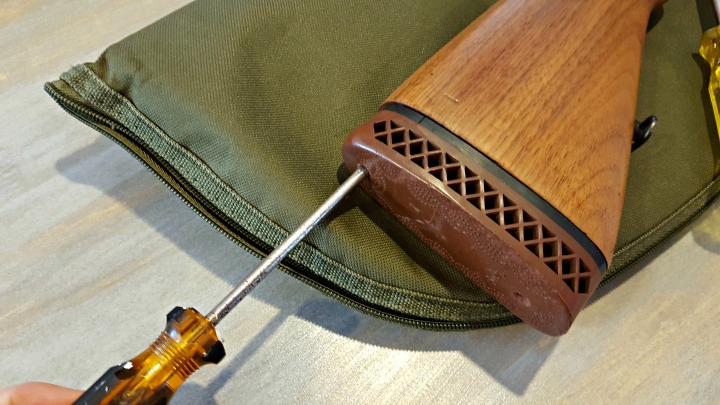
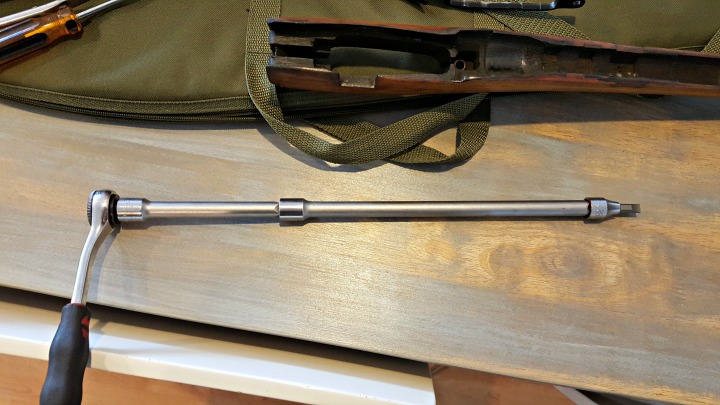
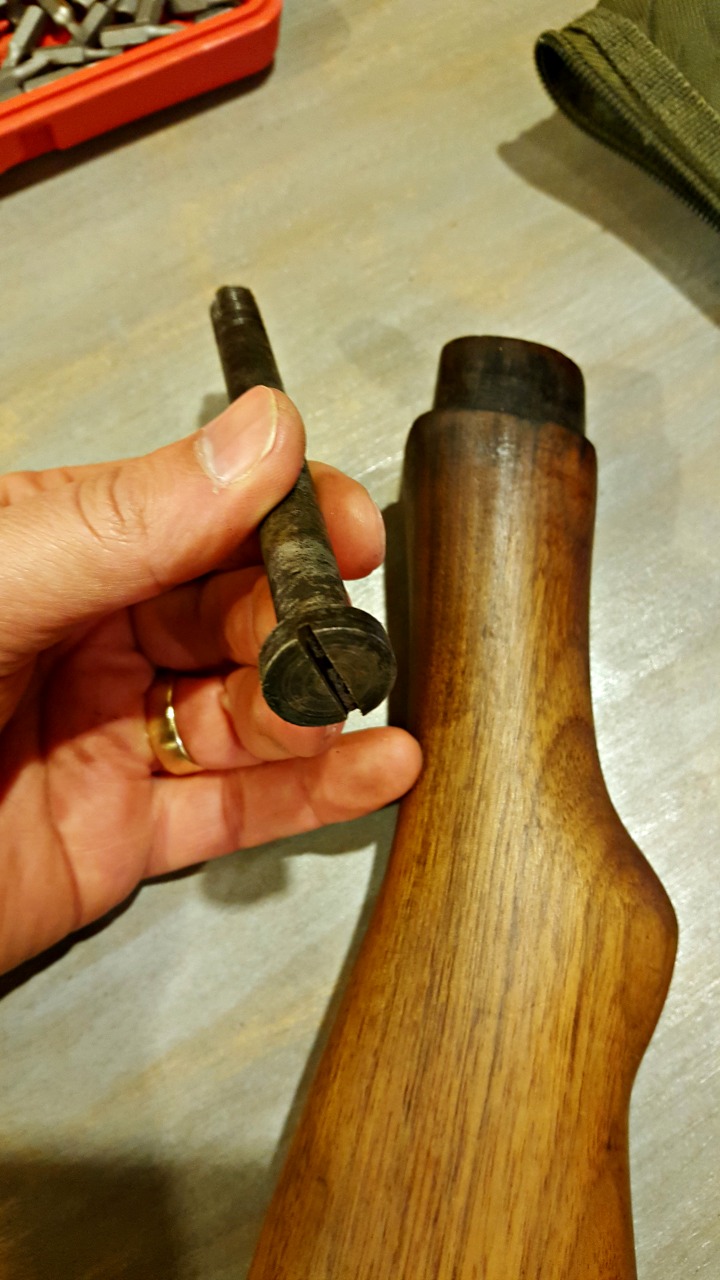
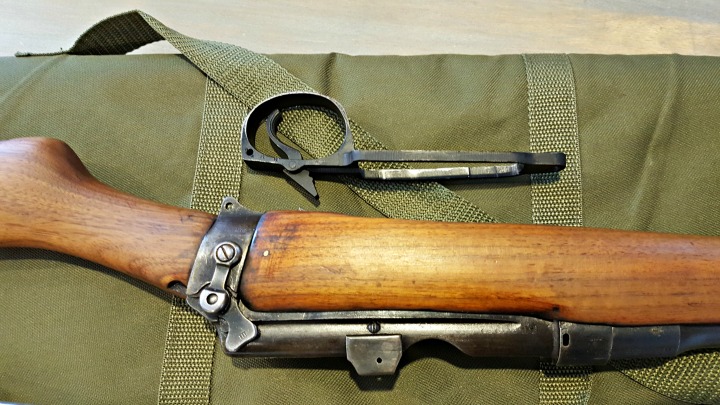
The two piece stock is easily taken apart with some screwdrivers, and potentially a socket driver if you don’t have a really long flat head screwdriver. Check out the easy tutorial here (with lots of pictures!).

Not many rifles will have the trigger come out with the floor metal.

Fitting the Boyds Field Stock Design

Final fitting will be needed.

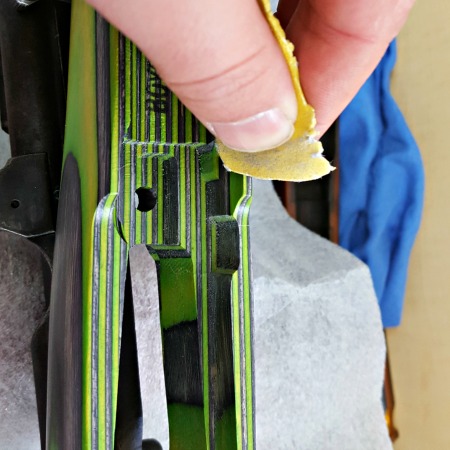
One thing I love about Boyds stocks is seeing the precision lines in the inletting. Now. Take a look at your naked Lee-Enfield. There is not a single square section on that thing. Because the action has so much inconsistency in shape and finish, I spent a fair bit of time sanding and filing around the top of the action and inside and around the sear and trigger slot.

The area around the mag well also needed some relieving of material to get the floor plate sitting properly again, which allowed the barrel channel to move into the appropriate position.

I found it really useful to mark the action with engineer’s blue (a permanent marker will do), to find the high spots on your action that necessitate removing some more wood.

Please be careful removing material, as it’s a lot easier to take off than it is to put on! While I say I spent a lot of time on this, that doesn’t mean I shaved off a lot of the laminate. Rather, I spent a lot of time making sure I didn’t take off too much, so I could still have a snug fit.

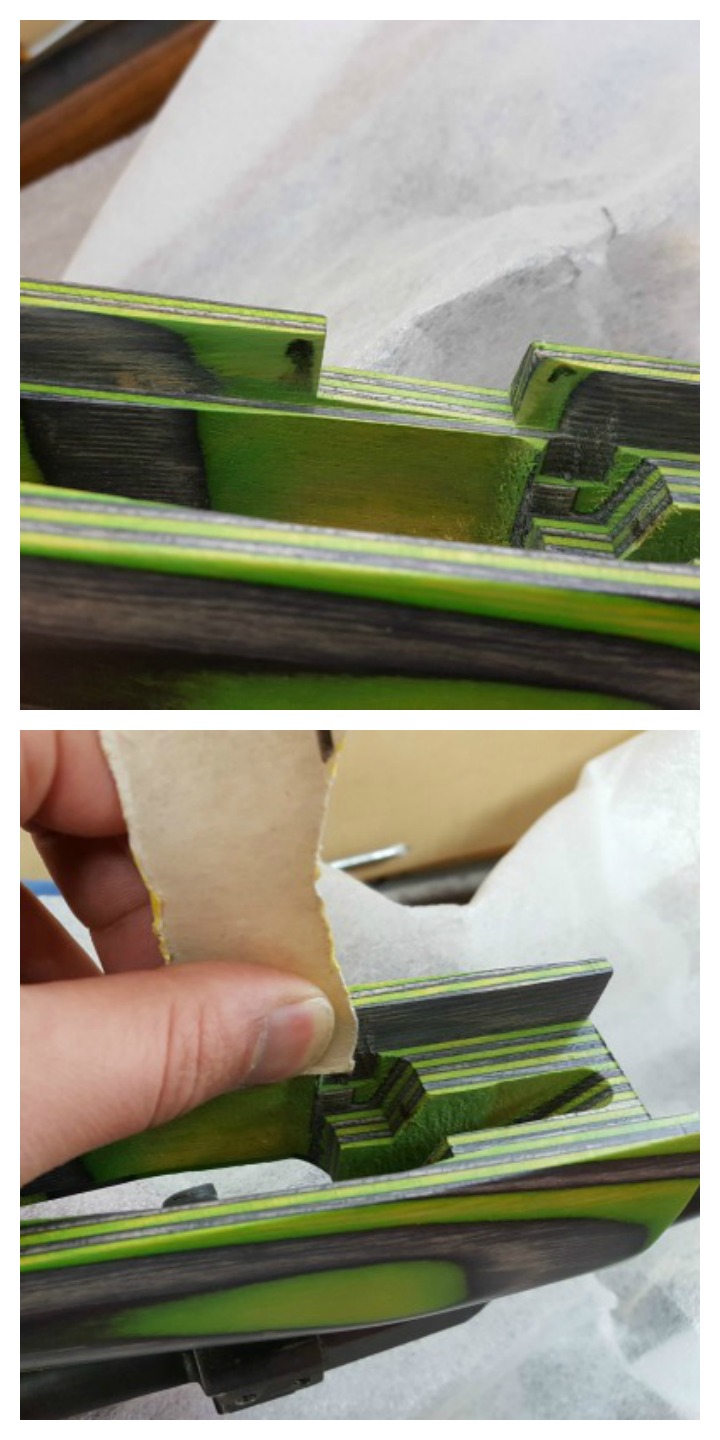
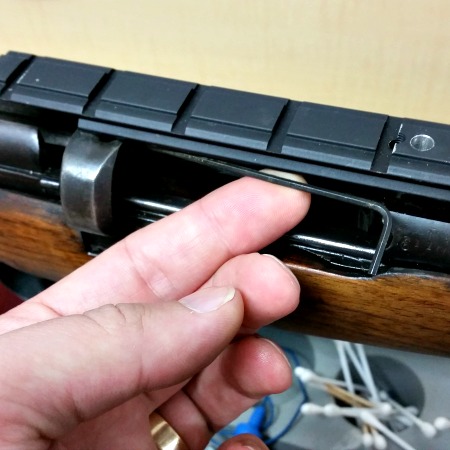
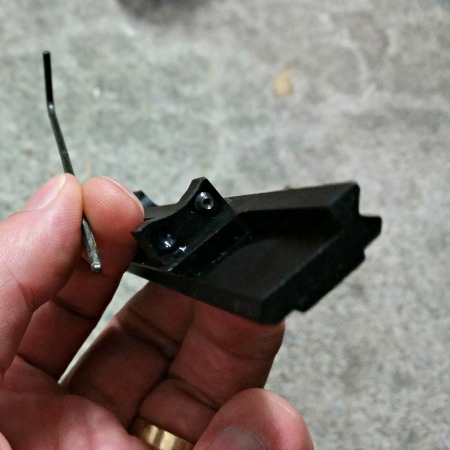
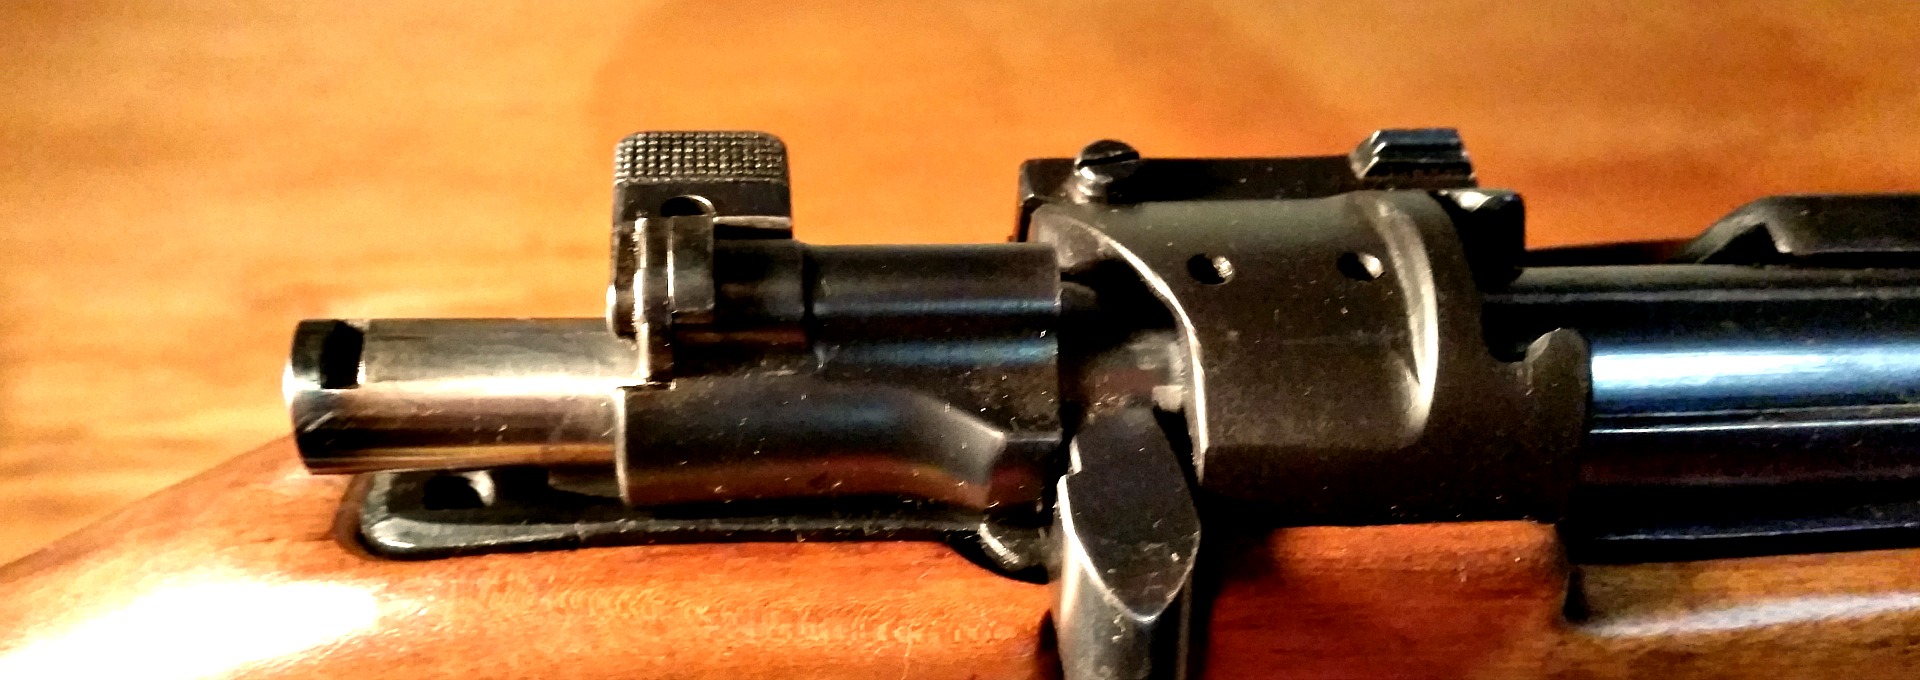
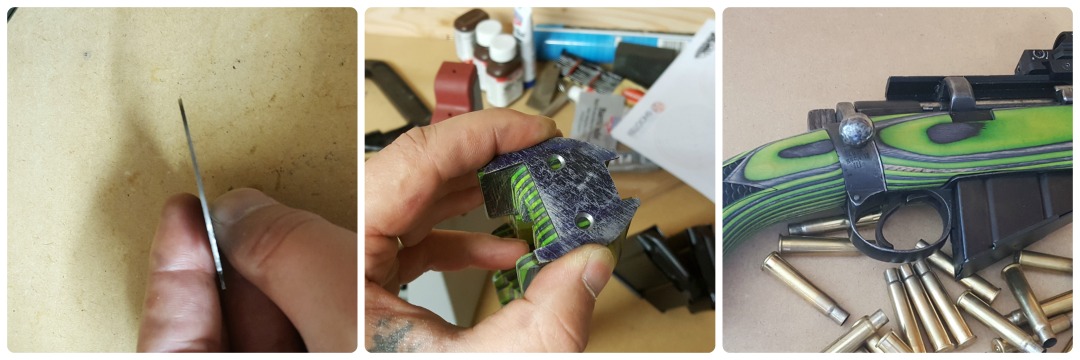
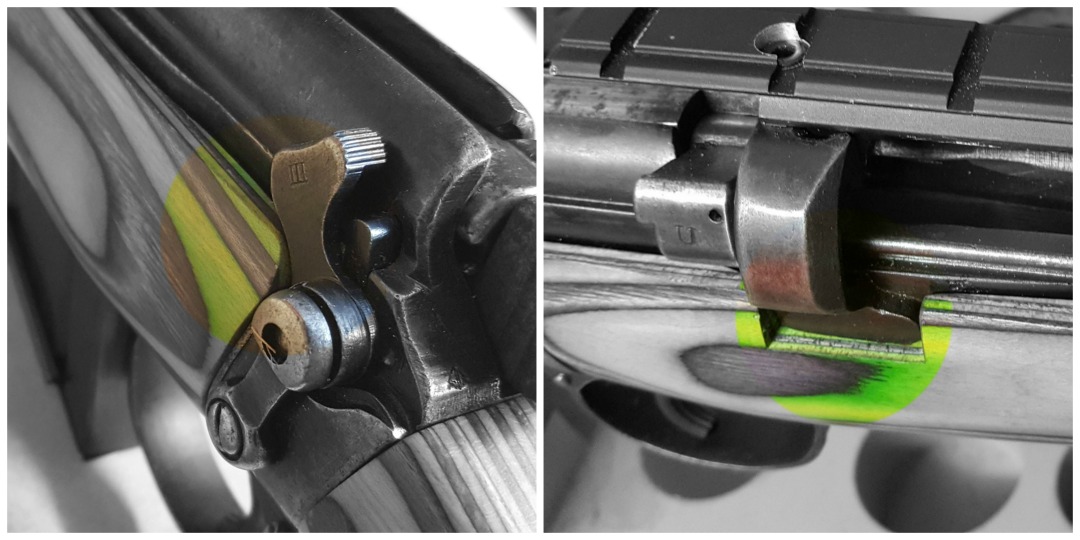
When fitting the butt stock, shaving off a small bit of wood off the top of the donut-shaped insert allowed the laminate stock to snug up nicely when I tightened the bolt. However, on the forend side I found there was a bit of a gap between the wood and the characteristic steel band which forms the rear of the receiver and separates the forend and butt stock. I had a shooting buddy of mine machine up a shim to bridge the gap. He put in some counter sunk holes so that I could screw it into the stock once I had all of the metalwork (including the shim) coated, however it’s so far been held in place by friction and is doing just fine.

The shim held in place by friction fills a small gap between action and stock. once coated with the rest of the metal work it will blend in well.
The shim held in place by friction fills a small gap between action and stock. Once coated with the rest of the metal work it will blend in well.

The gap between the forend and steel band I’ll put down to variance between manufacturers of rifles over time. I measured this strip of metal on my two SMLE rifles (one year apart, but one from Australia and one from the UK), and found a 1 mm – 2 mm difference in broadness.

You will definitely need to take out some wood where the rear ring of the receiver interrupts the line of the stock, and also where the safety lever goes in the forward position.

A radius and a square cut will make room for the safety lever and the rear action ring.

Positives of the Boyds Field Stock Design

If you’re looking to improve your Lee-Enfield Rifle or SMLE, you have three options:

  1. Restore the wood with new old stock or modern replicas (on a No 4 this is feasible, on a No 3, near impossible)
  2. Put it in a plastic stock, which will reduce weight, but will deliver more recoil, and increase your noise in the bush with its hollow construction
  3. Choose a hardwood/laminate solution

I’m assuming you landed on option 3, which is why you’re here. The hardwood solution is not only inline with the character of the gun, but also just feels right. I have a couple battle rifles in modern plastic stocks, and I’m too embarrassed to take them to the range, and too put off by the handling and feel to really enjoy them.

The Boyds Field Stock Design (and any of their stocks, really) is a re-imagining of the stock design based around the action and the shooter, not simply a replacement of the existing furniture. This means you can expect an increase in accuracy, stemming from various feature improvements, such as a better inletting, length of pull, cheek weld, positive grip characteristics and also added rigidity when compared to plastic aftermarket (or even original manufacture) stocks.

Line of sight

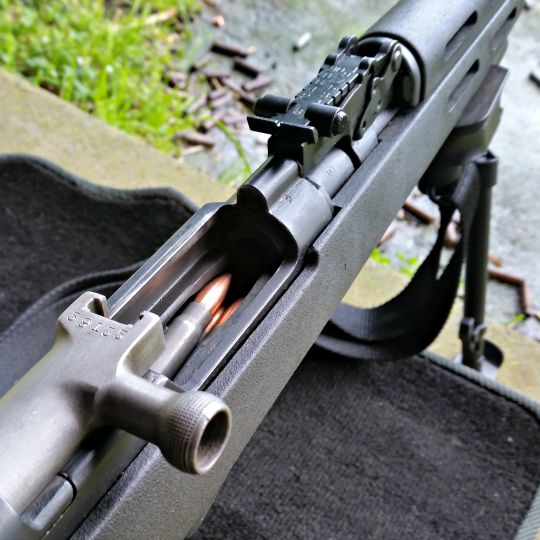
I found that the Boyds stock in particular raised the eye-line perfectly for the old rifle. With the original stock, if you try and get a positive cheek weld, you’ll be looking at the top of the action. You have to raise your head a bit and compromise your repeatable position on the rifle in order to see the iron sights.

Lining the two up by the rear of the bolt, the difference in drop is quite evident, as is the angle of the butt pad - both changing the handling characteristics of the gun.
Lining the two up by the rear of the bolt, the difference in drop is quite evident, as is the angle of the butt pad – both changing the handling characteristics of the gun.

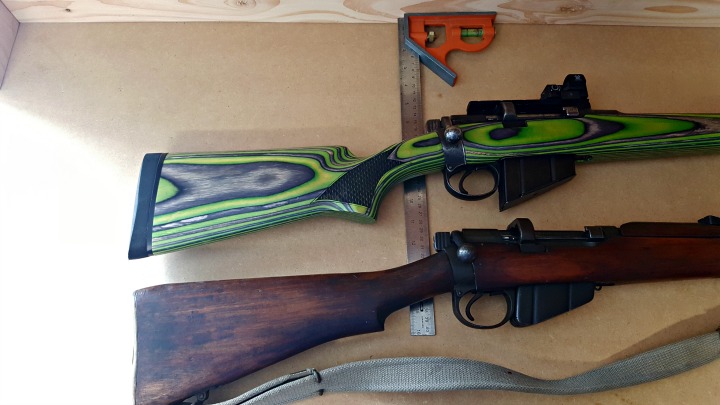
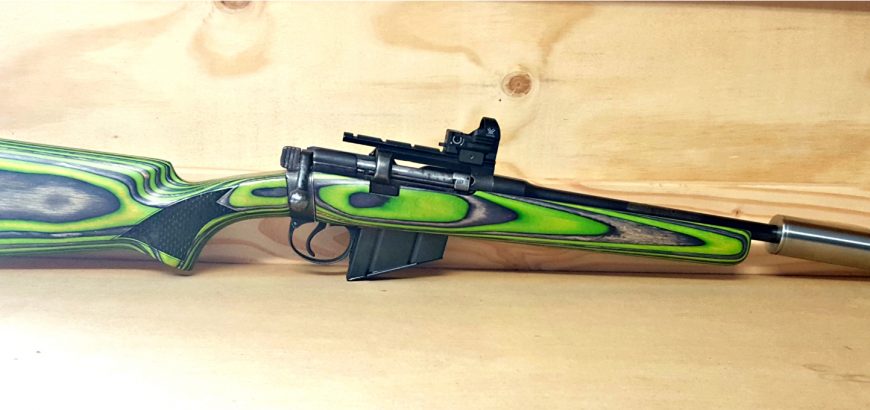
With the Boyds stock, the decreased drop on the comb means you are looking straight at the iron sights. If you had a low mounted scope, you could use this quite easily with little compromise in cheek weld. I have a Vortex Razor HD red dot sight mounted on mine, which, unfortunately, means added height to the optic. However, this doesn’t bother me because, with its unlimited eye relief, I can have my head just about anywhere on the stock and still have an accurate sight picture.

Solid construction

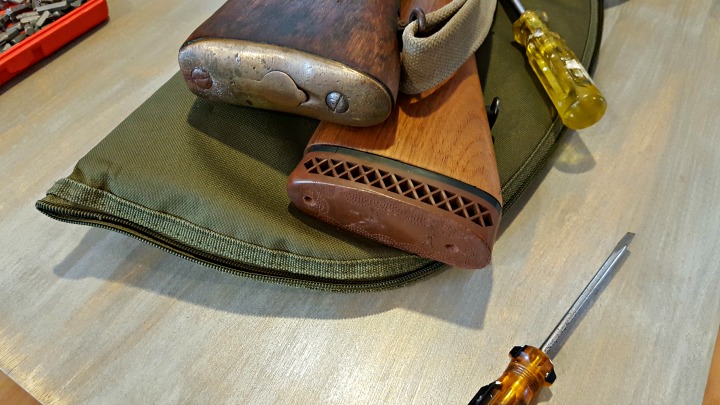
The Boyds stock is not only solidly made with highly advanced resins, but it feels more substantial when you’re shouldering or handling the rifle. The forend fits an adult male hand well, unlike many skinny stocks, where your fingers will wrap around onto the barrel if you’re not careful. It’s also beefier at the butt end. This is in contrast to the original skinny grip that would have been perfect for gloved hands in the trenches, but not user friendly for acquiring a positive grip in the hot bush and forest we often hunt in.

The slight increases in length, width and girth, add up to a much better length of pull and trigger/bolt manipulation characteristics, without increasing the overall length by much at all.

Choice

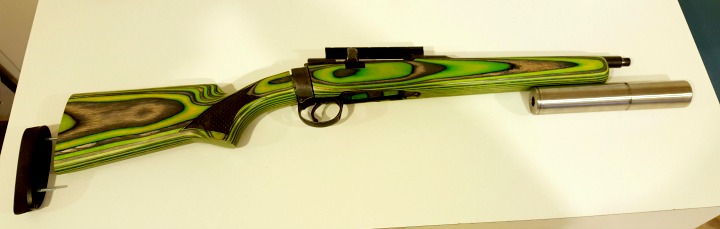
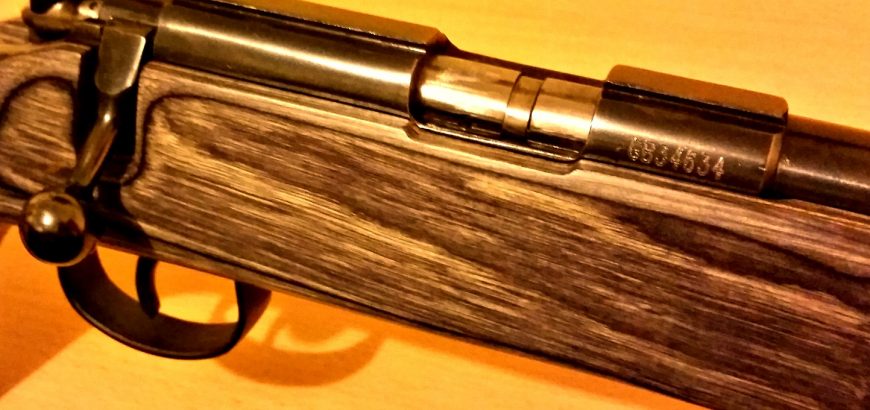
If you’re pulling apart an old rifle like this to do something special, why not make it truly one-of-a-kind? From the standard colours offered by Boyds, the Pepper laminate is a sexy rendition. Black and charcoal – it modernises any firearm, while still retaining the warmth of wood. There is also a straight walnut stock if that’s your preference.

The 'Scale' laser engraved chequering adds aesthetic appeal, visual depth, and enhanced grip characteristics.
The ‘Scale’ laser engraved chequering adds aesthetic appeal, visual depth, and enhanced grip characteristics.

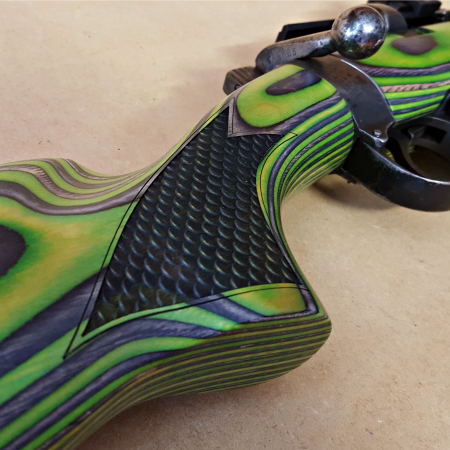
I chose a Zombie Hunter custom colour for an extra US$16.50, and my rifle stands out like no other. It’s an attention grabber at the range, and it just looks freaking cool. It’s one of those guns you want to take out and shoot, regardless of whether you’re actually working on a load or hunting or just plinking. I might burn through a lot more ammo just because she looks ‘cool’, but that’s okay. Not to mention, everyone else wants a go at it, too!

I also asked for some chequering on the stock, specifically the ‘Scale’ pattern. It’s laser engraved, and absolutely perfect. It adds some extra grip (of course), but also adds depth to the appearance of the rifle. There are a couple other options to choose from as well.

While you’re at it, you could also look at a custom finish, or a different butt pad option to tame your heavy-hitting wildcat magnums.

Negatives

Hey, nothing’s perfect, and there always have to be some negatives.

My only regret on this build (regarding the stock) is not having sling swivel studs, as a sling will be essential for crashing through some of our heavy NZ bush. However, I’m sure Boyds would have included some had I actually thought to ask. Not to worry, I do have some spare, but that’s definitely something I’ll think about next time. More a mistake on my part than a negative with the stock.

There is one negative, and again, it’s not actually a fault of the Boyds Field Design Stock: It’s the rifle. There is no way on God’s green earth that you will have a perfect fit. Unless you own the Boyds’ house action that they model their stocks off.

There is so much variation in fit, quality and manufacturing tolerances between these old war time rifles, that I can almost guarantee some work for you with sandpaper and a file or two, no matter what brand of gun stock you choose. However, if you’re restoring or upgrading any milsurp rifle, this should be something you expect along the way, so don’t let this put you off.

If hard work is not your cup of tea, there are plenty of modern actions that are very uniform and require little-to-no work to customise. Thankfully, Boyds makes stocks for those rifles, too!

sexy

Conclusion

At the end of the day, I’ve found (once again) that the Boyds product is a substantial improvement on the original stock that came on the gun. Not only this, but dollar for dollar, I can’t imagine another aftermarket stock coming close.

The customisation options offered by Boyds are a real bonus for anyone looking to increase the appeal of their old shooter, and the standard options are plenty for those who don’t like drawing too much attention to themselves or those who are watching their budget.

Would I buy it again? Yes. And I guess that’s the highest recommendation someone can give after thoroughly testing a product.

How to replace the stock on a Short Magazine Lee-Enfield (SMLE)

There are two types of Lee-Enfields out there. There are the pristine or refurbished, fully wooded, original-as-they-come investments. And then there are the sporters. These chopped and changed pieces of history make excellent first time hunter’s tools, or the basis of many a project.

We’re going to take a quick look at how to remove and replace (or upgrade) the furniture on your 303, and talk about some of the interesting things you’ll find along the way. Whether you’re building an awesome wildcat, such as a 25-303 or even a 40-303, or just beautifying grandad’s old hunter, I hope the steps in this article are helpful for your project.

Remove the floor metal

A large flat screwdriver is needed for the single action screw.
Remove the screw from behind the trigger guard, which the floor metal hinges on.
The floor metal should simply pull away. You may need to jiggle it a bit or get the right angle to slide the attached trigger out.
Depending on how your rifle's been treated over the years, you may need a bit of elbow grease to pull the fore wood off, but it should slide off easily.
Depending on how your rifle’s been treated over the years, you may need a bit of elbow grease to pull the fore wood off, but it should slide off easily.

Remove the butt plate or pad

If your rifle still has the brass butt plate, you can skip this next step by prying open the storage trap and removing anything that may be in there (oil bottle, pull through, etc).
For rifles with recoil pads on, it's time to unscrew these. More modern pads will likely require a No 2 Phillips head to remove the screws. Older pads like this are probably secured with a flat head screw.
For rifles with recoil pads on, it’s time to unscrew these. More modern pads will likely require a No 2 Phillips head to remove the screws. Older pads like this are probably secured with a flat head screw.

Unscrew the butt stock

The stock is held in place by a retaining bolt similar to that found in common shotgun designs. This means you'll either need an extra long screwdriver or extended socket driver.
The stock is held in place by a retaining bolt similar to that found in common shotgun designs. This means you’ll either need an extra long screwdriver or extended socket driver.
The bolt requires a large flat head driver. If your driver continues to turn after the screw should be out, but the wood won't come off, give it a sharp tap. It's probably held on by years of grease and tension.
The bolt requires a large flat head driver. If your driver continues to turn after the screw should be out, but the wood won’t come off, give the stock a sharp tap. It’s probably held on by years of grease and tension.

Select a stock to replace or upgrade your current furniture

There’s a chance you’re doing a straight swap for reproduction or original SMLE furniture. This could be because you’re replacing a broken stock, or restoring the rifle to its as-issued condition. Firstly, good luck finding furniture for a No 1 Mk iii. I’ve tried. You may as well keep your sporter and buy a whole specimen, because that’s the kind of money you’re looking at shelling out.

On the other hand, you could be looking to upgrade your old beater to something more functional. You do get synthetic Monte Carlo stocks that will lighten your rifle and bring your eye better in-line with a scope, but plastic just doesn’t feel right for these fine old beasts.

I’ve decided my project 303 needs a hardwood solution, and the Boyds laminate Field Design stock got the nod. With the customisation options available, you can create a unique firearm that not only performs better, but is a joy to look at every time you take it out of the safe.

We’ll have a review of the stock itself coming soon, and a detailed write up of the stock upgrade and other improvements to this rifle. In the meantime, below are some steps to take when fitting your new stock.

Fit and finish

Different iterations of the SMLE will have varying parts that need to be accommodated. There is so much variance in tolerances from arsenal to arsenal, that you’ll be glad if your stock manufacturer has left this last step for you to do yourself.

Pictured here is a cutout I had machined by a friend for the rear ring of the action. On the other side of the rifle, butt stock needs a slight radius to accommodate the safety lever.
Pictured here is a cutout I had machined by a friend for the rear ring of the action. On the other side of the rifle, the butt stock needs a slight radius to accommodate the safety lever.
Engineers/machinists blue or a permanent marker will help you find high spots on your action. Sand down your new stock to suit. An engineer that helped me work on this rifle said "there's not a single square section on this action", and he's absolutely right - war time quality isn't the greatest.
Engineers/machinists blue or a permanent marker will help you find high spots on your action. Sand down your new stock to suit. An engineer that helped me work on this rifle said “there’s not a single square section on this action”, and he’s absolutely right – war time quality isn’t the greatest.
Et voila! There's still some more work to be done on this rifle, but after reversing the disassembly steps, the stock will be complete.
Et voila! There’s still some more work to be done on this rifle, but after reversing the disassembly steps, the stock upgrade will be complete.

Gun Rack update

First off, an apology to regular readers for the gap in new content recently. It’s been a crazy couple months with a new addition to the family and purchasing our first home too.

Unfortunately my first born needs at least a few more years before he’s of any use as a reloading assistant, but for now he’s definitely entertaining. The reloading bench is also unfortunately far away from being ready, as I’m replacing my entire workshop set up (finally!). So it will take a little while for things to get back to normal, but we do still have a backlog of articles to get through. Here’s what you can expect to see in the coming month and a bit.

25 metre rapid shoot - always catches you up with your holdover!
25 metre rapid shoot – always catches you up with your holdover!

2016 NZDA Prize Shoot

This is a shoot I look forward to every year – and it seemed like I had no excuse going in, considering my rifle was successfully and repeatedly printing 6 mm groups… However, my placing was average, and as always I learned something new about being prepared for a competition. Look forward to telling you guys more about the day soon!

Venturing into F-Class

So I tried my hand at F-Class at the Franklin Rifle Club, shooting at 600 yards with some pretty good success. We’ll talk a bit more about F-Class in general, as well as give a little bit of info on the club and other long range destinations around the country.

I’d rather be out on the line… #tuesdaysucks #workweekblues

A photo posted by The Gun Rack (@gunracknz) on

Putting the finishing touches on a Boyds Field Design stock for my SMLE # 1 Mk iii.

How to replace the stock on an SMLE

The good ol’ .303 is a staple for NZ, Australian and Canadian shooters, and features strongly in militaria collections around the world. However, with the abundance of used and abused SMLEs out there, you’re bound to want to work on one at some point. This article will provide you with a quick look at how to remove and replace the wooden furniture on a sporterised No 1 Mk iii.

Product review: Boyd’s Field Stock for 303 SMLE

So, once you’ve removed the stock of your old .303 beater, you might want to spruce it up with a solid wood laminate stock from Boyds – which is exactly what I did. You can look forward to reading more about this stock – and the cool features available – soon.

Monster bush build

So, my project .303 didn’t only get brand new furniture from Boyds Gunstocks. It’s also wearing an MAE 6-30 ST suppressor, a Vortex Razor red dot site and is waiting for a fresh coat of Cerakote, when I can tee up a time with Victor from Cerakote NZ. This short-barreled bush build will be shooting subsonic lead and is begging to be taken out pig hunting. More on this monster in the near future.

DOCTER binocular reviews

What’s better than one pair of DOCTER binocs? Two! We’ll be taking a look at some more excellent optics from DOCTER, and talking about what to consider when purchasing new glass.

Hmm... what's gonna do the job?
Hmm… which is gonna do the job?

Product review: MDT TAC-21 Chassis for Tikka T3

What could make my Tikka T3 sexier? The TAC-21 chassis from MDT! We’re waiting on some magazines which are on back order, but when those arrive we’ll be taking this chassis out for a proper test drive. It’s already assembled and I’ve had a good amount of time to get a feel for it. I think this is going to make a good mid-range F-Open rig!

Rifle stock bedding and finishing: Part 3

Hey, it’s only been a year since we did part 1 in this series on rifle stock bedding and finishing! Before the end of the year we’ll take a look at the final steps in the process and also some of the excellent stocks available to complete your project.

So, these are some of the bits and pieces to look forward over the coming month and a bit, hope that’s whetted your appetite! Look forward to catching up iwth you on our Facebook and Instagram pages, and of course, right back here with some fresh new articles!

Mounting a scope on a .303

The old .303 has been a staple of the Kiwi bush for decades, and will most likely continue to be around for decades to come. Usually the pristine, fully wooded specimens are locked away in gunsafes and taken out for service rifle shoots, and even old sporters get treated with a degree of respect, reflecting their heritage from the culling days.

However, some sporters are the perfect base for a project that’s a little bit fun – a little bit different. So, looking out for the perfect beginning of a bush rifle project, an easy scope mounting scenario was high on the list for me.

Comparing two SMLEs, one with original fixed sights and one with a scope mounted and iron sights removed.

Most of the older rifles with scope mounts have rails that bridge the gap between the front of the action and the stripper-clip/bolt guide. I think I’ve only seen one with weaver-style rings jimmied into place, and one with a scout-type mount that fit over the rear sight – similar to what you see on some Mosin Nagant scout projects.

Anyway, these older rails – they all tend to lack any Weaver or Picatinny type cross sections – the slots where the recoil stop sits. If you try and fit modern rings to one of these older rifles, you’ll find that after a few shots, the rings will start to slide back or loosen.

So, this means if you buy a rifle with one of these old rails you have a couple choices.

Find some old rings

You could try and find some old style rings that lack a cross-bar. These are similar to the dovetail rings you get for rimfire rifles and for modern Tika rifles. The difference is the width of the ring bases, so you may not be able to find a modern type that will fit your older rifle – especially if the angle of the lips doesn’t mate up with the angle of the rail.

With the ATI scope mount, a longer allen key will be very helpful for the rear grub screws.

So, you may have to try and find some old school rings. However there are two downfalls to this approach. Firstly, older rings were phased out for a reason. The cross bar on picatinny and Weaver style scope rings means the rings cannot slide back on the rail under recoil.

The second downfall is that you will be getting an unknown quantity. They will probably be for 1″ tubes only, and you won’t know whether they’re good quality, well-aligned, etc.

Remove the rail and replace

There are a few modern rail types that you can fit to your .303. There are ones that you drill and tap into the side of the action – I’m not a big fan, but others like them. They’re quite similar to the kind of aftermarket rails you’d use on an AK, Mosin or SKS – basically actions that aren’t designed for scope rails.

The grub screws in the rear of the ATI scope mount use tension to keep the rail in place.

Because the rear ring of the action is quite different to modern actions, your standard MOA rails probably won’t be much help. However, ATI produces a mount that uses one screw into the front ring of the action and a couple grub screws against the rear ring of the action. While these two rear screws are not drilled and tapped into the action, the force they apply seems to be strong enough to keep the rail in place under recoil.

I’ve been using one on a project .303 for a while now, and have had no complaints.

With any aftermarket scope mounts on an SMLE, you’re going to have a pretty high scope. So, you’ll probably need to look at an aftermarket stock or some sort of cheek riser to allow easy and repeatable eye relief. More on that in another article soon, as this project continues to evolve.

Service rifle shoot at Waiuku

I’ve never had good luck with a shoot at Waiuku. I’ve been to the range twice before and both times been hit torrential rain and gales, making shooting uncomfortable, if not impossible. Well, third time was the charm as I attended the Waiuku service rifle shoot this Saturday past.

Firstly, let me say that Waiuku has great facilities that enable a wide range of shooters to enjoy themselves. It’s also one of those rare clubs where pistol, rifle and shotgun are all welcome. However, I’ll leave a review of the range for another post. For clarity’s sake, this isn’t the same Waiuku range were ASRA does their winter shooting (The Farm).

On to the shoot itself. Well, it’s a 45 round shoot which I was hoping to do with my .303, until I realised that morning that I only had 20 rounds in the safe. With an abundance of 7.62×39, it turned out that the trusty SKS would get a work out this morning.

Service rifle shoot

If you’re into your military surplus rifles, going along to a service rifle shoot should definitely be top of your list of things to do. With everything from WWI Lee Enfields, through to Mausers and AK47s and AR15s, every major armed conflict in recent history was represented.

The shoot was run in two details and as previously mentioned, was 45 rounds. This consisted of a Trinity and Action M match and a 10 round sniper shoot.

The Soviet weaponry and rusted casings are reminiscent of the Nicholas Cage movie Lord of War.

The trinity shoot is 5 rounds each in the standing, kneeling and prone positions. With no sighters or spotting scopes, you’ve got to know you’re rifle well. The SKS performed well, but was shooting low – which was more me than the rifle, as my wife was shooting too high with the same gun. One thing I may consider doing in the near future is replacing the front sight post with a skinnier one that doesn’t blot out the entire target. Those rifles that were scoped were limited to a magnification of 4x.

After those fifteen rounds, targets were checked, which is when a few of us actually got to see where our rounds were going. For myself, another shooter with an unsighted SKS and another with a new suppressor on his AR, the results were less than stellar.

The next ten rounds allowed us to compensate where we needed to, but the faster pace and movement involved in the Action M shoot means you can’t spend too much time trying to compensate, especially with open sights at 100 metres.

An Action M is usually shot in 60 seconds (at least it was when I last shot one at the Auckland Service Rifle Assn), and consists of 2 rounds prone, 2 rounds standing, one kneeling – reload another 5 round mag or clip – one kneeling, 2 standing and 2 prone. It’s 75 seconds for bolt actions, which is okay if you have a removable box magazine or stripper clips. However, when I shot this last with a Swedish Mauser and no stripper clips, it was certainly challenging. The rules for different types of matches are made by the NZ Service Rifle Association.

In light of the range of rifles and abilities present on the day, and the generally non-competitive nature of the shoot, no strict timing was done, although everyone went as quickly as they could.

SKS on bipod
The sniper shoot allowed for rests or bi-pods. Handy hint; your car’s floor carpeting can be used if you forget your shooting mat.

The last ten rounds was a sniper shoot which allowed shooting aids, such as rests, bi-pods and spotting scopes – this is where many people were able to turn the tables – despite the smaller targets. Having someone spotting for you is also very helpful when you’re on iron sights.

Although I didn’t place highly, I did enjoy the day and seeing all the old relics shooting (and their rifles too). About a third of the shooters were from HSSRC, so there were some friendly faces, and a few us enjoyed shooting some silhouettes with the rimfires on range 2 afterwards. All-in-all, for $20 and the cost of ammo, a good day was had all round.

Finishing the day off with some silhouettes at 25, 50, 75 and 100 metres was good fun.
JW-15 in Boyds laminate stock.

Custom rifles vs Factory rifles – who wins?

Let me preface this by saying… How long is a piece of string? If you’re looking for the definitive guide on the all-time showdown between factory and custom rifles, you’ve got a long wait ahead of you. There’s no way to say one is categorically better than the other, but depending on your needs, one will suit you more than another. Here’s a quick run down on the two options.

Custom vs “Custom”

Well, maybe there are three options. There are rifles that are custom built by fantastic gunsmiths, or even several different people (i.e. barrel manufacturer, suppressor builder, stock maker, etc), and they can run into the tens-of-thousands of dollars. Chances are you’re not comparing a $35,000 rifle built on a Surgeon action to a Weatherby. So, realistically, these types of custom rifles fall outside of the scope of this discussion.

There are even the customised Remington 700s, Sakos and others you can buy direct from a gun store, which have been assembled with a host of accessories and a non-factory stock, etc, which offer “custom” rifles at lower costs and with a lot less effort. This a kind of middle-ground which, again, falls outside of the debate of custom vs factory.

Factory rifles

There are a host of incredibly good choices out there when it comes to factory target or hunting rifles. And the fact of the matter is, with modern production techniques and better quality control standards, many of these rifles are incredibly accurate out of the box.

Sako guarantees the Tikka T3 line to produce an MOA 3-shot group out of the box, and they boldly make the same claim with their T3 varmint and tac and 5-shot group. That’s pretty impressive. However, that doesn’t mean your new Tikka T3 Lite in stainless/synthetic will do that with any ammo you feed it. Bear in mind, Sako tests rifles with ammunition they produce themselves.

So, you may need to find just the right brand of ammunition, or even reload your own to get that level of accuracy.

The great thing about factory rifles is that if you look after them and keep track of how many rounds you put through them, you’ll generally get a pretty good resale value if you decide to switch calibres or clean out the safe down the line. Selling firearms is just foreign to me – I want more, not less – so I couldn’t really relate personally. However, for some, it’s a major benefit.

Another aspect of factory rifles, and this is one that I can understand, is that you have warranties and guarantees form manufacturers and retailers. If something goes wrong with a stock-standard rifle, you’re usually okay. Again, this comes down to incredibly efficient modern materials and processes – a lot of manufacturers are so confident, they will give you a lifetime warranty, even with their base models.

Custom rifles

A lot of firearm owners like to try and get more for less. They’ll buy a rusty old milsurp and try restore it, or even convert a P14 action from .303 to a .338 Lapua long-distance shooter. It’s this undeniable urge to make something better and more accurate – but cheap.

Many people try, and many people fail. The old adage “cheap, accurate, reliable – pick two” still stands true. However, not all is lost. Many backyard tinkerers find that they learn more about gunsmithing, rifle maintenance and internal or external ballistics by working on their own firearms than if they bought an out-of-the-box MOA-shooter. It gives you a more holistic view and respect for firearms, and generally makes you a better shooter. The more you know about how your rifle works, the better you can work with it.

Modified Mauser bolt action.
This modified Mauser bolt action was a lot more work, but is a joy to shoot.

What I have found with my own projects, from JW-15s to Swedish Mausers, is you’ll probably spend enough money in the end to have bought a tack-driving factory rifle. So why would you do it?

  1. The initial outlay is low. Three or four hundred for an M38 in 6.5×55 which might need a lot of work to be great, but at least in the meantime, it’s still good.
  2. It’s a project. If you yearn to create your own sub-MOA rifle and constantly look up the latest Boyds’ rifle stocks or DPT muzzle devices, then this probably for you.
  3. It’s unique. Hey, it’s the gun you built, not the one Howa, Marlin or Remington made. There’s a certain amount of pride in this, and you can make it look and feel the way you want.
  4. Individual needs. Hey, if you need a bush gun – cut down a .303. If you want an odd-looking F-Class gun, try your hand at “improving” an old Mauser. The best part is never feeling bad about cutting into the steel – coz it only cost $250.

Who wins?

Well, if you want a reliable, dependable and accurate rifle to take hunting or to the range, you could go and get yourself a Tikka T3 Lite in stainless/synthetic for less than $1200. Chances are your home-improved P14 or Model 1896 is going to end up costing you more with a new/improved stock, bedding, barrel and chambering, suppressor, bases drilled and tapped, etc, etc.

floor metal
Floor metal from 1943 looking fresh and ready to go.

However, if you want something unique that you can enjoy working on for months – or even years – pick up a donor action to work with. Even an older (pre-1964) M70 or Remmy 700 is fun to use. And the best part is if you buy a complete milsurp, you can probably enjoy shooting it “as is” to start with for very little outlay.

I’ve heard many Tikka T3 owners say their rifle is “boringly accurate”. And that is high praise for any manufacturer. So, at the end of the day, if you want to drill tiny holes into paper or leave gaping exit wounds in deer at 400 yards – get the factory rifle. If you want to feel like you earned your way to shooting sub-MOA or making long-distance kills, a project might be on the cards.