
Product review: MDT TAC21 Chassis for Tikka T3 long action

Chassis systems have really come to the fore in the past few years, as tactical and precision rifle shooting has gained a larger following. Throw in lots of product innovation and modularity, and you’ve got a recipe for success.

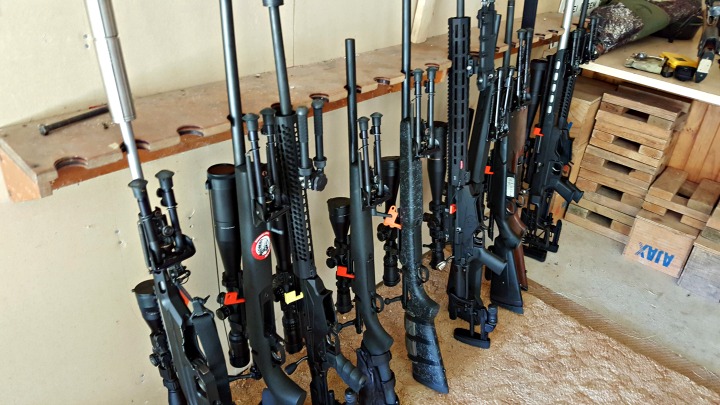
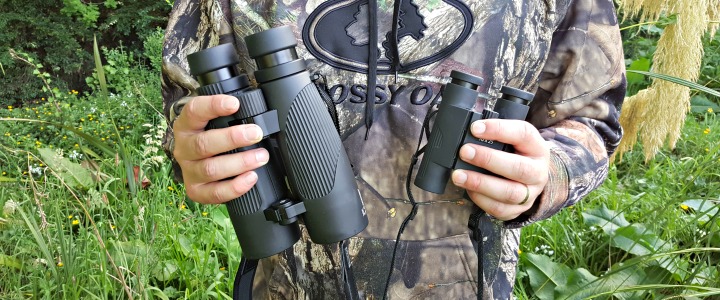
There are three rifles that usually get the royal treatment, and have chassis built for them by most major manufacturers. Namely, the Remington 700, Savage 110, and the Tikka T3(x). The Howa 1500 usually features too. If you’re looking for a chassis for any of these rifles, you’ll have plenty to choose from. Having looked around the market, I decided to to give the TAC21 chassis a go.

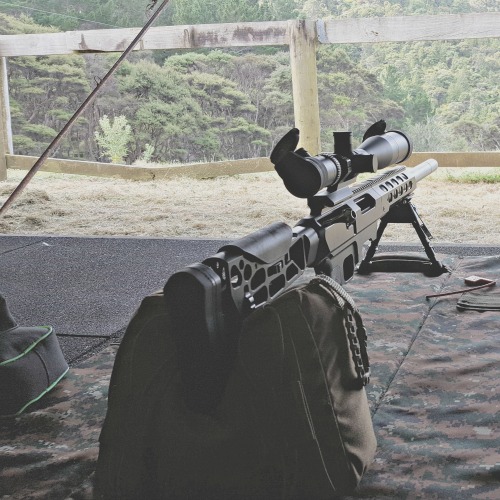
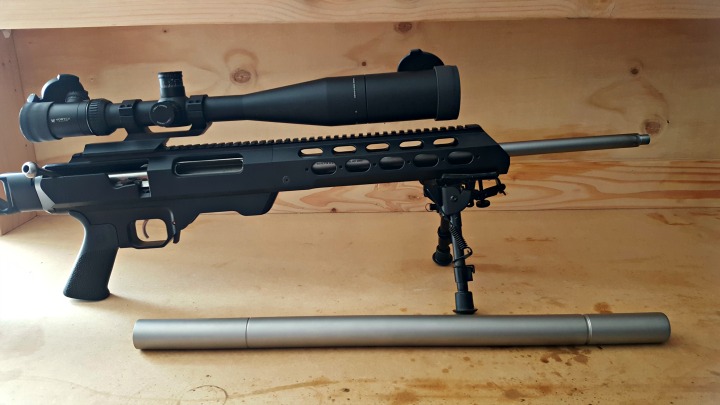
The reason the TAC21 really stood out as a potential option for the build I was working on, was that the forend came off as a separate piece, but still had a continuous Picatinny rail. This was particularly important for me, as my Tikka T3 in 6.5×55 has a full over-barrel MAE suppressor that comes right back to the action. It has a 1.26″ OD and would need to be removed after every shoot to get gas residue and powder fouling off the barrel and crown. The TAC21 looked like it was up for the task – and it sure looked a lot easier than taking my rifle out of its standard stock every time I left the range.
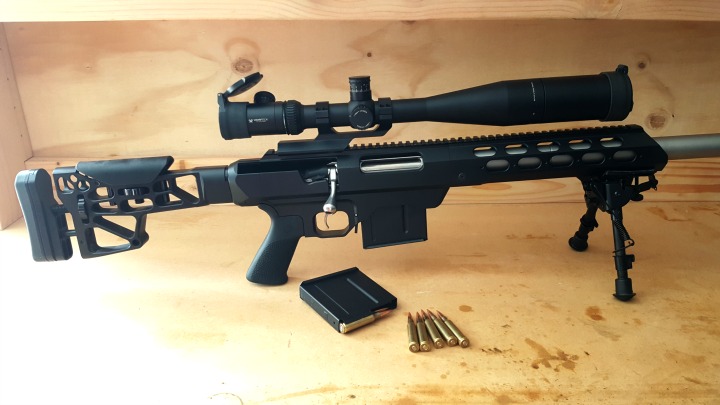
The TAC21 by Modular Driven Technologies (MDT). Note the dimensions are for a Remington 700 SA. [Image credit: MDT]
So, after deciding on a chassis, MDT offered us one to review. This is always a good sign – when a manufacturer stands by their products enough to let them out into the wild with reviewers! So, after customising my order on the MDT website, it was time to wait for it to be shipped to NZ.

The agony

Nothing is more painful than having a cool new toy come from across the world, and not knowing when it will arrive!

Compounding my dilemma was the fact that it was a Tikka T3 long action. This meant that standard AICS mags would not work, because of the shorter magazine port. MDT makes their own magazines, in metal. They are Cerakoted the same colour as the chassis too. Unfortunately as I placed my order, they were out of stock and back ordered, so I waited “patiently” as they made up some new ones.

When the rifle did arrive, I happily single-loaded for a while, until the magazines were ready.

However, this was all mitigated by the fact that MDT’s staff are perhaps the best human beings on the planet. I judge a company a lot by how they treat their customers, and MDT tops the charts in my books. The only other company that would share that rank would be Vortex. And when it comes to some of the really big bullet and component manufacturers, I can tell you, your concerns are right at the bottom of the pile with them.

You may think I received special treatment as a reviewer and that my experience is not really a true customer experience. Well, the first person I spoke to knew I was a reviewer – the other two people did not. So, I’m comfortable standing by the statement above.

The best day, was when I inquired after progress on the mags, and was told they were a few weeks out still. How was this the best day? The kind lady at MDT offered to send my entire order ASAP, and then expedite the magazines to me when they were available, at no charge.

To which I said ‘Yes’. Very much yes.

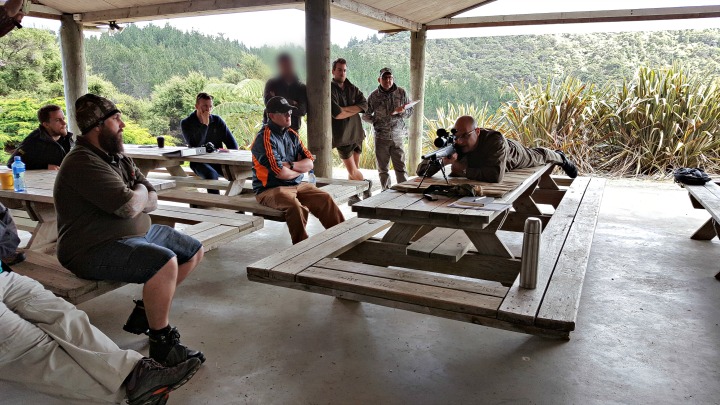
I really wanted to give this chassis a thorough testing, and I didn’t mind single-loading for a month or so if I had to. And I’m glad I did, as this gave me a chance to work through some of the unique aspects of the system, and also take it along to some cool events, such as the Long Range Fundamentals course with Kerry from Precision Shooter.

15992024_10154688046896357_489822583_o

First impressions

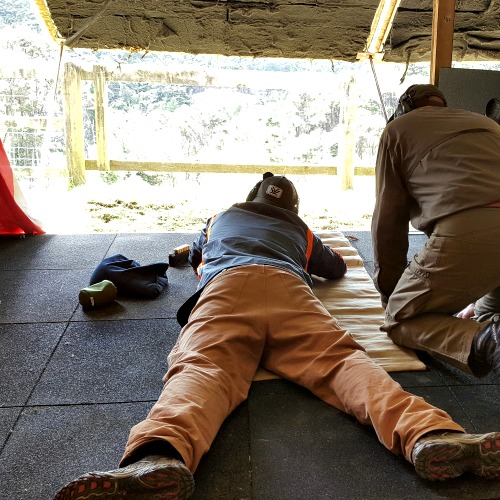
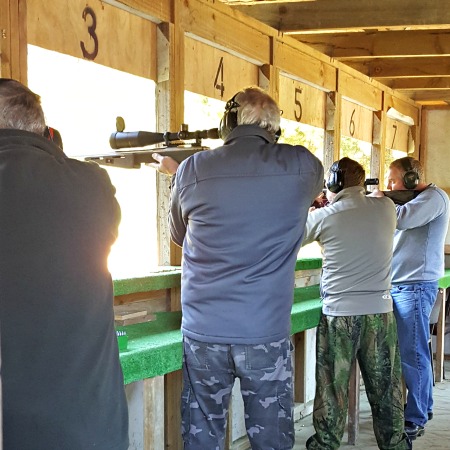
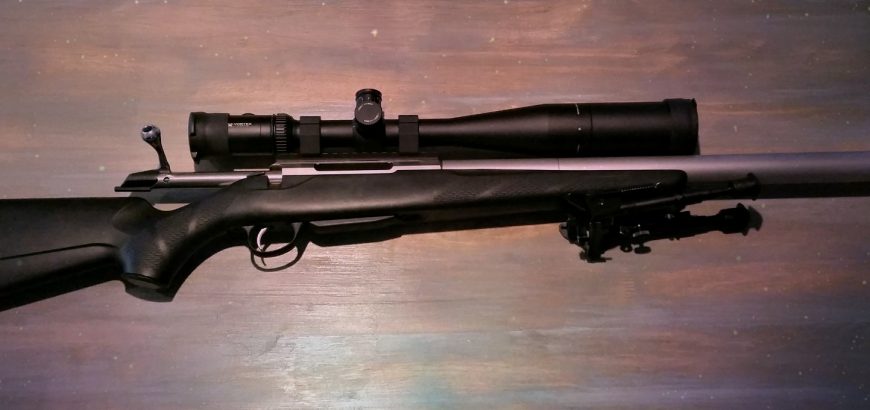
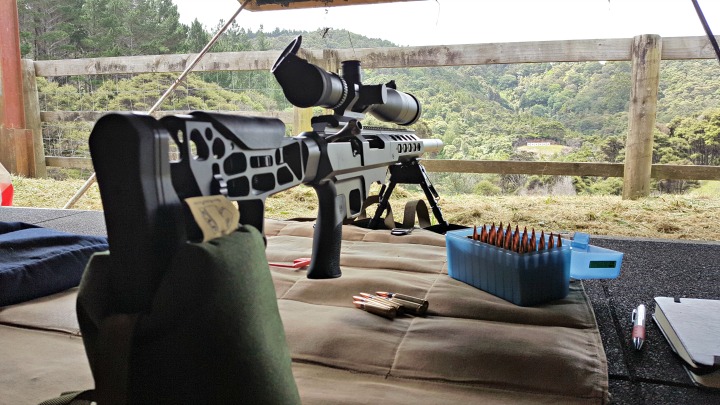
I cannot overstate how excited I was when I opened my package from Canada. But I unfortunately couldn’t use it straight away, as I was sighted in and good to go for my first F-Class shoot. After I attended that shoot with the Franklin Rifle Club at 600 metres, I got home, stripped and cleaned the rifle, and got busy putting it into the TAC21 chassis.

The first thing I noticed was that the solid aluminium chassis and Skeleton Rifle Stock added a good deal of weight. This was ideal for my purposes (an F-Open build), where extra mass means more stability and less felt recoil. If you’re after a lighter chassis system, for more run-and-gun shooting sports, look at the LSS or HS3 chassis by MDT – many of the same benefits as the TAC21, but much lighter by design.

Assembly

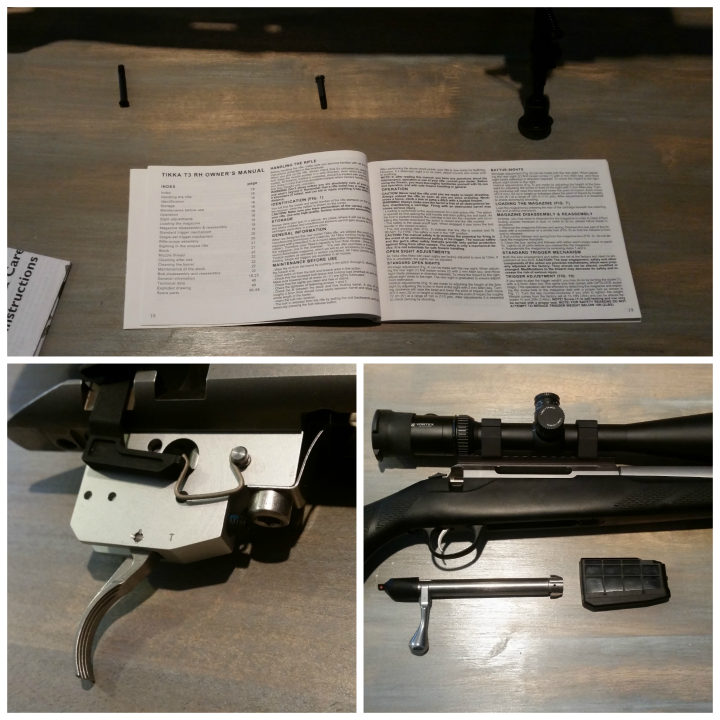
I won’t go through how to assemble the product – it’s pretty easy, and there are step-by-step instructions included. There are also some Youtube videos out there if you’re a visual learner.

While I was putting the rifle together I immediately noticed a few points. This chassis is not carelessly designed. There are some very obvious cutouts and reliefs specifically for my Tikka, where a Remington or Savage would have a different layout (bolt stops, safeties, etc.). Instead of finding a way to cookie-cutter design this chassis, they designed it around the actions they wanted to house, and did so with a high degree of accuracy and utility in mind.

The safety is easily accessible, and there is nowhere for the bolt to hang up. The bolt stop/release has its own little slot in the aluminium housing (they provide a longer retaining pin for this), and there’s even a window cut into the side so you can see your serial number. That last detail impressed me as an extra little bit of thoughtfulness.

The MDT 300 WM metal magazines give you an extra 1 - 2mm to play with.
The MDT 300 WM metal magazines give you an extra 1 – 2mm to play with.

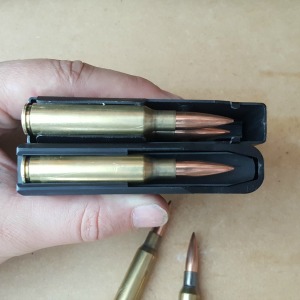
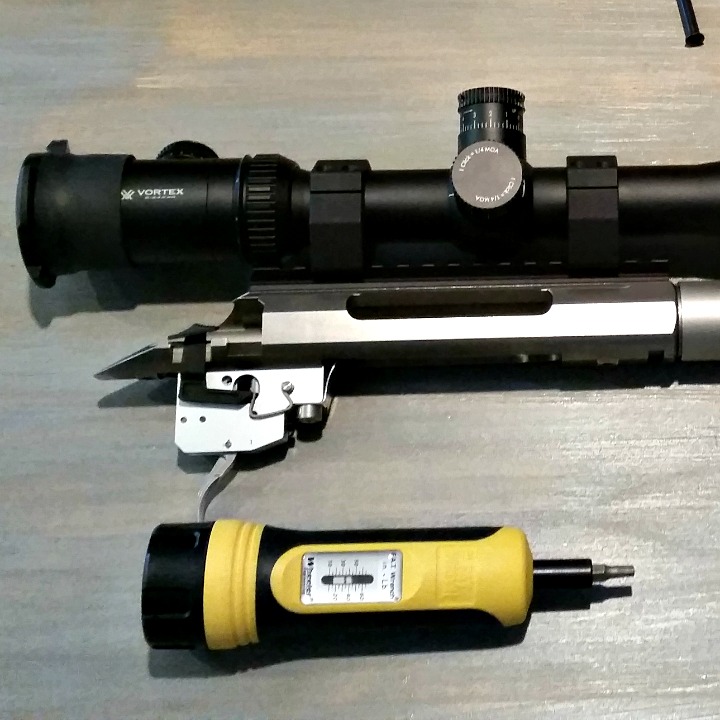
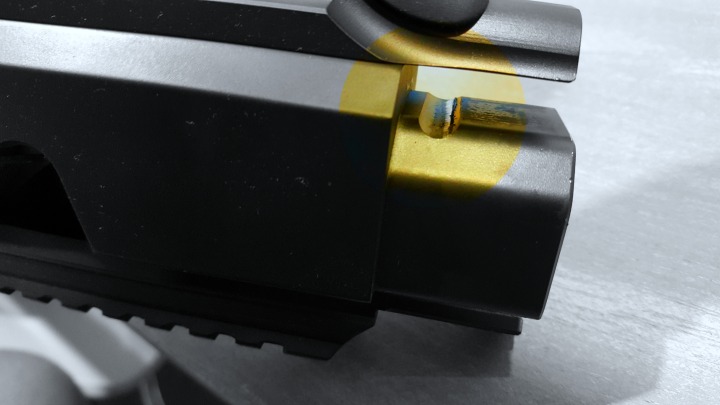
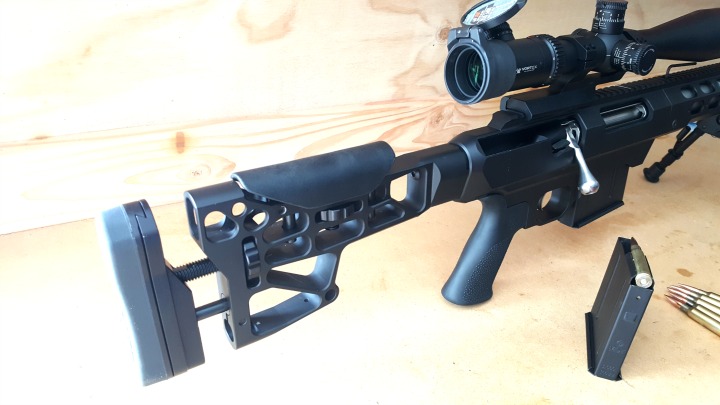
Other things to note… The Tikka’s free-floating recoil lug has just been upgraded for you. The chassis comes with a steel lug, that is far superior to the soft, aluminium one that comes standard on the T3. You’re also completely replacing your trigger guard and mag well, so this means you can’t use your factory mags. This is no problem though, as the factory magazines are always too small in capacity and never long enough to load out to the lands for you reloaders.

The MDT Tikka T3 LA magazines are solidly constructed out of steel, and designed for cartridges up to .300 WM. You can bend the feed lips to suit your round. I lightly bent the lips on my two magazines to get a grip on my 6.5×55 cartridges. I could have bent them over a bit more, but I found them tight enough that nothing would knock the rounds out unintentionally, and I could get 6 rounds per mag instead of 5. This is ideal for the F-Class shooting that I’ve been doing, where you shoot your 24 rounds in 2 details of 10 scoring shots and 2 sighters. This means only one mag change per detail, rather than the four mag changes I was having to do with the factory magazines.

Mail day! Thanks MDT! #nomoresingleloading

A photo posted by The Gun Rack (@gunracknz) on

The forend snugged up nicely to the body of the chassis – the offset screw holes helping to lock it in place. The rail on top truly was continuous, with perfect machining. The attachment of the forend is one of only two improvements I could think to make to this design.

The screw in the top rail could be hard to get to, depending on your scope/mount situation. I actually found I could just clear the scope with an allen key and remove the forend when necessary. Although most shooters would not need to remove this piece as often as I would, to clean under the full suppressor.

As I said - just enough space with my setup. Note the screw holes on the side for attachment of 1913 rails.
As I said – just enough space with my setup. Note the screw holes on the side for attachment of 1913 rails.

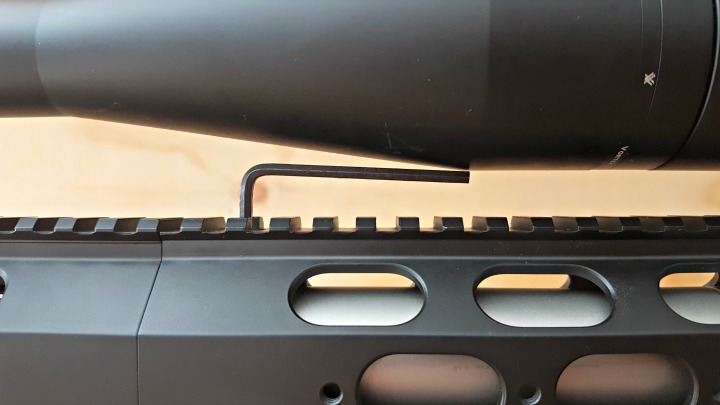
I would perhaps have done two screws on the diagonal sections between the rail (top) and the sides, rather than have the screw on top. I would rather have four screws to undo, than potentially have to take off my scope if I needed to work on the barrel exterior. However, I am no engineer, and aside from the extra labour and materials that would be required, I couldn’t tell you if my idea for fixing the two pieces together is anywhere near as good as the original design (in terms of robustness, etc.). So, a grain of salt and all that.

The other thing that I think would improve this design (for the Tikka shooters amongst us), would be replacing the bolt stop/release with an aftermarket one that sticks out further. It can be a bit finicky to get the bolt out, but certainly not to the point where I would say it is a flaw in the design. Just an area that could be improved – and perhaps this is an area for the end user to look at.

The Tikka T3 bolt stops differ from calibre to calibre. This allows to Tikka to produce a more uniform action, cutting down costs. I imagine it would be quite an undertaking to design, make and stock all of the possible options. However, if you look around, some machine shops and gunsmiths do make aftermarket versions out of steel or what-have-you, so it could be something to look at if you have fat fingers like me.

Breaking her in

This rifle has become my main centrefire rifle over the past few months, and I’ve enjoyed every minute of it. I did have some frustrations at the start, and we’ll go through how to avoid these yourself.

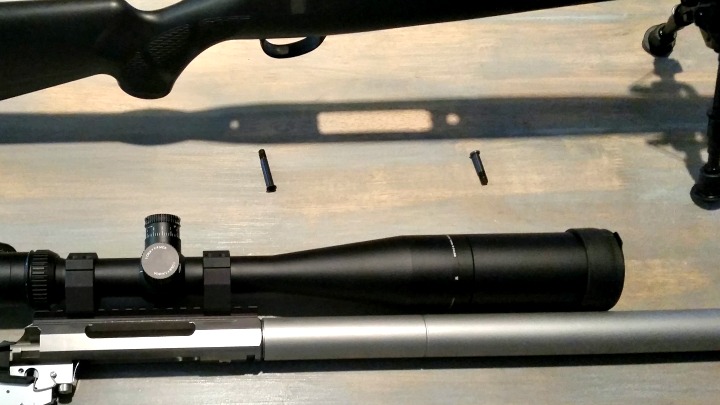
Scope mounting. If you have a large objective lens (which you likely do if you want a chassis for your shooter), it will not clear the full-length rail on short or standard rings. Unfortunately my Vortex precision-matched rings were 1mm too short to clear the chassis, so I hopped onto the Optics Planet website and set about ordering a one-piece riser, to get some more height.

I was told the riser I wanted was considered an AR-15 part, and therefore couldn’t be exported from the US. Annoying, but rules are rules. They gave me a couple replacement options and I went with a pair of quick detach risers (ironic, as these seem much more suited to an AR, but anyway).

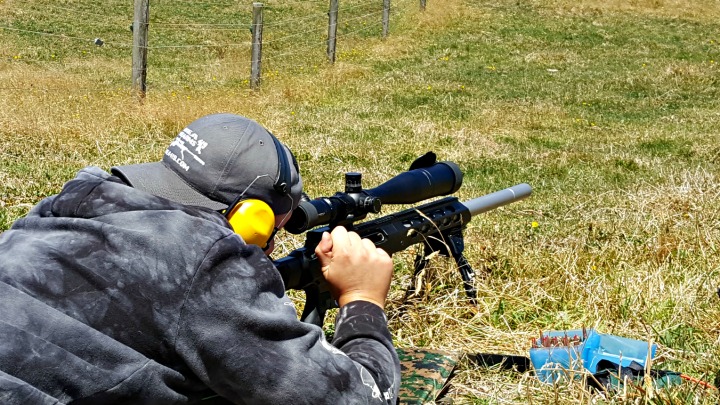
So, I mounted my Vortex Viper PST 6 – 24 X 50, and hit the 100 metre range at Waiuku Pistol Club. I almost cried. My rifle, which was shooting handloads into 0.2 MOA groups was now double grouping and doing just under 1.5 MOA. I felt sick to my stomach at the thought of having to do this review, with such a negative result.

After burning through around 50 rounds of pricey handloads, hearing comments like ‘shooter error’, I was ready to go home. I took the chassis apart to wipe the barrel down and noticed the QD riser at the front had worked loose, and must have been shifting back and forth a minuscule amount under recoil. Feeling like an idiot, but a hopeful idiot, I went home to reload some more rounds and hit the range the following weekend.

Thankfully I have a 2-inch offset cantilever ring mount, provided by Vortex for an upcoming review on their Strike Eagle scope. I switched this in and patiently waited another week to get to the range. With the cantilever mount, the centre of my scope now sat about 2.5″ above the centreline of my bore. Not a major problem, except this will accentuate any user error involving cant. I would suggest getting a bubble level to ensure vertical alignment to the target. If you’re into long range shooting, you probably have one already.

Thanks to Vortex I had an offset mount on hand. Note the height off the barrel.

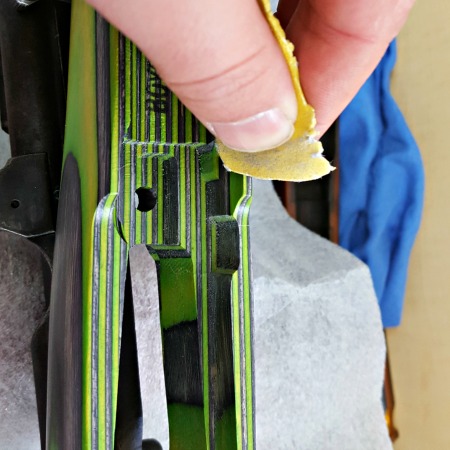
Another almost negative was that I found the latch that secured the Skeleton Rifle Stock to the chassis to be very stiff. I spoke to MDT and sent them some photos, of where paint had scraped off the housing for the latch’s retaining pin, indicating it was having trouble camming fully over.

This tiny build up from initial use was making it difficult to connect the chassis and stock. It didn't take long to sort it out though.
This tiny build up from initial use was making it difficult to connect the chassis and stock. It didn’t take long to sort it out though.

The MDT staffer said that a break in period could be expected, as the part was machined to tight tolerances to ensure a tight fit for the life of the rifle/chassis. He offered to send me another latch pin, free of charge, so I could polish down my current one, and use the new one after it had broken in. I said thanks, but no thanks. It wasn’t worth wasting their time and money if it was such a simple solution.

To ‘speed up time’ with my break in period, I gave the latch a couple hard taps with a wooden dowel and a rubber mallet. It now works perfectly.

The Skeleton Rifle Stock V4 is heftier than it looks, and features adjustable LOP and comb height. There's also mounting points for a rail at the bottom, to attached a monopod.
The Skeleton Rifle Stock V4 is heftier than it looks, and features adjustable LOP and comb height. There’s also mounting points for a rail at the bottom, to attached a monopod.

Findings

The TAC21 is designed to take your rifle from factory to precision with very little effort. Bedding is one of the most important aspects of increasing the accuracy of a rifle, and MDT makes this easy. The action only touches the V-bedding in a few spots, and with incredible repeatability and sturdiness. The forend leaves your barrel completely free-floating, for any barrel less than the diameter of the action.

If I had started with an out-of-the-box rifle with factory ammo, I would have expected to see dramatic gains in accuracy. MDT claims up to 28% increase in accuracy, and I can believe that, looking at the design.

Taking an already accurate rifle and putting it into the TAC21 chassis system, what I was looking for was accuracy (repeatability of shot placement – not smallness of group size).

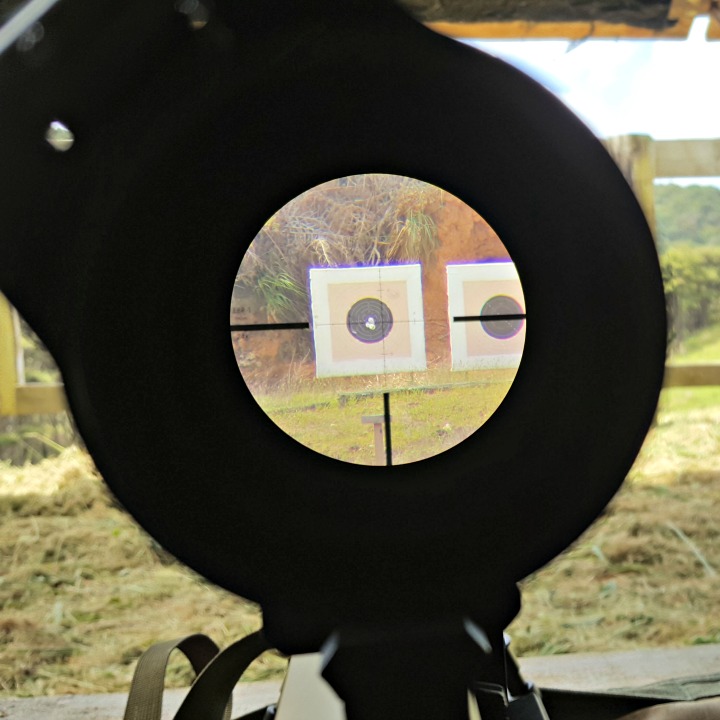
With scope now properly mounted, I was surprised to find there was hardly any POI shift from the 20 MOA Nightforce rail that was mounted to the Tikka action, to the 20 MOA rail integral to the action housing on the MDT chassis. It was literally a couple of clicks to get centre at 100 metres.

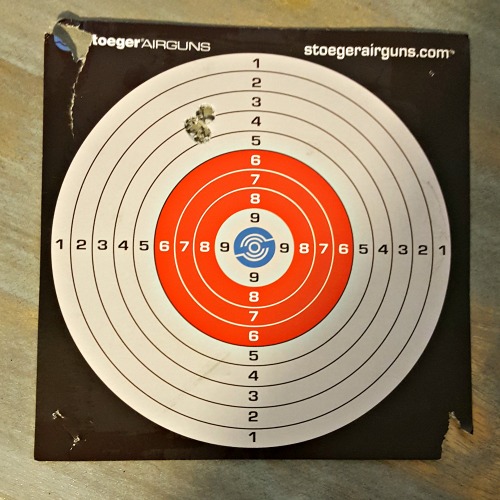
With factory ammo, I noticed accuracy was perfect. I had my doubts and expected I might get some shift in POI due to the optic being mounted to the chassis and not the rifle, but the repeatability was there. I had less than a full box of Norma ammo, so didn’t do too much grouping, but did notice a decrease in group size as well, by about 0.1 – 0.2 MOA, down to an average of 0.7 MOA.

Profile of the MDT TAC21 and Tikka T3.

My personal handload featuring Norma brass, 143 gr Hornady ELD-X projectiles, Federal Gold Match LR primers and ADI AR2208 powder (Varget) was just as repeatable.

As I mentioned before, repeatability was the test here, not smallness of group size. My handloads were tuned specifically to my rifle as it was, and this testing was done with the exact same load, with no further adjustment. It wasn’t shooting 0.2 MOA anymore, but it was shooting a consistent and repeatable 0.6 MOA.

Why did my handload group size increase, while the factory ammo groups decreased in spread? I suspect the bedding of the rifle worked its magic on the factory ammo, which is made to much lower tolerances than my reloads – and therefore could really benefit from the improved bedding.

I suspect my handloads increased in group size because the tension on the action has changed – almost double the torque to secure the action to the aluminium chassis, compared with the factory plastic stock. I imagine this has changed the harmonics somewhat. To reduce my group size again, I could either move my charge weight up or down a small amount, or I could play with seating depth.

Even at 0.6 MOA I was happy to take this rifle out to an 800 metre shoot, and it did quite well. Note if you use a rear bag, the inline stock will be higher off the ground, so you may need a bigger bag.

The latter is now a much more distinct possibility, as I have an extra 1.5mm of mag length to play with. I hope you haven’t got this far into reading this (fairly lengthy) article, and believe the increase in group size is an indication of negative performance on the part of the TAC21 chassis. As mentioned above, this is purely a function of my handloads being tuned to the rifle as it was.

With a bit more time to play around, I expect I’ll get this rifle back down to its 0.2 MOA capability, while enjoying the modularity of the rifle and ergonomic bliss that comes with having the action and butt stock inline. Just quickly, these are the features that I really like about the MDT TAC21:

  • V-bedding block for increased accuracy and decreased points of contact
  • Thoughtful design
  • Included recoil lug
  • Straight-line design to absorb felt recoil and decrease muzzle flip
  • Full length top rail – 20 MOA too!
  • Plenty of places to add a Magpul rail or two for your bipod, monopod, laser, printer, coffee maker, whatever…
  • Sling swivel stud included for bipods, but easily removable for rail mounted varieties
  • Excellent finish of hard anodizing plus Cerakote in your preferred colour – I had no marks on the stock after months of use, except for where the QD riser was loose on the top rail, and a couple points in the butt stock attachment area, that are not visible anyway when the rifle is assembled
  • Huge tolerance for barrel size, meaning you can have straight no-taper barrels, massive muzzle devices, whatever you want
  • Decent amount of weight for prone shooting and recoil reduction, but light enough to lug around a bit if necessary
  • It looks fantastic, and your factory rifle can play with the RPRs and HCRs and whatever else is on the firing line
  • Better magazine options

If you want any more convincing, head along to the MDT website and check out the customer reviews for this product. You will see exactly what I have experienced. Great product, fantastic service, and an all round improvement in your rifle.

Long Range Shooting – Level 1 – Fundamentals

Late last year I had the privilege of being invited along to the first Long Range Shooting course run by Precision Shooter. The event was not only an introduction to long range shooting for many, but also the first event of its kind.

The LRS Level 1 – Fundamentals class was primarily focused around getting shooters of all abilities onto a fairly level playing field, and teaching solid shooting techniques. The course was run by Kerry from The Bloke and Precision Shooter, but most of the content was delivered by Christian Neubauerx – Beretta’s head gunsmith in New Zealand. With 20+ years of experience as a smith, Christian knows his way around a gun better than most.

How's this for a classroom setting?
How’s this for a classroom setting?

The classroom

The first half of the day was a ‘lecture’ of sorts. Essentially a classroom-like setting, undercover and with the use of props (i.e. rifles and gear). If the word lecture puts you off, don’t let it. Think about all those questions you’ve been researching in internet forums and gun sites. Now imagine an authoritative source, giving you the answers direct, without bias and internet-inspired bravado or stupidity.

Even though my rifle was shooting groups like this the day before, I still found the course quite a 'shake up' of my technique.
Even though my rifle was shooting groups like this the day before, I still found the course quite a ‘shake up’ of my technique.

There was plenty of time for questions, and we managed to cover off what kind of rifles make good long range rigs, cartridge choice, shooting equipment and a decent amount of theory (such as MOA vs MIL, etc).

There were plenty of breaks and opportunities for tea/coffee and snacks (all provided). Before heading down to the mound we had a demonstration of shooting technique from Christian, who climbed up onto a long table with his unloaded rifle, and took us through body position and shooting sequence.

The range

Now it was time to put what we learned into practice. Everybody got their gear down to shooting position and racked their rifles. There was a good array of firearms, from utilitarian hunting rifles, through to long range platforms such as the Ruger Precision Rifle, and several in between.

I was shooting my fully supressed Tikka T3 in 6.5×55, residing in an MDT TAC21 chassis, and topped off with a  Vortex Viper PST 6-24×50. Having a Tikka, I particularly enjoyed having Christian take the course, as I was able to pick his brain on Tikka-specific issues, such as the trigger creep I was experiencing. As head gunsmith of Beretta NZ, he has forgotten more about these rifles than most could ever hope to know.

The venue for the day was the Swiss Club, north of Auckland. If you’ve ever shot at the ASAR (Any Sights Any Rifle) shoot, you’ll know it’s a pretty sweet set up, and all of your shooting is done from an enclosed shooting position, out of the sun and the wind.

We were shooting at a set distance of 300 m. Hold on you say – “that’s not long range”. Fair comment. Remember this is the fundamentals course. Some of those attending had never shot beyond 100 yards/metres before. Not only was it about bringing these guys up to speed, but it was also about honing fundamental skills, regardless of distance.

The target area and shooting hut.

Even at 300 m, trying to implement the techniques we had just learned, I did notice a lot more spread in my groups than I would have expected. Basically I was having a shake-up of my technique, and trying to focus on new ways to do things meant not shooting as well as I usually would, but building positive habits to shoot better in the future.

15992024_10154688046896357_489822583_o

There was one frustration on the day, and that was supporting the rear of the rifle. I had just bought a new bag that was the perfect height for my MDT chassis, which sits higher off the ground than the original Tikka stock. However, the Swiss club is most often used for unsupported shooting of target rifles, with slings and jackets. To suit this purpose the club had built their mound on a slight upwards incline, to better aid body position, while the targets were on a downward angle from the mound.

The bag I snagged from Kerry made a huge difference.

For many of us, this meant struggling somewhat to get the right height/angle on our rifles. Thankfully after trying one of the rear support bags that Kerry had on hand, I was able to get shots downrange with greater consistency. This really inspired me to start looking at purchasing a multipurpose bag for field shoots. I’m not always going to have a perfectly level and stable shooting platform, so a more versatile bag is definitely called for. I haven’t decided yet on the bag I’ll use. I like the idea of the Reasor Gamechanger Bag, but I’ll need to have another thorough look at the options provided by the Gearlocker before I make a final decision.

Coaching

The format of the shoot was focused around improving the individual shooter. We had a few sighters, and then Kerry and Christian gave each shooter individual, one-on-one coaching through a series of single shots. We focused on body position, breathing, eye-relief, rifle mounting, bipod loading and more.

At some point we had lunch, which again, was provided. This was a great opportunity to chat with everyone and see how they were doing and what they were learning.

One-on-one coaching was one of the highlights of the day.

Next up was shooting groups of five. However, instead of simply having Christian or Kerry tell you where your shot landed, we had to try and determine where the shot went, based on how the shot felt. After a while you get pretty good at this. Adding this extra link between action and reaction really helped me identify which parts of my technique and environment were affecting my shot placement.

Unfortunately we ran out of time to complete the shoot, as we learned that the resource consent for shooting is limited to 5 pm. However, after a full day of learning and shooting, no one left feeling disappointed. After packing up we headed back to the club house to do a quick debrief and also to talk about cleaning methods and some other bits and pieces. I found this last casual info session extremely useful, as there is a lot of misinformation and disinformation out there when it comes to proper cleaning technique and which products to use.

Comparing gear and swapping stories with other shooters was a big part of the day.

Being the first event of its kind, there were some timing/teething issues, but nothing that negatively impacted my experience of the day. Having been on another course run by Kerry, I know the next Long Range Shooting course will be running like clockwork.

Speaking of the next course… I’ve heard rumours from Precision Shooter that the Level 2 course could be coming up soon, and at distances up to 850 m. Definitely sign up for the Precision Shooter newsletter and keep an eye on their Facebook page so you don’t miss out on that one.

For those who would prefer to start at Level 1 and get their fundamentals solid, I would highly recommend the course, especially for anyone wanting to get into long range competition, or stretch out their ethical hunting ranges. Beginners will benefit the most from this course, but looking back over the 4 pages of notes I took, even those a bit further along the learning curve will take away significant amounts of useful tips and techniques.

Not the best shooting I've done in my life, but a day of serious learning.
Not the best shooting I’ve done in my life, but a day of serious learning.

One of the things I learned more about was the effect of cant (tilting) on point of impact – especially at longer ranges. It’s something I hadn’t considered too seriously, and you can bet I’m going to do a tall target test to check out my cant in the near future. Another good tip was, when deciding to use MOA or MIL, think about what kind of shooting you’re going to do. For example, I intend on shooting a bit of F-Class, and they mostly use MOA, so that will be easier for me. Also consider what your shooting buddy uses, so you can speak a common language when it comes to wind calls, etc.

You can read more about the past course here, and don’t forget to sign up for the newsletter to hear about upcoming events.

Gun Rack update

First off, an apology to regular readers for the gap in new content recently. It’s been a crazy couple months with a new addition to the family and purchasing our first home too.

Unfortunately my first born needs at least a few more years before he’s of any use as a reloading assistant, but for now he’s definitely entertaining. The reloading bench is also unfortunately far away from being ready, as I’m replacing my entire workshop set up (finally!). So it will take a little while for things to get back to normal, but we do still have a backlog of articles to get through. Here’s what you can expect to see in the coming month and a bit.

25 metre rapid shoot - always catches you up with your holdover!
25 metre rapid shoot – always catches you up with your holdover!

2016 NZDA Prize Shoot

This is a shoot I look forward to every year – and it seemed like I had no excuse going in, considering my rifle was successfully and repeatedly printing 6 mm groups… However, my placing was average, and as always I learned something new about being prepared for a competition. Look forward to telling you guys more about the day soon!

Venturing into F-Class

So I tried my hand at F-Class at the Franklin Rifle Club, shooting at 600 yards with some pretty good success. We’ll talk a bit more about F-Class in general, as well as give a little bit of info on the club and other long range destinations around the country.

I’d rather be out on the line… #tuesdaysucks #workweekblues

A photo posted by The Gun Rack (@gunracknz) on

Putting the finishing touches on a Boyds Field Design stock for my SMLE # 1 Mk iii.

How to replace the stock on an SMLE

The good ol’ .303 is a staple for NZ, Australian and Canadian shooters, and features strongly in militaria collections around the world. However, with the abundance of used and abused SMLEs out there, you’re bound to want to work on one at some point. This article will provide you with a quick look at how to remove and replace the wooden furniture on a sporterised No 1 Mk iii.

Product review: Boyd’s Field Stock for 303 SMLE

So, once you’ve removed the stock of your old .303 beater, you might want to spruce it up with a solid wood laminate stock from Boyds – which is exactly what I did. You can look forward to reading more about this stock – and the cool features available – soon.

Monster bush build

So, my project .303 didn’t only get brand new furniture from Boyds Gunstocks. It’s also wearing an MAE 6-30 ST suppressor, a Vortex Razor red dot site and is waiting for a fresh coat of Cerakote, when I can tee up a time with Victor from Cerakote NZ. This short-barreled bush build will be shooting subsonic lead and is begging to be taken out pig hunting. More on this monster in the near future.

DOCTER binocular reviews

What’s better than one pair of DOCTER binocs? Two! We’ll be taking a look at some more excellent optics from DOCTER, and talking about what to consider when purchasing new glass.

Hmm... what's gonna do the job?
Hmm… which is gonna do the job?

Product review: MDT TAC-21 Chassis for Tikka T3

What could make my Tikka T3 sexier? The TAC-21 chassis from MDT! We’re waiting on some magazines which are on back order, but when those arrive we’ll be taking this chassis out for a proper test drive. It’s already assembled and I’ve had a good amount of time to get a feel for it. I think this is going to make a good mid-range F-Open rig!

Rifle stock bedding and finishing: Part 3

Hey, it’s only been a year since we did part 1 in this series on rifle stock bedding and finishing! Before the end of the year we’ll take a look at the final steps in the process and also some of the excellent stocks available to complete your project.

So, these are some of the bits and pieces to look forward over the coming month and a bit, hope that’s whetted your appetite! Look forward to catching up iwth you on our Facebook and Instagram pages, and of course, right back here with some fresh new articles!

Trigger adjustment for Tikka T3

It goes without saying that the Tikka T3 is one of the most popular bolt action rifles in New Zealand. It’s loved by hunters for it’s simple operation, superb accuracy and reasonable price point. Competition shooters are increasingly turning to the T3 as the basis for customised F-Class rifles and the like. With an abundance of after-market parts and a fairly modular set up, it makes perfect sense as a platform to rival the Remingtons and Howas on the range.

Having a torque driver on hand to put everything back to spec again is ideal.

One of the great things about the Tikka T3 is that you don’t have to spend much money to make it a good shooter. Out of the box it has its 3-shot MOA guarantee, as well as some included rings and an adjustable trigger.

Common alterations to T3’s include the obvious, such as new scopes and suppressors. But others go a bit further with bipods, chassis systems, magazine/floor-metal replacement, etc. One thing that most shooters won’t need to change is the trigger. Your top end shooters may opt for an aftermarket trigger, but the majority of us can get away with the factory unit with no trouble.

Trigger overview

Adjustable from 2 ¼ – 4 7⁄16 lbs (10 – 20 N), the rifle comes set from the factory at around 3 lbs ( 13 – 15 N). Some models will allow access to the trigger pull weight adjustment screw through the magazine well once the mag is removed. On others you will need to remove the barrelled action. Even if you can access the screw through the mag well, you may as well take the gun apart, as it will probably be quicker and easier. With only two action screws to remove, it really isn’t hard work to do this, and you’ll get familiar with the innards of your gun too.

The factory setting is safe and light enough for hunting, however I personally prefer a lighter trigger (around the 2 lb mark). Since I never walk around with a round in the chamber, I don’t mind a light trigger from a safety perspective.

The user manual has all the info you need, but it's quite a simple job really.
The user manual has all the info you need, but it’s quite a simple job really.

The trigger breaks cleanly and crisply, and many are happy with it without feeling the need to lighten the pull weight. If you’re shooting from a bench or mound for groups, you may want to lighten the trigger, as I find even a 3 lbs pull weight can cause you to torque the rifle a bit while pulling the trigger, producing occasional flyers.

If this is your first rifle (good choice!), getting used to a heavier trigger is not a bad thing, as it results in good trigger control practices. If you’ve got a heavy calibre and you’re worried about developing a flinch, a heavy trigger pull can accentuate these tendencies, as you anticipate the break.

presentation17

In terms of function and looks, the T3 trigger unit is certainly above average for a factory rifle, and many will find it perfectly suitable without replacement. The easy adjustment makes it even more widely appealing.

If a safety is important to you’ll probably like the Tikka arrangement. It’s a thumb safety which when engaged will lock the bolt in the closed position, the firing pin in the cocked position and will keep the sear and trigger blade from moving. The red indicators for ready-to-fire are pretty clear on the safety and the bolt shroud.

Only a couple action screws and the Tikka comes apart easily. Although the "floor metal" is plastic, unlike other factory rifles the trigger guard can be removed to be easily replaced with a metal unit.
Only a couple action screws and the Tikka comes apart easily. Although the “floor metal” is plastic, unlike other factory rifles the trigger guard can be removed to be easily replaced with a metal unit.

Adjusting the trigger

The trigger pull weight is easily adjusted with a 2.5 mm allen key – the same size your scope rings use. The screw is self-locking, so you’ll definitely need the tool to make the adjustment, You also won’t have to worry about it working loose. The screw will only move so far in either direction, so it’s simply up to you to find the weight you like. If you have the tools, you can even measure your trigger pull weight to be 100% sure. This will also inform future trigger decisions, as you’ll know what weights you do and don’t like.

The trigger pull weight is the only adjustable part of the trigger, so don’t worry about anything else on there. If you are uncomfortable with making your own trigger adjustments, a competent gunsmith is your best friend.

If you need pictures or more guidance, consult your instruction manual. If you bought your rifle second hand, Sako has an online version of their Tikka T3 rifle user manual here. If you do take your rifle apart to do this adjustment, having a torque driver on hand to put everything back together to the correct specs is ideal.