Protean Innovations: The evolution of the bipod

I’ve recently completed a couple rifle builds, and while I was working on them I was on the lookout for a new bipod. I currently run a couple Harris-style bipods that switch between rifles, and one really odd piece of kit that sits on my SKS. I was looking for something different, something better. Top of mind for competition shooting (PRS-style matches) was something like the Harris or Atlas offerings – but then I stumbled on something really unique – Protean Innovations.

I saw some of their bipods in pics and videos on their Instagram page, and I was instantly intrigued. The bipods seemed to be built for exactly the kind of shooting I had in mind. I reached out to see if I could get a unit to test and evaluate, and their CEO Kyle Hayes, got in touch and offered to send me some gear to check out. A week or two later I received a nice little care package with a Gen II bipod and the Stability Tracker bipod (which is their gen 3 model, effectively). Also in the parcel were a bunch of Protean Innovations accessories. And not for nothing, a personal letter signed and sent by Kyle himself. That says something about the kind of company they are.
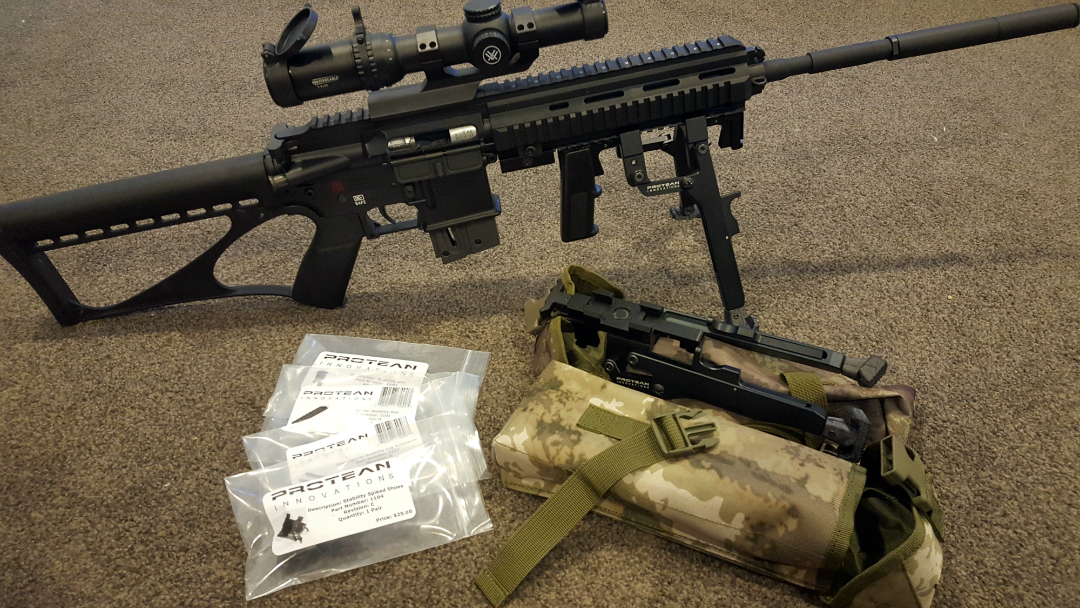
Unpacking the Protean Innovations care package

First impressions

First things first, opening this package was awesome, not only to get some new gear to test out, but also because of the way they package their products. Instead of plastic and cardboard, the Protean Innovations bipods came in their own camo pouches. These can easily be attached to molle webbing, a belt, or whatever else you want. Pro Tip: They also make great water bottle pouches to go on your belt when you’re hunting.

Looking the units over the first thing I noticed was the quality of the materials, workmanship and anodizing/coating. Despite a lot of aluminium-on-aluminium, there is no discernible friction in the system, and all tolerances seem to be exactly right for flawless deployment – precisely what you want in a “quick deploy” kind of system.

Testing

My primary use for these bipods would be for my competition guns, so that’s how I decided to test them. Of course they’re just as applicable to hunting or LE/MIL scenarios, but that’s not my use case, and I’ll leave it to other reviewers to cover those bases.

In terms of competition, I’ve used these at the PSNZ22 run by Precision Shooter, the TSCC Practical Rimfire shoot run by Gillice Practical Rifle Events, and the CNIGC Good Morning Vietnam shoot. I’ve also used the Stability Tracker bipod to get my bolt action centrefire competition rifles ready, but haven’t competed in F-Class this season.

Gen II Bipod

I ran the Gen II bipod on my 22LR HK416D, using the quad rail on the forend to mount the system. The Protean innovations bipod slides along the rail when you hold the deployment trigger, and catches into position when you let go. This allows you to deploy it securely at multiple angles. This can be great for practical shooting competitions, where you often shoot from angled positions, or through barricades/obstacles that have very specific fields of view at certain heights from the ground. For those thinking of a hunting application, it means you can lower your profile as you shoot downhill from a ridge into a valley, or something like that.

What if you don’t have a rail on the bottom of your rifle? Protean Innovations sells a simple and cost-effective adapter, called the Stability Rail, that will attach to your sling swivel stud and give you an easy to use picatinny rail. There are, obviously, other conversion system out there, if you prefer something else.

The Stability Rail is super easy to attach. It also has a hole to attach your sling, useful if you only have one sling swivel stud on your rifle

In this competition, which has a lot of positional shooting and some stages which cannot be shot supported, I used the Stability Grip attachment. This acts as a forward pistol grip, and attaches to the bipod deployment trigger. You can still pull the trigger and move the pistol grip forwards or backwards to deploy or retract the bipod.

I found this system great. It not only allowed me to quickly transition between off-hand and prone-supported positions, but the pistol grip allowed me to take more controlled standing shots, and be confident in my ability to quickly deploy the bipod, without having to play with small buttons or release levers.

Oh, worth a mention, you only need to pull the deploy trigger and slide it forward or backwards to manipulate the bipod. Unlike a Harris bipod, you don’t need to reach all the forward of your rifle and pull back the individual legs. You can stay completely in position on the rifle.

Other accessories that really make this a unique system include the Stability Spiked Shoe and the standard Stability Feet. The feet that come on the bipod from the factory are a quite grippy rubber design, and have a bit of bend in them, allowing you to achieve those angled positions in the field. With the extra grip you get compared to bipods with hard or round feet, you don’t get nearly as much “hop” or “bounce” when shooting larger centrefire rifles on hard surfaces, such as concrete benches or floors.

The feet allow for various angles, and the grippy, relatively soft rubber takes a lot out "bounce" out of heavier recoiling rifles.
The feet allow for various angles, and the grippy, relatively soft rubber takes a lot out “bounce” out of heavier recoiling rifles.

The spiked shoes are easily slipped over the rubber feet in seconds, and stay completely secure. This is a revolutionary approach to bipod feet. While there are endless options for more traditional bipod systems, they usually require tools and can take minutes to switch over – not ideal for field use or in high-pressure competitions.

I thoroughly enjoyed using this bipod in competition, and although I didn’t have my best day shooting, I can confidently say the Gen II and Stability Grip combination greatly enhanced my ability to tackle a very creative shooting course put on by Kerry, Matt and the others from the Precision Shooter crew.

In fact, I ran this bipod again at the Good Morning Vietnam shoot, put on by Central North Island Gun Club, and I can honestly say that without it, I would not have achieved my 3rd place in Open Division.

I was shooting my Aero Precision build, with most parts from NZAR15.com, and yes, I was that guy with the muzzle brake on the competition line. I heard all the comments behind me. However, I wasn’t the only one! So was the guy on my left, and the guy on my right! Thankfully only .223, with .308 and 7.62×39 further down the line.

But, even still, it was quite difficult to maintain a good sight picture with vented muzzle gas coming directly from another competitor’s rifle and getting in behind my glasses, making my eyes sting and glasses fog up in any longer strings of fire.

So, in the couple courses of fire where a supported prone position was allowed, the extra stability, and the option to quickly deploy after running to the firing line, all helped me get rounds down range before my vision became too impaired, and helped me to stay on target when my eyes were dripping tears from the stinging gas exiting the filthy brake next door.

My two rifles for the CNIGC shoot. As you can see, the Protean Innovations bipod is supper easy to slip on and off.

Stability Tracker

Now this is the next evolution in bipods and shooting support. Yup, this is the version after the Gen II, and the features show.

The appearance is refined, and weight reduced, with a single locking mechanism (compared to the two on the Gen II). The function is smoother, and the front attachment trigger is smaller, and less obtrusive.

Another feature which aids smooth operation is the integral picatinny rail which the bipod operates on. With rounded and lower profile rail slots, the operation is greatly eased. The whole unit still attaches to your picatinny rail, but less real estate is taken up for the operation of the system, as the guts of the bipod hangs below and moves on its own mechanism. This also allows Protean Innovations to introduce the piece de resistance, the tracking feature.

With a simple flip of the tracking trigger with either your left or right hand, you can now pan your rifle on the horizontal axis, without moving position or lifting your bipod from its place.
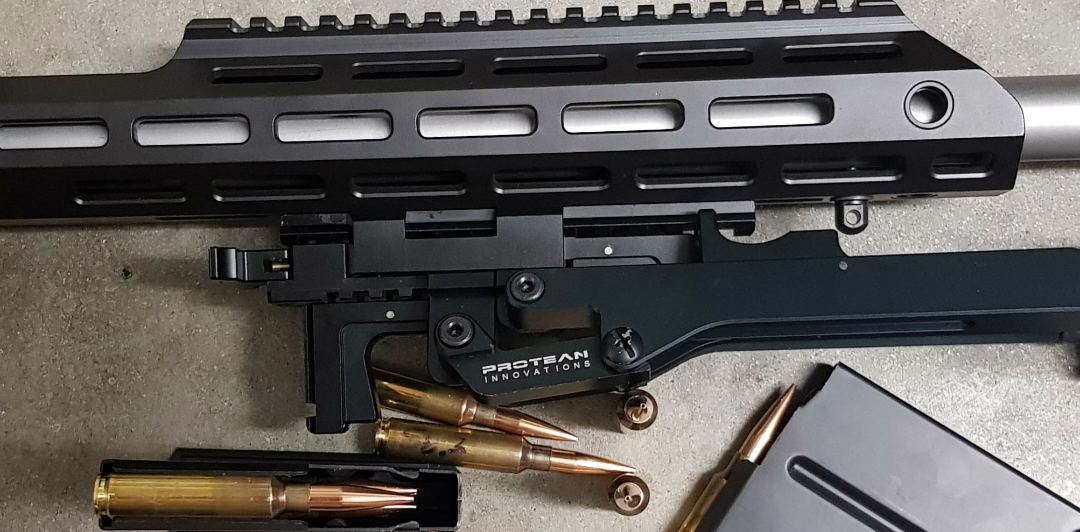
At the rear of the bipod, you can see the deployment trigger hanging down, and the tracking trigger, which looks a bit like a toggle, sitting just below the picatinny rail.

For moving targets this allows you to easily introduce lag or lead without twisting the rifle or running out of horizontal movement, which is very limited on traditional bipods. In competition with multiple targets at varying distances and placements from your shooting position, this can mean being able to engage more targets from the same firing position, without having to move and add time to your run.

To lock the bipod back in place, all you have to do is flip the trigger back to its original position, and as the rifle tracks around to centre, it will click in place. It couldn’t be easier.

I used the Stability Tracker bipod, as well as the Stability Grip again, for Simon Gillice’s practical 22LR event. The bipod ran flawlessly, and as at previous competitions, I had a few people coming up to me and asking where and how they could get their hands on what is objectively a cool looking setup.
Gear for the TSSC Pracitical 22LR shoot.

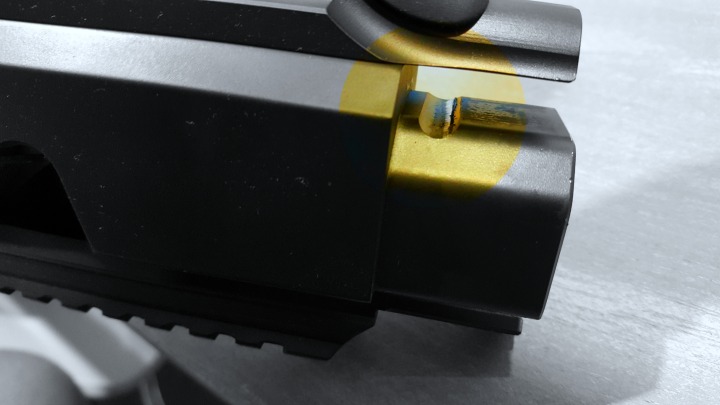
I did have one failure one the day, and as always, I tell the bad with the good. Between stages I noticed the pin on the tracking trigger was coming loose. Thankfully it didn’t pop out during the stage, or it would have been gone forever. So, I pushed it back in and stopped using the tracking feature for the day, and it was otherwise absolutely fine.

When I got back home, Kyle proved again, exactly the type of company they are. He gave me instruction on how I could stake the hole with a nail and hammer, similar to how you stake an AR15 bolt carrier. This repair worked and has lasted well. But, he didn’t stop there. Kyle later informed me that they took the feedback on board, and had sourced oversized pins to stop this happening in the future. This is a company that is dedicated to a quality product and, as their name says, innovation.

This excerpt below from an email directly from Kyle shows that not only did they seriously consider the issue around the pins, but also that they are constantly refining the design, and looking for better ways to support your rifle.

“For a long term solution I have located a supplier here in the US that makes pins that are oversized. This will eliminate this issue all together. We are continually refining the design. The next production run will have a few enhancements where we will remove some more weight without compromising strength, we will fix the press fit pin issue, and we are working on trimming up the leg extension triggers as well to remove more weight. All in all it should all be even better on the next go around by the time we get to it.”

I did also ask Kyle if a canting version would ever be on the market, but he (quite reasonably) said the R&D showed it would not work. He did do the entire redesign, but found that it added considerable weight, unnecessary complexity, and extra moving parts which made the bipod noisy. With all that weighing against the cant feature, he decided not to pursue it. Not to mention the increased cost to the consumer of the extra feature, which would push the bipod into a price bracket that is probably not viable for your average Joe.
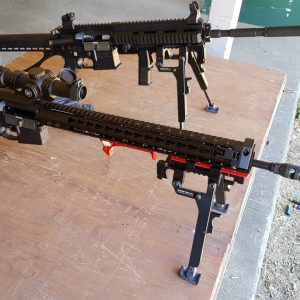
The two models side by side.

I was glad to hear the option had been thoroughly explored before deciding against it, and Kyle has a good point in that you can easily adjust your height using the legs (and extended legs option if you need them), if you often shoot from uneven surfaces. The aim of the system is quick deployment, not lots of finicky adjustment. And if you are on the F-Class line, chances are you are shooting from a flat and stable position. Feedback from PRS shooters and long range shooters has been that a lack of cant has not affected the usability of the bipod.

In our emails, Kyle did say that if he can ever figure out a reasonable way to introduce a cant feature, avoiding the above pitfalls, he will certainly consider it. So, it’s not out of the picture, but it is not a feature the Stability Tracker has right now.

Pros and Cons for the Gen II

The Gen II is a great model, and you can see in it how Protean Innovations continues to evolve their designs. Here are some of the pros and cons of this model.

Pros

  • High quality, solid metal construction and finish
  • Can be made more versatile with optional extras (spike feet, leg extensions, stability grip)
  • Angled shooting positions are easily achieved
  • Can lower your shooting profile when shooting downhill
  • Bipod feet designs reduces bipod hop from recoil
  • Bipod feet design allow for good vertical travel without losing grip
  • Quick deployment of a stable shooting platform when needed, quickly stowed when not
  • Interfaces with a common MIL-STD 1913 Picatinny rail
  • Easily transferable between multiple rifles in seconds
  • Easy/quick to extend legs to correct length
  • Cheaper price than Stability Tracker model

Cons

  • Will need an adapter for chassis or stocks without a rail
  • It is possible to overextend the bipod rearward if you are in a hurry (I was!). There is a simple fix. Either, get used to the operation and take your time, or, I mounted a picatinny-sling swivel stud adapter that I had lying around (took the stud out), just behind the rearward most point of travel, stopping it from going too far back. Easy fix. You could achieve the same with a rail riser, cut down scope ring, or any other picatinny accessory
  • If you push upwards on the stability grip while pushing the deployment trigger forwards to collapse the bipod, it can be a bit difficult to stow the bipod. This is a user issue – once you get used to it, it works beautifully
  • The model is likely to be discontinued as the Stability Tracker takes over as the primary model. If you want one, you’d need to get it in the very near future
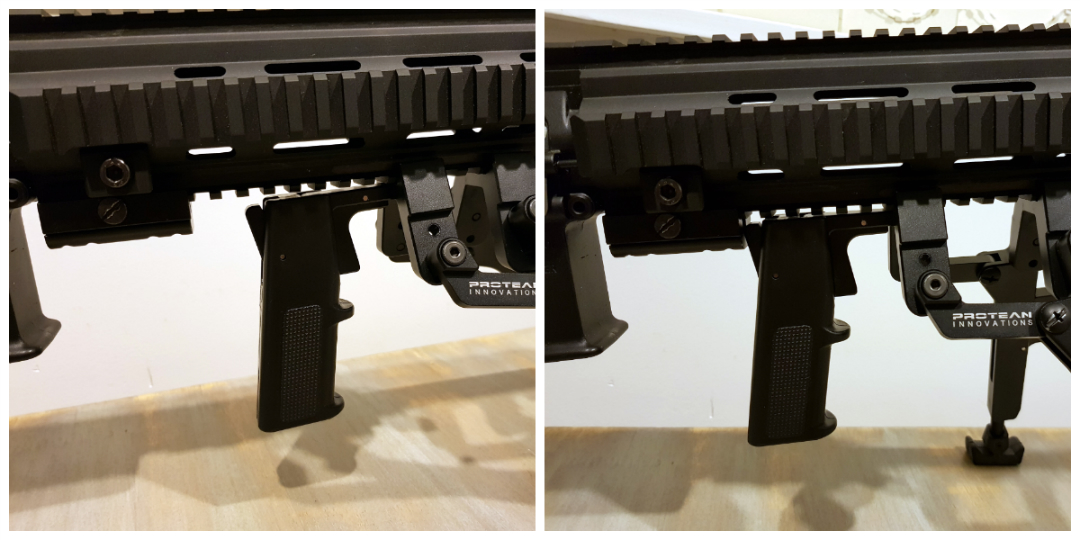
Creating a backstop for the Gen II bipod with Stability Grip means I don't have to think about anything when deploying the bipod.
Creating a backstop for the Gen II bipod with Stability Grip means I don’t have to think about anything when deploying the bipod.

Pros and Cons for the Stability Tracker

The Stability Tracker really is next level when it comes to bipods. Here are the pros and cons.

Pros

  • All the same pros as the Gen II, except that it is obviously a bit more expensive. Also;
  • Ability to pan for lead/lag
  • Smoother operation during deployment/stowing, thanks to its own integral rail
  • Simplified attachment compared to Gen II is even easier and quicker to use
  • Does not have the possibility of overextending during deployment

Cons

  • Will need an adapter if you don’t have a rail on your rifle
  • For a high-end bipod, lack of cant may put some off, but trade-off for weight/complexity is justified

Is this the right bipod for me?

Probably. I can’t personally think of a time when I would not use this system. I still have and use other bipods, but all of my rifles with rails or adapters will now be sharing Protean Innovation products. They’re so easy to switch between rifles, and I like the idea of using one system across multiple rifles. Building familiarity only increases efficiency.
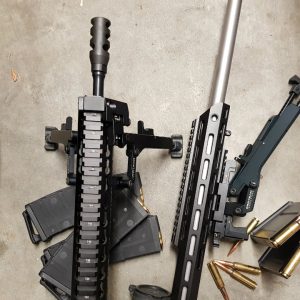
The system is as innovative and user-friendly, as it is cool-looking.

I would definitely recommend the Stability Tracker for anyone looking to shoot PRS-style matches at a competitive level. For hunting, I love the low-profile capabilities the Protean Innovation bipods give you when shooting downhill. And for range use, it has pretty much eliminated the hop I used to get from my more powerful centrefire rifles when shooting off the bench – this is probably the biggest highlight for me.

If you’re in the LE/MIL line of work, this testimonial from one of their customers might resonate with you:

“We have had one army sniper use the Tracker while deployed in Afghanistan. His testimonial was that he pitched his Harris after one mission and never went back to it afterwards. Said he used the tracker the entire time during his tour and refused to use anything else.”

Summary

If you’re looking for a bipod that is innovative and actually improves your shooting experience, I would not look past the Stability Tracker by Protean Innovations. It is robust, quick to deploy, technologically advanced, and a joy to use. The fact that the company are so good to their customers, take on feedback, and actually continue to innovate, is just a huge bonus.
Product review: Annealing Made Perfect (AMP)

The process of annealing brass has interested me from very early on in my reloading journey. There seemed to be some mystique around it, and only the most hardcore of reloaders really did it. I must confess that I was clearly never hardcore enough and am only now, many years on, beginning to anneal myself. For this reason I thought it would be a good opportunity for me to write an article right from the start of my annealing journey so that those who are interested can learn with me as I go.

Why anneal brass?

To start with, for those who have no idea what I’m talking about, in layman’s terms brass is a soft metal, each time we work a brass case (that may be sizing it, expansion as it is fired, or contraction as it cools and is ejected) the brass becomes more and more “work hardened”. Without trying to oversimplify it too much annealing is the process of heating the brass case neck to a very specific temperature in order to “soften it” back to its natural state.

There are a few benefits of this, firstly it means we can try and achieve a more consistent neck tension, by ensuring we have a consistent start point between reloads. This in turn affects pressures and ultimately potentially affects accuracy. It also extends the life of the case due to the fact that as cases become more and more work hardened they eventually become brittle and split.

It is important to note here that we only want to anneal the case neck and shoulder, we do not want to be softening the case body or base – doing so could be dangerous.

Brass uniformity – how much of a difference is there?

"Annealing Made Perfect" - a pretty bold claim. Does it live up to the name?
“Annealing Made Perfect” – a pretty bold claim. Does it live up to the name?

How is brass annealed?

There are a couple of main ways brass is annealed by reloaders, One of the most common ways is by using a temperature sensitive product which is painted on the inside of the case neck, the case neck is the rotated through a flame (most commonly a gas blowtorch) or cases are partially submerged in a water bath leaving the necks exposed and blowtorched, until the temperature sensitive paint shows the case has reached optimum temperature. There are a few different methods and machines available that follow this basic process which for many reloaders works OK, or at least they believe it to. But there are a number of variables with this process to consider. Firstly ambient temperature and gas levels will both affect the temperature of the flame.  Distance from the flame, angle of flame, time spent in the flame, case calibre, brass thickness, brass type and brand will all have an impact. This many variables, combined with having to use an open flame blowtorch in the house are really what prevented me from getting into annealing sooner.

Then a couple of years ago I came across a product “Annealing Made Perfect”, which I didn’t realise at the time was made in New Zealand. What the guys at AMP were doing seemed to be quite different to the above process and while I wasn’t an early adopter I started keeping more and more of an eye on the reviews and coverage of the guys at “AMP” while I continued to expand my knowledge of annealing and reloading in general.

The process that the AMP machine uses differs in that it uses a magnetic field to pass the brass through in order to create heat, because this magnetic field is electronically controlled it gives the potential for far greater temperature and time control as well as greater consistency and repeatability than the common method of using a gas flame. This method has allowed the guys at AMP to test many combinations of calibre, brass type, brand, thickness, etc., to create an extensive database and various programs within their machine for each type of brass. You are not reliant on using temperature sensitive paint and adjusting everything to get it just right, you now have the ability of selecting the right program and pushing the start button.

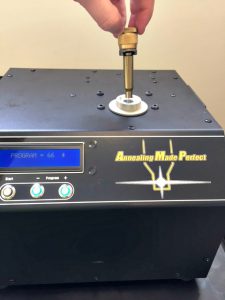
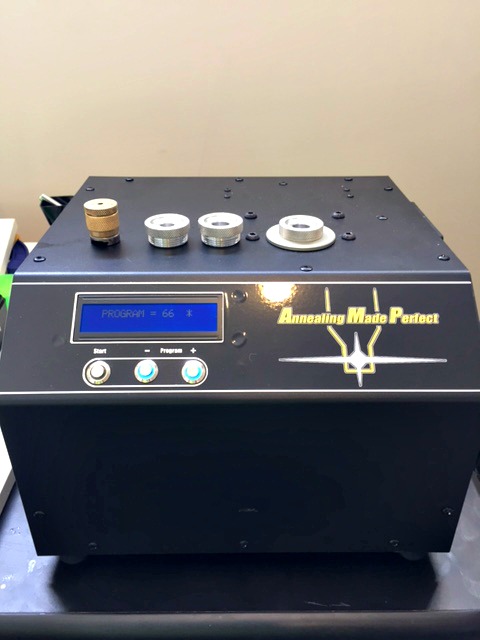
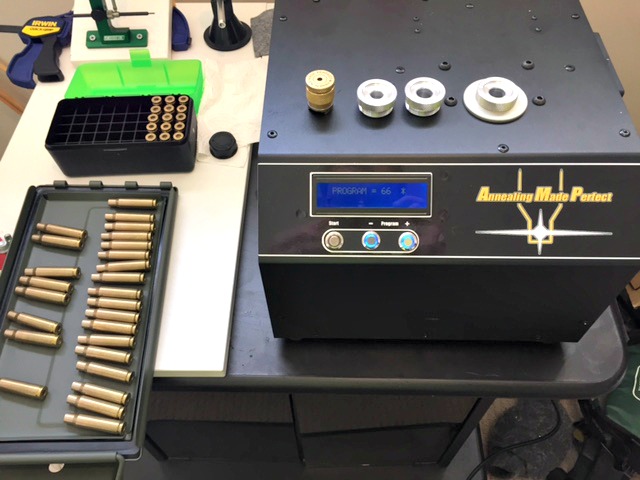
AMP machine with pilots and shellholder.

Another really great service that the guys at AMP offer, and, in fact, recommend, is you send them samples of your own brass and they will test it in their laboratory to identify its unique properties and they will let you know the perfect settings. This service is completely free, and is intended to get you, the customer, the best achievable result. This type of service to me really signals the values of the company and their intent to work with the reloading community rather than just selling them a product.

They have also included a USB port on the side of the machine, and computer link cable in an effort to future proof the machine, in the event of any updates AMP will provide these to be downloaded onto the machine, ensuring your unit is not going to be redundant in a year’s time.

Getting started with the AMP machine

I have recently been lucky enough to get my grubby little hands on an AMP machine to do some testing with, while as said above I haven’t had any experience with the blowtorch methods of annealing and therefore can’t compare the two, I am able to compare annealed vs un-annealed loads.

The first thing I noticed when I opened the box was the thought that has gone into it all, the machine was very well packed, as were the accessories. The user manual was incredibly simple, even for those of us who never read user manuals (Lots of step by step pictures). Realistically, it is so simple that it could even be compressed into one page.

Setting up the machine took all of 2 minutes, literally to take it out of the box, screw in the little rubber feet, plug in the power cord, and you’re ready to start annealing.

A quick check on the Annealing Made Perfect website settings section, selecting my calibre and brass brand from the dropdown list, and I was told what pilot number, and setting number to use.

You'll be ready to anneal in a matter of minutes - it doesn't get easier than that!
You’ll be ready to anneal in a matter of minutes – it doesn’t get easier than that!

The Pilots are semi calibre specific (many calibres may use the same pilot i.e .243/7mm-o8/308 use the same pilot, but it will depend on what calibres you load as to what pilots you will need), and they simply screw into the top of the machine to hold the brass at the optimum height.

The machine has 3 buttons on the front, a “+” button, a “–“ button and a “start” button. Simply press the “+” or “-“ button until the LCD screen shows the correct setting for your brass, place a case into your shell holder (the shell holder is used to handle the hot brass), drop the brass into the hole on the top of the machine and press the start button.

The start button will glow red for a short time (depending on brass and setting this time will vary, but likely to be around 3-4 seconds), and you’re done, pull the brass out using the shell holder being careful not to burn yourself on the extremely hot case and drop it into a metal tray or container.

The start button glows red while the operation is underway.

It really couldn’t be more simple and the part I like the most about this machine is it repeatability. With other methods I have seen, people tend to set up their machines for a single calibre. They were often reluctant to change, as doing so would mean a lot of setup to try and recreate the same results next time. It also meant people would do big batch runs of brass as the setup involved and lack of repeatability meant that small runs became an annoyance. With the AMP machine you could literally anneal one piece of brass, then a week later anneal another and the results would be the same. This seemed like a definite benefit to me as it allows me to anneal between each reload, and not have to save large number of brass up each time to get very consistent results.

Are there any downsides?

I will highlight that the two potential issues that some people may find with this machine-

The first is that it anneals one piece of brass at a time, and unlike some other systems which use an automated hopper type setup you have to manually insert and remove each piece of brass. Personally this isn’t a problem for me as I am annealing my brass after each shoot, so I am only doing 30ish pieces at a time. This is taking me less than 10 minutes in front of the TV to do and personally the benefits of this system over others outweigh this slight negative. But for those people who want to stockpile their brass and anneal it in a large batch AMP are currently working on a robotic system and case feeder to insert the brass and remove it, so you can set it and do something else, The system is not currently available, but there are videos on their Facebook page showing progress so far and I can’t imagine it will be too long until we see these out for delivery. The new robotic unit will fit existing AMP Machines.

The other thing I have seen people comment on is the “Thermal Cut Out”. Again for my application I don’t see any real problem here but I know that it comes up a little from time to time, so I thought I should address it. The machine is naturally going to get hot – its purpose is to produce heat after all! AMP have done a great job of addressing this and the machine is built with a number of internal fans (these fans are very quiet and for the most part do the job, with the outside of the machine remaining cool to the touch).

AMP have also built into the software a thermal cut out which monitors the internal temperature of the machine and if it reaches high levels it will place the unit into a cooldown mode where it will essentially stop annealing brass and run the fans until the temperature is reduced. Depending on the program / cartridge you are running AMP indicate this may be between 50-200 cases. The most I have put through nonstop in one hit was around a hundred 6.5 Creedmoor cases running program 53 and I did not reach this cut out, in fact the unit still felt very cool to the touch and the air being blown from the fans also felt cool. Once again I now anneal my brass after each shoot, so after my initial annealing of my existing brass stockpiles I won’t be doing any overly large batch runs so this isn’t a problem for me at all, in fact its quite comforting to know that the machine has this protection feature built in.


Testing the annealed cases

Now I guess you are all wondering, does it work? Well again I’m not a scientist by any means, so I urge you to do your own research in general, but I will say that I recently did a test comparing both annealed (through the AMP machine) and un-annealed loads in a newly broken in 308 build. The loads were essentially the same however there were TWO variables that potentially both impacted the test.

  1. One set of loads was Annealed and one was Not Annealed.
  2. The set that was Annealed were the 10 cases I had with most uniform neck wall thickness, and the set that was not annealed was the next most uniform 10 cases.

Both sets were selected from brass which had around 10 firings through them and were the 20 most uniform (neck wall thickness) cases of 150 measured.

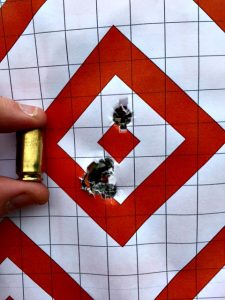
This is the annealed group. One cold bore shot and then 9 in the same hole. 9mm case for scale.

Measuring both sets of loads through a Magnetospeed Chronograph, the Standard Deviation of the 10 loads which were Not Annealed was 16.4. The Standard Deviation of the Annealed set was 9.4. The groupings of both sets at 100m was very good (one ragged hole, excluding a cold bore shot with each set) and I could not in fairness distinguish between sets, except for a single flyer on the Not Annealed set which while I don’t believe it was the result of shooter error, I can’t rule that out.

How important the Standard Deviation reduction is depends on you and what you are doing with the load. Both sets (Annealed an Non Annealed) would have happily taken down game out a long way, but for ringing steel or punching paper or shooting out at distance the reduction in SD (and ultimately grouping size/vertical dispersion) could well be worth it.

Overall, this is a great piece of kit. I plan to continue to update this article as I go and the machine is tested with as many calibres, brands and environments as I can. In the meantime, in New Zealand machines can be purchased from Serious Shooters in Auckland, and international purchasers can see their local stockists on the AMP website

[Editor’s note: If you enjoyed reading this article from Chris (or any of his others), you may like to follow Chris on Facebook]


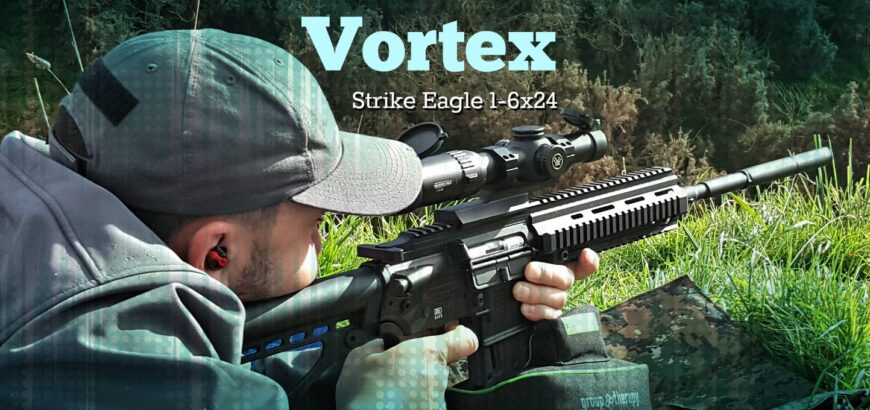
Product review: Vortex Strike Eagle 1-6x24mm

In a market saturated by black rifle parts and accessories, is there room to stand out? The Vortex Strike Eagle has been around for a couple years, and it has certainly carved its niche in the landscape of optics for the ubiquitous AR-15. So, what sets this scope apart?

Image credit: Vortex

The reticle

Really, to gain traction in the glass game these days, you need to be offering innovative sighting systems. It wasn’t too long ago that grid reticles weren’t even a thing. Now, most long range shooters wouldn’t look past them for practical or tactical style shooting competitions. With the Strike Eagle, Vortex went the other direction, tending towards the simple and easy to use.

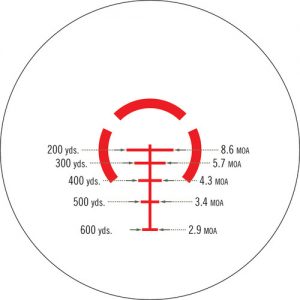
The AR-BDC (AR Ballistic Drop Reticle) is designed to give easy elevation holdover using common .233/5.56 loadings. With a 50 yard zero, the crosshair is good to use from 20 yards through 200 yards, on any magnification setting. On 6 power (top of magnification range), the hashmarks equate to a holdover for 300, 400, 500 and 600 yards.

This makes for very fast shooting for competitions such as IPSC or 3 Gun, and combined with a switchview throw lever, extremely quick transitions from near to long-range targets can be achieved, without relying on a secondary optic or BUS (back up sights). Another feature which aids quick target acquisition is the halo that surrounds the crosshair, drawing your eye to the centre of the reticle.

A Vortex V-4 Switchview Throw Lever is installed in literally a minute, and makes your life so much easier.

There is a newer version of the Strike Eagle, which comes with a 1-8x magnification range and the AR-BDC 2 reticle, which follows the general principals discussed above. It also, however, has holdover notches for 5 and 10 mph winds, again, aiding quick decision-making while engaged in a course of fire.


What if I’m not shooting .223 Rem?

One of the wonderful things about the AR platform is its versatile and modular nature. As such, many of you will likely have an AR-10 or AR-15 in a different calibre, and the AR-BDC hasn’t got you all giddy yet. Well, the manual for the reticle does include drops for your average .308 Win load. And if you’re getting more exotic than that, you can easily use the Vortex LRBC (Long Range Ballistic Calculator) to work out drops for your specific rifle and ammunition.

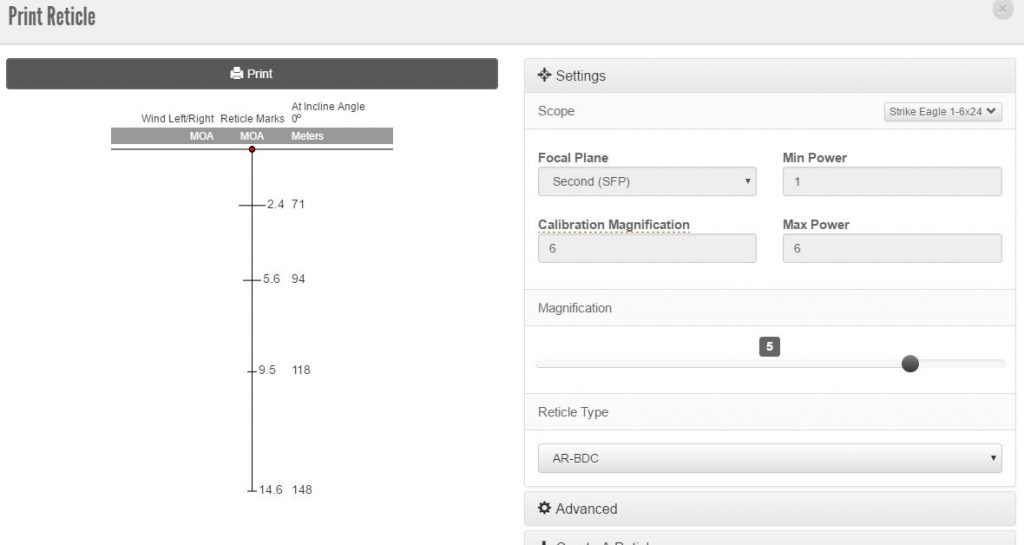
I’ve been using the Strike Eagle 1-6×24 on my .22LR trainer, which is a Carl Walther produced HK416D. By plugging in my ballistic data for CCI standard ammo (which I verified with a chronograph), I was able to find my drops on the various hashes in the reticle. In preparing for the PSNZ22 practical rimfire shoot, which had known distances of 40 m to 150 m, I zeroed at 50 m and used the LRBC to produce the below reticle image.

The Vortex LRBC web app is incredibly useful for figuring out drops and wind holds, and can give you traditional drop charts or reticle images such as the above.

As you can see I had a pretty good holdover for 70, 95, 120 and 150 metres on the 5x setting. Getting used to the magnification settings (or writing them down) you could actually get quite a precise drop on a specific hashmark by change your zoom level.

Outstanding features

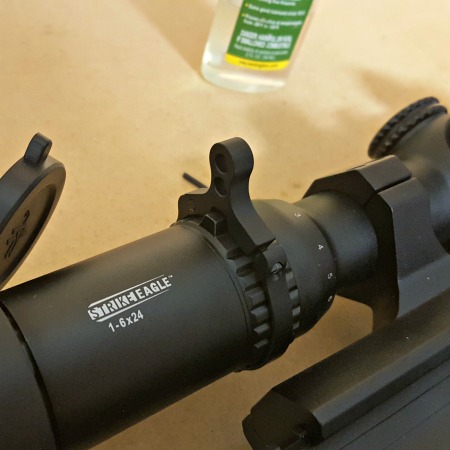
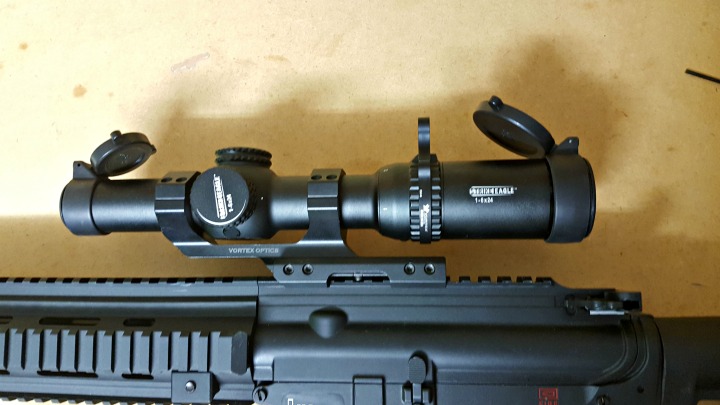
There are a few nice extras that help to keep this scope top of mind when considering an optic for ‘run and gun’ style comps. The included flip caps mean you don’t have to worry about losing or forgetting a bikini style scope cover. It also adds to the ‘tactical’ look that many strive for with their black rifles.

Also included is an illuminated reticle, with 11 brightness settings. Sure, this isn’t anything new, but it’s well thought out. The dial is on the side of the sccope, rather than near the ocular bell. This means you hardly have to lift your head to see the setting you are selecting.

I don’t often make use of illuminated reticles (black targets at extended ranges probably being a notable exception, with my Viper PST), but I found this one particularly useful for the inaugural PSNZ22 shoot, which was shot in overcast conditions in pouring rain. I mean, bucketing down at some points. Having the illuminated reticle on very bright setting (it was still daylight after all), I was able to easily pick up on the subtensions and holdover, despite shooting against black or dull targets, obscured by rain.

Speaking of rain, if you get it on your scope lenses – don’t try and blow it off with your mouth before you shoot. You’ll just fog up the glass for a few seconds, which is very disorientating. And I did it twice!

Build quality

The Strike Eagle is exactly what you pay for. The glass is not the same quality as the Vortex long range scopes, but you don’t need it to be for this style of shooting. The construction is solid, yet refined. Not to mention, backed by the Vortex unlimited lifetime warranty. Did I mention the rain before? Because, damn, did it rain! The Strike Eagle 1-6×24 held up its end of the bargain, delivering outstanding reliability, and has done so on several trips since.

The turrets are capped – so if you’re wanting the ultimate tacticool sniper rifle scope laser sight with external tactical tactile turrets, this might not be the one for you. However, if you’re interested in shooting quickly from a defined zero while holding over at known or ranges, this scope will fit the bill, without the risk of bumping your turrets while throwing your gun around the course.

A cantilever mount with 2 inch offset assures correct eye relief and proper alignment of the 30 mm tube.

The negatives

When I first looked at the Strike Eagle, one of the other writers from the blog noted that when they had seen one in-store, the 1x magnification setting, was actually smaller than normal vision – in otherwise less than 1x. I was concerned about this and wrote to Vortex, and they pointed out that eye relief can make a difference in this department. After playing with the eye-relief adjustment ring, I found the perfect spot, and the magnification was true to what it said on the dial. So, not a negative, but something to keep an eye out for (pun intended).

There was one negative. I found the battery cap on the illumination knob wanted to unscrew when I manipulated the dial in the same direction as the thread. This may have been a missed thread on my scope in particular, or it could be something to watch out for when checking out the scope for yourself. Either way, I did not feel it was a big enough deal to try and send back for repair or replacement. In fact, if I just grasp the dial by the body of the knob, rather than near the edge, there’s no problem.

It’s inconvenient if you’re trying to maneuver yourself and your firearm quickly – it’s just one more thing to be mindful of. However, as I mentioned above, Vortex have the best warranty in the business, so if you find yourself with a part that doesn’t feel quite right, don’t be lazy like me – ask them to fix it, and they will.

Overall impression

Ten out of ten, would buy again. Yes, there are ‘better’ AR optics out there. You could have a very sophisticated piece of equipment, or you could go rugged and basic, I’m sure you could find something that beats the Strike Eagle in one way or another. However, I personally think that very few optics deliver in all the ways this Vortex unit does, and at the same price point.

If you want a reliable and easy to use scope with great features at a reasonable price,  I don’t know what more you could ask for.

Product review: Tac-Pac ammo storage boxes

I stumbled across Tac-Pac while browsing gearlocker.nz for hearing protection. I’d been thinking of a way to store my pistol reloads without paying ten bucks per ammo storage box, and I couldn’t believe how perfect these boxes appeared to be as a solution.

I ordered some… well, I ordered a fair few. I got ten each of the small, medium and large rifle boxes, and ten pistol boxes. At the time of writing there is a 5% discount when you order 10 or more, or a 10% discount when you order 25 or more. At $1.60 per case for the small pistol boxes I was looking at just over $15 to store 500 rounds, compared to $40 – $60 if I went and bought some MTM Case-Gards.

I do have several MTM and Plano ammo boxes, and they’re great, but for storing large volumes of ammo, I’d much rather have a cheaper solution.

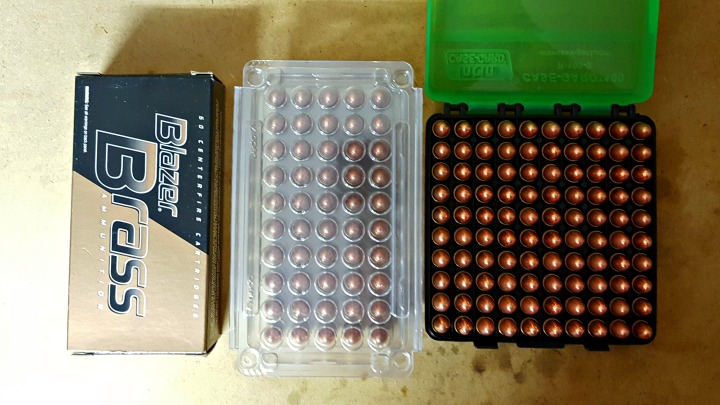
The Tac-Pac small pistol case is similar in dimension to a factory box, so doesn't take up too much space. The MTM case on the right does fit 100 rounds (compared to 50) in a similar space, but costs $8 - $12, depending on where you shop.
The Tac-Pac small pistol case is similar in dimension to a factory box, so doesn’t take up too much space. The MTM case on the right does fit 100 rounds (compared to 50) in a similar space, but costs $8 – $12, depending on where you shop.
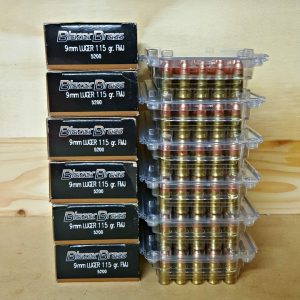
The 50 round small pistol cases stack nicely (as they all do), and as you can see, these half-dozen cases actually take up less room than 6 packs of factory ammo.

Tac-Pac positives

  • Clear cases. Be 100% sure of what ammo you are grabbing when you leave the house for a hunt or a trip to the range
  • Cheap. You can buy stacks of ammunition boxes compared to the hard-case ammo containers available
  • Water-resistant. Much better than cardboard boxes when it gets wet out there
  • Stable and secure packaging
  • A range of sizes to suit your rounds
  • Recyclable
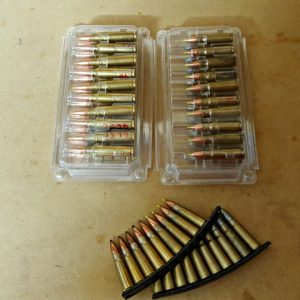
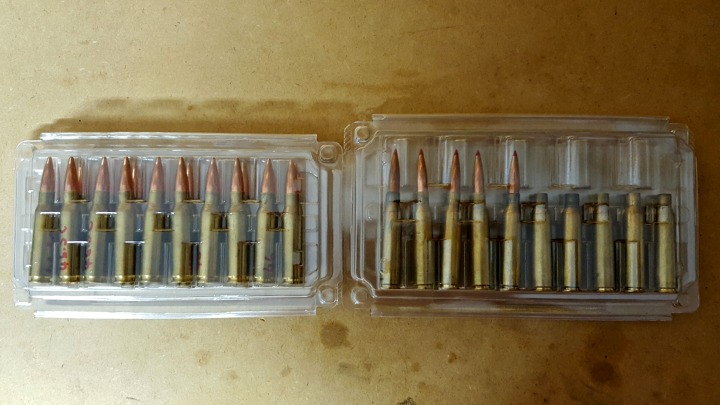
7.62x39 rounds don't fit particularly well, being too large for the small case and too short for the medium case. But hey, not many people reload these, so if you're stocking up on Russian ammo, it's probably in spam cans.
7.62×39 rounds don’t fit particularly well, being too large for the small 50 round case and too short for the medium 20 round case. I think they would fit in the small 20 round case, but I don’t have any on hand to try out. Anyway, not many people reload these, so if you’re stocking up on Russian ammo, it’s probably in spam cans.

Tac-Pac negatives

  • Certain sizes are less space efficient than factory boxes or hard-case containers
  • Will probably not last as long as a hard-case (but will far out last cardboard packaging)
  • Not all cartridges are going to have a Tac-Pac box to call home

Tac-Pac users

So, who is the Tac-Pac storage solution for? I’d say it’s perfect for volume reloaders and competitions shooters. If you load hundreds of rounds at a time, these stackable, clear containers are perfect for storing your rifle or pistol rounds. For those competition shooters who want to keep weight down in their bags, but still take hundreds of rounds of ammo, these light containers are perfect, and the price means you won’t feel nearly as bad if you lose one or two when you pack up at the end of the day.

You might also consider yourself a volume reloader if you load for yourself and friends or family. These would be the perfect way to keep your orders separate and visible. Speaking of which, I use these to separate out identical looking rounds for different rifles.

For example, my 6.5×55 Tikka has 4 different loads I regularly use. The 142 gr SMK and 143 gr ELD-X for target shooting inside 600 metres, and the ELD-X for larger deer. The 123 gr SST for goats and fallow. And a load I’m working up with the 140 gr ELD-M for 1000 m shoots (they get humming when seated on top of some ADI AR2209). I also have 123 gr SST, 129 gr Interlock, 140 gr A-MAX, 142 gr SMK and 143 gr ELD-X loads for my 6.5×55 Husqvarna M38. The Husky loads are obviously loaded to very different pressures, and need to be kept separate.

The medium rifle case on the left is ideal for my M305 .308 Win loads, while the large case on the right houses my 6.5x55 ELD-X hunting loads for my Husky.
The medium rifle case on the left is ideal for my M305 .308 Win loads, while the large case on the right houses my 6.5×55 ELD-X hunting loads for my Husky.

The target loads live in Plano boxes, while the hunting loads now live in Tac-Pac cases. This means I can label them individually and have plenty of each on hand for whatever shooting I intend to do. It’s fantastic knowing I can grab a clear box of 20 rounds, know which rifle they are for and how many are fired or unfired at a glance. I also think a box of twenty is ideal for a one or two day hunt, giving you a few rounds to check your zero and warm your barrel, and plenty for any unlucky creatures you encounter.

I used to save factory ammo boxes for uses like the above, but when the cardboard gets wet they fall apart, and if you load longer than factory spec, the rounds often won’t fit.

Overall, these are a great product for those who have a use for them, and I would highly recommend grabbing some. Check out the Tac-Pac website for more details and a size guide. If you are in New Zealand, you can buy them from Kerry at the Gearlocker.


Product review: MDT TAC21 Chassis for Tikka T3 long action

Chassis systems have really come to the fore in the past few years, as tactical and precision rifle shooting has gained a larger following. Throw in lots of product innovation and modularity, and you’ve got a recipe for success.

There are three rifles that usually get the royal treatment, and have chassis built for them by most major manufacturers. Namely, the Remington 700, Savage 110, and the Tikka T3(x). The Howa 1500 usually features too. If you’re looking for a chassis for any of these rifles, you’ll have plenty to choose from. Having looked around the market, I decided to to give the TAC21 chassis a go.

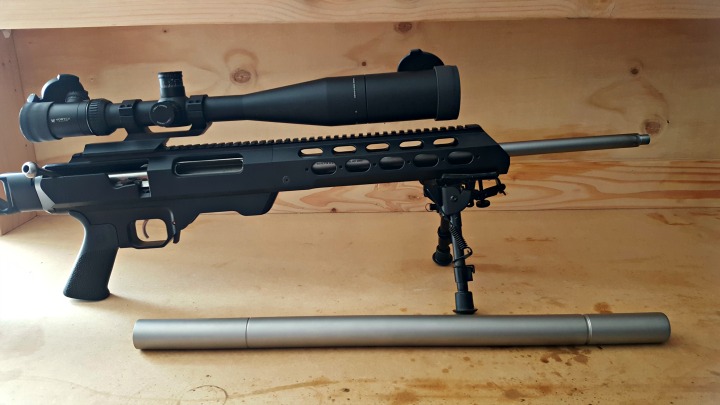
The reason the TAC21 really stood out as a potential option for the build I was working on, was that the forend came off as a separate piece, but still had a continuous Picatinny rail. This was particularly important for me, as my Tikka T3 in 6.5×55 has a full over-barrel MAE suppressor that comes right back to the action. It has a 1.26″ OD and would need to be removed after every shoot to get gas residue and powder fouling off the barrel and crown. The TAC21 looked like it was up for the task – and it sure looked a lot easier than taking my rifle out of its standard stock every time I left the range.

The TAC21 by Modular Driven Technologies (MDT). Note the dimensions are for a Remington 700 SA. [Image credit: MDT]
So, after deciding on a chassis, MDT offered us one to review. This is always a good sign – when a manufacturer stands by their products enough to let them out into the wild with reviewers! So, after customising my order on the MDT website, it was time to wait for it to be shipped to NZ.

The agony

Nothing is more painful than having a cool new toy come from across the world, and not knowing when it will arrive!

Compounding my dilemma was the fact that it was a Tikka T3 long action. This meant that standard AICS mags would not work, because of the shorter magazine port. MDT makes their own magazines, in metal. They are Cerakoted the same colour as the chassis too. Unfortunately as I placed my order, they were out of stock and back ordered, so I waited “patiently” as they made up some new ones.

When the rifle did arrive, I happily single-loaded for a while, until the magazines were ready.

However, this was all mitigated by the fact that MDT’s staff are perhaps the best human beings on the planet. I judge a company a lot by how they treat their customers, and MDT tops the charts in my books. The only other company that would share that rank would be Vortex. And when it comes to some of the really big bullet and component manufacturers, I can tell you, your concerns are right at the bottom of the pile with them.

You may think I received special treatment as a reviewer and that my experience is not really a true customer experience. Well, the first person I spoke to knew I was a reviewer – the other two people did not. So, I’m comfortable standing by the statement above.

The best day, was when I inquired after progress on the mags, and was told they were a few weeks out still. How was this the best day? The kind lady at MDT offered to send my entire order ASAP, and then expedite the magazines to me when they were available, at no charge.

To which I said ‘Yes’. Very much yes.

I really wanted to give this chassis a thorough testing, and I didn’t mind single-loading for a month or so if I had to. And I’m glad I did, as this gave me a chance to work through some of the unique aspects of the system, and also take it along to some cool events, such as the Long Range Fundamentals course with Kerry from Precision Shooter.

15992024_10154688046896357_489822583_o

First impressions

I cannot overstate how excited I was when I opened my package from Canada. But I unfortunately couldn’t use it straight away, as I was sighted in and good to go for my first F-Class shoot. After I attended that shoot with the Franklin Rifle Club at 600 metres, I got home, stripped and cleaned the rifle, and got busy putting it into the TAC21 chassis.

The first thing I noticed was that the solid aluminium chassis and Skeleton Rifle Stock added a good deal of weight. This was ideal for my purposes (an F-Open build), where extra mass means more stability and less felt recoil. If you’re after a lighter chassis system, for more run-and-gun shooting sports, look at the LSS or HS3 chassis by MDT – many of the same benefits as the TAC21, but much lighter by design.

Assembly

I won’t go through how to assemble the product – it’s pretty easy, and there are step-by-step instructions included. There are also some Youtube videos out there if you’re a visual learner.

While I was putting the rifle together I immediately noticed a few points. This chassis is not carelessly designed. There are some very obvious cutouts and reliefs specifically for my Tikka, where a Remington or Savage would have a different layout (bolt stops, safeties, etc.). Instead of finding a way to cookie-cutter design this chassis, they designed it around the actions they wanted to house, and did so with a high degree of accuracy and utility in mind.

The safety is easily accessible, and there is nowhere for the bolt to hang up. The bolt stop/release has its own little slot in the aluminium housing (they provide a longer retaining pin for this), and there’s even a window cut into the side so you can see your serial number. That last detail impressed me as an extra little bit of thoughtfulness.

The MDT 300 WM metal magazines give you an extra 1 - 2mm to play with.
The MDT 300 WM metal magazines give you an extra 1 – 2mm to play with.

Other things to note… The Tikka’s free-floating recoil lug has just been upgraded for you. The chassis comes with a steel lug, that is far superior to the soft, aluminium one that comes standard on the T3. You’re also completely replacing your trigger guard and mag well, so this means you can’t use your factory mags. This is no problem though, as the factory magazines are always too small in capacity and never long enough to load out to the lands for you reloaders.

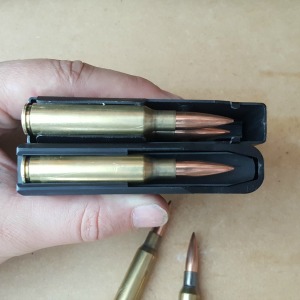
The MDT Tikka T3 LA magazines are solidly constructed out of steel, and designed for cartridges up to .300 WM. You can bend the feed lips to suit your round. I lightly bent the lips on my two magazines to get a grip on my 6.5×55 cartridges. I could have bent them over a bit more, but I found them tight enough that nothing would knock the rounds out unintentionally, and I could get 6 rounds per mag instead of 5. This is ideal for the F-Class shooting that I’ve been doing, where you shoot your 24 rounds in 2 details of 10 scoring shots and 2 sighters. This means only one mag change per detail, rather than the four mag changes I was having to do with the factory magazines.

Mail day! Thanks MDT! #nomoresingleloading

A photo posted by The Gun Rack (@gunracknz) on

The forend snugged up nicely to the body of the chassis – the offset screw holes helping to lock it in place. The rail on top truly was continuous, with perfect machining. The attachment of the forend is one of only two improvements I could think to make to this design.

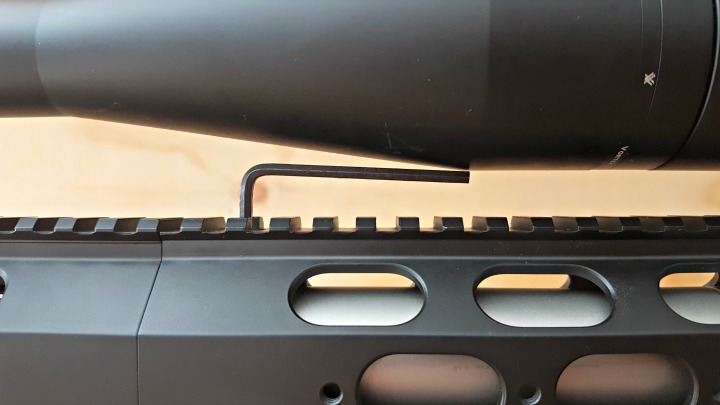
The screw in the top rail could be hard to get to, depending on your scope/mount situation. I actually found I could just clear the scope with an allen key and remove the forend when necessary. Although most shooters would not need to remove this piece as often as I would, to clean under the full suppressor.

As I said - just enough space with my setup. Note the screw holes on the side for attachment of 1913 rails.
As I said – just enough space with my setup. Note the screw holes on the side for attachment of 1913 rails.

I would perhaps have done two screws on the diagonal sections between the rail (top) and the sides, rather than have the screw on top. I would rather have four screws to undo, than potentially have to take off my scope if I needed to work on the barrel exterior. However, I am no engineer, and aside from the extra labour and materials that would be required, I couldn’t tell you if my idea for fixing the two pieces together is anywhere near as good as the original design (in terms of robustness, etc.). So, a grain of salt and all that.

The other thing that I think would improve this design (for the Tikka shooters amongst us), would be replacing the bolt stop/release with an aftermarket one that sticks out further. It can be a bit finicky to get the bolt out, but certainly not to the point where I would say it is a flaw in the design. Just an area that could be improved – and perhaps this is an area for the end user to look at.

The Tikka T3 bolt stops differ from calibre to calibre. This allows to Tikka to produce a more uniform action, cutting down costs. I imagine it would be quite an undertaking to design, make and stock all of the possible options. However, if you look around, some machine shops and gunsmiths do make aftermarket versions out of steel or what-have-you, so it could be something to look at if you have fat fingers like me.

Breaking her in

This rifle has become my main centrefire rifle over the past few months, and I’ve enjoyed every minute of it. I did have some frustrations at the start, and we’ll go through how to avoid these yourself.

Scope mounting. If you have a large objective lens (which you likely do if you want a chassis for your shooter), it will not clear the full-length rail on short or standard rings. Unfortunately my Vortex precision-matched rings were 1mm too short to clear the chassis, so I hopped onto the Optics Planet website and set about ordering a one-piece riser, to get some more height.

I was told the riser I wanted was considered an AR-15 part, and therefore couldn’t be exported from the US. Annoying, but rules are rules. They gave me a couple replacement options and I went with a pair of quick detach risers (ironic, as these seem much more suited to an AR, but anyway).

So, I mounted my Vortex Viper PST 6 – 24 X 50, and hit the 100 metre range at Waiuku Pistol Club. I almost cried. My rifle, which was shooting handloads into 0.2 MOA groups was now double grouping and doing just under 1.5 MOA. I felt sick to my stomach at the thought of having to do this review, with such a negative result.

After burning through around 50 rounds of pricey handloads, hearing comments like ‘shooter error’, I was ready to go home. I took the chassis apart to wipe the barrel down and noticed the QD riser at the front had worked loose, and must have been shifting back and forth a minuscule amount under recoil. Feeling like an idiot, but a hopeful idiot, I went home to reload some more rounds and hit the range the following weekend.

Thankfully I have a 2-inch offset cantilever ring mount, provided by Vortex for an upcoming review on their Strike Eagle scope. I switched this in and patiently waited another week to get to the range. With the cantilever mount, the centre of my scope now sat about 2.5″ above the centreline of my bore. Not a major problem, except this will accentuate any user error involving cant. I would suggest getting a bubble level to ensure vertical alignment to the target. If you’re into long range shooting, you probably have one already.

Thanks to Vortex I had an offset mount on hand. Note the height off the barrel.

Another almost negative was that I found the latch that secured the Skeleton Rifle Stock to the chassis to be very stiff. I spoke to MDT and sent them some photos, of where paint had scraped off the housing for the latch’s retaining pin, indicating it was having trouble camming fully over.

This tiny build up from initial use was making it difficult to connect the chassis and stock. It didn't take long to sort it out though.
This tiny build up from initial use was making it difficult to connect the chassis and stock. It didn’t take long to sort it out though.

The MDT staffer said that a break in period could be expected, as the part was machined to tight tolerances to ensure a tight fit for the life of the rifle/chassis. He offered to send me another latch pin, free of charge, so I could polish down my current one, and use the new one after it had broken in. I said thanks, but no thanks. It wasn’t worth wasting their time and money if it was such a simple solution.

To ‘speed up time’ with my break in period, I gave the latch a couple hard taps with a wooden dowel and a rubber mallet. It now works perfectly.

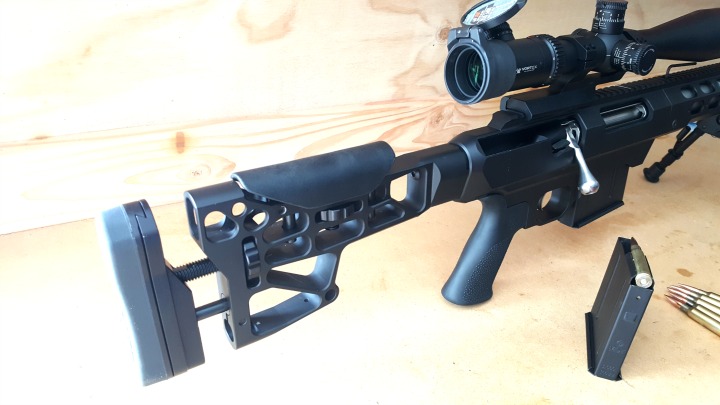
The Skeleton Rifle Stock V4 is heftier than it looks, and features adjustable LOP and comb height. There's also mounting points for a rail at the bottom, to attached a monopod.
The Skeleton Rifle Stock V4 is heftier than it looks, and features adjustable LOP and comb height. There’s also mounting points for a rail at the bottom, to attached a monopod.

Findings

The TAC21 is designed to take your rifle from factory to precision with very little effort. Bedding is one of the most important aspects of increasing the accuracy of a rifle, and MDT makes this easy. The action only touches the V-bedding in a few spots, and with incredible repeatability and sturdiness. The forend leaves your barrel completely free-floating, for any barrel less than the diameter of the action.

If I had started with an out-of-the-box rifle with factory ammo, I would have expected to see dramatic gains in accuracy. MDT claims up to 28% increase in accuracy, and I can believe that, looking at the design.

Taking an already accurate rifle and putting it into the TAC21 chassis system, what I was looking for was accuracy (repeatability of shot placement – not smallness of group size).

With scope now properly mounted, I was surprised to find there was hardly any POI shift from the 20 MOA Nightforce rail that was mounted to the Tikka action, to the 20 MOA rail integral to the action housing on the MDT chassis. It was literally a couple of clicks to get centre at 100 metres.

With factory ammo, I noticed accuracy was perfect. I had my doubts and expected I might get some shift in POI due to the optic being mounted to the chassis and not the rifle, but the repeatability was there. I had less than a full box of Norma ammo, so didn’t do too much grouping, but did notice a decrease in group size as well, by about 0.1 – 0.2 MOA, down to an average of 0.7 MOA.

Profile of the MDT TAC21 and Tikka T3.

My personal handload featuring Norma brass, 143 gr Hornady ELD-X projectiles, Federal Gold Match LR primers and ADI AR2208 powder (Varget) was just as repeatable.

As I mentioned before, repeatability was the test here, not smallness of group size. My handloads were tuned specifically to my rifle as it was, and this testing was done with the exact same load, with no further adjustment. It wasn’t shooting 0.2 MOA anymore, but it was shooting a consistent and repeatable 0.6 MOA.

Why did my handload group size increase, while the factory ammo groups decreased in spread? I suspect the bedding of the rifle worked its magic on the factory ammo, which is made to much lower tolerances than my reloads – and therefore could really benefit from the improved bedding.

I suspect my handloads increased in group size because the tension on the action has changed – almost double the torque to secure the action to the aluminium chassis, compared with the factory plastic stock. I imagine this has changed the harmonics somewhat. To reduce my group size again, I could either move my charge weight up or down a small amount, or I could play with seating depth.

Even at 0.6 MOA I was happy to take this rifle out to an 800 metre shoot, and it did quite well. Note if you use a rear bag, the inline stock will be higher off the ground, so you may need a bigger bag.

The latter is now a much more distinct possibility, as I have an extra 1.5mm of mag length to play with. I hope you haven’t got this far into reading this (fairly lengthy) article, and believe the increase in group size is an indication of negative performance on the part of the TAC21 chassis. As mentioned above, this is purely a function of my handloads being tuned to the rifle as it was.

With a bit more time to play around, I expect I’ll get this rifle back down to its 0.2 MOA capability, while enjoying the modularity of the rifle and ergonomic bliss that comes with having the action and butt stock inline. Just quickly, these are the features that I really like about the MDT TAC21:

  • V-bedding block for increased accuracy and decreased points of contact
  • Thoughtful design
  • Included recoil lug
  • Straight-line design to absorb felt recoil and decrease muzzle flip
  • Full length top rail – 20 MOA too!
  • Plenty of places to add a Magpul rail or two for your bipod, monopod, laser, printer, coffee maker, whatever…
  • Sling swivel stud included for bipods, but easily removable for rail mounted varieties
  • Excellent finish of hard anodizing plus Cerakote in your preferred colour – I had no marks on the stock after months of use, except for where the QD riser was loose on the top rail, and a couple points in the butt stock attachment area, that are not visible anyway when the rifle is assembled
  • Huge tolerance for barrel size, meaning you can have straight no-taper barrels, massive muzzle devices, whatever you want
  • Decent amount of weight for prone shooting and recoil reduction, but light enough to lug around a bit if necessary
  • It looks fantastic, and your factory rifle can play with the RPRs and HCRs and whatever else is on the firing line
  • Better magazine options

If you want any more convincing, head along to the MDT website and check out the customer reviews for this product. You will see exactly what I have experienced. Great product, fantastic service, and an all round improvement in your rifle.

Product review: Boyds Field Design stock for 303 SMLE

Anyone who follows The Gun Rack on Instagram or Facebook has seen sneak peeks of a very green 303 over the past few months. I’ve really taken my time on this particular gun build, and subsequently the review of this stock, but here it is – The Gun Rack official product review of Boyds Gunstocks’ stock upgrade for the British Lee-Enfield series of rifles.

Guess which firearm is getting a makeover?

A photo posted by The Gun Rack (@gunracknz) on

The build…

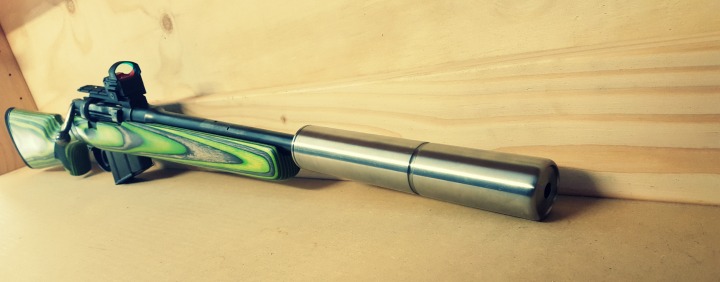
This particular rifle is a quiet bush monster. Monstrous in appearance, but suppressed and subsonic in its implementation. There’s a lot that’s gone into this particular rifle, so – fittingly – we’ll do an entire article covering the various bits and pieces, and the decisions that led to each of them.

One decision that was, unfortunately, made for us, is that I’m no longer going to have the rifle Cerakoted, as a dear and valued member of the NZ shooting community, Victor Alberts, passed away recently while on holiday overseas. Victor was the applicator and artist behind Cerakote NZ, so necessarily we’ll be looking to sort out some other means of protecting the metal on this bush gun.

The rifle that defended the free world – twice

The Short Magazine Lee-Enfield (SMLE) rifle was featured in both world wars and a host of conflicts all around the world. Its younger brother is only now being phased out of service with the Canadian Rangers, who will have a locally made, licensed version of a Sako product (T3 CTR). Other weapons have been trialled, but none compared to the reliability of the Rifle No 4 Mk 2 (since 1941 – not bad).

Even still, the old Lee-Enfield is a devastating tool in the hands of irregular forces around the world, who do not have access to more modern weaponry, or who perhaps have an abundance of old Commonwealth stock. With ballistics and firepower not too far off the .308 Win, it’s not hard to see why the rifle has kept pace.

Anyway, I digress. So, this stunning piece of history came to my possession in a sorry state. Which is okay, as I was keeping an eye out for an old beater that could be beautified without destroying a battlefield artifact.

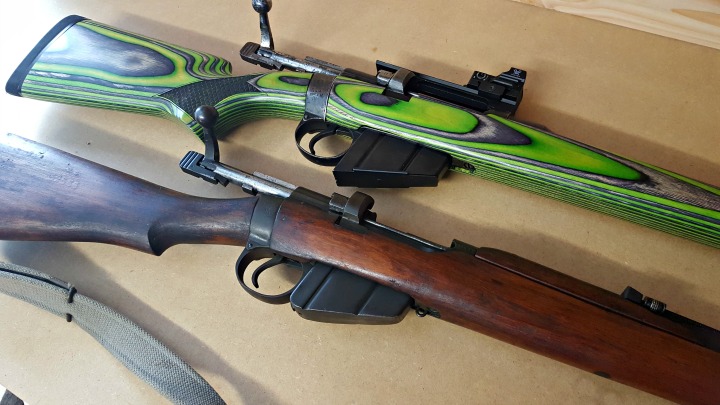
My 1943 SMLE (above) was in a sad state when I bought it - compared to my 1942 (below) which will stay unchanged.
My 1943 SMLE (above) was in a sad state when I bought it – compared to my 1942 (below) which will stay unchanged.

One of the problems with using a wartime rifle (1943), that was mass-produced with unique ‘improvements’ and variations across the world, is that you are bound to run into quality issues. In contrast, I do have a 1942 Lithgow rifle which is beautifully symmetrical and well-machined (even if it is left a bit rough in some areas). But this made-in-Britain wartime specimen is a product of its environment, and loose tolerances, rough surfaces, and poor bluing are to be expected.

In hindsight, I really wish I’d done this build off a Rifle No. 4 instead of an SMLE No.1 Mk iii, as the action lends itself to being rebarrelled to higher-power cartridges, but that may have taken this build in another direction altogether.

If you’re considering a build on a No. 4 or even No. 5 action, Boyds thankfully caters to those, too.

Taking apart the two-piece stock

The Lee-Enfield is everything a modern precision rifle is not. It’s not free floated, the stock is not a single piece and and the ergonomics are all wrong. However it was well-suited to winter clothing and putting a lot of lead downrange, so we can’t really judge the designers for that.

The two piece stock is easily taken apart with some screwdrivers, and potentially a socket driver if you don’t have a really long flat head screwdriver. Check out the easy tutorial here (with lots of pictures!).

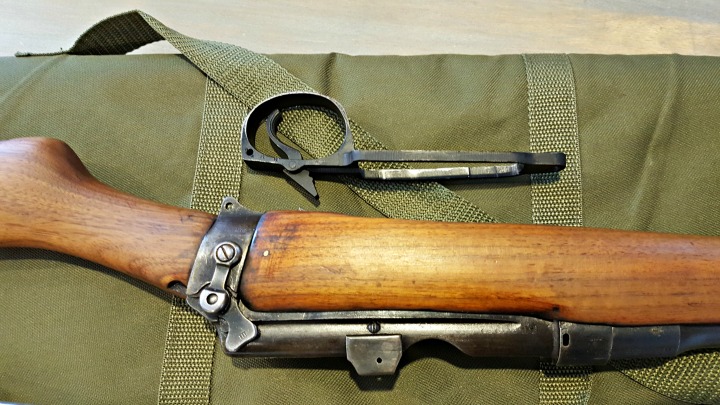
Not many rifles will have the trigger come out with the floor metal.

Fitting the Boyds Field Stock Design

Final fitting will be needed.

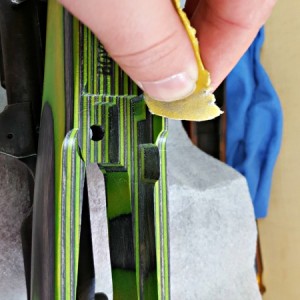
One thing I love about Boyds stocks is seeing the precision lines in the inletting. Now. Take a look at your naked Lee-Enfield. There is not a single square section on that thing. Because the action has so much inconsistency in shape and finish, I spent a fair bit of time sanding and filing around the top of the action and inside and around the sear and trigger slot.

The area around the mag well also needed some relieving of material to get the floor plate sitting properly again, which allowed the barrel channel to move into the appropriate position.

I found it really useful to mark the action with engineer’s blue (a permanent marker will do), to find the high spots on your action that necessitate removing some more wood.

Please be careful removing material, as it’s a lot easier to take off than it is to put on! While I say I spent a lot of time on this, that doesn’t mean I shaved off a lot of the laminate. Rather, I spent a lot of time making sure I didn’t take off too much, so I could still have a snug fit.

When fitting the butt stock, shaving off a small bit of wood off the top of the donut-shaped insert allowed the laminate stock to snug up nicely when I tightened the bolt. However, on the forend side I found there was a bit of a gap between the wood and the characteristic steel band which forms the rear of the receiver and separates the forend and butt stock. I had a shooting buddy of mine machine up a shim to bridge the gap. He put in some counter sunk holes so that I could screw it into the stock once I had all of the metalwork (including the shim) coated, however it’s so far been held in place by friction and is doing just fine.

The shim held in place by friction fills a small gap between action and stock. once coated with the rest of the metal work it will blend in well.
The shim held in place by friction fills a small gap between action and stock. Once coated with the rest of the metal work it will blend in well.

The gap between the forend and steel band I’ll put down to variance between manufacturers of rifles over time. I measured this strip of metal on my two SMLE rifles (one year apart, but one from Australia and one from the UK), and found a 1 mm – 2 mm difference in broadness.

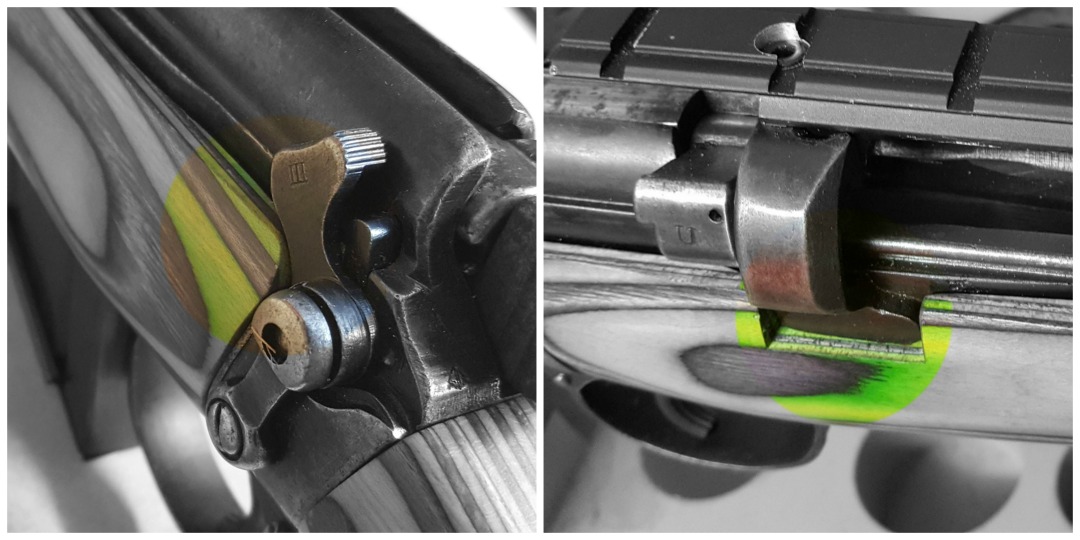
You will definitely need to take out some wood where the rear ring of the receiver interrupts the line of the stock, and also where the safety lever goes in the forward position.

A radius and a square cut will make room for the safety lever and the rear action ring.

Positives of the Boyds Field Stock Design

If you’re looking to improve your Lee-Enfield Rifle or SMLE, you have three options:

  1. Restore the wood with new old stock or modern replicas (on a No 4 this is feasible, on a No 3, near impossible)
  2. Put it in a plastic stock, which will reduce weight, but will deliver more recoil, and increase your noise in the bush with its hollow construction
  3. Choose a hardwood/laminate solution

I’m assuming you landed on option 3, which is why you’re here. The hardwood solution is not only inline with the character of the gun, but also just feels right. I have a couple battle rifles in modern plastic stocks, and I’m too embarrassed to take them to the range, and too put off by the handling and feel to really enjoy them.

The Boyds Field Stock Design (and any of their stocks, really) is a re-imagining of the stock design based around the action and the shooter, not simply a replacement of the existing furniture. This means you can expect an increase in accuracy, stemming from various feature improvements, such as a better inletting, length of pull, cheek weld, positive grip characteristics and also added rigidity when compared to plastic aftermarket (or even original manufacture) stocks.

Line of sight

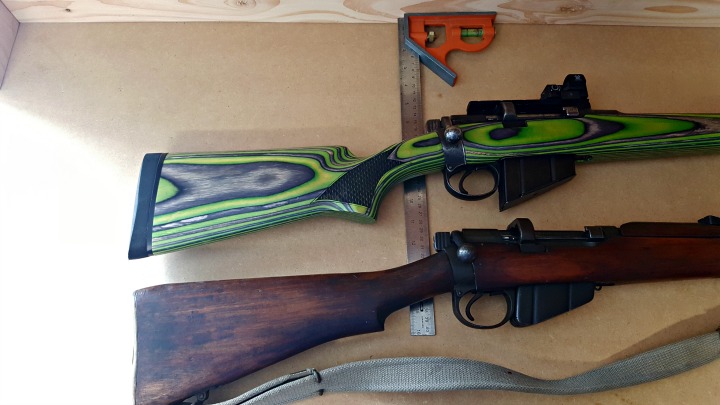
I found that the Boyds stock in particular raised the eye-line perfectly for the old rifle. With the original stock, if you try and get a positive cheek weld, you’ll be looking at the top of the action. You have to raise your head a bit and compromise your repeatable position on the rifle in order to see the iron sights.

Lining the two up by the rear of the bolt, the difference in drop is quite evident, as is the angle of the butt pad - both changing the handling characteristics of the gun.
Lining the two up by the rear of the bolt, the difference in drop is quite evident, as is the angle of the butt pad – both changing the handling characteristics of the gun.

With the Boyds stock, the decreased drop on the comb means you are looking straight at the iron sights. If you had a low mounted scope, you could use this quite easily with little compromise in cheek weld. I have a Vortex Razor HD red dot sight mounted on mine, which, unfortunately, means added height to the optic. However, this doesn’t bother me because, with its unlimited eye relief, I can have my head just about anywhere on the stock and still have an accurate sight picture.

Solid construction

The Boyds stock is not only solidly made with highly advanced resins, but it feels more substantial when you’re shouldering or handling the rifle. The forend fits an adult male hand well, unlike many skinny stocks, where your fingers will wrap around onto the barrel if you’re not careful. It’s also beefier at the butt end. This is in contrast to the original skinny grip that would have been perfect for gloved hands in the trenches, but not user friendly for acquiring a positive grip in the hot bush and forest we often hunt in.

The slight increases in length, width and girth, add up to a much better length of pull and trigger/bolt manipulation characteristics, without increasing the overall length by much at all.

Choice

If you’re pulling apart an old rifle like this to do something special, why not make it truly one-of-a-kind? From the standard colours offered by Boyds, the Pepper laminate is a sexy rendition. Black and charcoal – it modernises any firearm, while still retaining the warmth of wood. There is also a straight walnut stock if that’s your preference.

The 'Scale' laser engraved chequering adds aesthetic appeal, visual depth, and enhanced grip characteristics.
The ‘Scale’ laser engraved chequering adds aesthetic appeal, visual depth, and enhanced grip characteristics.

I chose a Zombie Hunter custom colour for an extra US$16.50, and my rifle stands out like no other. It’s an attention grabber at the range, and it just looks freaking cool. It’s one of those guns you want to take out and shoot, regardless of whether you’re actually working on a load or hunting or just plinking. I might burn through a lot more ammo just because she looks ‘cool’, but that’s okay. Not to mention, everyone else wants a go at it, too!

I also asked for some chequering on the stock, specifically the ‘Scale’ pattern. It’s laser engraved, and absolutely perfect. It adds some extra grip (of course), but also adds depth to the appearance of the rifle. There are a couple other options to choose from as well.

While you’re at it, you could also look at a custom finish, or a different butt pad option to tame your heavy-hitting wildcat magnums.

Negatives

Hey, nothing’s perfect, and there always have to be some negatives.

My only regret on this build (regarding the stock) is not having sling swivel studs, as a sling will be essential for crashing through some of our heavy NZ bush. However, I’m sure Boyds would have included some had I actually thought to ask. Not to worry, I do have some spare, but that’s definitely something I’ll think about next time. More a mistake on my part than a negative with the stock.

There is one negative, and again, it’s not actually a fault of the Boyds Field Design Stock: It’s the rifle. There is no way on God’s green earth that you will have a perfect fit. Unless you own the Boyds’ house action that they model their stocks off.

There is so much variation in fit, quality and manufacturing tolerances between these old war time rifles, that I can almost guarantee some work for you with sandpaper and a file or two, no matter what brand of gun stock you choose. However, if you’re restoring or upgrading any milsurp rifle, this should be something you expect along the way, so don’t let this put you off.

If hard work is not your cup of tea, there are plenty of modern actions that are very uniform and require little-to-no work to customise. Thankfully, Boyds makes stocks for those rifles, too!

sexy

Conclusion

At the end of the day, I’ve found (once again) that the Boyds product is a substantial improvement on the original stock that came on the gun. Not only this, but dollar for dollar, I can’t imagine another aftermarket stock coming close.

The customisation options offered by Boyds are a real bonus for anyone looking to increase the appeal of their old shooter, and the standard options are plenty for those who don’t like drawing too much attention to themselves or those who are watching their budget.

Would I buy it again? Yes. And I guess that’s the highest recommendation someone can give after thoroughly testing a product.