
Product review: Weaver 40/44 Series 6.5-20×44 scope

Every now and then you come across a product that presents you with the best of dilemmas. The problem I have with my new 40/44 scope is choosing which rifle to fit it to. Now, I may sound like a gushing schoolgirl at this point, but read on and let me explain why this scope’s versatility is a nice problem to have.

Price range

The ocular bells allows plenty of clearance for bolt handles and gloved fingers.
The ocular bell allows plenty of clearance for bolt handles and gloved fingers.

Let’s not kid ourselves, when you’re purchasing optics the first thought you have is, ‘How much is my wallet going to bleed to get the kind of clarity/magnification/quality I want?’

There’s a common saying that if you put a $300 scope on a $1000 rifle, then you’ve got a $300 rifle. I would argue that the 40/44 Series 6.5-20×44 is the exception to this platitudinal rule.

The manufacturer suggested retail price (MSRP) listed on Weaver’s website is roundabout $320-330 USD, depending on the specs you go for. If you’re lucky, you can catch it on special or find a store/site with free shipping and get it to your door for around that price. But! Does it shoot like it belongs in the $300 – $500 USD ($450 – $600 NZD) range?

Quality

Finish

The first thing I did when I unpacked the 40/44 was mount it on a Savage .243 to check out the fit and function. Unfortunately I installed it with rings that were a tad snug, and immediately had some long scratches after I pushed and pulled the scope around finding a comfortable fit.

The objective bell clears the rear sight on this Savage nicely.

Feeling pretty upset with myself for ruining a brand new scope (before I’d even had a chance to photograph it for this review too!), I tried to rub the marks out a bit with my thumb. And they lifted. The black, hard-anodized matte finish is built for such rugged use that even scraping it along in tight metal rings didn’t leave any permanent marks on the finish. I’ve had much more expensive scopes (especially with matte finishes) end up with unsightly scratches even from a trip to the range, let alone hiking through the bush.

Mechanical

If there’s one thing that’s a tell-tale sign of poor – or even average – manufacturing quality, it’s sloppy elevation and windage adjustments.

The fine gearing makes for smooth use and precise adjustments.

Even when I was just playing around with the scope before actually going to the range, I could tell that the 40/44 Series was just a little bit better made in this area than most. The clicks were tight and consistent, and there was no play in the adjustment turrets. After taking the turret caps off, adjustments can be made with your fingers, with no special tools or coins necessary.

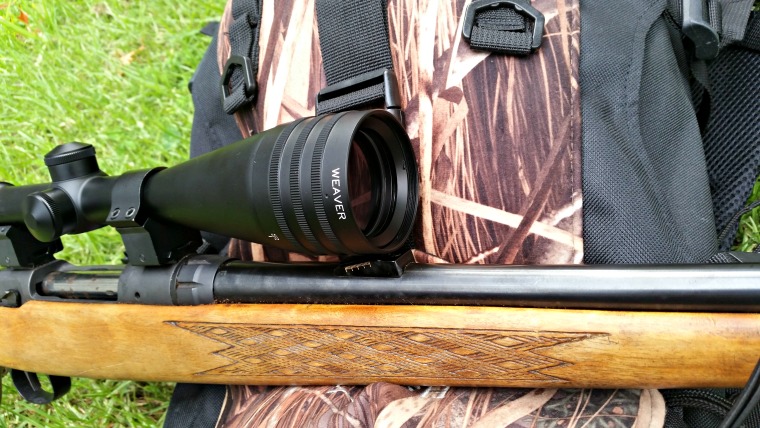
The parallax and magnification adjustments have a bit of a longer throw than other scopes in the same price bracket. This is actually a good thing. What this indicates is finer internal gearing, which means more precise adjustments can be made. The movement of these parts is also smooth, but resistant enough to the point where you don’t have to worry about unintentional movement.

Optical

The optical quality is really what most people get giddy about when choosing a new scope, although I’d maintain that mechanical quality is just as important.

In my experience there are two major indicators of optical quality in a scope. The first (and most obvious) is light transmission. Is the scope clear, bright and easy to use? The answer in this case is yes. The second, and certainly equal, indicator of quality materials and craftsmanship is the ability of a high-magnification scope to continue to provide optimal light transmission at the high end of its zoom range.

In other words, if I were hiking around the back country with the magnification set around 10 for medium-range shots, but then decided to take a longer range shot requiring all 20x zoom power – at dusk – could I expect the same level of optical clarity?

Many competitor scopes at this level – and certainly the cheap no-name brand scopes on TradeMe – start to get murky towards the end of their range. I had a 6-24x power scope that I realistically couldn’t use beyond 18 or 20 without losing too much light. I’ve also owned an 8-32x scope that may as well have been an 8-24x for all the use the upper range was.

It may be a hunting scope, but it's perfectly at home on this rimfire rifle.
It may be a hunting scope, but it’s perfectly at home on this rimfire rifle, along with the aftermarket Boyds stock.

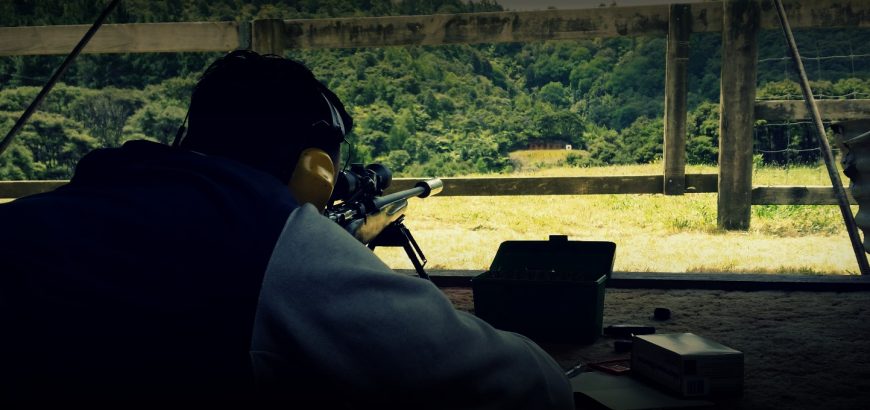
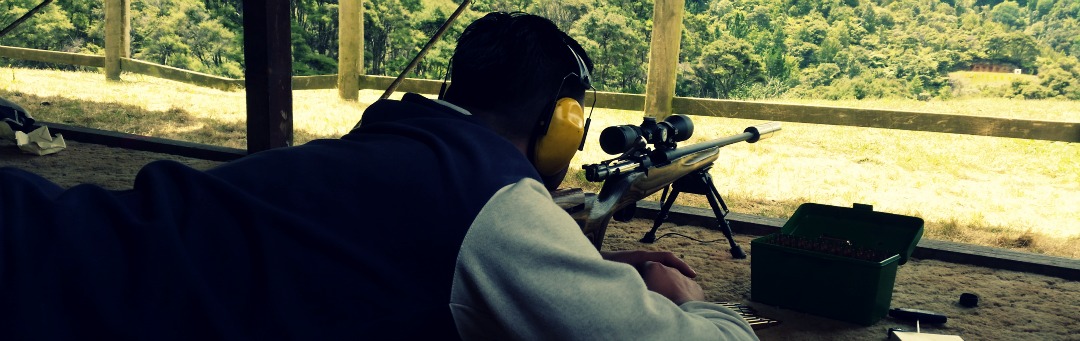
I’ve glassed tree-lined creek beds with this scope in failing light at maximum zoom, and also used it at maximum zoom at an indoor target range, and in both situations found the light transmission to be excellent. So much so that I would be confident in saying I could use the full potential of this scope, and not just stick to the lower ranges.

Specified use

Of course, how you intend to use any particular scope is up to you. However, certain optics are created with particular uses in mind. According to Weaver’s website, the primary use for the 40/44 in 6.5-20×44 with Dual-X reticle is as a large game hunting setup.

The 6.5-20x version of this scope comes with three reticle options – the Dual-X, Ballistic-X and Varminter. All are variations on the duplex reticle and the use for hunting is readily apparent. The thick posts draw your eye naturally to the finer crosshair in the centre, making for quick target acquisition.

The Ballistic-X version has some elevation holdover hashes for those who prefer to holdover rather than adjust their turrets – useful for shooting on the move, rather than from a prone position. The Varminter crosshair features a round dot in the middle of the reticle to form a natural point of focus for the eye.

If you choose the Dual-X (like I have) or the Varminter, you’ll likely be making elevation adjustments in the field. Using a ‘cheat sheet’ calculator, you can quickly figure out what adjustments you need to make and have these on a card taped to your rifle for quick reference. Alternatively, some time at a range with multiple distance options can help you figure out exactly what your load/rifle/optic combination requires.

Thankfully the 40/44 is designed with quick adjustments like these in mind. After removing the turret caps, you’ll notice the turret markings are easily visible from the shooter’s position.

The turret adjustments are easily seen from the shooter's position.
The turret adjustments are easily seen from the shooter’s position.

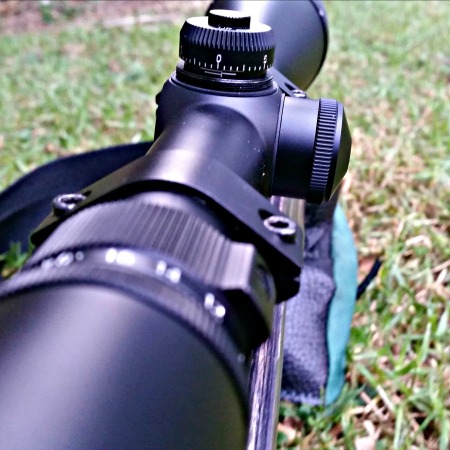
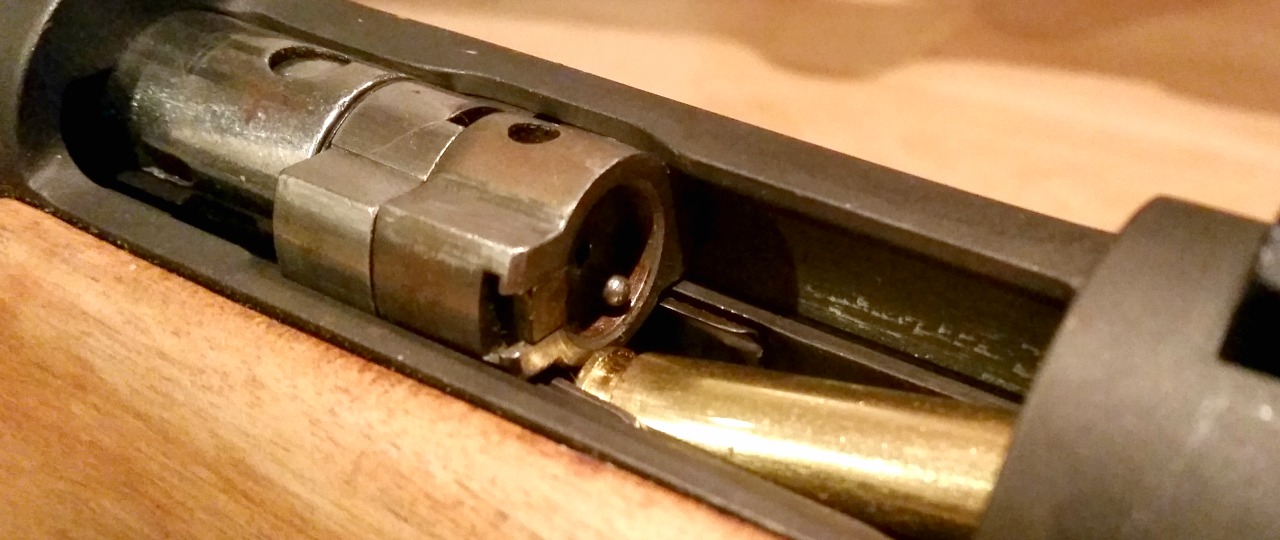
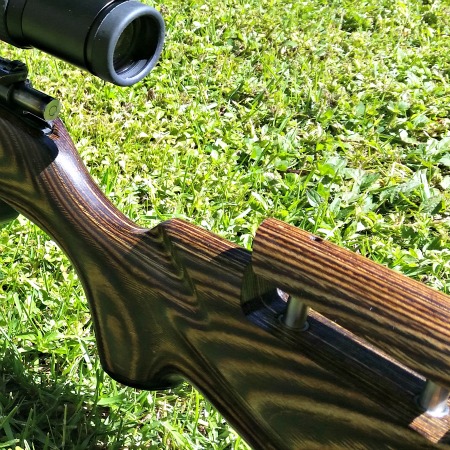
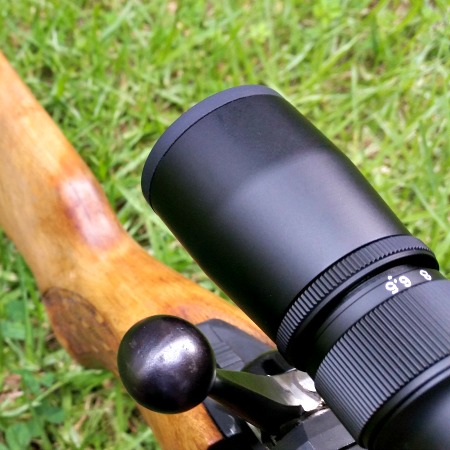
The ocular bell is also quite compact, which has multiple benefits. It’s easier to see past when making turret adjustments for starters. But more importantly it means more clearance between the bolt handle and the scope. This makes for easier mounting on older rifles, as well as convenient use with gloves when you’re in the mountains.

Overall impressions

It’s easy to see how this scope could be favoured by hunters the world over. It’s not a Super Slam, but for the budget-conscious shooter or the back-up rifle, it’s great value for money with many of the same features as the more expensive scopes. It’s no surprise that it’s a ‘best rated’ product on Optics Planet.

The ruggedness and mechanical reliability means a lifetime of use, while the optical clarity makes it perfect the times of day you really expect to be hunting in New Zealand. The uncomplicated reticle and ease of adjustment makes for more confident shooting in the field too.

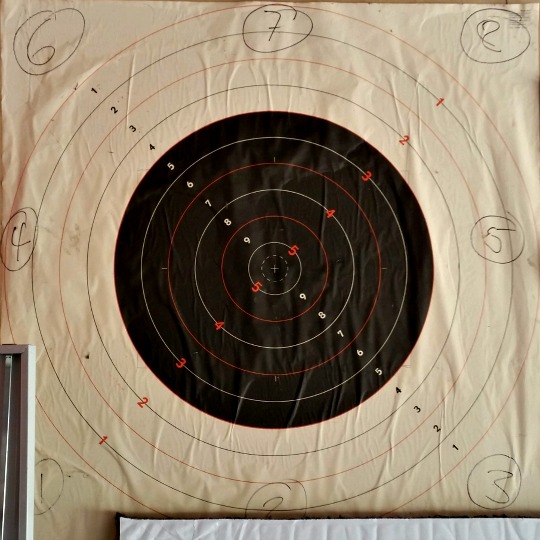
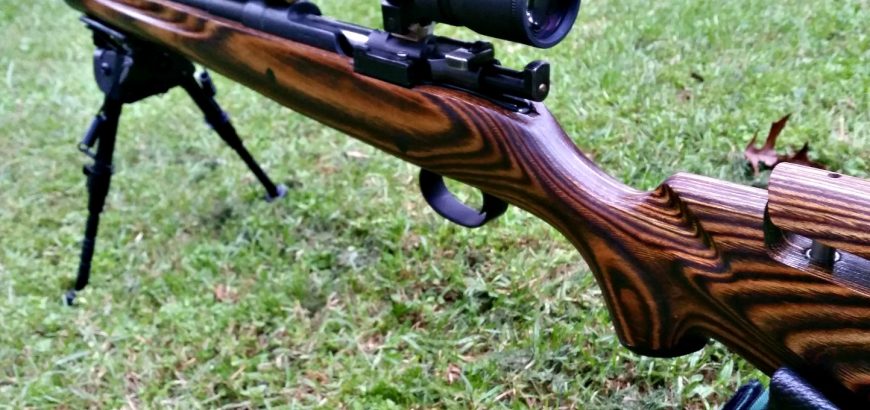
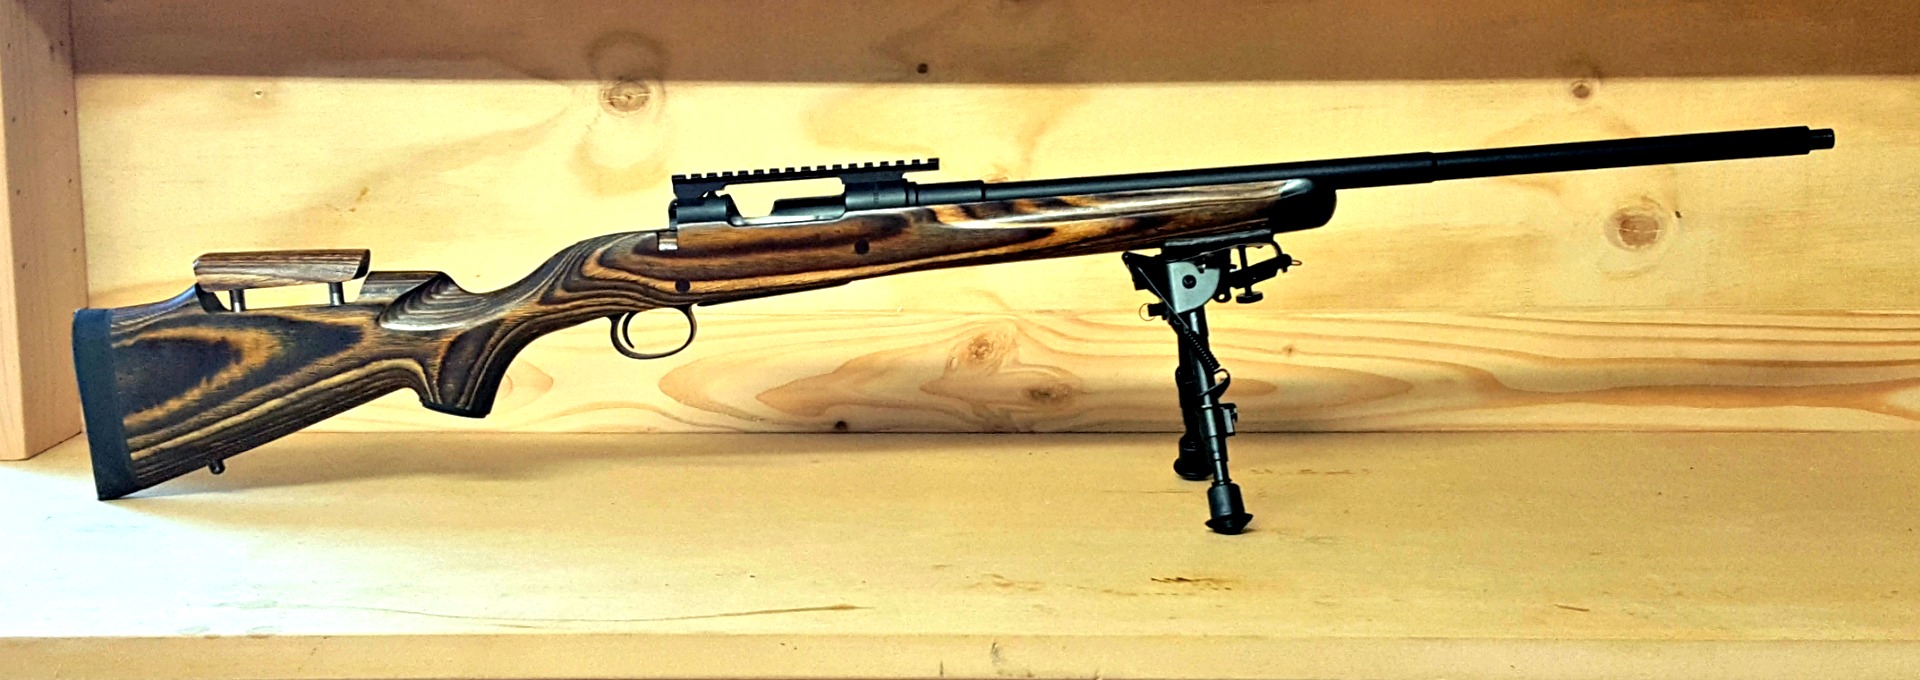
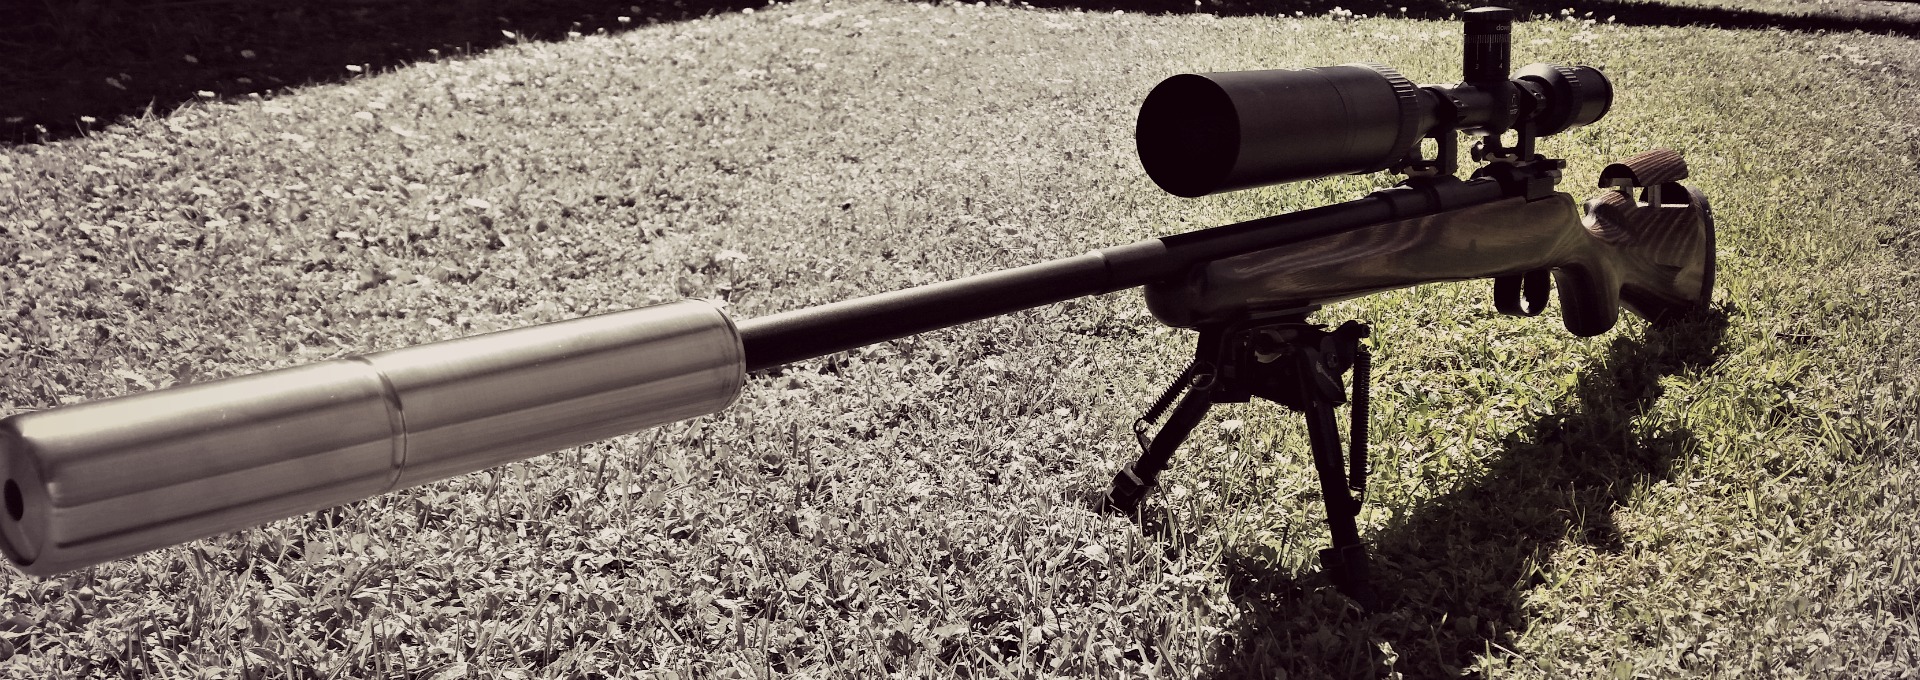
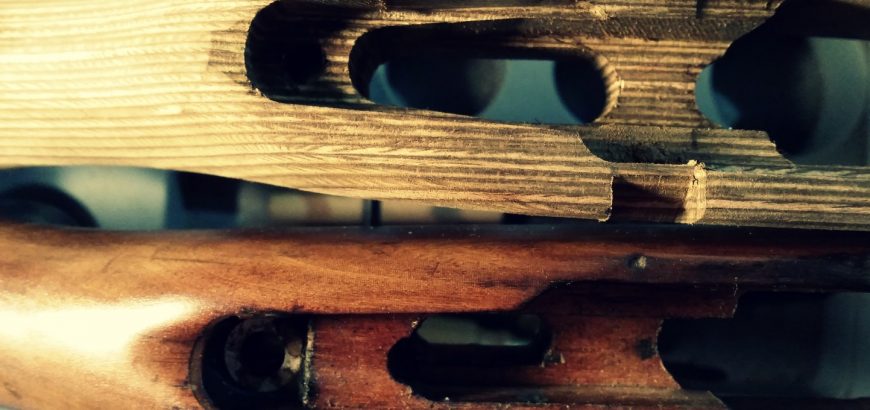
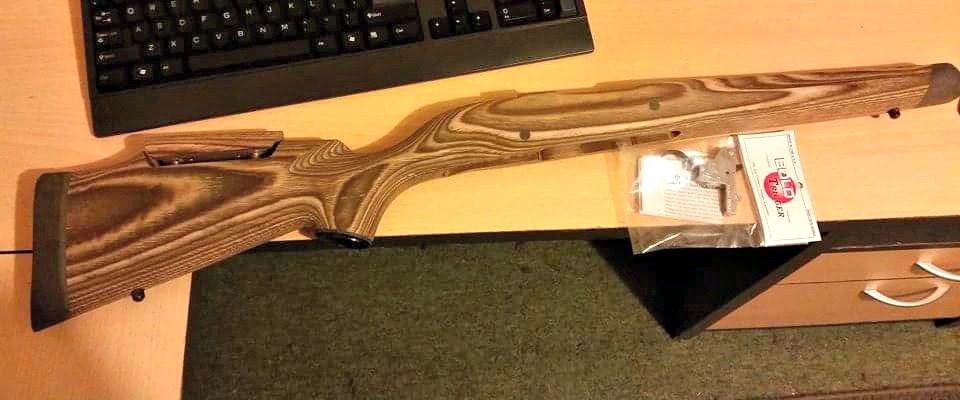
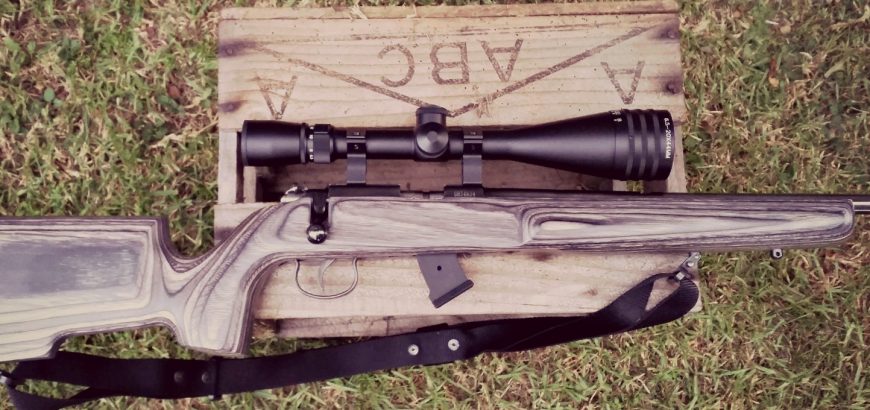
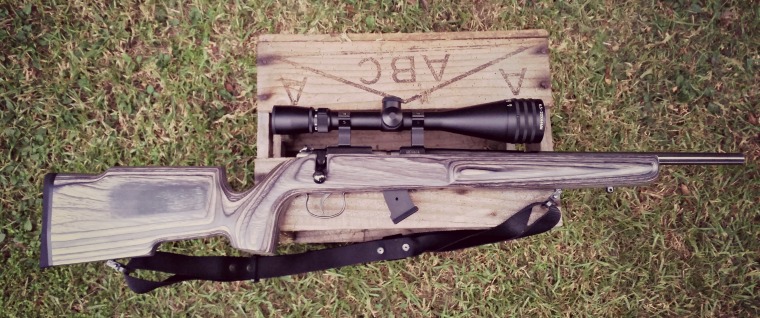
While this scope was originally mounted on a .243 Winchester for hunting use, it’s found a new home on my bolt action .22LR along with a Boyds Pro Varmint stock for target shooting. While it may seem a strange application, indoor smallbore target shooting involves known distances without wind variation, making the simple reticle ideal. The high level of magnification also means precise shooting and knowing what your score is before you leave the mound. The large objective lens also means plenty of visibility indoors under artificial lighting. Lastly, the adjustable objective means you can shoot at high magnification at ranges as close as 25 yards.

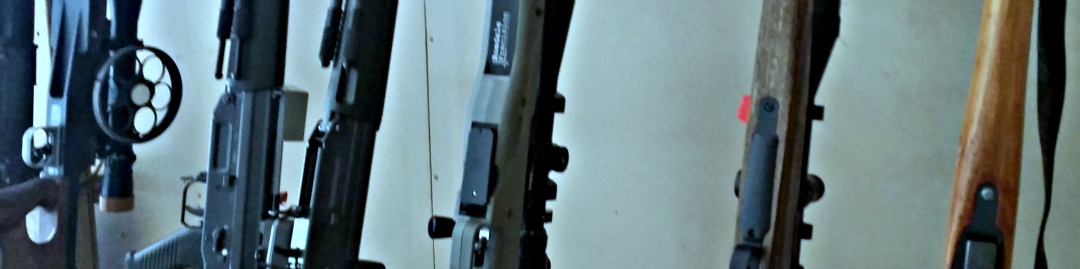
But, as I mentioned at the beginning of this article, this scope could sit on almost any of my rifles and be fit for purpose. It could go on my 6.5×55 and be used for F-Class, or thrown onto my 7mm-08 for a light, bush-ready rig. Like I said at the start, it’s a good problem to have!

Bullet selection for hunting this roar

For many young girls and guys around the country, this roar will be their first opportunity to hunt – or at least to hunt some of the more prized species New Zealand has to offer in their prime coats and colours. While a shooter may be proficient with their weapon of choice, this does not automatically make them a good hunter.

Aside from the bushcraft, fitness and stalking involved – not to mention antler-induced-excitement behind the trigger – a serious consideration is the choice of ammunition. Fortunately for those shooting a more common calibre, there is plenty of off-the-shelf ammo that will do the trick. If you don’t intend to shoot much aside from sighting in and hunting, then buying ammo makes much more sense than reloading.

Bullet choice in New Zealand

Some common hunting calibres in New Zealand include .308, .303, .223, 6.5×55, 7mm-08, .243, .270, .260 and .30-06. To a limited extent the old Russian military calibres see some use (7.62×39 on goats or yearlings at close range or 7.62x54R if you’re running around with a sporterised Mosin-Nagant). And .300 BLK is becoming quite popular for goat culling or in short-range (but fancy) bush guns.

If you’re buying ammo for more common calibres like .308 or 7mm-08, your store owner’s recommendation will likely be good enough. Remington Core-LOKT and Winchester Power-Point are popular choices, and Hornady Whitetail does very well in most modern bolt actions too. However, for reloaders who have been chasing accuracy, bullet choice can change the game completely.

Some of the more common 7mm-08 hunting choices.

For example, with my 6.5×55 a 142 gr SMK or 140 gr AMAX does a beautiful group at 100 yards. In fact, my new favourite is Norma-Sierra 144 gr – it’s a factory load, but I can’t seem to beat it with the projectiles I have on hand. However, all of these loads have hit-and-miss performance on game. The AMAX less so, but certainly the SMKs are not meant for hunting. They have erratic terminal performance, sometimes yawing and producing massive wounds, sometimes producing pinhole wounds that can lead to inhumane kills and extended tracking of wounded animals.

But isn’t the Sierra Match King a hollow point? Yes it is, however the HP in this projectile is not designed for expansion on game. This hollow section in the bullet is to keep weight to the rear of the bullet, stabilizing it in flight and making it a more accurate round.

The SMK looks great on paper but does not produce consistent wounds.

Factors like this need to be considered carefully, especially in calibres with higher sectional density, which can lead to deep penetration, but poor expansion if bullet choice is incorrect. This can be prominent in the 6mm and 7mm calibres.

If you’re about to start working up your hunting load for this year’s roar and do some quick sighting in, there are a few ways you can narrow down your bullet selection. You could start by checking out the forums or facebook pages and seeing what others with your rifle/calibre have been using. Or you could start by doing some research on sites like Nathan Foster’s Terminal Ballistics, or checking out the projectile manufacturer’s website. If you are the type to learn better by doing rather than reading, try a sampler pack from Gunworks to get a few different projectiles through your rifle and find its sweet spot.

Push feed vs controlled feed bolt action rifles

Whenever there is more than one option, shooters around the world will have vastly differing opinions for and against each. The same could be said for push vs controlled feed bolt action rifles. However, after over a hundred years of having both on the scene, it seems a sort of stalemate has been reached.

So, what's the big deal?
So, what’s the big deal?

People still have their preferences, but realistically, there are much more important factors to consider when choosing a bolt action rifle, and the feed/eject mechanism is almost ancillary to other concerns. That being said, there are differences.

The double feed

A push feed action is exactly what it sounds like. The round is pushed by the base of the bolt into the chamber. Once the bolt is fully closed the extractor claw will engage the rim of the cartridge, so that the ejector plunger can push it out when it’s clear of the chamber again (once the bolt is pulled rearwards).

The oft-quoted push action double feed can occur if you do not fully close the bolt upon chambering a round. This means the round will not eject as the extractor claw has not engaged the cartridge. If you move the bolt forward again, you’ll feed a second round into the base of the first.

The bolt in this .243 Stevens literally pushes the round without grabbing onto the rim until the action is fully closed.

This situation is very unlikely to occur, except through clear operator error. We all like to think we’re beyond such simple mistakes, but stress can cause us to do funny things. When might you be this stressed? Hunting dangerous game, or perhaps in fast-paced action matches like the Precision Rifle Series. However, most competitors use modern push feed actions without any issues. Big game hunters on the other hand, are probably the biggest proponents of the Mauser-style controlled-round feed.

Making life easier

The main reason for the proliferation of push feed rifles is that they are cheaper and easier to manufacture. Having said that, some very expensive, reliable and accurate rifles use push feed actions.

There’s one thing that just makes like easier with a controlled-round feed. You don’t have to push the bolt fully closed, or completely work the action, to pick up and eject a round. And no, this isn’t the same point above worded in a different way.

This Mauser action with its large claw extractor grips the round upon picking it up out of the magazine.

If you spend a lot of time on the range drilling small holes into paper, you’ll come across plenty of situations where you have to clear your rifle so someone can go forward. This may be for a change of targets, a ceasefire in a match or  some other situation where rifles need to be made safe.

If you have a box magazine, no issues either way. However, if you have a blind magazine, emptying a full mag with a push feed action can be annoying and time consuming. A good example of this is the Mossberg 100 ATR which I recently reviewed. A nice, slick bolt action, but you can’t pull the magazine out or drop a floorplate if you want to quickly empty your rifle.

With the Mauser-style actions built by CZ, Winchester (some model 70s), Ruger, Kimber and others, you can simply move the bolt a fraction of the way forward and pull it back again to solidly pick up and eject a round. I do also find that the bolts are generally less sloppy in the action, as the long extractor acts as another guide to keep the bolt going forward and not sideways.

These sound like silly points to favour one rifle over another, and they are. Although it’s a feature I really like, it wouldn’t influence which rifle I bought if I was choosing between two (unless they were otherwise identical, which isn’t going to happen).

If you want to dig a bit more into the subject, there’s plenty on the web, including this well-illustrated article at Lucky Gunner.

If I had a range like this in my back yard, I may divide my time slightly differently.

Swiss 300 metre shoot – Any Sights Any Rifle

There are a few centrefire rifle events every year that are just thoroughly enjoyable and worth attending. The Auckland NZDA Prize Shoot is one, as is the Thames NZDA shoot. The Hangiwera Station Sniper Shoot is definitely up there, and so is the Swiss Club’s Any Sights Any Rifle 300 metre shoot.

This year was my first shoot at the Swiss Club, although some of my shooting buddies have been going for years, and I attended on their recommendation.

An enjoyable shoot

The shoot is well organised, and is accommodating for younger or inexperienced shooters. There are club rifles available and the RO is very helpful with sighting in. The club rifles are either straight-pull Karabiners (K31s), chambered in the venerable 7.5×55, or modern semi-autos in 5.56 NATO/.223 Remington.

If you’re bringing your own rifle (as most do), you can use anything you like. If you’re really ambitious, you can try your open-sighted SKS and see what it will do at 300, but you’ll be going up against Bench Rest rifles that hit 10.1 more often than not. Most rifles on the day were a mix of F-Class, BR, sporting and service rifles. Because there is such a variety of shooters and equipment, it’s more likely that you will be competing amongst your group of friends than with the top of the table – unless you’re an excellent BR shooter.

The variety of rifles on the range is a joy in itself.

Although I knew there was no way I could beat the top BR shooters with my modest sporter, this did not diminish my enjoyment of the day at all. I’m pretty competitive by nature, but found myself comparing my scores to my wife’s and those of the other Howick shooters. It also meant I got to see a bunch of really cool guns that you wouldn’t usually see in one competition.

Three-hundred metres is a pretty challenging distance if you haven’t shot past a hundred before. There were even a few who had not shot at all before. However, with the help of the club’s rifle master, these young shooters were hitting paper in no time.

The cost of the shoot is not prohibitive, with a range of $20 on the day, and of the cost of 25 rounds of ammo. The Swiss Club has a really good website for the ASAR shoot, which lets you book your position on the mound ahead of time. With several details across a few days of shooting, you’ll definitely find a time to shoot, and you may even try and better your score on another day.

Swiss Club target.
Swiss Club target.

The format

The shoot starts with 5 individual sighters. Each shooter on the line takes a single shot from the prone position (all shooting is prone), after which the targets go down and the scorers call back the score and location of the round to the RO via radio. A notepad and pen are handy, as you try and figure out where your sighters are landing. The shots are called out like “9 at 3 o’clock” or “7 at at 1 o’clock”, with the first number being the score (1-10) and the position on the clock helping you to identify which segment of the target you are landing on.

After you’ve gone through your 5 sighters, there are 10 individual scoring shots, shot in a very similar fashion. Each shot is still called out, helping you adjust your shot placement, especially if the wind picks up downrange.

A notepad is essential to sighting in at 300 metres.

After the individual shots, you have “rapid” groups of 2, 3 and 5. I say rapid, but it’s really not. It’s simply a few shots in a row. There is no pressure to hurry up, and there are plenty of people single loading their shots.

All shots are still called out, except for the final group. This means you can adjust your shot placement right up the last minute.

How hard is it to hit the 10 ring? You’ll need to be shooting around MOA (just over) to consistently hit the 10 ring at 300 metres. If you want to notch up a bunch of 10.1’s, you’ll need to be shooting around between 0.5 and 0.66 MOA.

The experience

I thoroughly enjoyed the shoot. I went a bit early to watch some of my mates shoot, but also to familiarise myself with the format and calls. I did end up waiting around a bit, but I ended up being there for most of the day, as I had some “technical difficulties”.

After watching the 11 am detail, I hung around over lunch time before taking up my spot on the mound. I was a bit nervous as I was shooting my rifle in its complete configuration for the first time. Since the last time I had shot, I had fitted and bedded my Boyds Prairie Hunter stock, had a new bolt handle machined, and modified my magazine follower. Also unfamiliar to me was a 6-24 scope that I had been sent to review.

One new bolt handle coming up, thanks to my mate Thomas.

Unfortunately the scope did not perform and was unable to be zeroed on the day. This meant I had to wait through an entire detail, pushing out my wife’s shoot as well. However, I used this time to fit my trusty Vortex Diamondback 4-12×40 BDC, which I brought just in case. I have learnt my lesson with taking unfamiliar equipment to a shoot.

Unfortunately this meant I had to sight in from scratch, however, I was on paper on my 3rd shot, and the rest was just fine-tuning. By the end of my shoot I had it right were I wanted it, which meant my wife had the rifle ready to go for her shoot, and actually did quite well. Results can be seen here.

Overall I was very happy with the my complete sporter set up, and with some more powerful glass, I think I’d be comfortable taking this rig out onto the F-Class range.

Looking forward to some Norma brass at the end of this.

I think the load development still has some way to go, particularly as the barrel on this rifle is quite short. Not having developed a satisfactory handload, I shot this competition with factory 6.5×55 ammo. I used the Norma-Sierra 144gr HPBT, and the round seemed to perform pretty well. To be honest, I was more interested in the brass than anything else, as I think this rifle will prefer lighter projectiles, in the 130 – 140 grain range. Over the holidays I’ll be testing out the 129 gr Hornady Interlock and 140 gr A-max. I’ll be comparing this projectiles side-by-side with the 142 gr SMK and the 144 gr OEM projectile in the Norma-Sierra load.

At the end of the day, the shoot was enjoyable, and definitely an experience worth repeating. You can shoot multiple times on one day, or on multiple days across the competition. If I have the time next year, I’ll probably try shoot it on a few days. Being located only 45 mins or so north of Auckland, the range is really accessible, although it is also rarely accessible. The Swiss Club is, of course, a club for Swiss nationals, and as far as I know, this shoot is the only time of the year that the range is opened up to the general public.

If you would like to try a different range and format, and perhaps a longer distance than you usually get to, you’ll definitely enjoy the Swiss Club’s ASAR shoot.

Product review: Boyds Prairie Hunter gun stock for Swedish Mauser

Sometimes you find a winning combination. Something that just works for you. This has been my experience with the Prairie Hunter rifle stock from Boyds, combined with my 1943 Husqvarna Mauser – a dream come true. What makes this such an epic combination? There are several factors that combine to make this gun incredibly shootable, but for now, let’s look at the fancy piece of wood it’s sitting in.

The looks

The old Mauser looks perfectly at home on the range in its Prairie Hunter stock.

The Prairie Hunter is a good looking stock, no doubt about it. The first time this rifle was on the range in its new configuration, an old time shooter said “such a pretty stock for such an old rifle!” And he wasn’t the only one. Laminates are known for being hardy, heavy and beautiful in an age of synthetic rifle stocks.

In the looks department, this stock was certainly helped along. Boyds provided this specimen with a nice, thick Limbsaver recoil pad and synthetic caps for the nose and grip. What adds to both the functionality and visual appeal of the rifle, is an adjustable cheek piece. The adjustments are made from the top, with an allen wrench, which means no adjustment knobs on the side of the rifle.

Full profile picture of the Boyds Prairie Hunter stock with adjustable cheek rest. This picture is here especially for Zach.

Final fitting needed

Boyds does advise that their stocks are made to their house actions (imagine how many actions they have!), so final fitting may be needed for your rifle. For this particular project, I received my stock in ‘unfinished’ condition. This means a final sanding and some polyurethane are needed. The reason for this, is that old Mausers come with several different bolt configurations, depending on the life they’ve had. This means that the channel that the bolt handle fits into should be determined by the end user, depending on their particular model. With a bit of work to do, Boyds doesn’t send you a finished stock, that you will then have to cut into and sand down anyway. Makes sense.

Some relieving of matriral was needed at the front of the mag well.
Some relieving of material was needed at the front of the mag well.

The bolt handle notching was easily done, and is covered in my series of articles on bedding and finishing stocks. With this particular stock, I found that the floor metal was a couple millimetres further back than I needed it to be. All I needed to do was to relieve some material from the front end of the mag well to get the metal sitting where it should, and mating up to the action.

I chose to bed my action, which was a bit more work still, and instead of polyurethane, I opted for a hand-rubbed finish, using Birchwood Casey Tru-Oil and Stock Sheen and Conditioner. The oil even gave a nice gloss to the plastic bits on the stock as well. Learn my lesson without doing the hard yards though, tape off the recoil pad if it’s rubbery. The oil will make this super sticky, and you will get all sorts of fluff on your butt pad for a while. You will eventually be able to rub it all off.

The Tru-Oil immediately brings out the character in the laminate.

Performance

Oh what a joy. I couldn’t be happier.

And that’s not sarcasm!

The 6.5×55 is not known to have heavy recoil, but if you have a shortened barrel and sporterised stock, you feel every bit of it. Having purchased this rifle second-hand with the intention of restoring it, I was happy enough with the home-made sporter stock, but it was certainly made for a shorter person, and the lightweight nature of it didn’t do much to tame the kick of the old service round.

The extra weight associated with the laminate stock meant all sorts of recoil-reduction. I would definitely recommend going for this or a walnut stock over most of the synthetic options out there. The normal-person-sized length of pull also helped, along with the 1″ recoil pad. Don’t get me wrong, the stock isn’t overly heavy either. With a hollowed out barrel channel for free-floating and weight reduction, the balance and weight is nice. Most of the heft is around and behind the action – where you need it most.

Tall scope mounts are no problem with the adjustable cheek rest.

Combining this with my MAE 6-30 ST suppressor, recoil concerns are now a thing of the past. So much so, that I can shoot off the bipod with my off-hand under the grip as a stabiliser, instead of holding down the fore end to stop myself getting a scope in the face, as I had to do with the synthetic-stocked Mossberg ATR a month or so ago.

Shooting with this configuration and my wife’s Vortex 4-12X Diamondback with BDC reticle, my wife and I were hitting 9’s and 10’s at the 300 metre Swiss Club shoot a couple weeks ago – even a 10.1! And this is with factory loads (Norma-Sierra 144gr).

Adjustable cheek rest

One of the major selling points of the configuration I now have is the adjustable cheek piece on the Boyds stock, and I would highly recommend this option on the next stock you buy. Below are a few of the reasons I love this feature:

  • easily adjust for different users and eye-relief
  • raise your line-of-sight for scopes that are mounted high due to large optic bells, iron sights or bolt handle clearance
  • quickly lower the cheek piece when needed for cleaning rod access
  • ensure proper cheek-weld to maintain repeatable, accurate shot placement

Overall impressions

There is a lot to be said for keeping old military rifles in their original condition. However, if you’ve bought yourself a bit of a project, or inherited a less-than-perfect specimen, a great place to start with your customisation efforts is a replacement stock from Boyds.

You can get a stock that is more suited to varminting, target-shooting or tactical-style precision matches than the military wood. These old stocks were made to be shot with full winter clothing, and to be light as well. As such, they transfer a lot of recoil to a normal-size shooter. You can also help your sweet Swede look as good as it shoots. With a nice-looking stock, like the one I have in a Nutmeg finish, you won’t feel out of place next to the Howas and Tikkas on the range.

The Boyds stock completes the set up, along with an MAE suppressor and BOLD Trigger unit.

Bear in mind, when you order a stock from Boyds and you are not in the States, you have to keep your order under $100 to avoid costly permits which make the process impossible. If you or someone you know is making a trip to the USA, take advantage. Or get friends and family over there to help you out. Worst case scenario, you can still get an amazing stock, but you may have to forego some of the bells and whistles.

Rifle stock bedding and finishing: Part 1

Properly bedding and finishing your rifle will not only help it look a million bucks, but will seriously enhance your accuracy as well. In this blog series I’ll be looking at bedding and finishing my Boyds Prairie Hunter stock for my Swedish Mauser.

The stock

The stock I’ve chosen for my small ring Husqvarna chambered in 6.5×55 is a laminate from Boyds Gunstocks, in their Prairie Hunter shape with a nutmeg finish. The stock has more weight than my current one, absorbing some more recoil, but also balancing well against the almost half a kilo of suppressor on the other end. It also has a more appropriate length of pull, and a nice recoil pad that not only reduces kick, but also gives me that little bit of extra length.

This stock has been provided with a few nice extras, including an adjustable comb and synthetic pistol grip and forend caps.

The Boyds stock and BOLD Trigger made a nice car package to come home to.
The Boyds stock and BOLD Trigger made a nice care package to come home to.

For some stocks, Boyds only provides their products unfinished, which is the case here. This is because some rifles come in so many variations of configuration, that they will necessarily require some fitting by the user. In this case it’s differences in bolt handle that make it a must for users to complete their own stock. Many older Mausers still have their straight bolt handles, but increasingly if you come across an old Swede, the bolt handle will be bent back, or you could even have an M38 bolt – or similar – which comes turned down from the factory.

After finishing this, and any other inletting adjustments needed, you can then apply your choice of protective coating. While Boyds recommends a polyurethane, I really like the hand-rubbed oil look, so that’s what I’ll be trying with this project. My Pro Varmint stock from Boyds does have the polyurethane finish from the factory, and I must admit, it looks good and is very hard-wearing. But hey, since I’m doing this bit myself, I may as well try something different.

The bedding compound

There are various bedding compounds and systems on the market, and you have some serious research and decision-making to do. Some newer factory rifles will come with an aluminium bedding block, while others are pillar-bedded.

Rifles that are bedded after the fact can be done in several ways, depending on your capability, tools, budget (if your smith is doing it), desired application and the needs of your rifle’s action.

Terminal Ballistics Matchgrade Bedding Compound - release agent, component A and component B.
Terminal Ballistics Matchgrade Bedding Compound – release agent, component A and component B.

Generally people choose between pillar or glass bedding, or both. Then there’s also a full, front or front-and-rear glass bedding job. Pillar bedding uses metal pillars, such as aluminium or stainless steel, to eliminate the risk of compression or crush when tightening the king screws.

The pillars are tubes that are epoxied in the action screw holes, for the screws to go through. This way, when the wood expands and contracts, or is put under pressure between the floor metal and action, the screws can always be done up to the same point, as the metal is pretty much impervious to these stresses.

Glass bedding is the process of using a compound, that is pretty much an epoxy in most cases, that is reinforced in a fibreglass-like way. The compound I prefer is Nathan Foster’s Matchgrade Bedding Compound, which is steel reinforced, and easy to apply.

Check back in for Part 2, where I’ll go over the first steps of the stock prep and bedding process.