So, it’s been an awesome year, both personally, and for The Gun Rack. Having recently started importing Boyds gunstocks, it’s been great to bring Kiwis (and the occasional Aussie) a product they haven’t been able to have for a long time (certainly not at a decent price, anyway).
To celebrate the end of an awesome year, I’m giving away one free stock to one of you lucky buggers. If you buy a stock in our next order, you will have a 1 in 10 chance of having the full cost of your stock refunded to you, including the GST and shipping costs.
This is the last order for the year, and I already have 2 out of 10 spots filled (those 2 guys will qualify too). For the next 8 people who jump onto this order, simply:
Head on over to the Boyds website and find the stock and upgrade options you want
Place your order (this includes payment upfront, as usual)
Wait for your awesome stock to arrive, and hopefully for some cash to hit your bank account too!
If you want to read more about the ordering process, head over here, or email me. Unfortunately the stock won’t arrive before Christmas, as it takes a while to manufacture, ship, get through customs, courier, etc. However, if you are the lucky winner, you will get your money back as soon as the order is complete (which will hopefully be before Christmas!).
The winner will be chosen using a random draw method of some description. The decision will be random, and it will also be final (And no correspondence will be entered into, etc, etc,. Basically, I’m giving away something free, don’t be a douche if you don’t win).
Merry Christmas everyone, and thanks for being part of The Gun Rack community and our journey importing Boyds gunstocks into NZ (and AU). I’m hoping in the new year to be bringing in some other cool bits and pieces – will keep you updated on that.
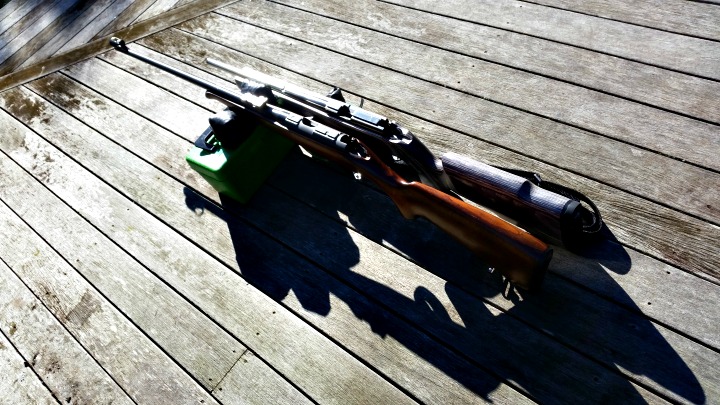
There are two types of Lee-Enfields out there. There are the pristine or refurbished, fully wooded, original-as-they-come investments. And then there are the sporters. These chopped and changed pieces of history make excellent first time hunter’s tools, or the basis of many a project.
We’re going to take a quick look at how to remove and replace (or upgrade) the furniture on your 303, and talk about some of the interesting things you’ll find along the way. Whether you’re building an awesome wildcat, such as a 25-303 or even a 40-303, or just beautifying grandad’s old hunter, I hope the steps in this article are helpful for your project.
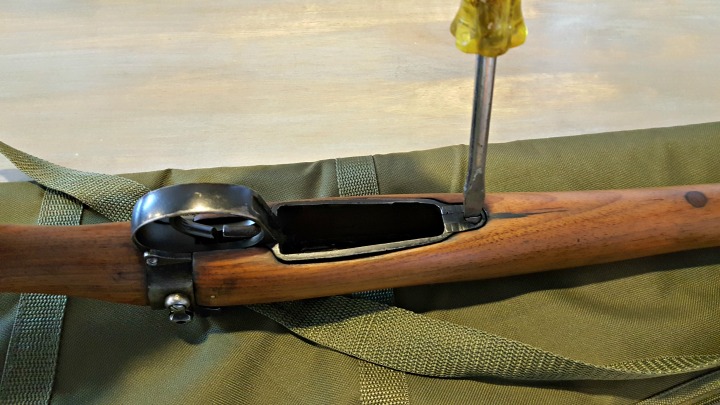
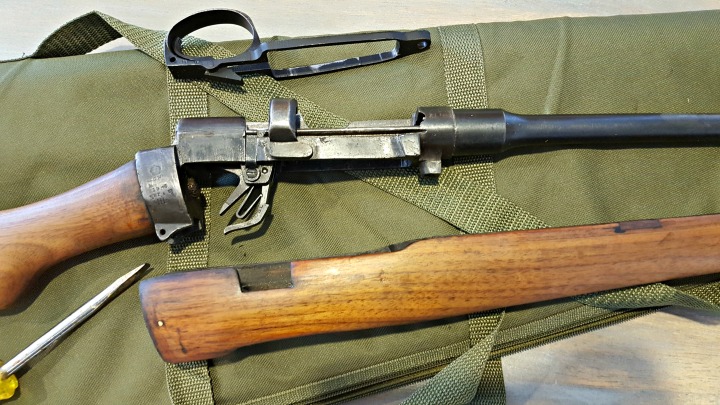
Remove the floor metal
A large flat screwdriver is needed for the single action screw.Remove the screw from behind the trigger guard, which the floor metal hinges on.The floor metal should simply pull away. You may need to jiggle it a bit or get the right angle to slide the attached trigger out.Depending on how your rifle’s been treated over the years, you may need a bit of elbow grease to pull the fore wood off, but it should slide off easily.
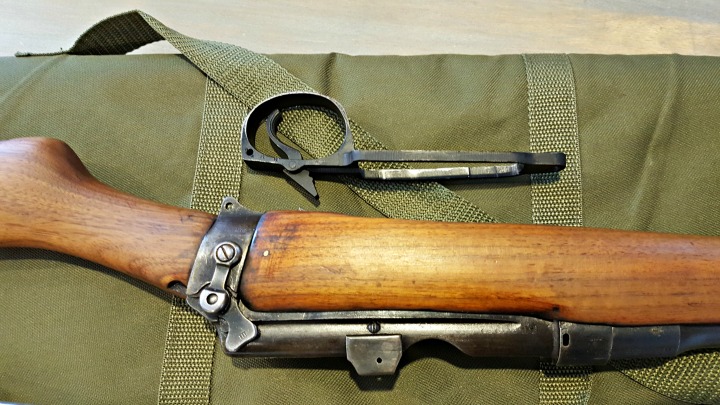
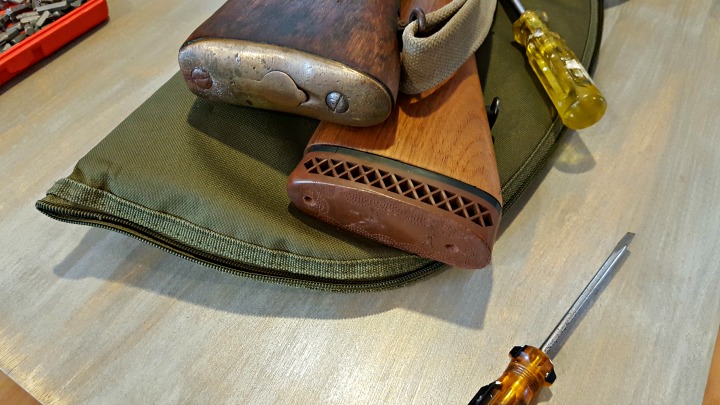
Remove the butt plate or pad
If your rifle still has the brass butt plate, you can skip this next step by prying open the storage trap and removing anything that may be in there (oil bottle, pull through, etc).For rifles with recoil pads on, it’s time to unscrew these. More modern pads will likely require a No 2 Phillips head to remove the screws. Older pads like this are probably secured with a flat head screw.
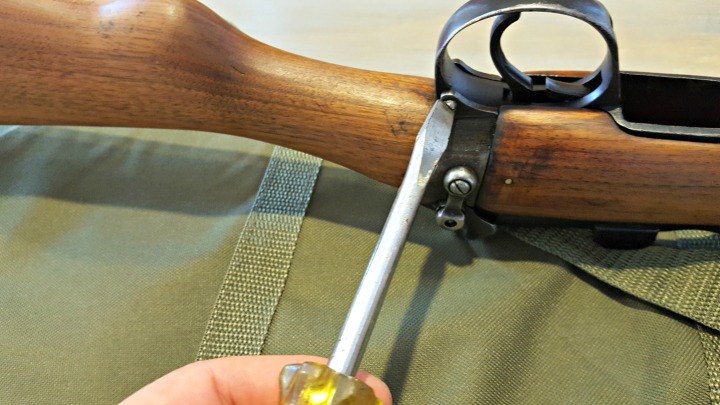
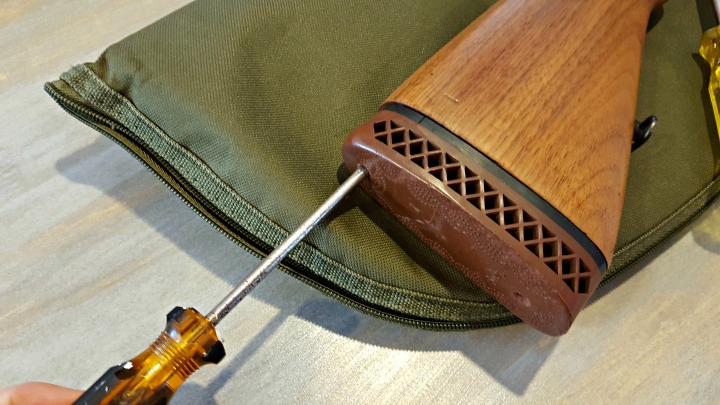
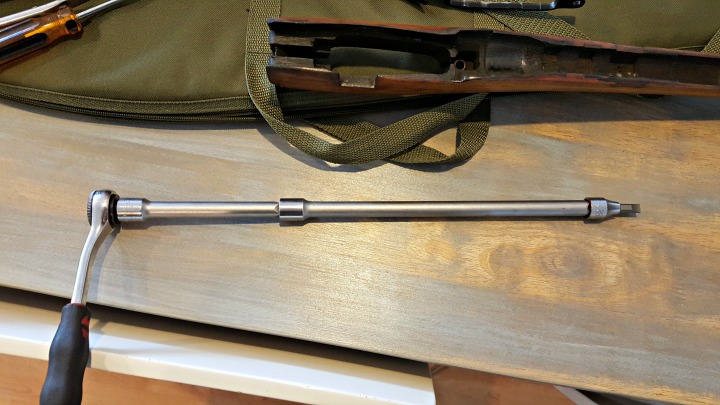
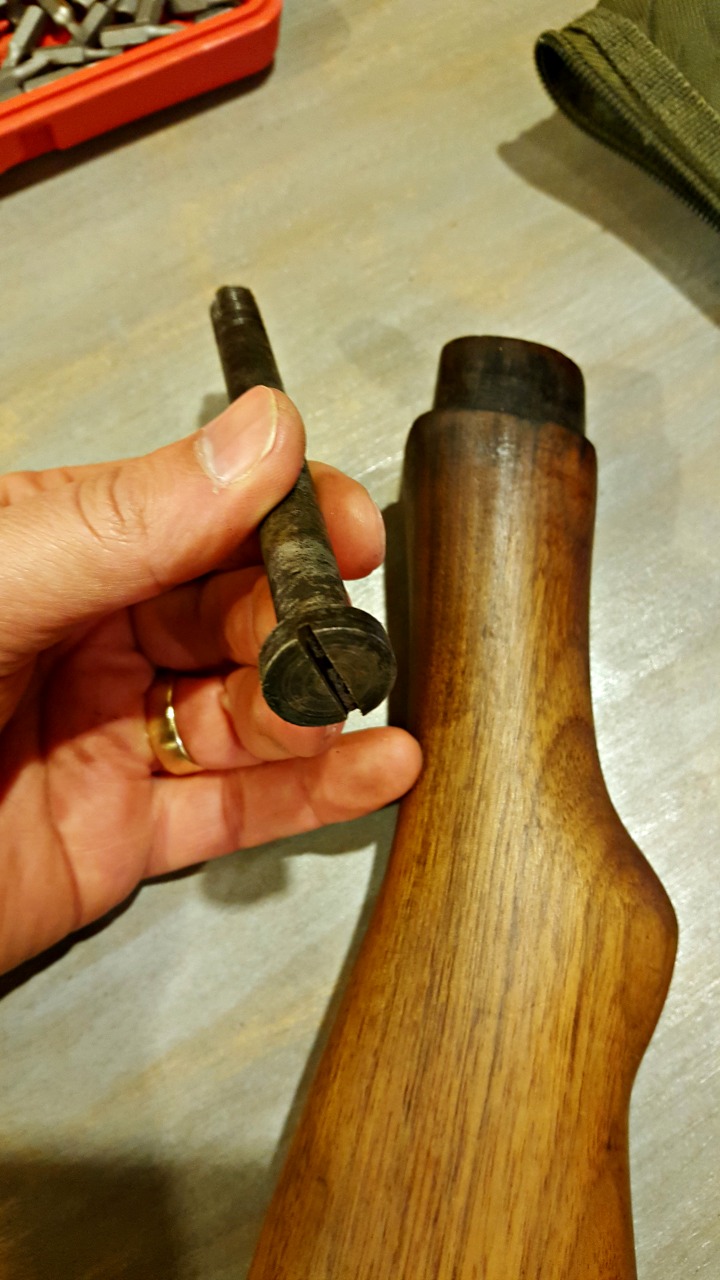
Unscrew the butt stock
The stock is held in place by a retaining bolt similar to that found in common shotgun designs. This means you’ll either need an extra long screwdriver or extended socket driver.The bolt requires a large flat head driver. If your driver continues to turn after the screw should be out, but the wood won’t come off, give the stock a sharp tap. It’s probably held on by years of grease and tension.
Select a stock to replace or upgrade your current furniture
There’s a chance you’re doing a straight swap for reproduction or original SMLE furniture. This could be because you’re replacing a broken stock, or restoring the rifle to its as-issued condition. Firstly, good luck finding furniture for a No 1 Mk iii. I’ve tried. You may as well keep your sporter and buy a whole specimen, because that’s the kind of money you’re looking at shelling out.
On the other hand, you could be looking to upgrade your old beater to something more functional. You do get synthetic Monte Carlo stocks that will lighten your rifle and bring your eye better in-line with a scope, but plastic just doesn’t feel right for these fine old beasts.
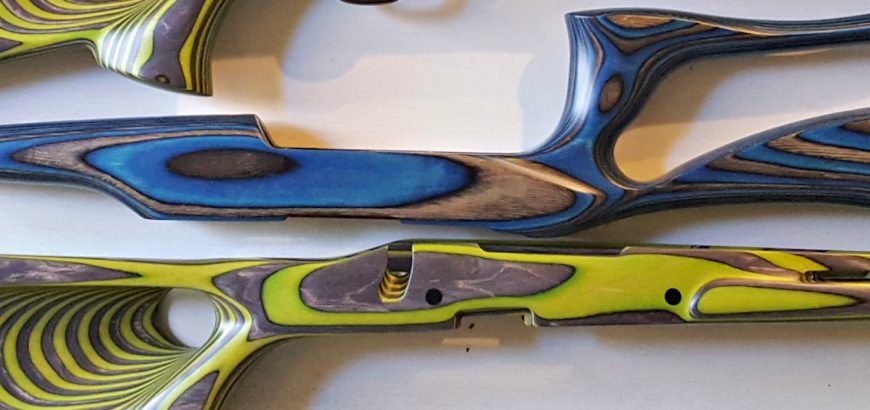
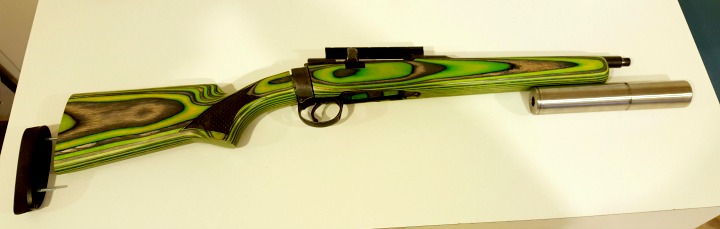
I’ve decided my project 303 needs a hardwood solution, and the Boyds laminate Field Design stock got the nod. With the customisation options available, you can create a unique firearm that not only performs better, but is a joy to look at every time you take it out of the safe.
We’ll have a review of the stock itself coming soon, and a detailed write up of the stock upgrade and other improvements to this rifle. In the meantime, below are some steps to take when fitting your new stock.
Fit and finish
Different iterations of the SMLE will have varying parts that need to be accommodated. There is so much variance in tolerances from arsenal to arsenal, that you’ll be glad if your stock manufacturer has left this last step for you to do yourself.
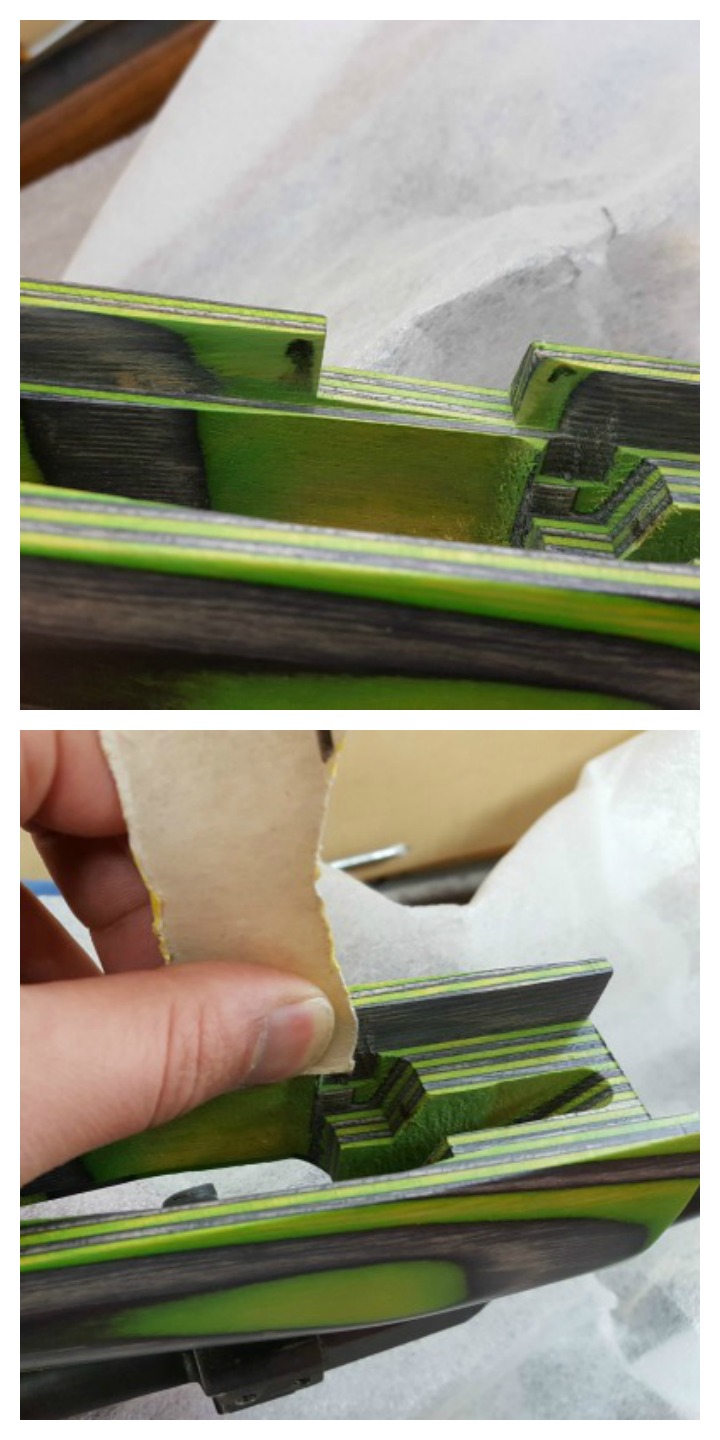
Pictured here is a cutout I had machined by a friend for the rear ring of the action. On the other side of the rifle, the butt stock needs a slight radius to accommodate the safety lever.Engineers/machinists blue or a permanent marker will help you find high spots on your action. Sand down your new stock to suit. An engineer that helped me work on this rifle said “there’s not a single square section on this action”, and he’s absolutely right – war time quality isn’t the greatest.Et voila! There’s still some more work to be done on this rifle, but after reversing the disassembly steps, the stock upgrade will be complete.
In late June I had a question from Ken in Gisborne about whether or not you could fit a BRNO Model 2E in a JW-15 plastic after market stock. Immediately you probably have two questions.
Why am I only answering this question now; and,
Why would you put a beautiful European-crafted rifle in a cheap, ugly stock?
So, I’ll quickly answer those:
I replied to his email, so don’t you worry!
Ken is unable to obtain an original stock – and I imagine his beautiful rifle is pretty hard to shoot without a stock!
Comparing the JW-15 and BRNO Model 2, you’ll see a lot of similarities, but even more differences.
Easy way to find out stock dimensions
If you ever come up against a similar issue yourself, you may need a quick work around to see if you can do something similar. The other question you often get is “Can you put a CZ 452 in a JW-15 stock?” Usually this comes from people who want a light, farm-ready 22LR, without having to ruin their wood stock or buy a new rifle. FYI, the CZ 452 and BRNO Mod 2E are practically identical. Here’s a nice little write up that someone has done on the BRNO, which saves me repeating a lot of the same points.
Essentially, as with many European brands, there was sharing of parts and designs, and eventually a merger. The rifle was largely unchanged. And the difference between the 2E and the 2 is that the 2E is the luxe version. Nicer stock, etc.
Anyway, I digress. A quick, easy way to confirm barrel and action dimensions for stocks? Head on over to the Boyds’ Gunstocks website. They give you the barrel dimensions and centre to centre measurements between action screws for all their house actions (that they base their aftermarket and OEM stocks on). While you’re there, you may be tempted to buy a whole new Boyds stock, and why not? They’re awesome quality, solid wood and modern designs!
So, using my little cheat, this is what the Boyds website reveals:
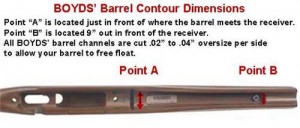
Boyds barrel measurements. Image from Boyds’ website.
Barrel Dimensions: Point A = 59/64″ and Point B = 43/64″
Center to Center of Action Screws: 3 25/32″
Over All Length of Part: 31 1/2″
Comes with Boyds’ 1/2″ Rubber Recoil Pad
Other differences
The biggest barrier is the difference in action size.
While my quick cheat above provides a very useful starting point for stock comparison, there are other things to consider as well. When considering a rifle like the JW-15, which is essentially the cost-saving, poor cousin of the BRNO/CZ, you’ll usually get differences in dimensions where changes have been made in the manufacturing process to reduce costs. Often you’ll find this in stamped instead of milled parts, simpler contours, thinner barrels, etc.
Below are some of the basic differences that unfortunately make this stock swap a no-go.
Action shape
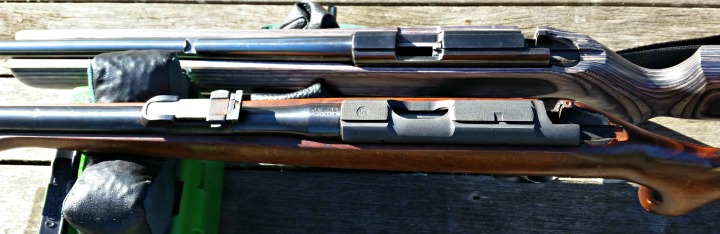
The BRNO/CZ action is longer, thicker and circumference and a little bit different where inletting is concerned (this last isn’t the biggest concern in stock swapping, as you can alter inletting). Somehow the Mauser-action origins seem more apparent in the lines of the BRNO, even though the JW-15 has a similar, but simplified, shape.
Barrel contour
The Chinese rifle has a much simpler barrel contour, while the Czech rifle follows traditional lines. The thickness of the barrel is a fair bit different, but where it meets the larger action is the biggest difference, as the BRNO barrel swells up to meet the threads.
The BRNO barrel is close to what we’d consider a bull barrel in a modern rifle, and the contour differs significantly to the JW-15.
Action screws
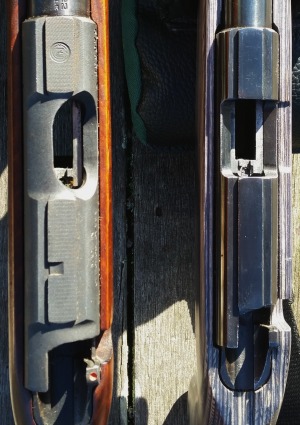
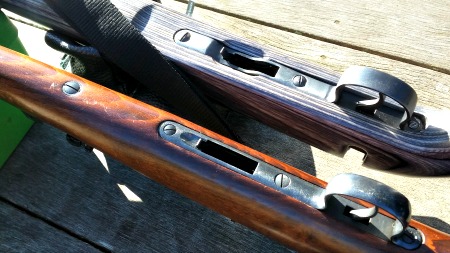
Another clever simplification in the Norinco is reducing the amount of screws and metal work by merging the forward action screw with the recoil lug. Looking at the image below you’ll see three screws on the JW-15 and four on the BRNO. The rear screw on both is a wood screw, which secures the trigger guard to the stock.
The next screw forward on both rifles is a simple action screw. In front of the trigger is the last action screw. In the JW-15, this screws up into a recoil lug dovetailed into the action. The BRNO has another screw, independent and forward of the floor metal. This screws up through a steel collar into a recoil lug that forms the hidden part of the rear sight assembly.
Differences in inletting and dimensions are indicated by the presence of fewer screws in the Norinco. Also notice the softer metal the screws are made of.
Bits and pieces
There are various other bits and pieces that differ, such as the mag well and the trigger unit. The trigger in the Model 2E is a fine example of a single stage trigger, with adjustable over-travel, and a clean break around 3 lb. This is streets ahead of the simple, but practical, trigger in the JW-15. These can be toyed with to produce more acceptable results, as detailed in this previous article on JW-15 trigger improvement.
Verdict
If you are considering swapping things up with either of these rifles, an aftermarket stock specific for the JW-15 or BRNO would be far better than trying to adapt one to the other.
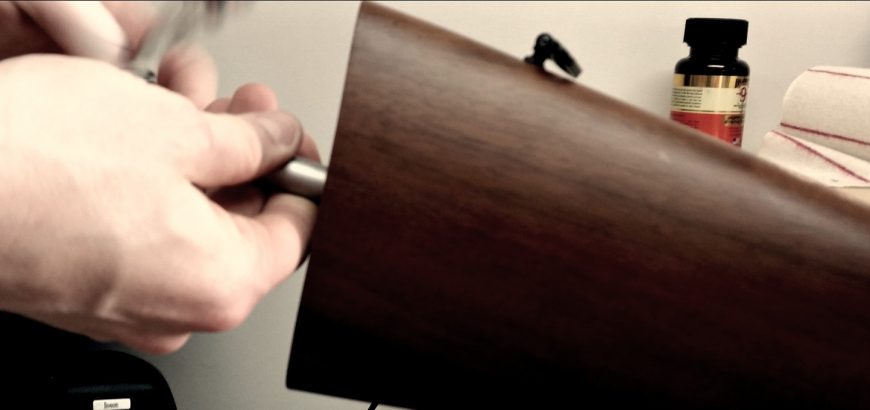
If you’re more familiar with the build of a bolt action rifle, removing a shotgun stock can be puzzling at first. No obvious action screws and a bunch of stuff hidden inside. Here’s a quick run down on replacing a shotgun stock.
Step one: Remove the recoil pad
The reason you can’t see any action screws holding the wood to the metal is that you have one long bolt hidden in the buttstock that keeps it all together. Removing the recoil pad will reveal a hole in the centre of the stock, through which you can access that bolt.
A Phillips head screwdriver is usually the tool for the job.
If the screws holding your recoil pad to the stock are hidden in the rubber and you can’t see what tool to use, try a Phillips head screw driver. Most manufacturers still use these.
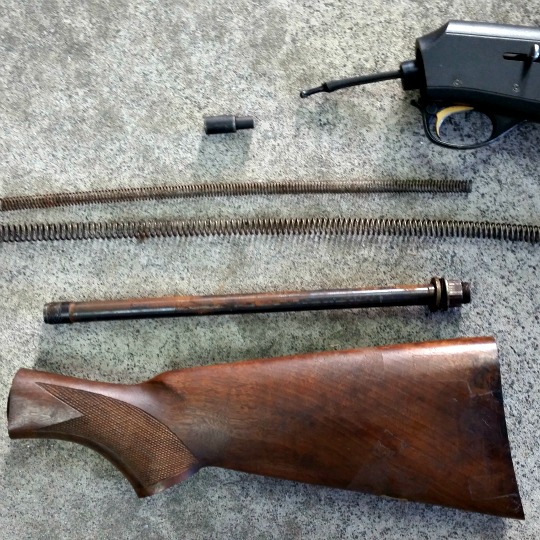
What’s missing from this SKB? You’ll never know if you weren’t paying attention in the first place.
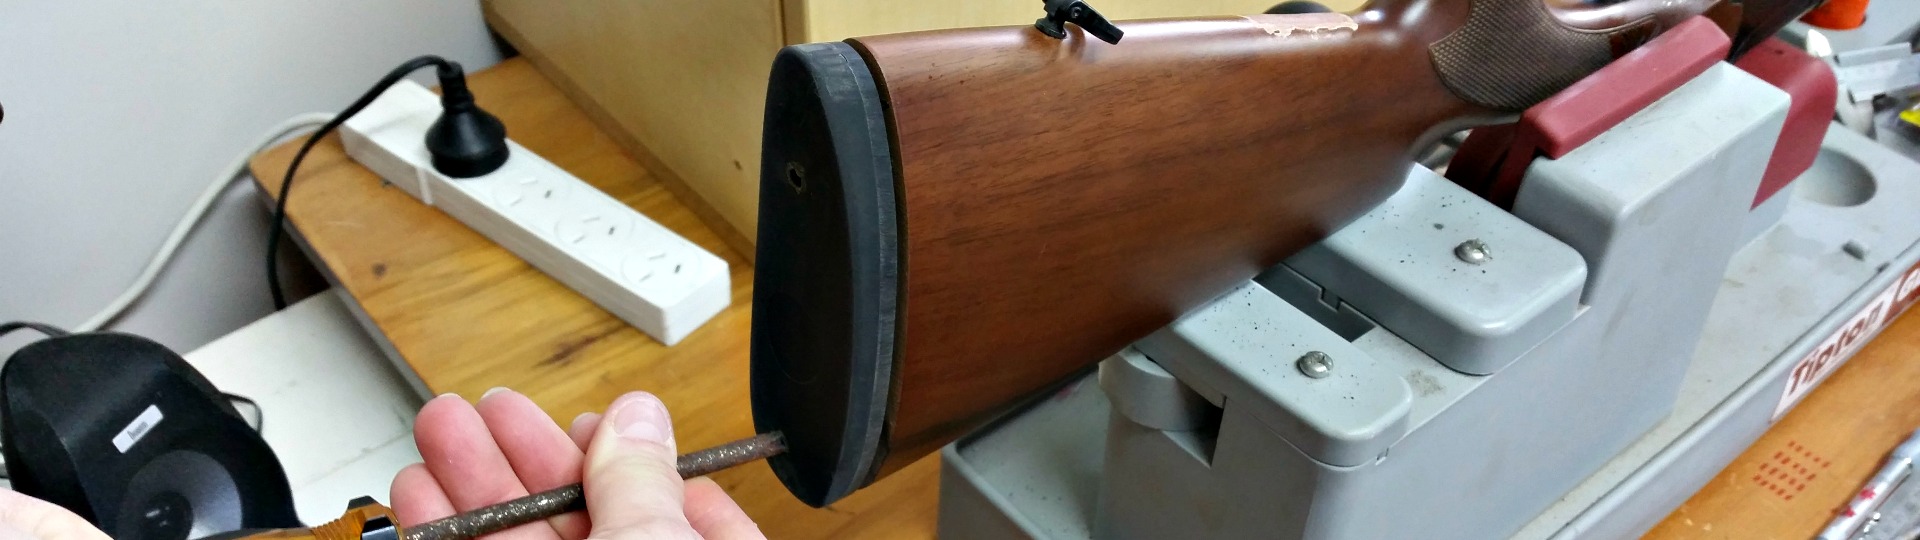
Step two: Remove the stock bolt
These are usually pretty easy to remove, and all you need is a socket wrench with appropriate extensions and the correct size socket. Trial and error will help you find the right socket size, as each firearm is different.
Because these bolts are not overly tight, the slight differences between imperial and metric should not be too much trouble.
CAUTION: If you’re working on a semi-automatic shotgun, there are a lot of parts (including springs) that will shoot out if you do not hold the stock and action together and carefully remove the bolt and other pieces. Watch how they come out, as you’ll have to put it back together.
Step three: Do whatever it is you were going to do
This is the part where you clean your action, replace your stock, repair any cracks, or whatever it is that motivated you to remove the stock in the first place.
Step four. Reassemble
Putting it all back together is pretty simple, especially for U/O, SxS and pump-action shotguns. If you’re working on a semi for the first time, I hope you paid attention when you took all the bits and pieces out, or you may end up with a click but no bang the next time you go out shooting.
There may be some fining up to do at this point. If you’ve replaced your buttstock, you may have to grind the old recoil pad down to size, or you might want to use some sawdust, stain and oil to fill up fine gaps between the action and the replacement stock (if necessary).
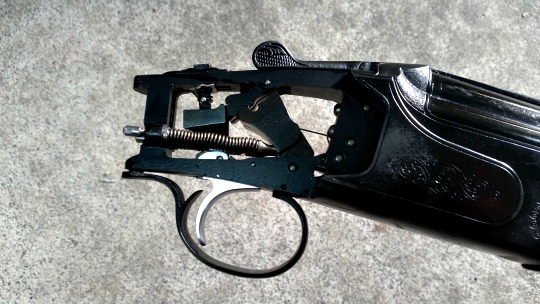
This Hatsan Optima O/U got a good clean while the stock was off for replacement.
Step five: Function test
With an empty chamber or dummy rounds (snap caps), test the firearm for function. This means loading, firing and unloading. This is the time you want to find out about it. Not in the blind or on the range.