
Protean Innovations: The evolution of the bipod

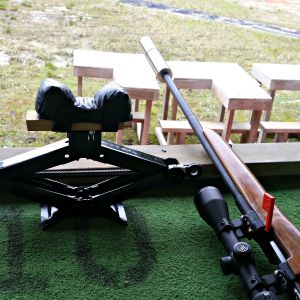
I’ve recently completed a couple rifle builds, and while I was working on them I was on the lookout for a new bipod. I currently run a couple Harris-style bipods that switch between rifles, and one really odd piece of kit that sits on my SKS. I was looking for something different, something better. Top of mind for competition shooting (PRS-style matches) was something like the Harris or Atlas offerings – but then I stumbled on something really unique – Protean Innovations.

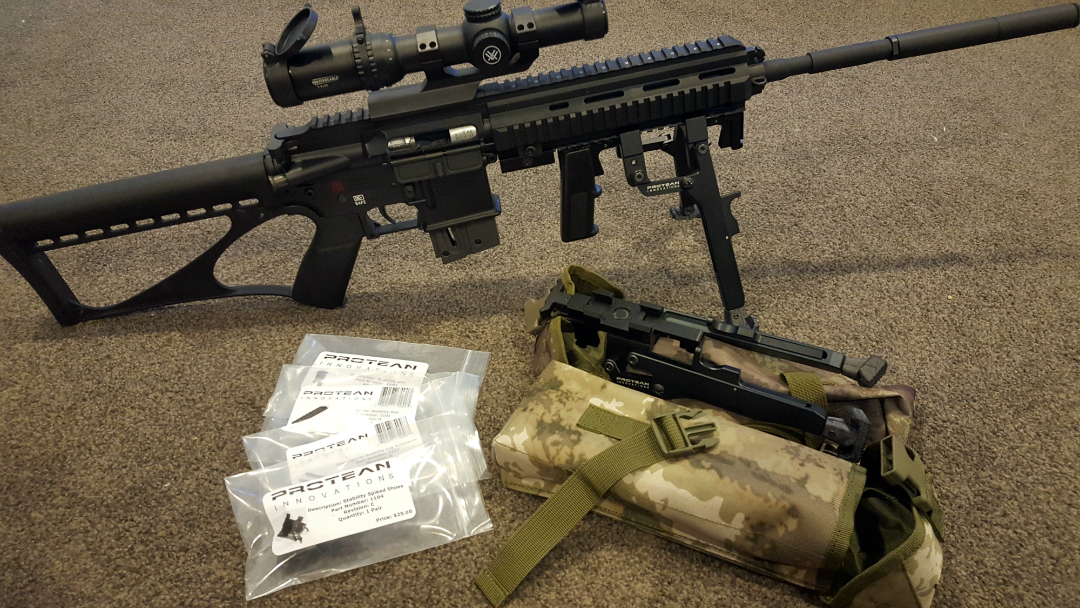
I saw some of their bipods in pics and videos on their Instagram page, and I was instantly intrigued. The bipods seemed to be built for exactly the kind of shooting I had in mind. I reached out to see if I could get a unit to test and evaluate, and their CEO Kyle Hayes, got in touch and offered to send me some gear to check out. A week or two later I received a nice little care package with a Gen II bipod and the Stability Tracker bipod (which is their gen 3 model, effectively). Also in the parcel were a bunch of Protean Innovations accessories. And not for nothing, a personal letter signed and sent by Kyle himself. That says something about the kind of company they are.

Unpacking the Protean Innovations care package

First impressions

First things first, opening this package was awesome, not only to get some new gear to test out, but also because of the way they package their products. Instead of plastic and cardboard, the Protean Innovations bipods came in their own camo pouches. These can easily be attached to molle webbing, a belt, or whatever else you want. Pro Tip: They also make great water bottle pouches to go on your belt when you’re hunting.

Looking the units over the first thing I noticed was the quality of the materials, workmanship and anodizing/coating. Despite a lot of aluminium-on-aluminium, there is no discernible friction in the system, and all tolerances seem to be exactly right for flawless deployment – precisely what you want in a “quick deploy” kind of system.

Testing

My primary use for these bipods would be for my competition guns, so that’s how I decided to test them. Of course they’re just as applicable to hunting or LE/MIL scenarios, but that’s not my use case, and I’ll leave it to other reviewers to cover those bases.

In terms of competition, I’ve used these at the PSNZ22 run by Precision Shooter, the TSCC Practical Rimfire shoot run by Gillice Practical Rifle Events, and the CNIGC Good Morning Vietnam shoot. I’ve also used the Stability Tracker bipod to get my bolt action centrefire competition rifles ready, but haven’t competed in F-Class this season.

Gen II Bipod

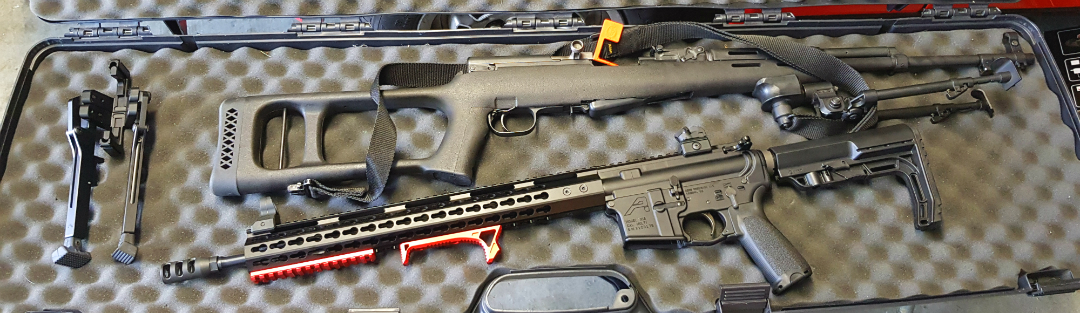
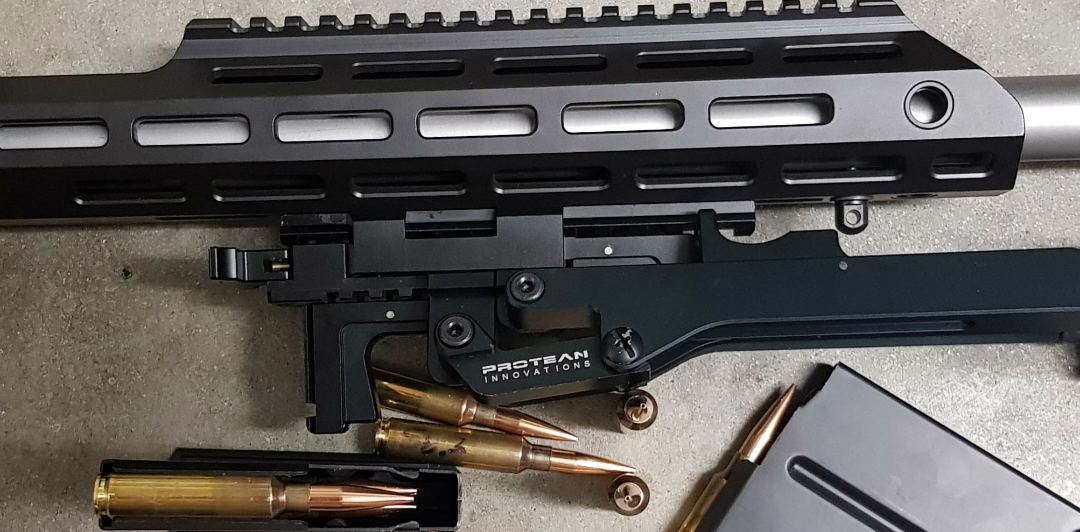
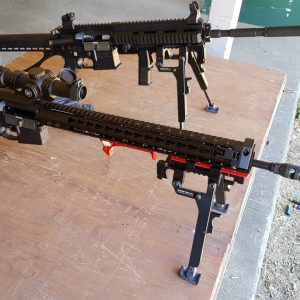
I ran the Gen II bipod on my 22LR HK416D, using the quad rail on the forend to mount the system. The Protean innovations bipod slides along the rail when you hold the deployment trigger, and catches into position when you let go. This allows you to deploy it securely at multiple angles. This can be great for practical shooting competitions, where you often shoot from angled positions, or through barricades/obstacles that have very specific fields of view at certain heights from the ground. For those thinking of a hunting application, it means you can lower your profile as you shoot downhill from a ridge into a valley, or something like that.

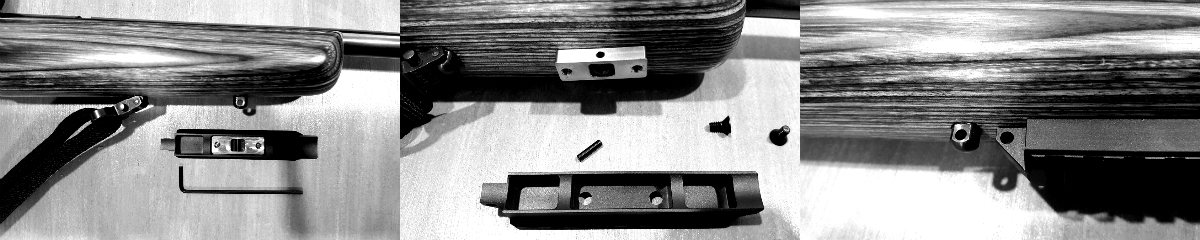
What if you don’t have a rail on the bottom of your rifle? Protean Innovations sells a simple and cost-effective adapter, called the Stability Rail, that will attach to your sling swivel stud and give you an easy to use picatinny rail. There are, obviously, other conversion system out there, if you prefer something else.

The Stability Rail is super easy to attach. It also has a hole to attach your sling, useful if you only have one sling swivel stud on your rifle

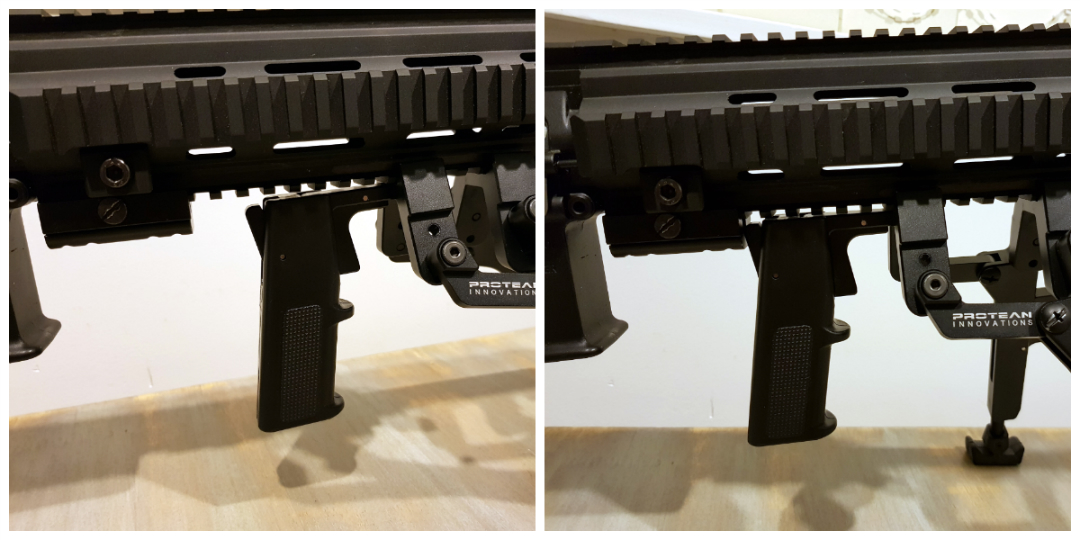
In this competition, which has a lot of positional shooting and some stages which cannot be shot supported, I used the Stability Grip attachment. This acts as a forward pistol grip, and attaches to the bipod deployment trigger. You can still pull the trigger and move the pistol grip forwards or backwards to deploy or retract the bipod.

I found this system great. It not only allowed me to quickly transition between off-hand and prone-supported positions, but the pistol grip allowed me to take more controlled standing shots, and be confident in my ability to quickly deploy the bipod, without having to play with small buttons or release levers.

Oh, worth a mention, you only need to pull the deploy trigger and slide it forward or backwards to manipulate the bipod. Unlike a Harris bipod, you don’t need to reach all the forward of your rifle and pull back the individual legs. You can stay completely in position on the rifle.

Other accessories that really make this a unique system include the Stability Spiked Shoe and the standard Stability Feet. The feet that come on the bipod from the factory are a quite grippy rubber design, and have a bit of bend in them, allowing you to achieve those angled positions in the field. With the extra grip you get compared to bipods with hard or round feet, you don’t get nearly as much “hop” or “bounce” when shooting larger centrefire rifles on hard surfaces, such as concrete benches or floors.

The feet allow for various angles, and the grippy, relatively soft rubber takes a lot out "bounce" out of heavier recoiling rifles.
The feet allow for various angles, and the grippy, relatively soft rubber takes a lot out “bounce” out of heavier recoiling rifles.

The spiked shoes are easily slipped over the rubber feet in seconds, and stay completely secure. This is a revolutionary approach to bipod feet. While there are endless options for more traditional bipod systems, they usually require tools and can take minutes to switch over – not ideal for field use or in high-pressure competitions.

I thoroughly enjoyed using this bipod in competition, and although I didn’t have my best day shooting, I can confidently say the Gen II and Stability Grip combination greatly enhanced my ability to tackle a very creative shooting course put on by Kerry, Matt and the others from the Precision Shooter crew.

In fact, I ran this bipod again at the Good Morning Vietnam shoot, put on by Central North Island Gun Club, and I can honestly say that without it, I would not have achieved my 3rd place in Open Division.

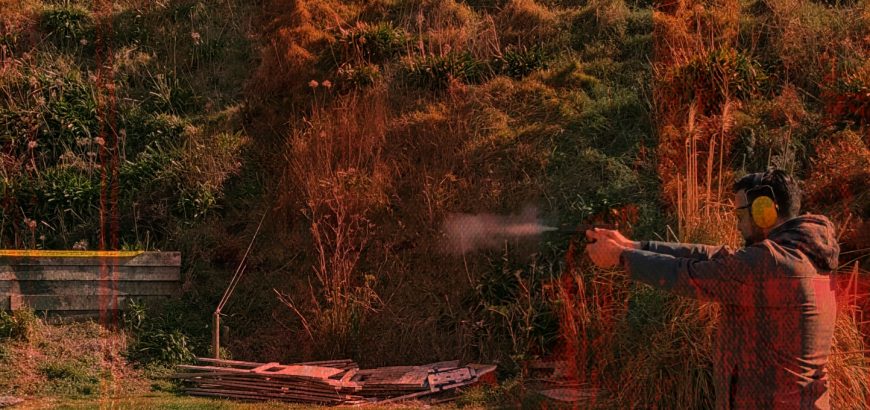
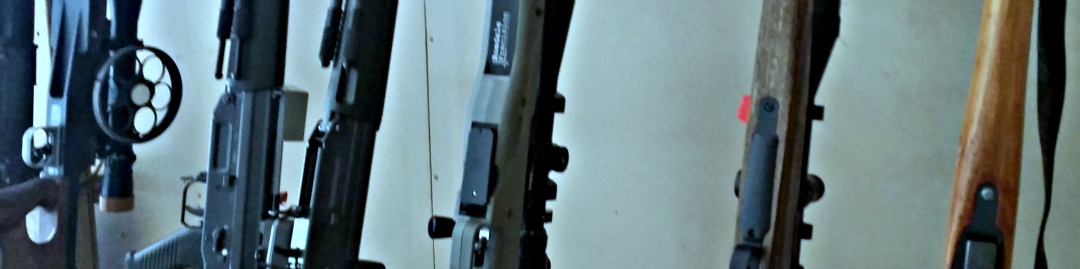
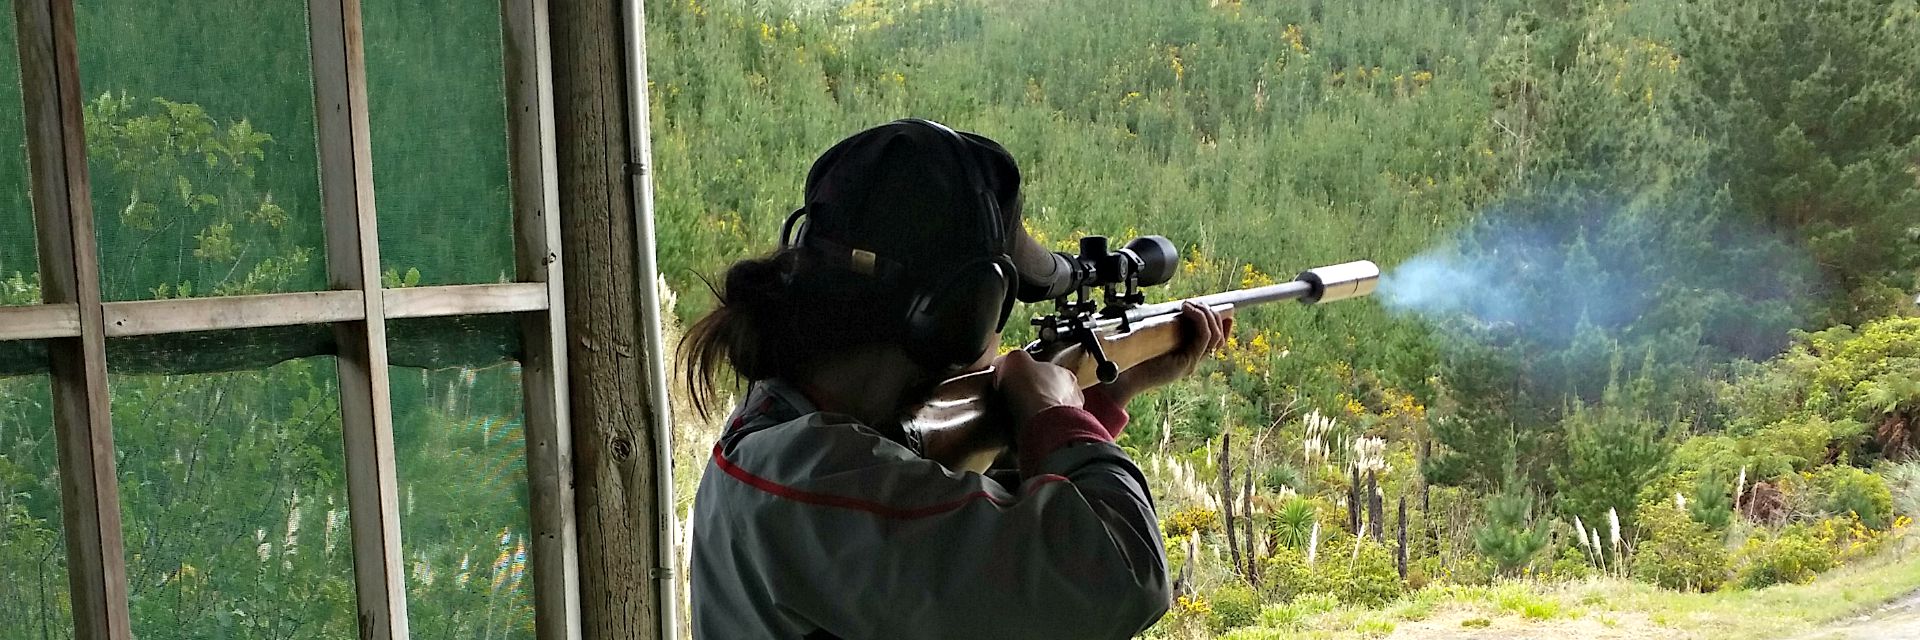
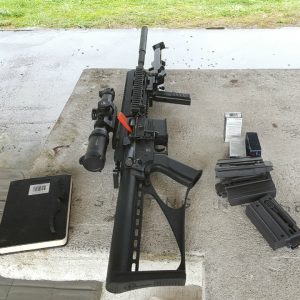
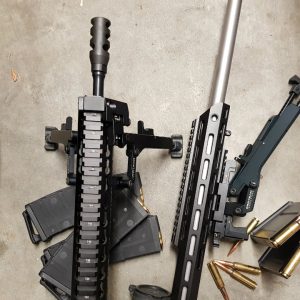
I was shooting my Aero Precision build, with most parts from NZAR15.com, and yes, I was that guy with the muzzle brake on the competition line. I heard all the comments behind me. However, I wasn’t the only one! So was the guy on my left, and the guy on my right! Thankfully only .223, with .308 and 7.62×39 further down the line.

But, even still, it was quite difficult to maintain a good sight picture with vented muzzle gas coming directly from another competitor’s rifle and getting in behind my glasses, making my eyes sting and glasses fog up in any longer strings of fire.

So, in the couple courses of fire where a supported prone position was allowed, the extra stability, and the option to quickly deploy after running to the firing line, all helped me get rounds down range before my vision became too impaired, and helped me to stay on target when my eyes were dripping tears from the stinging gas exiting the filthy brake next door.
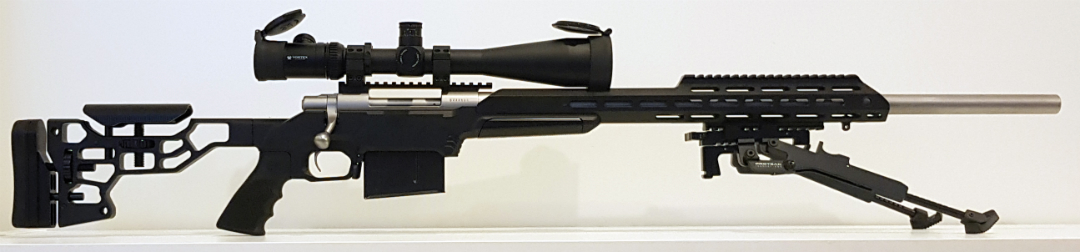
My two rifles for the CNIGC shoot. As you can see, the Protean Innovations bipod is supper easy to slip on and off.

Stability Tracker

Now this is the next evolution in bipods and shooting support. Yup, this is the version after the Gen II, and the features show.

The appearance is refined, and weight reduced, with a single locking mechanism (compared to the two on the Gen II). The function is smoother, and the front attachment trigger is smaller, and less obtrusive.

Another feature which aids smooth operation is the integral picatinny rail which the bipod operates on. With rounded and lower profile rail slots, the operation is greatly eased. The whole unit still attaches to your picatinny rail, but less real estate is taken up for the operation of the system, as the guts of the bipod hangs below and moves on its own mechanism. This also allows Protean Innovations to introduce the piece de resistance, the tracking feature.

With a simple flip of the tracking trigger with either your left or right hand, you can now pan your rifle on the horizontal axis, without moving position or lifting your bipod from its place.

At the rear of the bipod, you can see the deployment trigger hanging down, and the tracking trigger, which looks a bit like a toggle, sitting just below the picatinny rail.

For moving targets this allows you to easily introduce lag or lead without twisting the rifle or running out of horizontal movement, which is very limited on traditional bipods. In competition with multiple targets at varying distances and placements from your shooting position, this can mean being able to engage more targets from the same firing position, without having to move and add time to your run.

To lock the bipod back in place, all you have to do is flip the trigger back to its original position, and as the rifle tracks around to centre, it will click in place. It couldn’t be easier.

I used the Stability Tracker bipod, as well as the Stability Grip again, for Simon Gillice’s practical 22LR event. The bipod ran flawlessly, and as at previous competitions, I had a few people coming up to me and asking where and how they could get their hands on what is objectively a cool looking setup.

Gear for the TSSC Pracitical 22LR shoot.

I did have one failure one the day, and as always, I tell the bad with the good. Between stages I noticed the pin on the tracking trigger was coming loose. Thankfully it didn’t pop out during the stage, or it would have been gone forever. So, I pushed it back in and stopped using the tracking feature for the day, and it was otherwise absolutely fine.

When I got back home, Kyle proved again, exactly the type of company they are. He gave me instruction on how I could stake the hole with a nail and hammer, similar to how you stake an AR15 bolt carrier. This repair worked and has lasted well. But, he didn’t stop there. Kyle later informed me that they took the feedback on board, and had sourced oversized pins to stop this happening in the future. This is a company that is dedicated to a quality product and, as their name says, innovation.

This excerpt below from an email directly from Kyle shows that not only did they seriously consider the issue around the pins, but also that they are constantly refining the design, and looking for better ways to support your rifle.

“For a long term solution I have located a supplier here in the US that makes pins that are oversized. This will eliminate this issue all together. We are continually refining the design. The next production run will have a few enhancements where we will remove some more weight without compromising strength, we will fix the press fit pin issue, and we are working on trimming up the leg extension triggers as well to remove more weight. All in all it should all be even better on the next go around by the time we get to it.”

I did also ask Kyle if a canting version would ever be on the market, but he (quite reasonably) said the R&D showed it would not work. He did do the entire redesign, but found that it added considerable weight, unnecessary complexity, and extra moving parts which made the bipod noisy. With all that weighing against the cant feature, he decided not to pursue it. Not to mention the increased cost to the consumer of the extra feature, which would push the bipod into a price bracket that is probably not viable for your average Joe.

The two models side by side.

I was glad to hear the option had been thoroughly explored before deciding against it, and Kyle has a good point in that you can easily adjust your height using the legs (and extended legs option if you need them), if you often shoot from uneven surfaces. The aim of the system is quick deployment, not lots of finicky adjustment. And if you are on the F-Class line, chances are you are shooting from a flat and stable position. Feedback from PRS shooters and long range shooters has been that a lack of cant has not affected the usability of the bipod.

In our emails, Kyle did say that if he can ever figure out a reasonable way to introduce a cant feature, avoiding the above pitfalls, he will certainly consider it. So, it’s not out of the picture, but it is not a feature the Stability Tracker has right now.

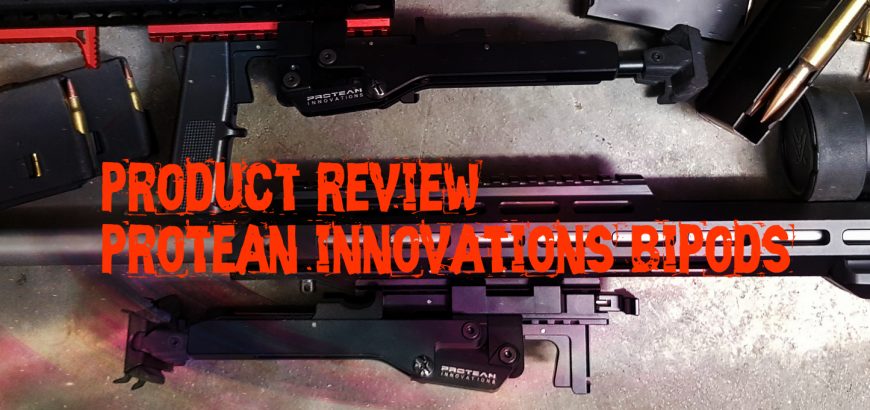
Pros and Cons for the Gen II

The Gen II is a great model, and you can see in it how Protean Innovations continues to evolve their designs. Here are some of the pros and cons of this model.

Pros

  • High quality, solid metal construction and finish
  • Can be made more versatile with optional extras (spike feet, leg extensions, stability grip)
  • Angled shooting positions are easily achieved
  • Can lower your shooting profile when shooting downhill
  • Bipod feet designs reduces bipod hop from recoil
  • Bipod feet design allow for good vertical travel without losing grip
  • Quick deployment of a stable shooting platform when needed, quickly stowed when not
  • Interfaces with a common MIL-STD 1913 Picatinny rail
  • Easily transferable between multiple rifles in seconds
  • Easy/quick to extend legs to correct length
  • Cheaper price than Stability Tracker model

Cons

  • Will need an adapter for chassis or stocks without a rail
  • It is possible to overextend the bipod rearward if you are in a hurry (I was!). There is a simple fix. Either, get used to the operation and take your time, or, I mounted a picatinny-sling swivel stud adapter that I had lying around (took the stud out), just behind the rearward most point of travel, stopping it from going too far back. Easy fix. You could achieve the same with a rail riser, cut down scope ring, or any other picatinny accessory
  • If you push upwards on the stability grip while pushing the deployment trigger forwards to collapse the bipod, it can be a bit difficult to stow the bipod. This is a user issue – once you get used to it, it works beautifully
  • The model is likely to be discontinued as the Stability Tracker takes over as the primary model. If you want one, you’d need to get it in the very near future
Creating a backstop for the Gen II bipod with Stability Grip means I don't have to think about anything when deploying the bipod.
Creating a backstop for the Gen II bipod with Stability Grip means I don’t have to think about anything when deploying the bipod.

Pros and Cons for the Stability Tracker

The Stability Tracker really is next level when it comes to bipods. Here are the pros and cons.

Pros

  • All the same pros as the Gen II, except that it is obviously a bit more expensive. Also;
  • Ability to pan for lead/lag
  • Smoother operation during deployment/stowing, thanks to its own integral rail
  • Simplified attachment compared to Gen II is even easier and quicker to use
  • Does not have the possibility of overextending during deployment

Cons

  • Will need an adapter if you don’t have a rail on your rifle
  • For a high-end bipod, lack of cant may put some off, but trade-off for weight/complexity is justified

Is this the right bipod for me?

Probably. I can’t personally think of a time when I would not use this system. I still have and use other bipods, but all of my rifles with rails or adapters will now be sharing Protean Innovation products. They’re so easy to switch between rifles, and I like the idea of using one system across multiple rifles. Building familiarity only increases efficiency.

The system is as innovative and user-friendly, as it is cool-looking.

I would definitely recommend the Stability Tracker for anyone looking to shoot PRS-style matches at a competitive level. For hunting, I love the low-profile capabilities the Protean Innovation bipods give you when shooting downhill. And for range use, it has pretty much eliminated the hop I used to get from my more powerful centrefire rifles when shooting off the bench – this is probably the biggest highlight for me.

If you’re in the LE/MIL line of work, this testimonial from one of their customers might resonate with you:

“We have had one army sniper use the Tracker while deployed in Afghanistan. His testimonial was that he pitched his Harris after one mission and never went back to it afterwards. Said he used the tracker the entire time during his tour and refused to use anything else.”

Summary

If you’re looking for a bipod that is innovative and actually improves your shooting experience, I would not look past the Stability Tracker by Protean Innovations. It is robust, quick to deploy, technologically advanced, and a joy to use. The fact that the company are so good to their customers, take on feedback, and actually continue to innovate, is just a huge bonus.

Free Boyds gunstock this Christmas

So, it’s been an awesome year, both personally, and for The Gun Rack. Having recently started importing Boyds gunstocks, it’s been great to bring Kiwis (and the occasional Aussie) a product they haven’t been able to have for a long time (certainly not at a decent price, anyway).

To celebrate the end of an awesome year, I’m giving away one free stock to one of you lucky buggers. If you buy a stock in our next order, you will have a 1 in 10 chance of having the full cost of your stock refunded to you, including the GST and shipping costs.

Lots of pepper in this @boydsgunstocks order! #boyds #wood #gunstock #rifle #pewpewpew #accessorize #laminate

A post shared by The Gun Rack (@gunracknz) on

How will it work?

This is the last order for the year, and I already have 2 out of 10 spots filled (those 2 guys will qualify too). For the next 8 people who jump onto this order, simply:

  • Head on over to the Boyds website and find the stock and upgrade options you want
  • Send me an email with the stock details to get a quote
  • Place your order (this includes payment upfront, as usual)
  • Wait for your awesome stock to arrive, and hopefully for some cash to hit your bank account too!

If you want to read more about the ordering process, head over here, or email me. Unfortunately the stock won’t arrive before Christmas, as it takes a while to manufacture, ship, get through customs, courier, etc. However, if you are the lucky winner, you will get your money back as soon as the order is complete (which will hopefully be before Christmas!).

The winner will be chosen using a random draw method of some description. The decision will be random, and it will also be final (And no correspondence will be entered into, etc, etc,. Basically, I’m giving away something free, don’t be a douche if you don’t win).

Merry Christmas everyone, and thanks for being part of The Gun Rack community and our journey importing Boyds gunstocks into NZ (and AU). I’m hoping in the new year to be bringing in some other cool bits and pieces – will keep you updated on that.

Cardboard challenge

You may have heard of steel challenge. The competitive test of a pistol shooter’s accuracy and speed, involving lead and copper tipping over steel plates at a rapid rate of knots.

Quick reloads are half the battle won! Photo credit: Chris Watt

So, what’s cardboard challenge? That’s what you do when you don’t have steel! Legitimate steel challenge involves eight standard courses of fire, shooting at steel plates ranging between dinner-plate size to double that. It’s scored only by the time it takes you to complete each stage. If you’d like to learn more about, you can check out the official page here.

However, what I really wanted to talk about after shooting this mocked-up, strung-together course of fire, is the importance of being part of a club that is willing to try new things. Although we didn’t have the necessary targets available a couple weeks ago, people at the Waiuku Pistol Club were willing to put in the time and effort for everyone to have a go and see if it’s a sport that could have a home at the club.

Last weekend there was an FBI qualification shoot (not an actual one – obviously! But the same one the FBI does). Once a month the 3 gunners take over range one and the Cowboy Action Shooters take over range five. Not to mention service pistol, IPSC and all of the rifle and shotgun disciplines available.

If you're shooting competitions, get ready to burn through a lot of ammo!
If you’re shooting competitions, get ready to burn through a lot of ammo!

In New Zealand shooting sports aren’t nearly as developed as they are in the States, however with clubs providing adequate facilities and plenty of interest from organisers and participants alike, there’s no reason it can’t get that way. The important bit is that we all play our own part and get involved – without people to take part, arrange events and even just clean up afterwards, it just wouldn’t happen.

Make sure you’re giving your local club plenty of love!

If I had a range like this in my back yard, I may divide my time slightly differently.

Swiss 300 metre shoot – Any Sights Any Rifle

There are a few centrefire rifle events every year that are just thoroughly enjoyable and worth attending. The Auckland NZDA Prize Shoot is one, as is the Thames NZDA shoot. The Hangiwera Station Sniper Shoot is definitely up there, and so is the Swiss Club’s Any Sights Any Rifle 300 metre shoot.

This year was my first shoot at the Swiss Club, although some of my shooting buddies have been going for years, and I attended on their recommendation.

An enjoyable shoot

The shoot is well organised, and is accommodating for younger or inexperienced shooters. There are club rifles available and the RO is very helpful with sighting in. The club rifles are either straight-pull Karabiners (K31s), chambered in the venerable 7.5×55, or modern semi-autos in 5.56 NATO/.223 Remington.

If you’re bringing your own rifle (as most do), you can use anything you like. If you’re really ambitious, you can try your open-sighted SKS and see what it will do at 300, but you’ll be going up against Bench Rest rifles that hit 10.1 more often than not. Most rifles on the day were a mix of F-Class, BR, sporting and service rifles. Because there is such a variety of shooters and equipment, it’s more likely that you will be competing amongst your group of friends than with the top of the table – unless you’re an excellent BR shooter.

The variety of rifles on the range is a joy in itself.

Although I knew there was no way I could beat the top BR shooters with my modest sporter, this did not diminish my enjoyment of the day at all. I’m pretty competitive by nature, but found myself comparing my scores to my wife’s and those of the other Howick shooters. It also meant I got to see a bunch of really cool guns that you wouldn’t usually see in one competition.

Three-hundred metres is a pretty challenging distance if you haven’t shot past a hundred before. There were even a few who had not shot at all before. However, with the help of the club’s rifle master, these young shooters were hitting paper in no time.

The cost of the shoot is not prohibitive, with a range of $20 on the day, and of the cost of 25 rounds of ammo. The Swiss Club has a really good website for the ASAR shoot, which lets you book your position on the mound ahead of time. With several details across a few days of shooting, you’ll definitely find a time to shoot, and you may even try and better your score on another day.

Swiss Club target.
Swiss Club target.

The format

The shoot starts with 5 individual sighters. Each shooter on the line takes a single shot from the prone position (all shooting is prone), after which the targets go down and the scorers call back the score and location of the round to the RO via radio. A notepad and pen are handy, as you try and figure out where your sighters are landing. The shots are called out like “9 at 3 o’clock” or “7 at at 1 o’clock”, with the first number being the score (1-10) and the position on the clock helping you to identify which segment of the target you are landing on.

After you’ve gone through your 5 sighters, there are 10 individual scoring shots, shot in a very similar fashion. Each shot is still called out, helping you adjust your shot placement, especially if the wind picks up downrange.

A notepad is essential to sighting in at 300 metres.

After the individual shots, you have “rapid” groups of 2, 3 and 5. I say rapid, but it’s really not. It’s simply a few shots in a row. There is no pressure to hurry up, and there are plenty of people single loading their shots.

All shots are still called out, except for the final group. This means you can adjust your shot placement right up the last minute.

How hard is it to hit the 10 ring? You’ll need to be shooting around MOA (just over) to consistently hit the 10 ring at 300 metres. If you want to notch up a bunch of 10.1’s, you’ll need to be shooting around between 0.5 and 0.66 MOA.

The experience

I thoroughly enjoyed the shoot. I went a bit early to watch some of my mates shoot, but also to familiarise myself with the format and calls. I did end up waiting around a bit, but I ended up being there for most of the day, as I had some “technical difficulties”.

After watching the 11 am detail, I hung around over lunch time before taking up my spot on the mound. I was a bit nervous as I was shooting my rifle in its complete configuration for the first time. Since the last time I had shot, I had fitted and bedded my Boyds Prairie Hunter stock, had a new bolt handle machined, and modified my magazine follower. Also unfamiliar to me was a 6-24 scope that I had been sent to review.

One new bolt handle coming up, thanks to my mate Thomas.

Unfortunately the scope did not perform and was unable to be zeroed on the day. This meant I had to wait through an entire detail, pushing out my wife’s shoot as well. However, I used this time to fit my trusty Vortex Diamondback 4-12×40 BDC, which I brought just in case. I have learnt my lesson with taking unfamiliar equipment to a shoot.

Unfortunately this meant I had to sight in from scratch, however, I was on paper on my 3rd shot, and the rest was just fine-tuning. By the end of my shoot I had it right were I wanted it, which meant my wife had the rifle ready to go for her shoot, and actually did quite well. Results can be seen here.

Overall I was very happy with the my complete sporter set up, and with some more powerful glass, I think I’d be comfortable taking this rig out onto the F-Class range.

Looking forward to some Norma brass at the end of this.

I think the load development still has some way to go, particularly as the barrel on this rifle is quite short. Not having developed a satisfactory handload, I shot this competition with factory 6.5×55 ammo. I used the Norma-Sierra 144gr HPBT, and the round seemed to perform pretty well. To be honest, I was more interested in the brass than anything else, as I think this rifle will prefer lighter projectiles, in the 130 – 140 grain range. Over the holidays I’ll be testing out the 129 gr Hornady Interlock and 140 gr A-max. I’ll be comparing this projectiles side-by-side with the 142 gr SMK and the 144 gr OEM projectile in the Norma-Sierra load.

At the end of the day, the shoot was enjoyable, and definitely an experience worth repeating. You can shoot multiple times on one day, or on multiple days across the competition. If I have the time next year, I’ll probably try shoot it on a few days. Being located only 45 mins or so north of Auckland, the range is really accessible, although it is also rarely accessible. The Swiss Club is, of course, a club for Swiss nationals, and as far as I know, this shoot is the only time of the year that the range is opened up to the general public.

If you would like to try a different range and format, and perhaps a longer distance than you usually get to, you’ll definitely enjoy the Swiss Club’s ASAR shoot.

Regular target at HSSRC

Auckland smallbore interclub

Smallbore shooting is both enjoyable and competitive, and never more so than during the interclub season. Hosted in turn by the various Auckland sporting clubs, it’s pretty much for bragging rights and continues through the winter and spring months.

The format

Each interclub shoot is completed on the target of the host club. This means every year you get shoot a few different targets from your usual, including groupings, application targets, snap shoots, silhouettes and all shot in various positions.

The nights are hosted at either the Howick or Waitakere ranges, and there is a Saturday shoot in Riverhead at the Auckland NZDA. Some years the North Auckland NZDA puts on a fun shoot as well.

All of the shoots held at Waitakere are shot in every position except standing, as the mounds don’t have much headroom. The Howick rifle range features shoots in all four positions (standing, sitting, kneeling, standing), as does the NZDA shoot. The Auckland NZDA shoot is the only one shot at 50 metres, while the others are at 25.

The 50 metre shoot (which happened to be today) is 40 rounds, ten each in the four positions mentioned above, with 2 minutes of sighters to start. Without the snaps and silhouettes to explain and call, it’s a pretty easy shoot, but the extra distance adds some challenge – especially for the standing. All of the shoots are between 40 and 50 rounds, so one box of ammo will be fine.

What’s on the line?

Each club puts together a team of five shooters (or tries to), and a team of juniors as well. The top four scores counting on the night. There is recognition for the top team, top junior team, top gun and top gun junior.

As mentioned above, it’s pretty much bragging rights. If we’re honest, Waitakere has some of the best shooters out there, so they take out the top spot almost exclusively, but it’s still a very competitive atmosphere and there’s certainly a lot of jostling for the other spots on any given night.

Usually there are pins or boxes of ammo as prizes, and at the end of the year there are trophies to dole out as well.

At the end of the day, it’s a great way to meet more of the shooting community, try different targets and shoot at a couple different ranges. If you’d like to find out more about the competition or smallbore in general, go along to a regular shoot at your local club and ask a committee member or the captain, or simply leave a comment below.

Auckland NZDA Prize Shoot

The annual NZDA Auckland branch Prize Shoot is a great day out for Auckland shooters of all abilities. Falling in September each year, the weather can be a bit hit and miss, but aside from that, it’s a perfectly pleasant day on the range with your favourite rifle and some mates.

This year – the 46th Prize Shoot – I shot for my second time and my wife completed her first centrefire competition. We both did fairly well, but she truly excelled. I’ll claim that it’s because I sighted the rifle in through my shooting (we shared a rifle). However, all credit to her, as she outshot some great shooters.

The field

That’s another thing that makes the day enjoyable – there are shooters of all abilities. I placed well ahead of some very experienced shooters, but was beaten by someone shooting for their first time ever. And vice versa. It really is a great field of competitors, where everyone can benchmark their performance against others.

NZDA 100 metre standing shoot
100 metres is more than enough from the standing position.

At the top of Division A were the usual suspects, including Paul Carmine. My wife, Kassie, took out Division B – which got her called up second in the order of prize recipients, allowing her to choose a really nice Hunting and Fishing backpack for her prize.

This year there were four ladies and two junior shooters. In total, there were just under 40 shooters, making up two details. Last year there were around 60 shooters (despite the inclement weather), and apparently previous years have had a similar turnout. Perhaps timing a competition to coincide with Bathurst wasn’t the best move…

The format

The format of the shoot is very simple and easy to follow. Once the safety instructions and competition rules had been read out, the first detail (Squad A) went to the mound for sighting in and the prone target shoot.

Rest and bipods are allowed for sighting in, however, you want tomake sure you're sighted in before competition day if possible.
Rest and bipods are allowed for sighting in, however, you want to make sure you’re sighted in before competition day if possible.

Sighting in is done on a target on the right hand side of the frame, and five minutes are allowed for unlimited sighters.  The range for the competition is 100 metres. I got 13 rounds off in this time, trying to get my rifle on point. The lesson here being to always sight your rifle in before competition day if you’ve done some work on it. After 13 rounds, there was a decent amount of mirage created by the heat of the barrel and my new MAE suppressor. However, by taking my time this didn’t affect my prone shoot.

You can use a rest or bipod to sight in, however the rest of the competition is shot without any aids (aside from a shooting mat and a kneeling roll).This means no slings, jackets or gloves.

The prone shoot is 5 shots in 7 minutes – plenty of time. After this is finished and the rifles are cleared and removed from the mound, scorers go forward to retrieve targets. Squad B is next, but in the meantime, people stand around chatting and enjoying the all-day sausage sizzle.

After Squad B, the same process is followed and Squad A goes up for 5 rounds in the kneeling position, also in 7 minutes. Rinse and repeat for Squad B. The last shoot of the day is 5 rounds standing, again in 7 minutes. This is what separates the men from the boys. Some of those scoring in the 40’s in the prone event struggle to scrape 20 together in the standing position.

In between these, there is a 5 round rapid shoot on the 25 metre range, to be completed in 40 seconds. Again, making sure you know your hold under/over and your parallax settings before competition day is invaluable. If you’re sharing a rifle with your partner or buddy, you will be accommodated with an extra rapid at the end – although you’ll probably have time in between while targets are retrieved and people yack on about how they pulled that one shot. Targets are also given out once scored, so there is plenty to talk about during the day.

The rifles

Generally speaking, the rifles are hunting rifles in hunting calibres. There are some rifles that would look more at home in an F-Class shoot, and some that would be quite comfortable in the lineup for a military service rifle shoot. The most exotic calibre of the day was probably .310 Cadet, with one .22 Hornet and a 6BR making an appearance.

As far as I could see, the only semi-auto was a Norinco M305 (the Chinese version of the M14), whereas last year a couple AR-15’s placed very highly in the field. At the 2014 Prize Shoot I did take an SKS – what a mistake. The iron sights had not been sighted in and after I took the muzzle brake off, the scope’s zero was so off that I wasn’t on the paper. It was an exercise in frustration, and using the iron sights and a whole lot of compensation, I managed to get some scoring shots in the kneeling and standing events.

This year I went armed with my 1943 Husqvarna M38, chambered in 6.5×55. This rifle was sporterised when I got it, and has since been modified even more. Over the last ten or so months it has a new matte black coating applied, the bolt has been replaced and the cocking piece cut down to reduce lock time. I’ve also installed a Vortex Diamondback BDC 4-12 x 40, and a new adjustable BOLD Trigger, which was kindly supplied by Boyds. Completing the setup was a brand new MAE suppressor, which thoroughly impressed my shooting buddies as well as those that heard it perform.

I also have a new Boyds Gunstock waiting to be fitted to this rifle, but I didn’t want to rush the bedding and finishing before this shoot. It should be ready before the 300m Swiss Club shoot in November. And I’ve learnt my lesson – sight in beforehand!

The load I was shooting was as follows:

Projectile: SMK HPBT 142 gr
Powder: ADI AR2208 34.7 gr
Brass: PPU (twice fired)
Primer: Federal Gold Medal Large Rifle Match

Aside from my wife and I, there was one other person shooting 6.5×55. The most common calibre by far was  .223 Remington, with 14 shooters using this round. There was one .243 and three .270s, with eight .308 rifles as well. The winning rifle was a .222. There were also four other rifles in this calibre on the day, two placing very low in the field and the other two coming in near the top.

The MAE suppressor cut down felt recoil and the loud crack of the rifle, making it a pleasure to handle.

The prizes

The prizes for the shoot are kindly donated by several sponsors, including major Auckland gun stores, as well as private individuals and club members. Also on offer was a one-year membership to the club, as well as a couple magazine subscriptions.

There were some great prizes to be had, including four of these Leupold knives.

Dotted along the prize table were all sorts of cool items for the garage, range, shed, field or bush. Ranging from knives and a machete to ammunition, books, cleaning products, car accessories and even a leather-working voucher.

Everyone walked away happy, having picked a prize that was probably worth more than the $25 they paid to enter the competition. With free sausages all day, and a lot of shooting to do, it adds up to a very worthwhile day.

With the prizes on display all day, everyone eyes up what they want, and probably spend a fair bit of time vacillating between equally awesome prizes. Last year the knives were first to go, however this year they stuck around for a bit. There were a fair few on offer, and myself and two other members of HSSRC managed to score three out of the four limited edition Leupold hunting knives. The first place junior made a bee-line for the machete, which was clearly something he’d been eyeing up all day.

Whether you only break out the centrefire rifles a few times a year or you regularly enjoy taking your hunting rig out, the NZDA Annual Prize Shoot is a rewarding experience in more ways than one, and is something I’d definitely recommend.