
How to replace the stock on a Short Magazine Lee-Enfield (SMLE)

There are two types of Lee-Enfields out there. There are the pristine or refurbished, fully wooded, original-as-they-come investments. And then there are the sporters. These chopped and changed pieces of history make excellent first time hunter’s tools, or the basis of many a project.

We’re going to take a quick look at how to remove and replace (or upgrade) the furniture on your 303, and talk about some of the interesting things you’ll find along the way. Whether you’re building an awesome wildcat, such as a 25-303 or even a 40-303, or just beautifying grandad’s old hunter, I hope the steps in this article are helpful for your project.

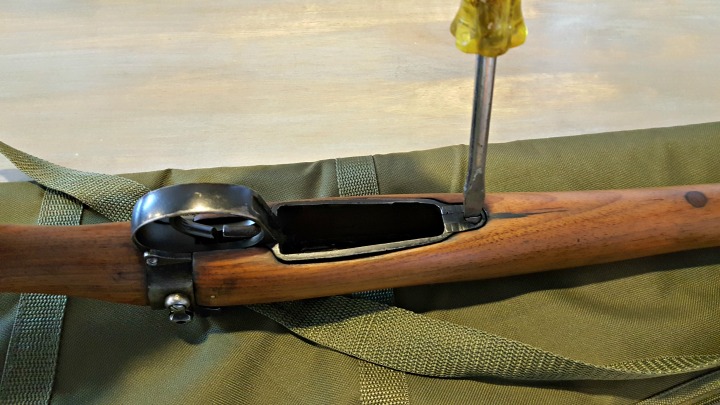
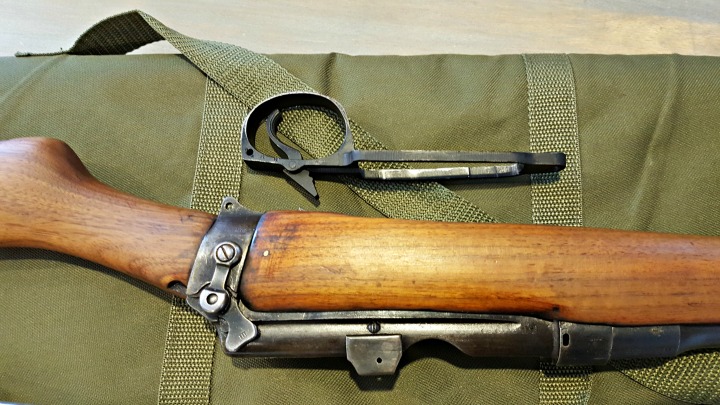
Remove the floor metal

A large flat screwdriver is needed for the single action screw.
Remove the screw from behind the trigger guard, which the floor metal hinges on.
The floor metal should simply pull away. You may need to jiggle it a bit or get the right angle to slide the attached trigger out.
Depending on how your rifle's been treated over the years, you may need a bit of elbow grease to pull the fore wood off, but it should slide off easily.
Depending on how your rifle’s been treated over the years, you may need a bit of elbow grease to pull the fore wood off, but it should slide off easily.

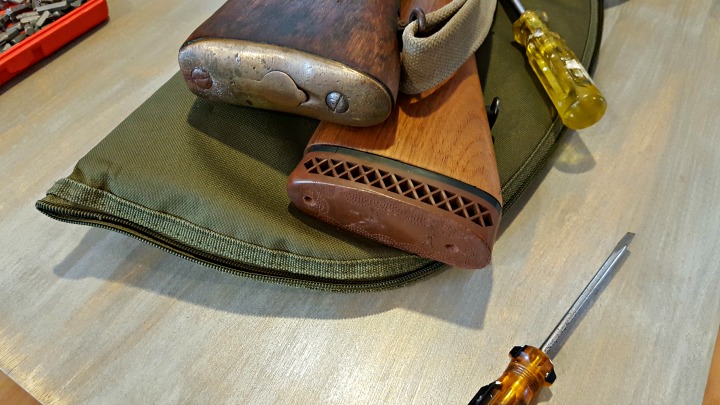
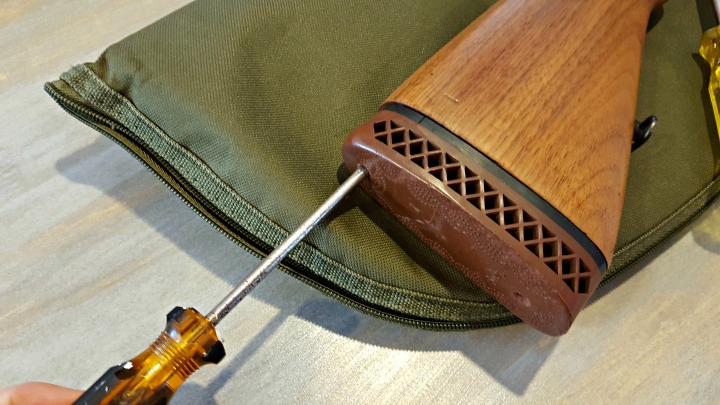
Remove the butt plate or pad

If your rifle still has the brass butt plate, you can skip this next step by prying open the storage trap and removing anything that may be in there (oil bottle, pull through, etc).
For rifles with recoil pads on, it's time to unscrew these. More modern pads will likely require a No 2 Phillips head to remove the screws. Older pads like this are probably secured with a flat head screw.
For rifles with recoil pads on, it’s time to unscrew these. More modern pads will likely require a No 2 Phillips head to remove the screws. Older pads like this are probably secured with a flat head screw.

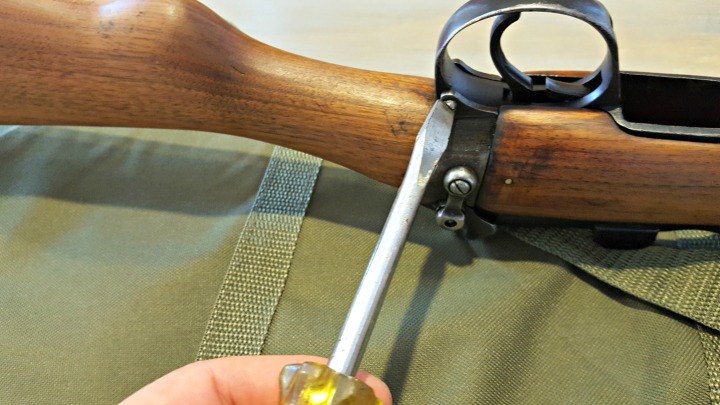
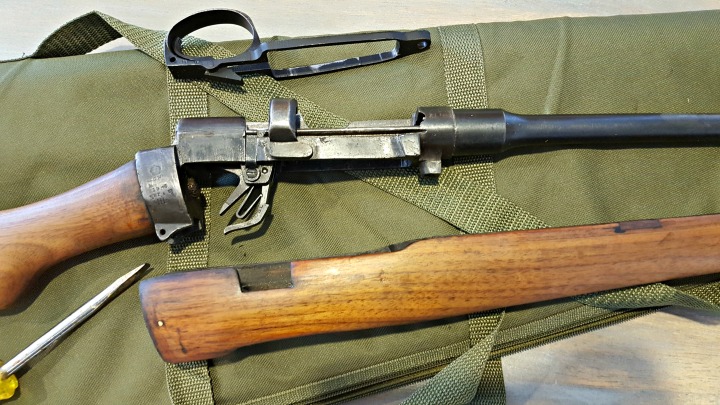
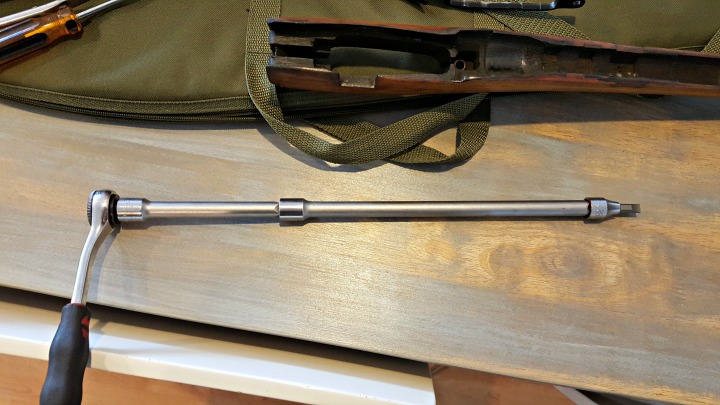
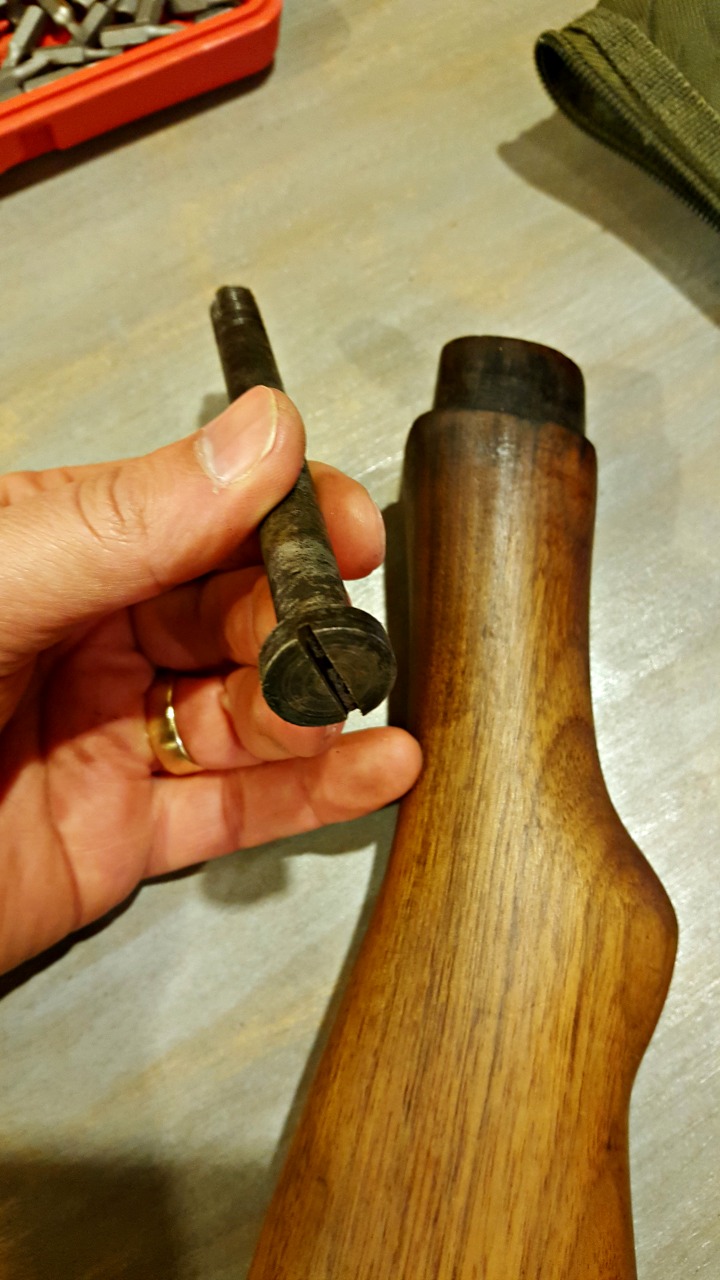
Unscrew the butt stock

The stock is held in place by a retaining bolt similar to that found in common shotgun designs. This means you'll either need an extra long screwdriver or extended socket driver.
The stock is held in place by a retaining bolt similar to that found in common shotgun designs. This means you’ll either need an extra long screwdriver or extended socket driver.
The bolt requires a large flat head driver. If your driver continues to turn after the screw should be out, but the wood won't come off, give it a sharp tap. It's probably held on by years of grease and tension.
The bolt requires a large flat head driver. If your driver continues to turn after the screw should be out, but the wood won’t come off, give the stock a sharp tap. It’s probably held on by years of grease and tension.

Select a stock to replace or upgrade your current furniture

There’s a chance you’re doing a straight swap for reproduction or original SMLE furniture. This could be because you’re replacing a broken stock, or restoring the rifle to its as-issued condition. Firstly, good luck finding furniture for a No 1 Mk iii. I’ve tried. You may as well keep your sporter and buy a whole specimen, because that’s the kind of money you’re looking at shelling out.

On the other hand, you could be looking to upgrade your old beater to something more functional. You do get synthetic Monte Carlo stocks that will lighten your rifle and bring your eye better in-line with a scope, but plastic just doesn’t feel right for these fine old beasts.

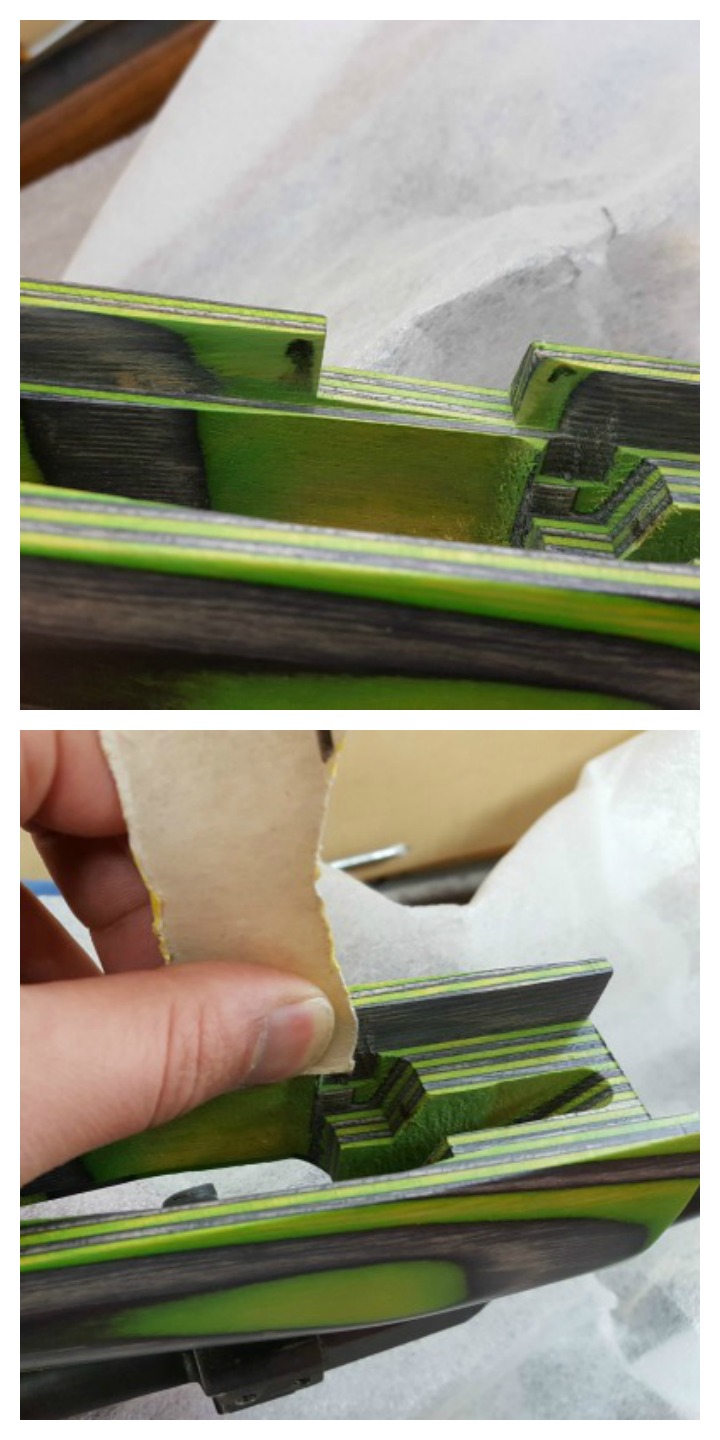
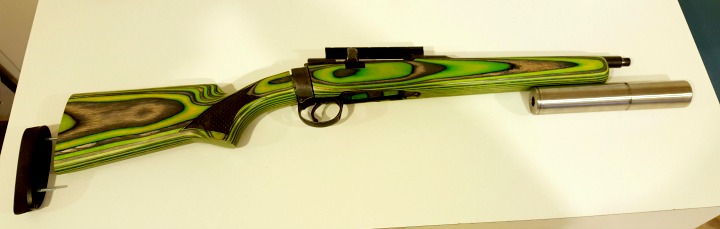
I’ve decided my project 303 needs a hardwood solution, and the Boyds laminate Field Design stock got the nod. With the customisation options available, you can create a unique firearm that not only performs better, but is a joy to look at every time you take it out of the safe.

We’ll have a review of the stock itself coming soon, and a detailed write up of the stock upgrade and other improvements to this rifle. In the meantime, below are some steps to take when fitting your new stock.

Fit and finish

Different iterations of the SMLE will have varying parts that need to be accommodated. There is so much variance in tolerances from arsenal to arsenal, that you’ll be glad if your stock manufacturer has left this last step for you to do yourself.

Pictured here is a cutout I had machined by a friend for the rear ring of the action. On the other side of the rifle, butt stock needs a slight radius to accommodate the safety lever.
Pictured here is a cutout I had machined by a friend for the rear ring of the action. On the other side of the rifle, the butt stock needs a slight radius to accommodate the safety lever.
Engineers/machinists blue or a permanent marker will help you find high spots on your action. Sand down your new stock to suit. An engineer that helped me work on this rifle said "there's not a single square section on this action", and he's absolutely right - war time quality isn't the greatest.
Engineers/machinists blue or a permanent marker will help you find high spots on your action. Sand down your new stock to suit. An engineer that helped me work on this rifle said “there’s not a single square section on this action”, and he’s absolutely right – war time quality isn’t the greatest.
Et voila! There's still some more work to be done on this rifle, but after reversing the disassembly steps, the stock will be complete.
Et voila! There’s still some more work to be done on this rifle, but after reversing the disassembly steps, the stock upgrade will be complete.