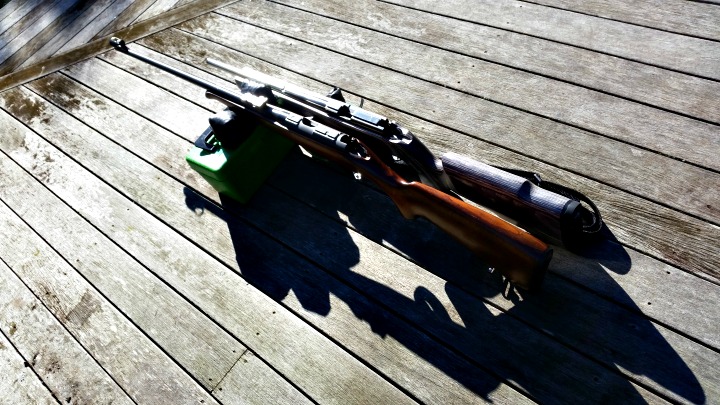
In late June I had a question from Ken in Gisborne about whether or not you could fit a BRNO Model 2E in a JW-15 plastic after market stock. Immediately you probably have two questions.
- Why am I only answering this question now; and,
- Why would you put a beautiful European-crafted rifle in a cheap, ugly stock?
So, I’ll quickly answer those:
- I replied to his email, so don’t you worry!
- Ken is unable to obtain an original stock – and I imagine his beautiful rifle is pretty hard to shoot without a stock!
Easy way to find out stock dimensions
If you ever come up against a similar issue yourself, you may need a quick work around to see if you can do something similar. The other question you often get is “Can you put a CZ 452 in a JW-15 stock?” Usually this comes from people who want a light, farm-ready 22LR, without having to ruin their wood stock or buy a new rifle. FYI, the CZ 452 and BRNO Mod 2E are practically identical. Here’s a nice little write up that someone has done on the BRNO, which saves me repeating a lot of the same points.
Essentially, as with many European brands, there was sharing of parts and designs, and eventually a merger. The rifle was largely unchanged. And the difference between the 2E and the 2 is that the 2E is the luxe version. Nicer stock, etc.
Anyway, I digress. A quick, easy way to confirm barrel and action dimensions for stocks? Head on over to the Boyds’ Gunstocks website. They give you the barrel dimensions and centre to centre measurements between action screws for all their house actions (that they base their aftermarket and OEM stocks on). While you’re there, you may be tempted to buy a whole new Boyds stock, and why not? They’re awesome quality, solid wood and modern designs!
So, using my little cheat, this is what the Boyds website reveals:
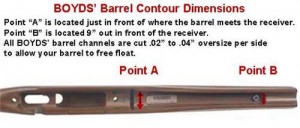
Barrel Dimensions: Point A = 1 1/16″ and Point B = 15/16″
- Center to Center of Action Screws: 6 1/8″
- Over All Length of Part: 30″
- Comes with Boyds’ 1/2″ Rubber Recoil Pad.
Barrel Dimensions: Point A = 1 1/16″ and Point B = 15/16″
- Center to Center of Action Screws: 6 1/8″
- Over All Length of Part: 30″
- Comes with Boyds’ 1/2″ Rubber Recoil Pad.
Barrel Dimensions: Point A = 59/64″ and Point B = 43/64″
- Center to Center of Action Screws: 3 25/32″
- Over All Length of Part: 31 1/2″
- Comes with Boyds’ 1/2″ Rubber Recoil Pad
Other differences
While my quick cheat above provides a very useful starting point for stock comparison, there are other things to consider as well. When considering a rifle like the JW-15, which is essentially the cost-saving, poor cousin of the BRNO/CZ, you’ll usually get differences in dimensions where changes have been made in the manufacturing process to reduce costs. Often you’ll find this in stamped instead of milled parts, simpler contours, thinner barrels, etc.
Below are some of the basic differences that unfortunately make this stock swap a no-go.
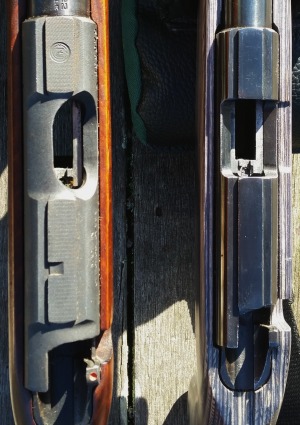
Action shape
The BRNO/CZ action is longer, thicker and circumference and a little bit different where inletting is concerned (this last isn’t the biggest concern in stock swapping, as you can alter inletting). Somehow the Mauser-action origins seem more apparent in the lines of the BRNO, even though the JW-15 has a similar, but simplified, shape.
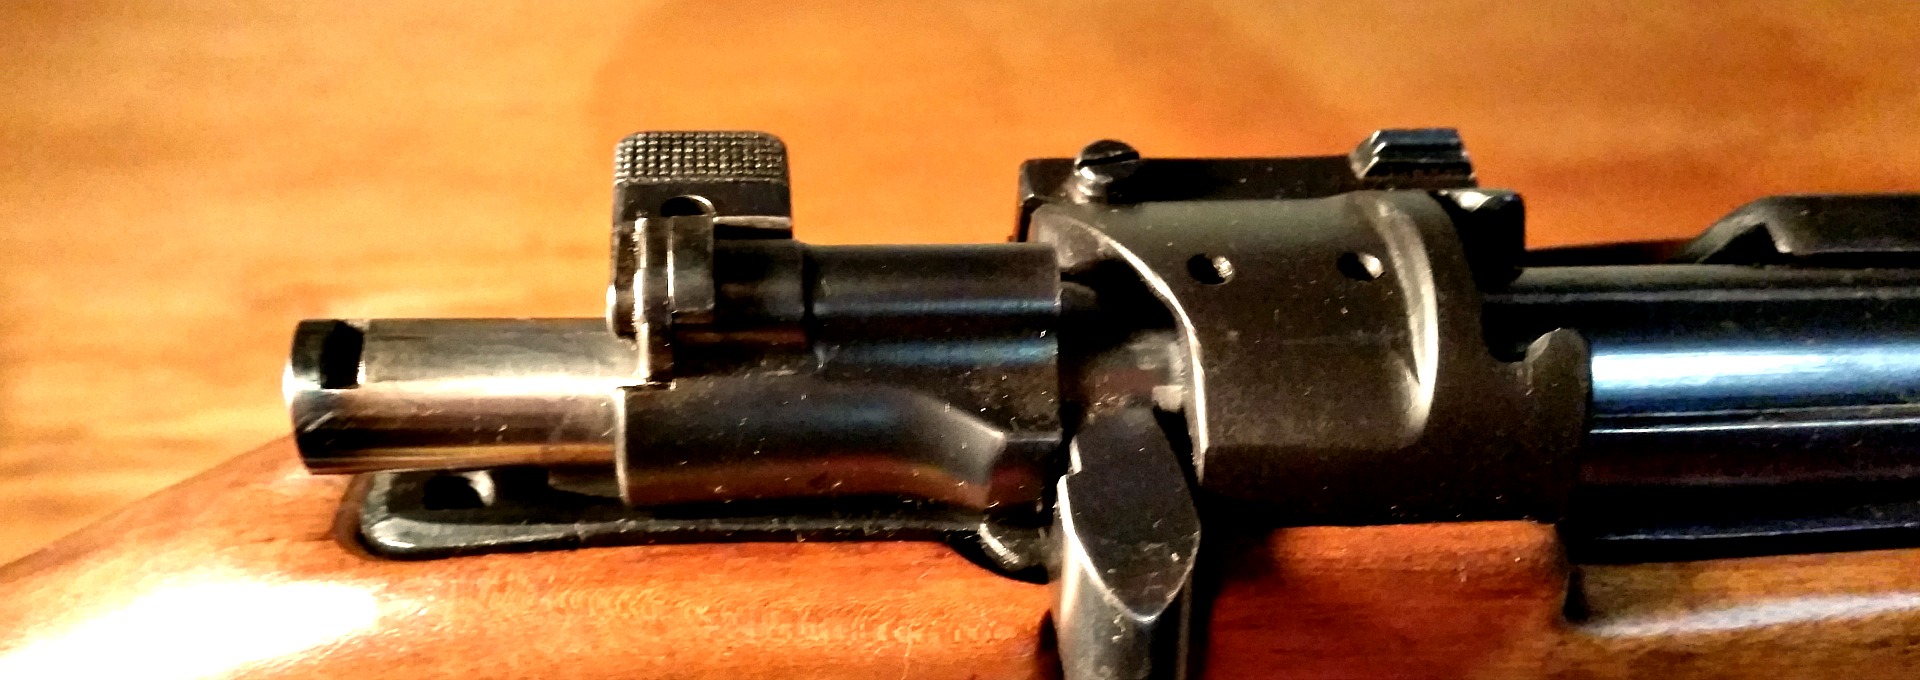
Barrel contour
The Chinese rifle has a much simpler barrel contour, while the Czech rifle follows traditional lines. The thickness of the barrel is a fair bit different, but where it meets the larger action is the biggest difference, as the BRNO barrel swells up to meet the threads.
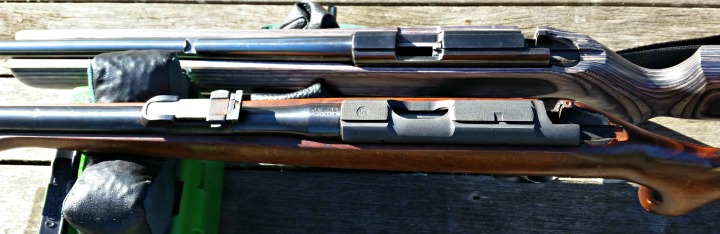
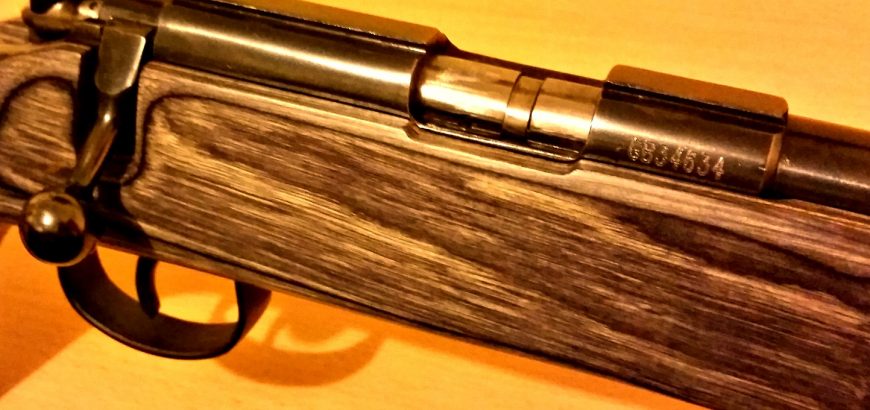
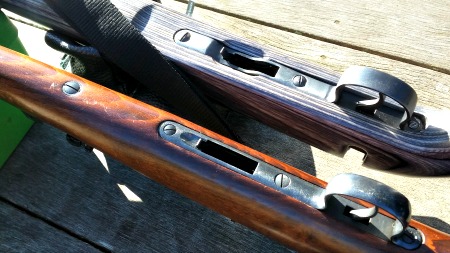
Action screws
Another clever simplification in the Norinco is reducing the amount of screws and metal work by merging the forward action screw with the recoil lug. Looking at the image below you’ll see three screws on the JW-15 and four on the BRNO. The rear screw on both is a wood screw, which secures the trigger guard to the stock.
The next screw forward on both rifles is a simple action screw. In front of the trigger is the last action screw. In the JW-15, this screws up into a recoil lug dovetailed into the action. The BRNO has another screw, independent and forward of the floor metal. This screws up through a steel collar into a recoil lug that forms the hidden part of the rear sight assembly.
Bits and pieces
There are various other bits and pieces that differ, such as the mag well and the trigger unit. The trigger in the Model 2E is a fine example of a single stage trigger, with adjustable over-travel, and a clean break around 3 lb. This is streets ahead of the simple, but practical, trigger in the JW-15. These can be toyed with to produce more acceptable results, as detailed in this previous article on JW-15 trigger improvement.
Verdict
If you are considering swapping things up with either of these rifles, an aftermarket stock specific for the JW-15 or BRNO would be far better than trying to adapt one to the other.