Removing and disassembling the bolt of a Swedish Mauser is a pretty simple affair and may need to be undertaken for any number of reasons. Most commonly, you’ve picked up a rifle nearing a century in age, and there’s a lot of gunk and crap in there that needs to be cleaned out. The other scenario is that you could be modifying your bolt to cock on close, or reduce lock time with lighter materials and a stronger spring.
Hopefully if the latter is your reason for stripping a Mauser bolt, you’ve inherited or bought a sporter – there are fewer and fewer whole specimens left.
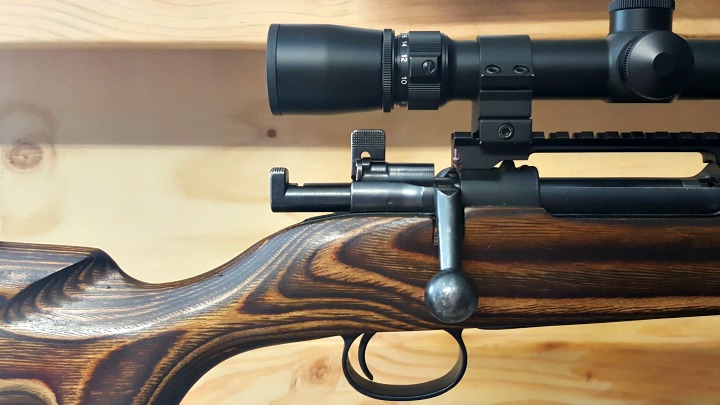
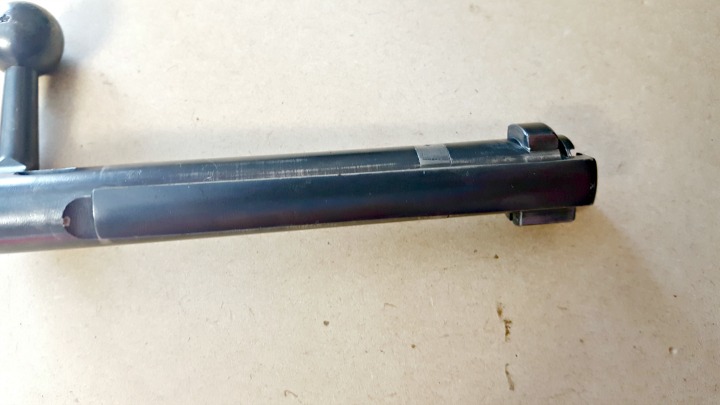
Below are a series of pictures showing how to disassemble a Mauser bolt (small ring, not a K98). If your bolt looks different, don’t fret. This is from a commercial rifle, not a military conversion. It has a blued finish and a bent bolt handle, which thankfully clears my Weaver 44/40 scope, thanks to an EGW 20 MOA rail. If you’re wondering how the extra height affects consistent cheek weld and sight lines, a Boyds stock with adjustable cheek rest helps out there.
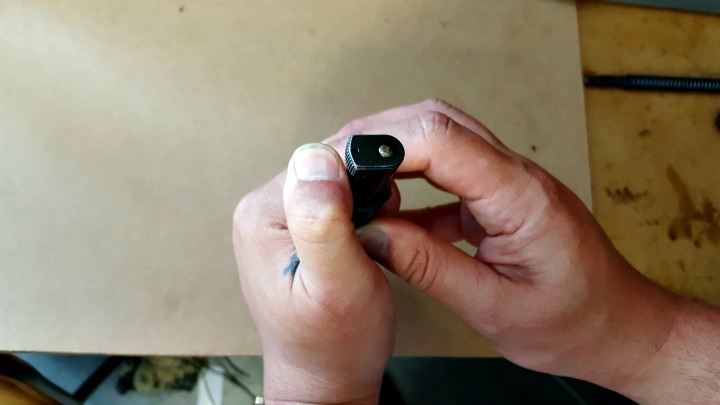
Step 1 – Get the firing pin out of the bolt body
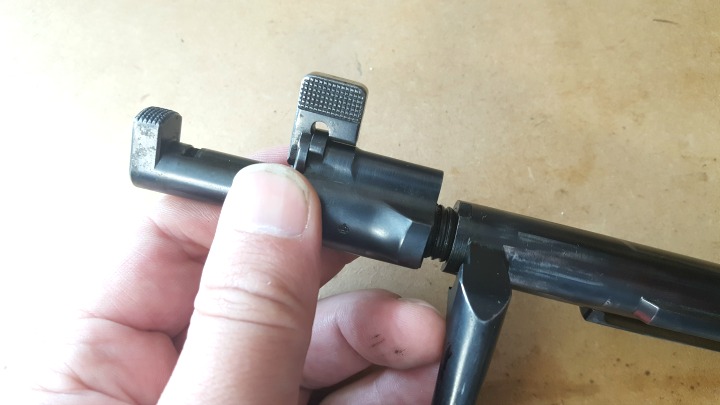
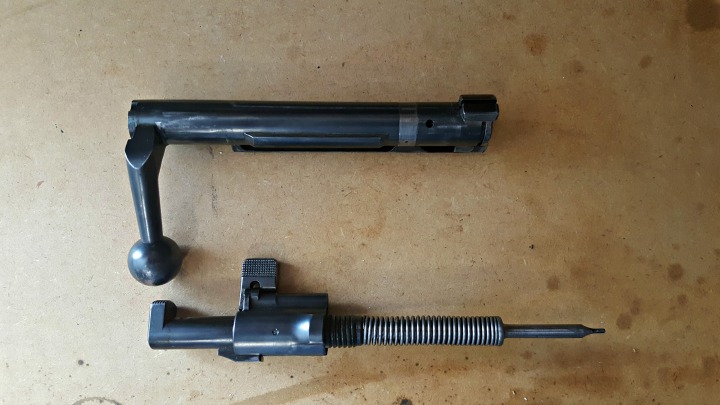
After checking the rifle is unloaded, close the bolt fully.Lift the safety lever into the upright position and remove the bolt without lowering the safety. You may need to remove your scope if the safety won’t clear it.The bolt shroud should easily unscrew from the bolt body now. Note the cocking piece is held under spring tension by the safety lever.The firing pin separated from the bolt body. Again, note the spring and firing pin are locked back – if you don’t do the next step carefully, the spring, cocking piece, and firing pin could separate with a fair amount of speed and force.
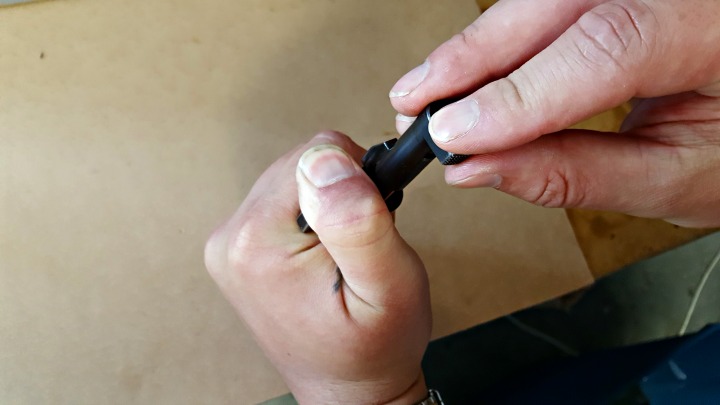
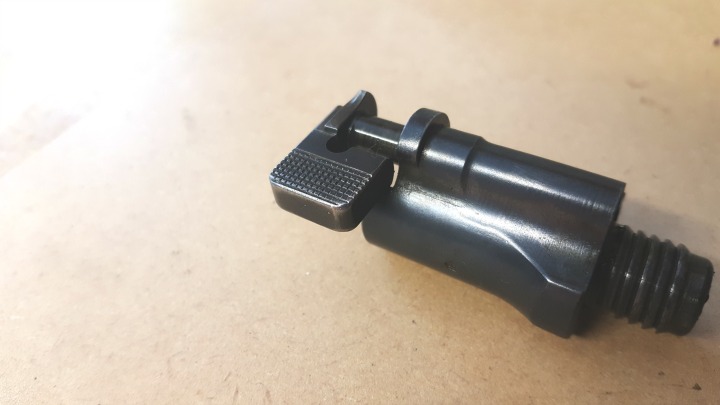
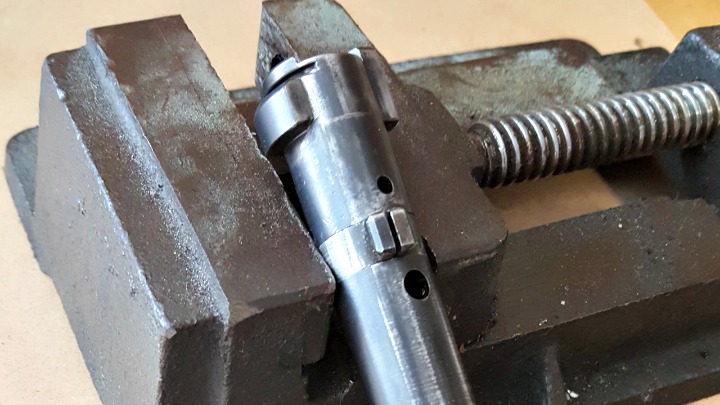
Step 2 – Separate the firing pin from the bolt shroud
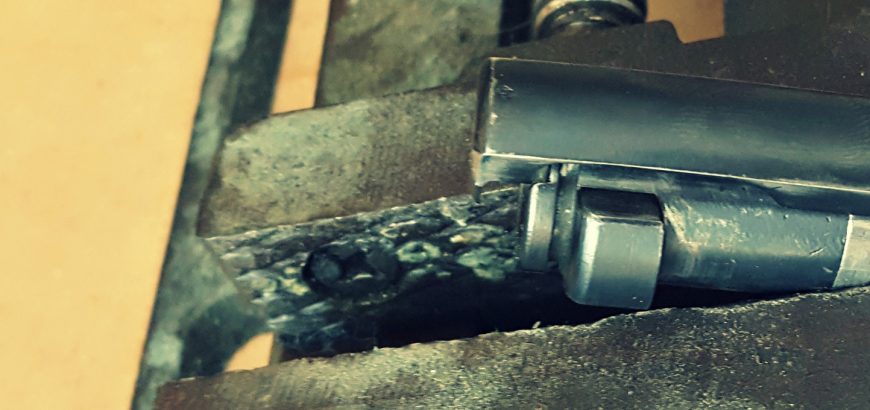
Find a hard surface you don’t mind denting. Or, if you have an original stock with brass disc, you can use the indent for this step. With the firing pin against your hard surface, force the bolt shroud downward. The safety lever provides a good amount of purchase.Twist the cocking piece 90 degrees. At this point make sure you have a firm grip on the bolt shroud and firing pin, and slowly release the spring tension to avoid sending pieces flying.Fold the safety lever all the way over and pull it back to separate it from the shroud.Shroud, cocking piece, spring, safety lever, and firing pin.
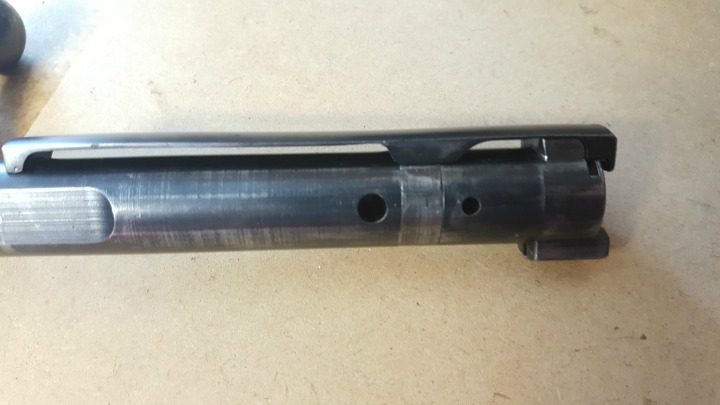
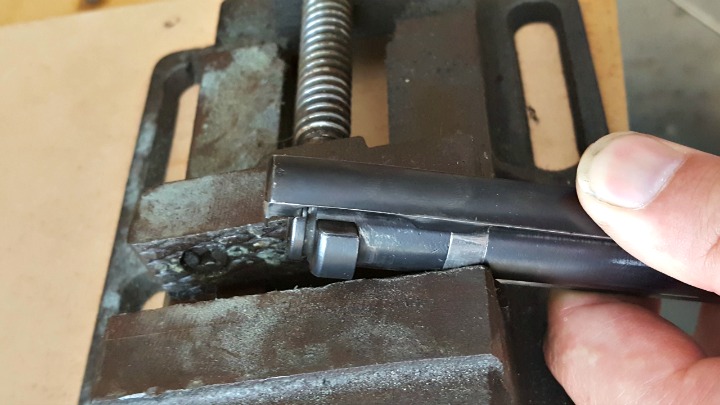
Step 3 – Remove the extractor from the bolt body
Note the extractor sits in a groove just before the bolt face.Rotate the extractor about 90 degrees so that it exits the notch.Apply downward pressure with your thumb, as you slide the extractor forward. Remember this sweet spot, as you’ll need to apply pressure in the same spot to get the extractor back on.Getting this collar off is easy, but you will stretch it as you do so. A flat screwdriver can be used to pry it open if needed. Getting it back on once it has been taken off is harder, and a vice of some sort will be handy, as you’ll need both hands to get the extractor back on.When reassembling the bolt, getting the extractor onto the collar is probably the hardest bit. If you have locking pliers or a small vice, it shouldn’t be hard to slide the slot on the underside of the extractor onto the collar. Remember where you applied downward pressure to remove the extractor – this is the same spot you need to apply pressure to as you slide it back on.
From here on, the rest of the reassembly is easy, and is simply the reverse of the above.
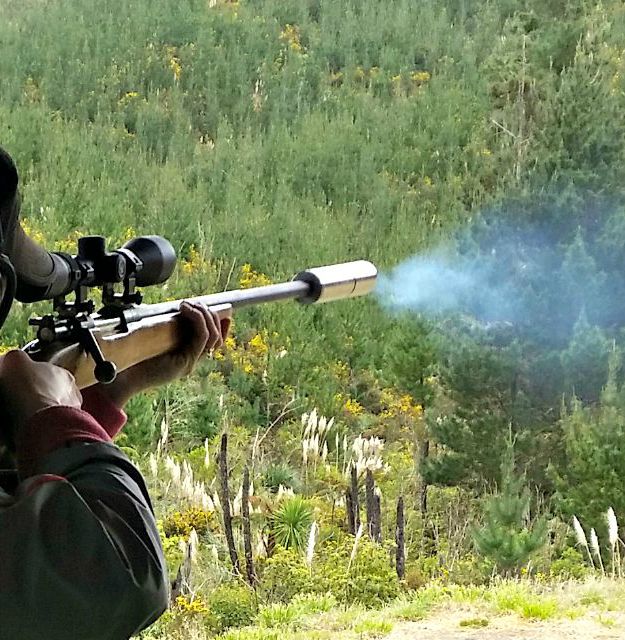
Before the NZDA Prize Shoot earlier this month, I was lucky enough to get my hands on a brand new suppressor from MAE. I didn’t get a chance to shoot with it before the day, so I must admit I was a bit nervous – but it was well worth it in the end.
MAE
MAE are a New Zealand suppressor manufacturer, based out of East Tamaki in Auckland. These guys are not only part of what keeps New Zealand’s shooting community ticking, but they are able to actively engage with their customers to discover new needs and develop better products. Some of the models and cutaways that I saw at the shop were incredibly impressive – include a suppressor that tightens itself on the thread as you fire.
Suppressors in New Zealand
Unlike the USA, suppressors can be had without any legal hoopla or extra taxes. They are seen as practical accessories that improve the shooting experience, control noise on the range or farm, and make it easier to destroy pests or hunt game.
Suppressors help to reduce felt recoil, as well as decibel levels.
There are many – many – types of suppressors on the market, include muzzle forward (muzzle cans), over-barrel (reflex) or full-barrel (integrated). There are many produced here, and as much come in from overseas. Price-wise, you can expect to pay anything between $300 and well over $1000 for a centrefire suppressor. A decent rimfire silencer can go for as little as $55 on Trademe, and up to a couple hundred bucks if you want better performance. Again, the more you spend, the more you get. I have seen some impressive .22LR setups with full-barrel or over-barrel suppressors.
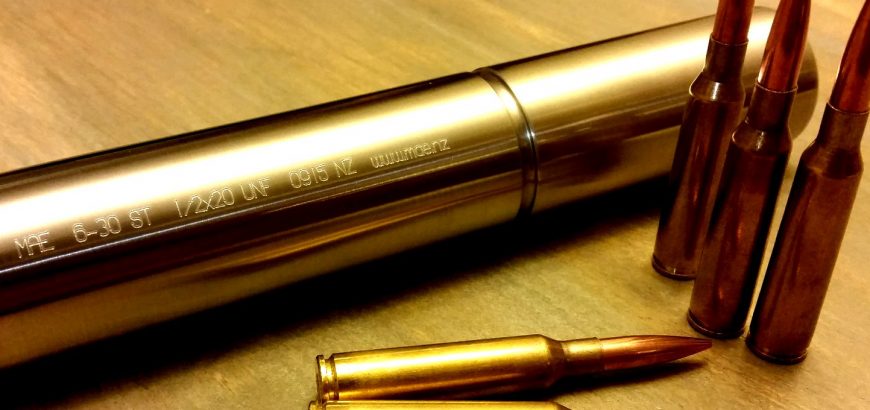
6-30 ST Muzzle Can
The 6-30 ST suppressor is the cheapest (brand new) centrefire suppressor I have seen in New Zealand recently. Don’t let this fool you though – it’s damn good.
The positives
It does what it says. This suppressor greatly reduces felt recoil and muzzle climb. It was infinitely easier to shoot with this suppressor fitted, especially with a light (and short) stock. For modern hunting rigs in large calibres and light stocks, one of these should be on your radar.
It’s a solid unit. Literally. It doesn’t come apart for cleaning and is joined at the muzzle end with some very neat TIG welding. This means there are no bits to lose or break.
Long life expectancy. With a 5000 round minimum service life according to MAE, you can expect this suppressor to last as long as the barrel on your rifle. For the price, it’s definitely worth it.
Solid stainless. The 304 stainless means it’s heavy as hell, and you certainly notice the balance shift. However, the heavy material absorbs more sound and makes for a more solid unit. The 304 will also be less prone to corrosion than other materials. For a range rig, this is ideal. For a hunting rig, you may want something that reflexes over the barrel to spread the weight a bit better. MAE offers a 5 year warranty, so you know they’re built like a brick sh…
The price. At $250 for the stainless finish or $290 for the matte black, it’s the cheapest you’ll find on the market (at least as far as I can see).
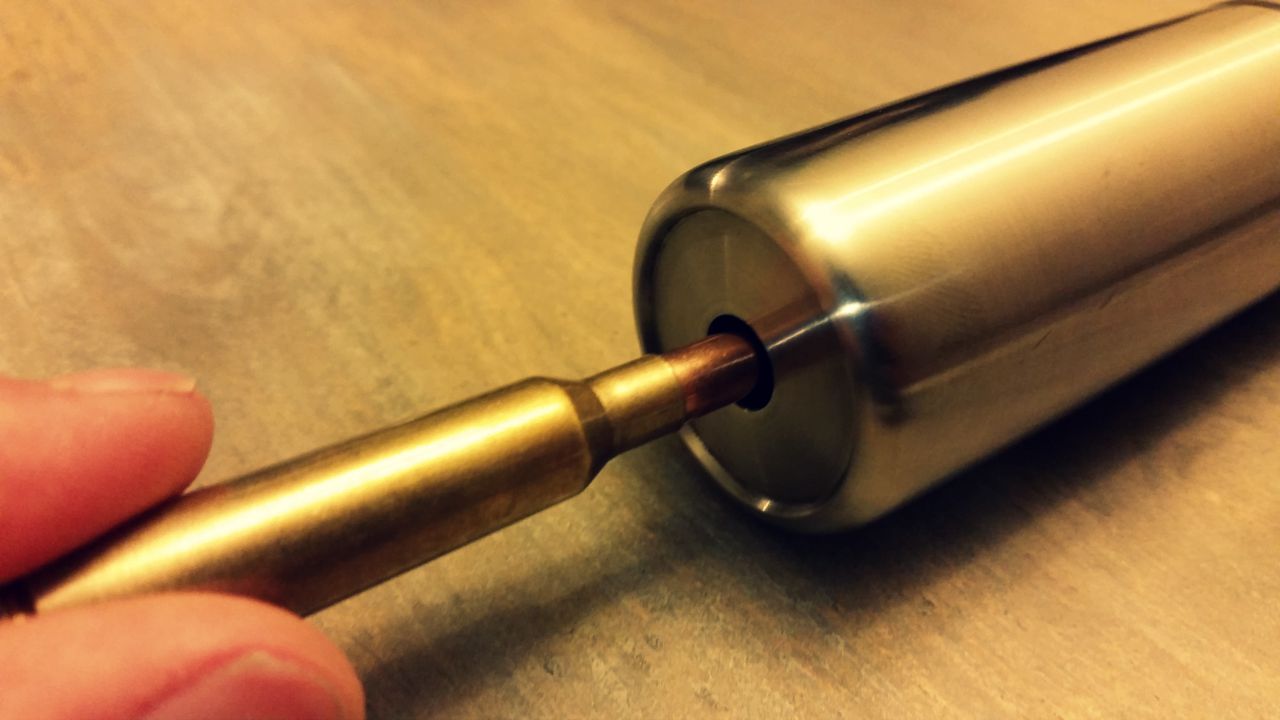
The versatility. If you have multiple rifles with the same thread but in different calibres, this silencer is for you. Good for anything between 6mm and right up to the 300 magnums, you can have one suppressor for your rifle, your partners, and the three she doesn’t know about.
The suppressor is built for anything between 6mm and .300 RUM. The 6.5×55 above shows how much room there is left over.
The negatives
Weight. Although I like the weight of this unit, at almost half a kilo, it could be off-putting for those after a bush-ready rig. If you want a long-range shooter or a tactical sniper set-up, then this won’t deter you at all.
The price. Some people just don’t feel like they’re getting a good product unless they have to have their wallet surgically removed through their nose. In my opinion, this suppressor does what much more expensive ones do (without skipping a beat), at a much lower price. If this bothers you, I imagine your gun safe is full of some pretty expensive stuff. If you do want to spend more money, I’m sure MAE will have something to fit the bill.
Um…… I can’t think of anything else to be honest.
Range shooting
I must admit, I had a pretty poor shoot at the NZDA, but that was me, not the rifle. However, the one thing I did get out of the day was an immense satisfaction with my new suppressor, as well as the BOLD Trigger from Boyds Gunstocks.
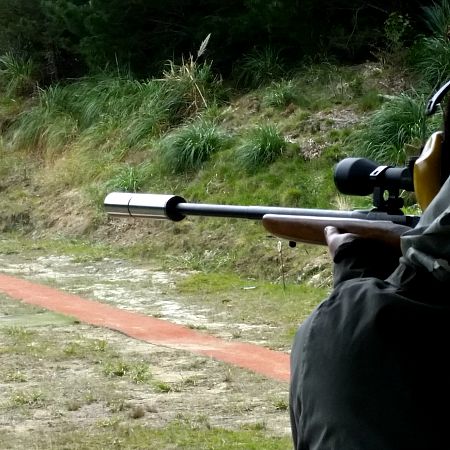
The brushed stainless finish stands out and looks great. Although, for hunters a matte black would be better.
I chose to leave my suppressor as brushed stainless. Not only did it keep the cost down, but it looks cool with my rifle and the other polished metal bits on it (the Mauser-style extractor and the cocking piece). Having had a look at the paint MAE use (Gun Kote 2410F), I knew I had a pretty good match at home if I wanted to paint it myself later. In fact, it would then perfectly match my barrel which I did with the same paint.
The 6.5×55 is a pretty mild-recoiling round, however, in the short, light-weight stock mine is in, it has quite a kick. Not enough to make it uncomfortable to shoot, but after 50 rounds, you’d definitely feel it. The first thing I noticed was an immense reduction in recoil. Not only does this get rid of the instinctual flinch you might develop over time, but it means you are right on target for your next shot. Previously I would find myself pointing two targets over to the left after each shot.
Shooting amongst a bunch of bare-barrel .308s and .223s all day, I could certainly notice (and appreciate) the significant reduction in noise from my old Swede. Ross, whom I shoot with regularly at the Howick Smallbore club, remarked several times throughout the day that he was incredibly impressed with how quite my gun was – he was sitting next to me and expecting a pretty big blast. Another shooter from our club noted that the rifle sounded “pretty cool” – which I must admit, it did. If you play Battlefield 4, you’ll know what I’m talking about. I was even approached by a complete stranger who said he would love to get one himself.
With the grand sacrifice of $250, and a little weight on the end of my rifle, I improved my shooting experience greatly. And the rifle did do really well on the day in the end, as my wife placed top of Division B with it.
Some caveats
When I got my suppressor I was given two bits of advice. Firstly, use a lubricant on the threads to ensure you can get it off after you shoot (nickel-based is good, copper-based is bad). Secondly, take the suppressor off after you shoot, or the stainless will attack the barrel.
Anyone who is familiar with the concept of sacrificial metals will quickly grasp that last one. I would just add one last piece of advice. The burnt powder and gunk that is on the crown of the barrel when you remove the suppressor – wipe this off immediately. I waited until I got home and cleaned my rifle, and it had hardened and become very difficult to remove.
My overall opinion is that this is a product which will help you enjoy shooting more – especially larger calibres, and will improve your accuracy. If those are two things you would like to do, and at a reasonable price too, then this is the suppressor for you.